After looking everywhere for the best way to make your online store, you finally decided to try WordPress and WooCommerce. You rely on its affordability, popularity and simplicity, but you don’t know where to start.
No problem! In this article, we’ll review the initial WooCommerce settings so we can create your website together with a foolproof guide and step-by-step instructions.
There are many steps, so let’s start with the first one.
Table of contents
- Create your eCommerce Site: Use the WooCommerce Setup Wizard to Install and Launch
- Customizing the Appearance and Pages of your Store
- Product Creation and Management
- Setting up Payment Methods
- Configuring Shipping and Taxes
- General Settings and Currency
- Configuring Transactional Emails
- Final Testing, Launch, and Ongoing Maintenance
Create your eCommerce Site: Use the WooCommerce Setup Wizard to Install and Launch
After purchasing a WordPress site from a hosting service, the first step is to install WooCommerce.
It is possible that your hosting provider already has WordPress and WooCommerce set up. If WooCommerce is not installed, don’t worry; it only takes a couple clicks to install and activate it.
In the sidebar of your WordPress dashboard, click Plugins > Add Plugins.
Search for “WooCommerce” in the search bar, and you will immediately find the WooCommerce plugin.
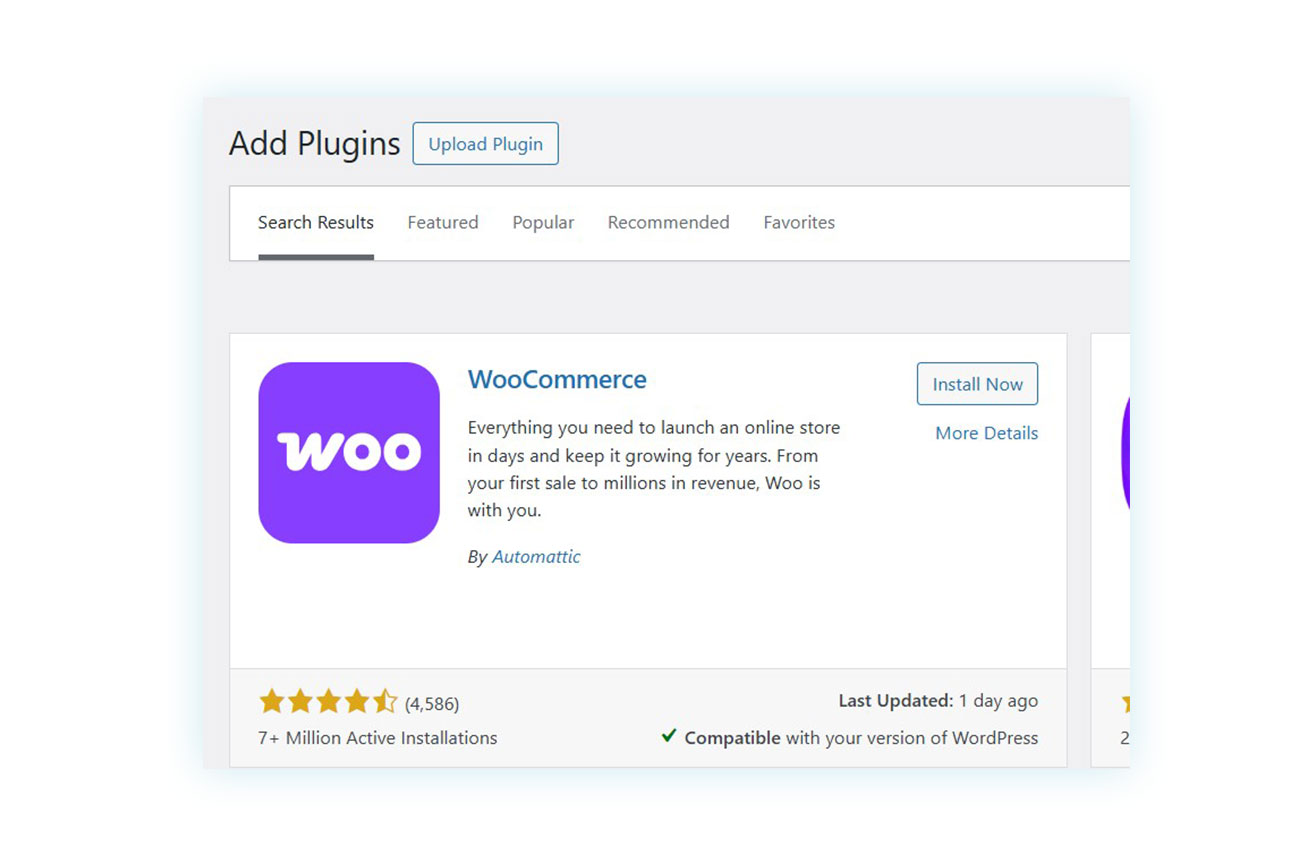
After installation, click on the “Activate” button to begin configuring your eCommerce store. After activation, you’ll see the WooCommerce setup Wizard, which is a guided process through the store’s settings.

Let’s start with the first step. Here, you can either begin the WooCommerce settings process or skip the setup screen. If this is your first time using WooCommerce, we recommend following it to simplify the initial setup.
Once you start the WooCommerce setup, you will see these options:
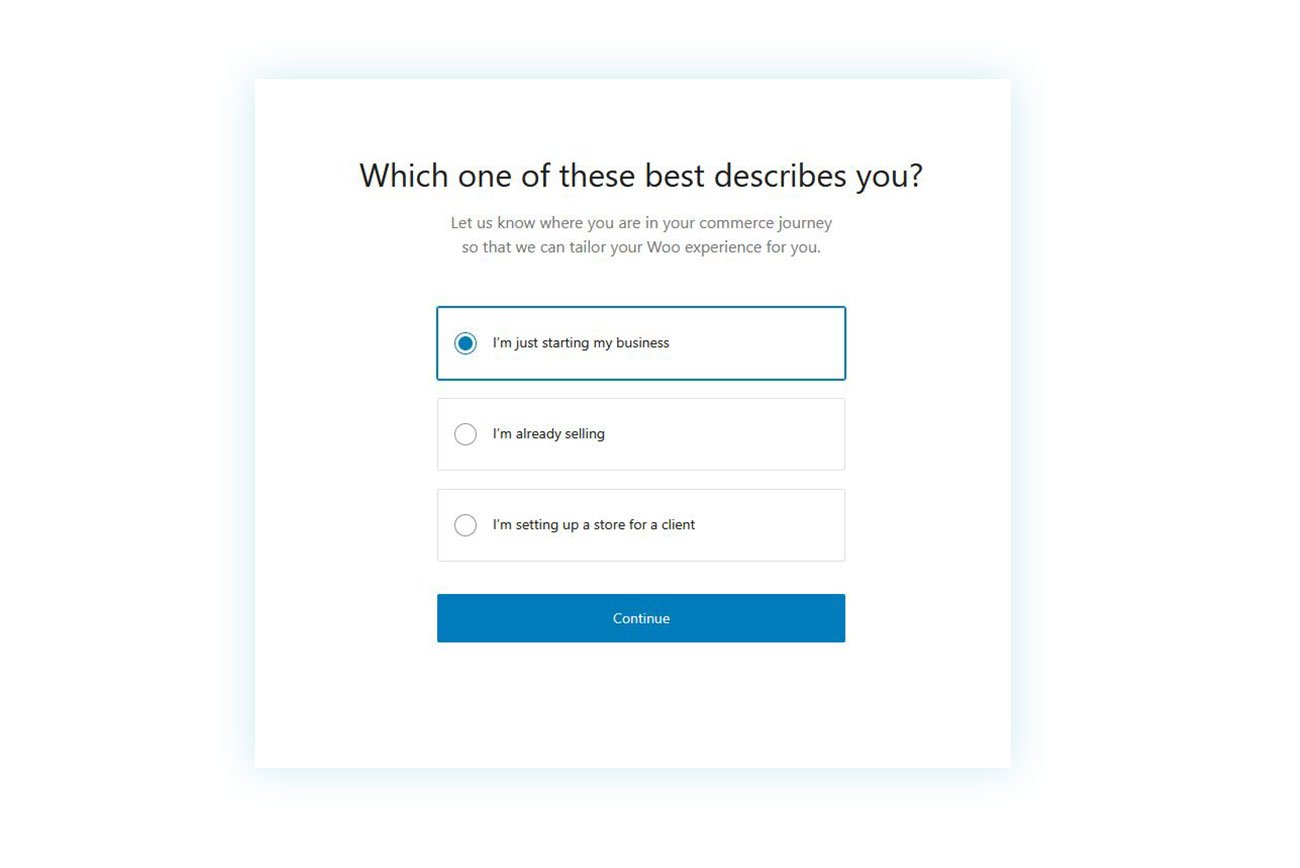
At this stage, you will be asked to specify your seller type. There are three options:
- I’m just starting my business
- I’m already selling
- I’m setting up a store for a client
For this guide, we will select the first option and proceed to the next screen.
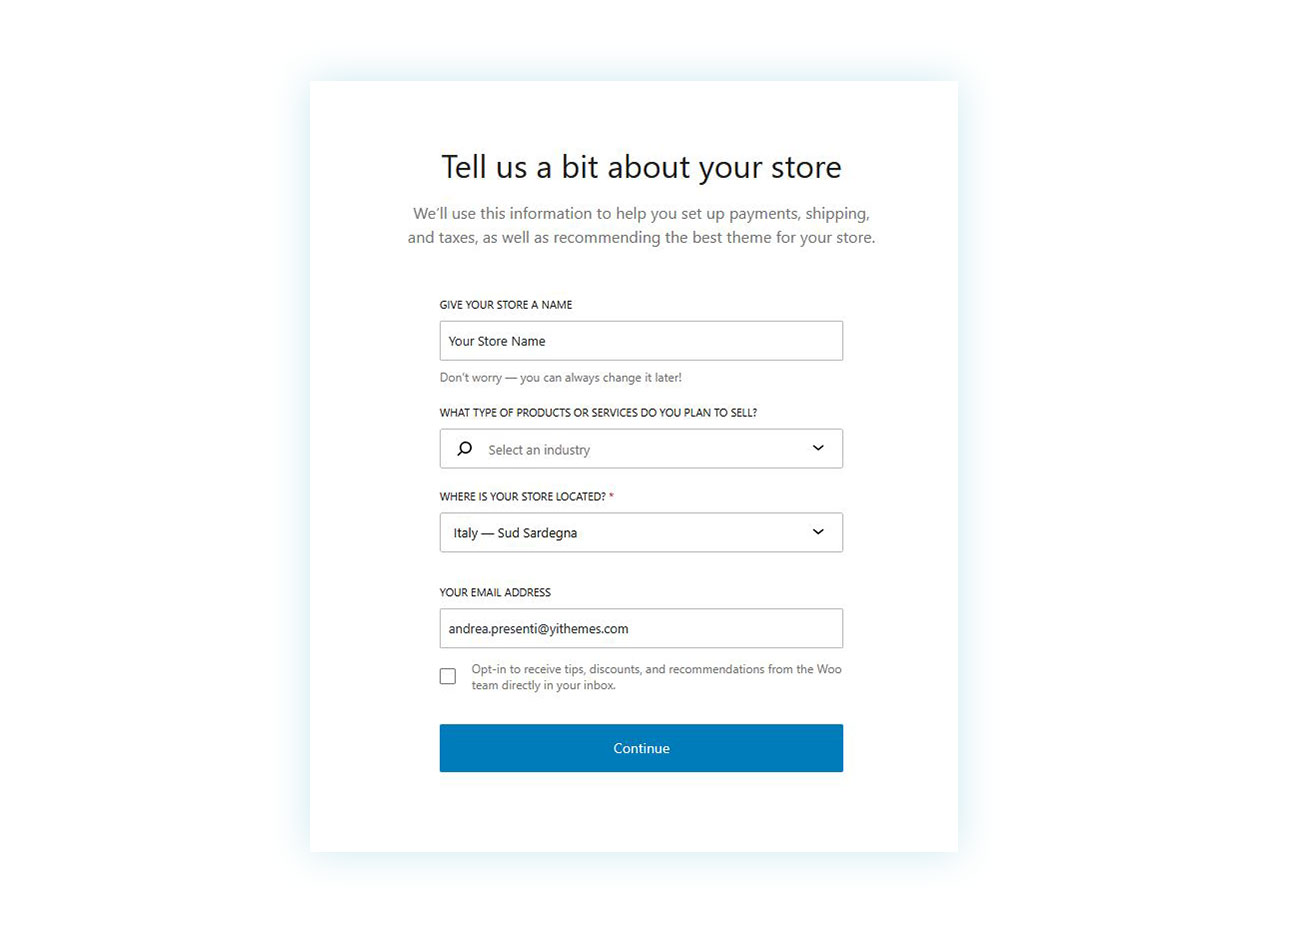
You will now be asked to provide the store details. This includes giving your store a name, selecting the types of products or services you will sell, indicating the store’s address, and choosing an email address for the eCommerce store administrator.
After completing these fields, you can move on to the next screen.
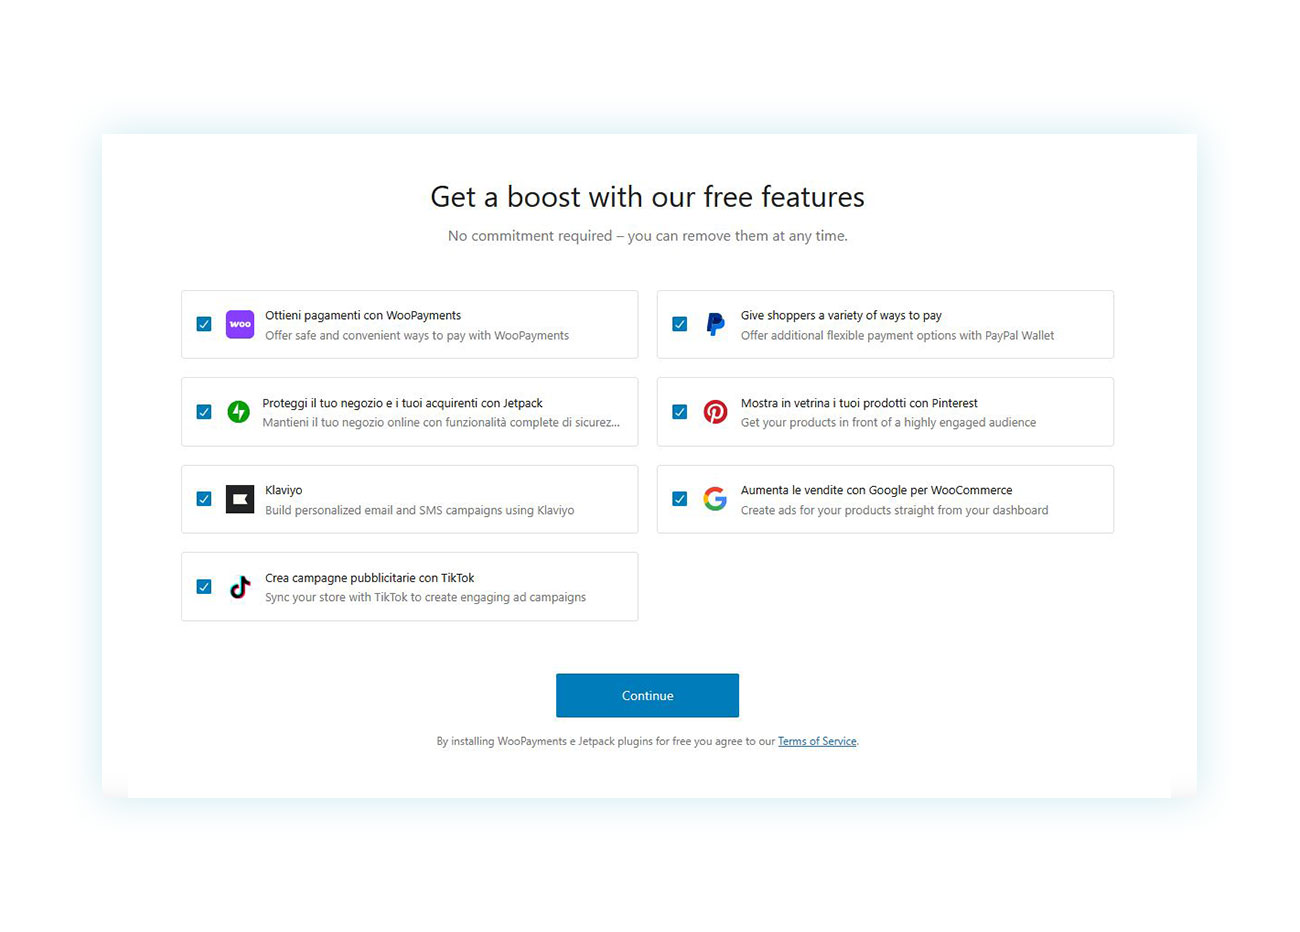
At this point, WooCommerce will suggest free extensions for additional features. Choose which ones to add and which ones to skip, then proceed to the next screen. If you choose to install more extensions, you will be prompted to create an account and connect your WooCommerce website to your WordPress account.
This step completes the initial WooCommerce setup Wizard, but the process is not yet finished. It is now time for the second phase to begin.
Customizing the Appearance and Pages of your Store
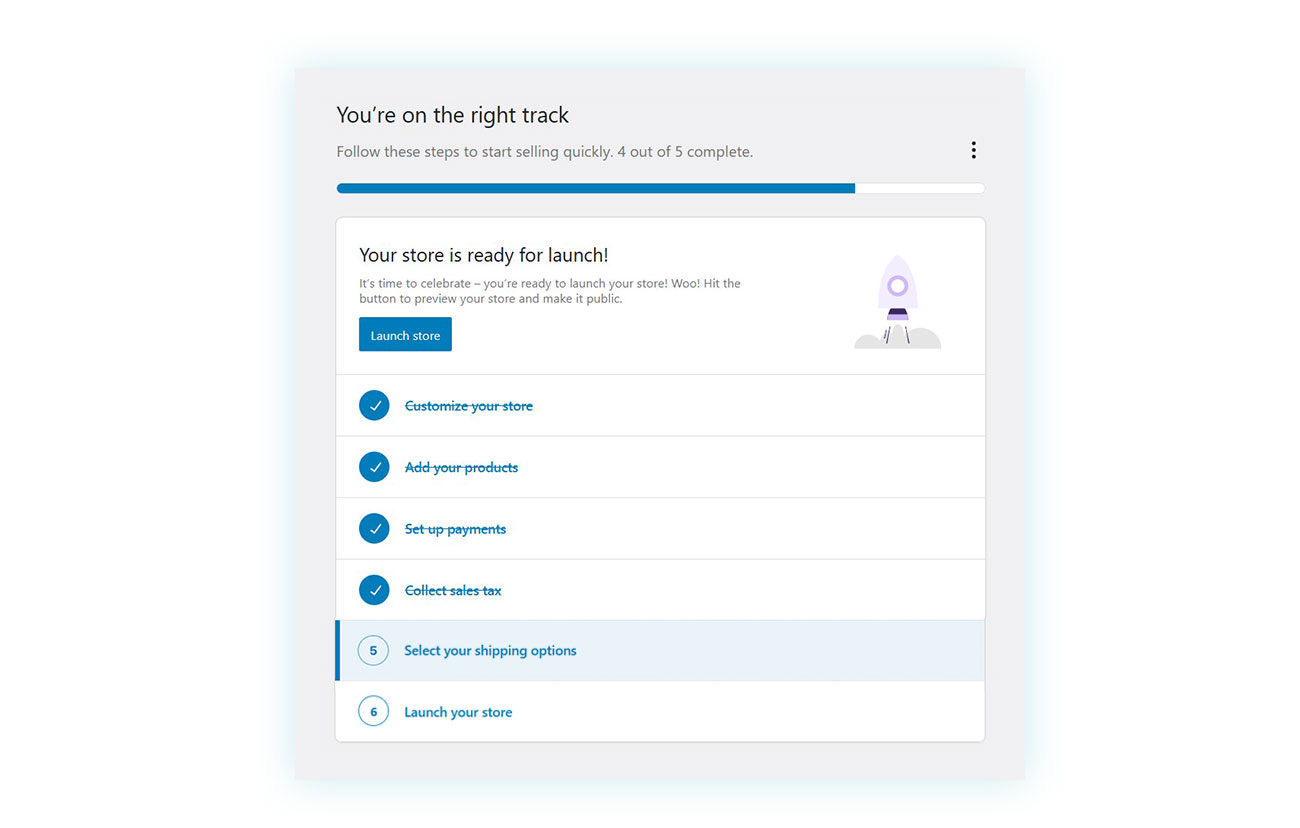
After completing the setup wizard, you will be directed to the store control panel. There, you will find six additional steps for preparing your WooCommerce store for sales.
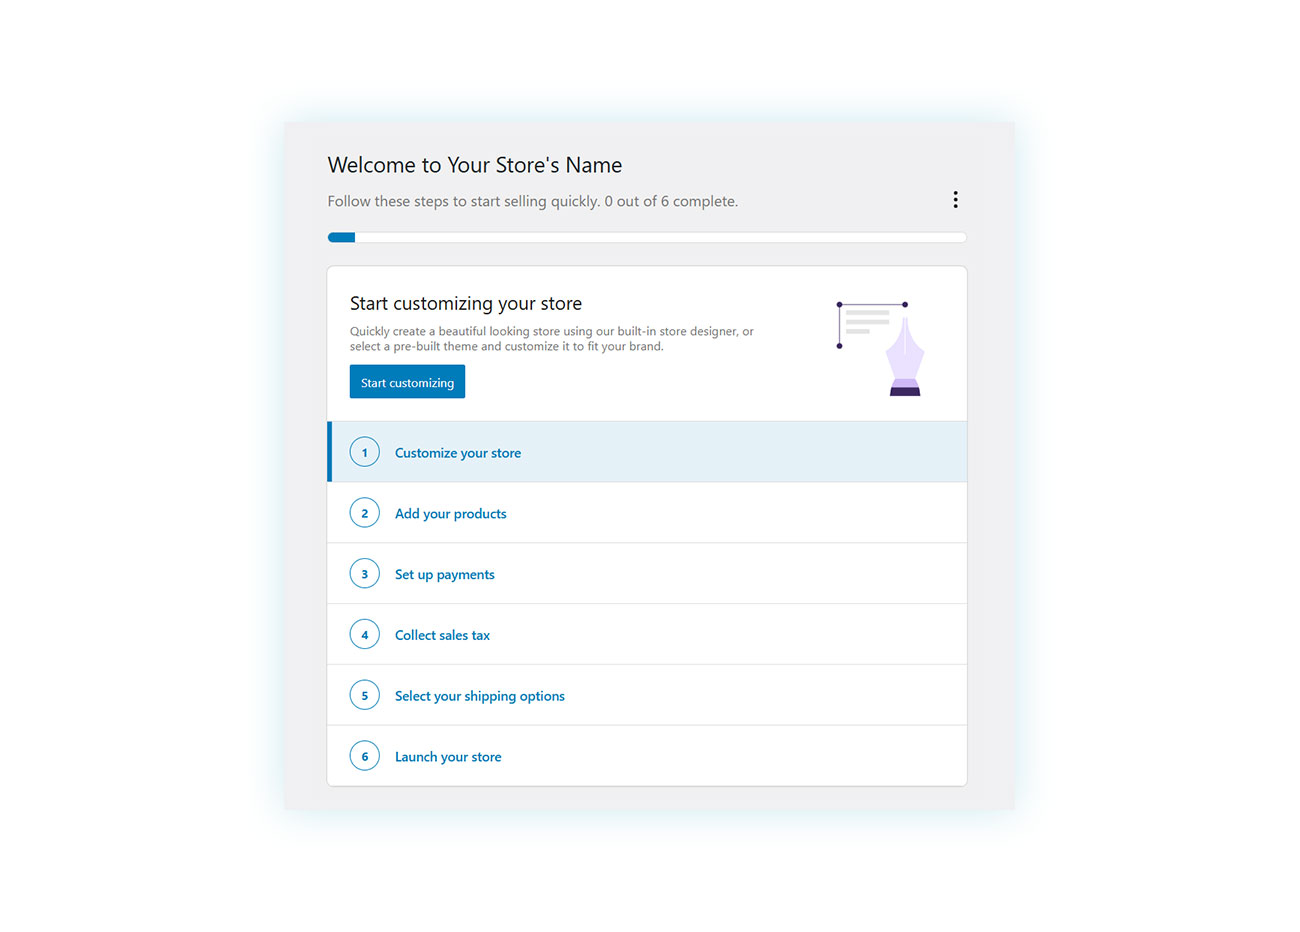
The first step is to set up the visual appearance of your WooCommerce store. Click on “Start customizing” to go to the next page:
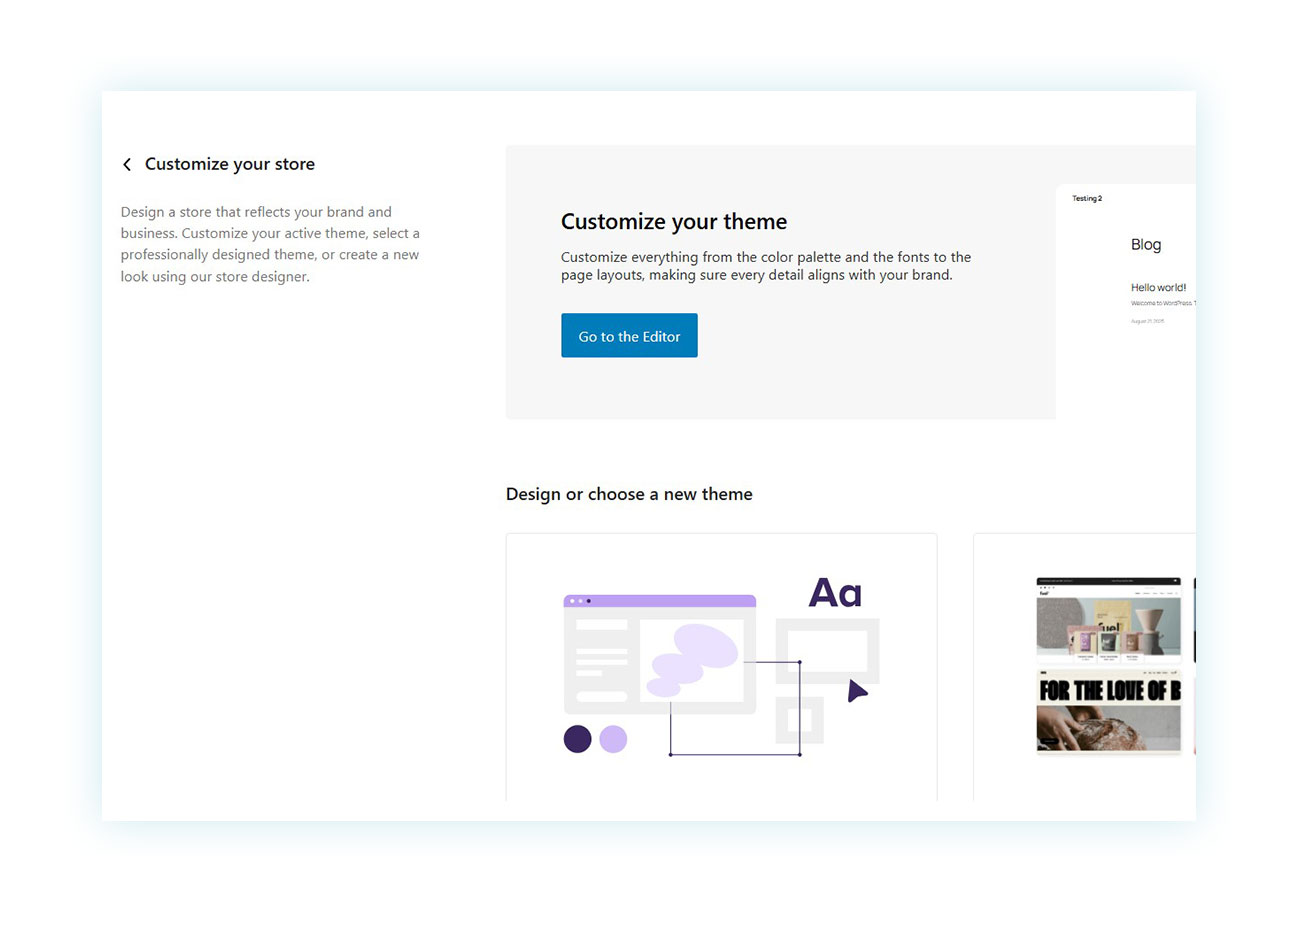
You can choose from two options here: design the theme yourself using the store designer to customize every aspect of the store, or choose a professionally designed theme.
If you select the first option, you will be taken to the site editor page, where you can modify the graphics however you like:
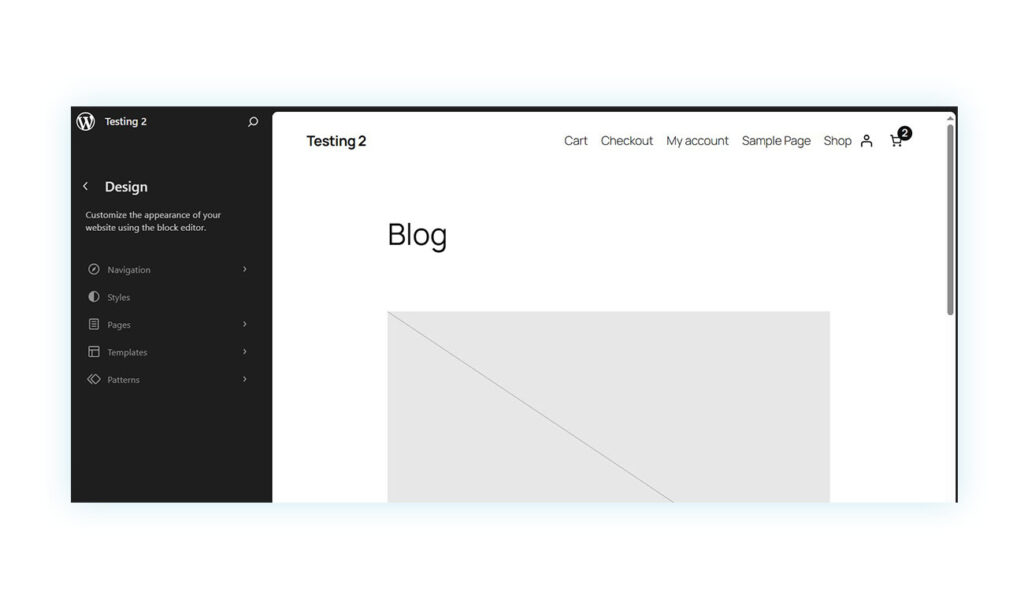
Although this page is important, we do not recommend using it at this time because choosing a suitable theme is very important.
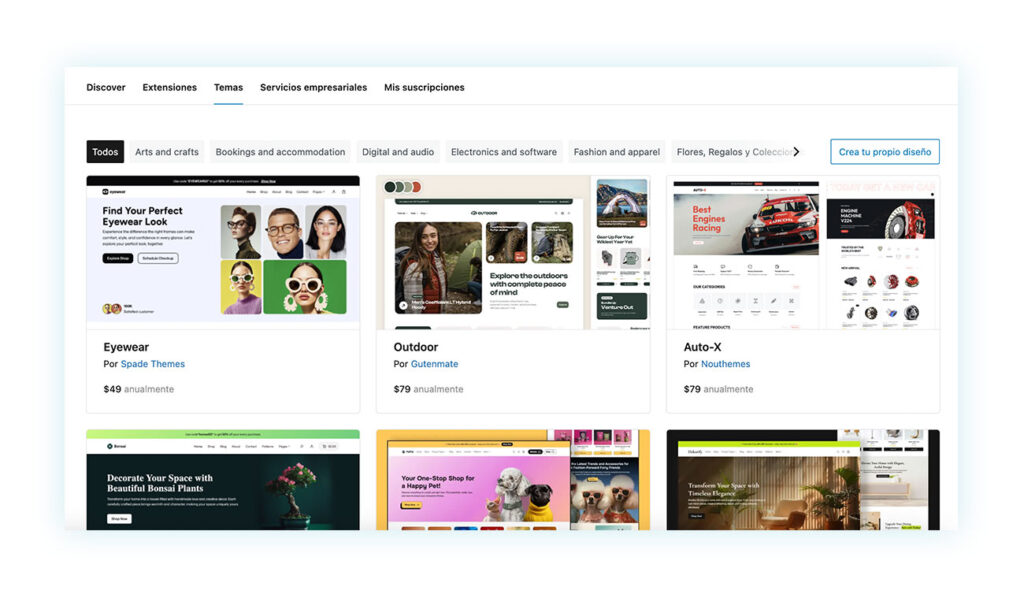
If you select the second option, you will be taken to a theme marketplace where you can find themes offered by different developers at varying prices:
Although WooCommerce only seems to offer these two options, you can actually choose your preferred theme by purchasing it outside of this marketplace or by downloading a free one directly from WordPress. To do so, go to “Appearance” > “Themes” > “Add Theme”:
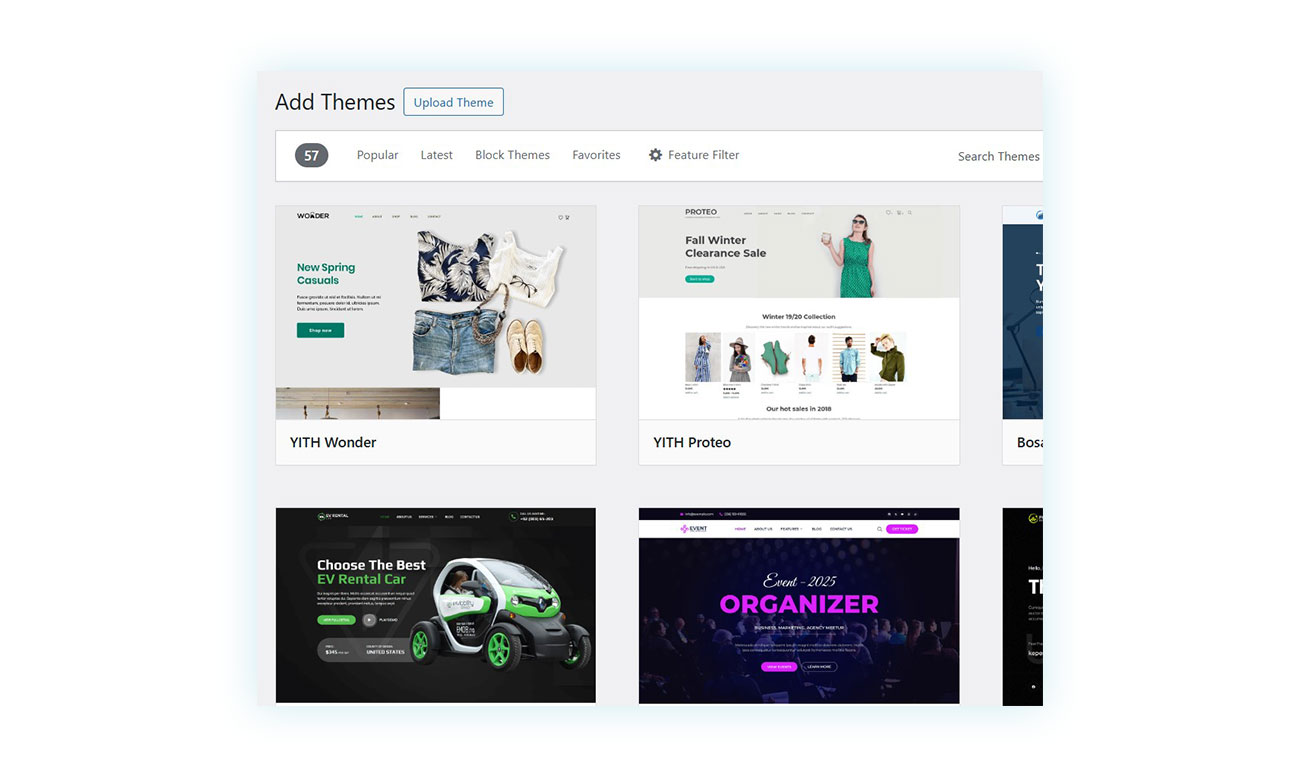
You can upload a previously purchased theme by clicking “Upload theme” at the top and selecting the zip folder containing your theme. You can also download and activate one of the themes in the catalog. Among these, you can find professional themes that are also free, such as Wonder.
After choosing it, you can customize its various elements however you like.
Once you have finished customizing your website, proceed to the next step.
Product Creation and Management
Product management is a fundamental aspect of your online store. That’s why the second step is dedicated to this topic.
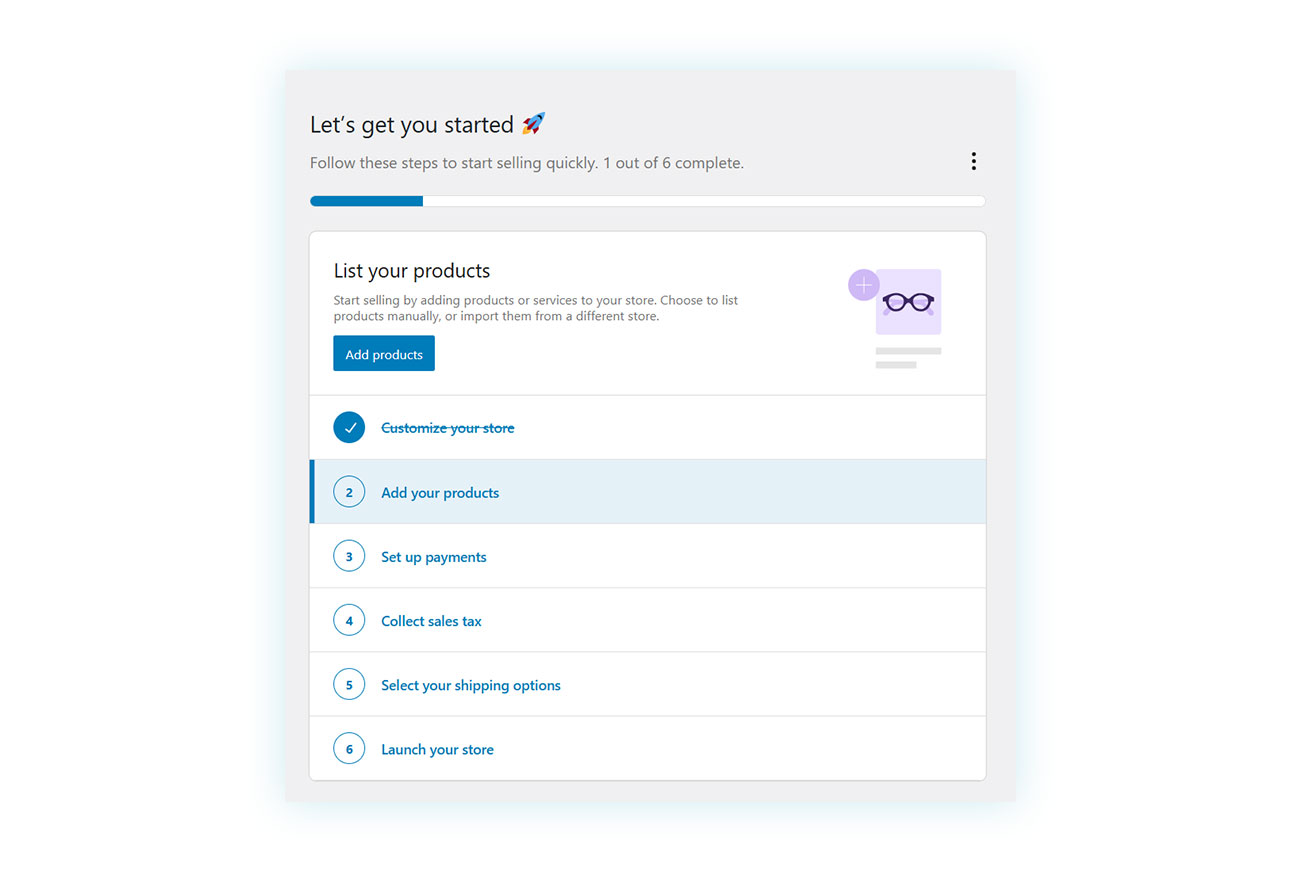
Clicking the “Add Products” button will take you to the next page, which has several options:
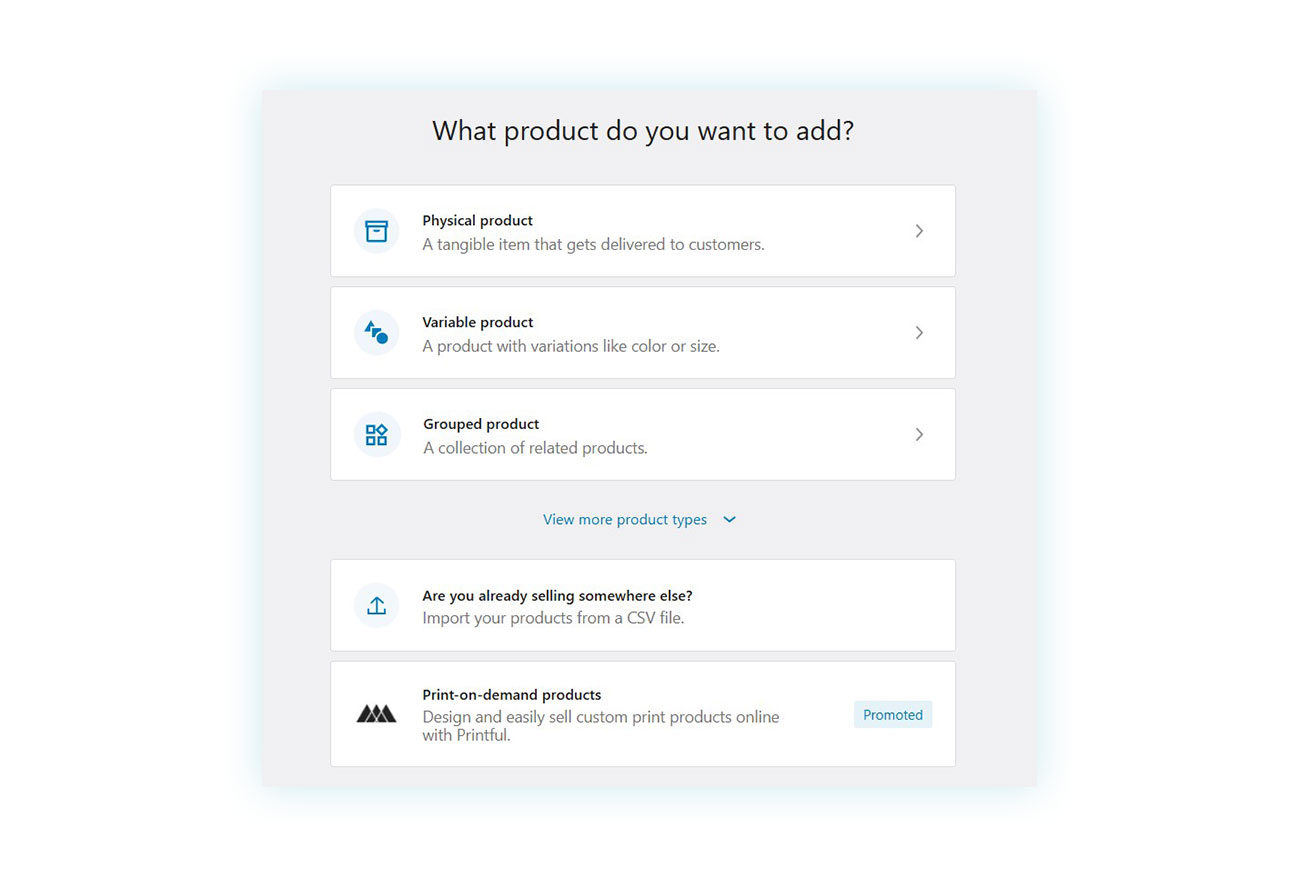
The first three items ask what type of products you sell and give you three options.
- Physical Product: A traditional product that must be shipped or picked up by the customer.
- Variable product: A product with characteristics that can vary based on the customer’s choices. For example, a shirt could be available in different sizes and colors.
- Grouped products: A collection of related products.
You can see other types of products by clicking on “View more product types”, but to understand how to add a product to your WooCommerce store, you can simply click on the first option.
Note: At the bottom, you will also find the option to import your products if you already sell them elsewhere and have a CSV file containing them.
For this tutorial, click on “Physical product”, which will take you to the edit product page:
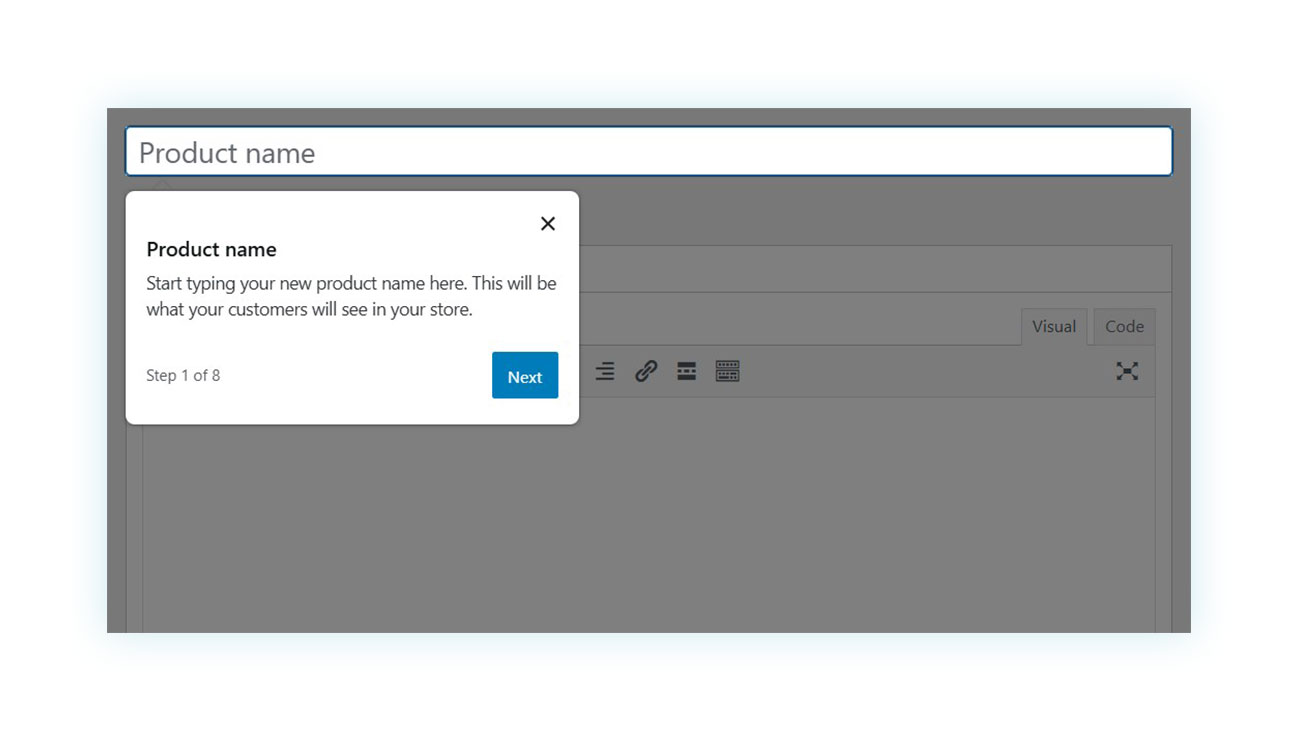
You can access this page at any time from the “Products” tab, where you can add a new product. A wizard will guide you through the process of configuring your product for sale step by step, starting with the name that will be shown in the catalog.
Once you understand how to add products to the online store, you can move on to the third step of the tutorial, which covers payment options.
Setting up Payment Methods
This step requires you to configure the payment gateways:
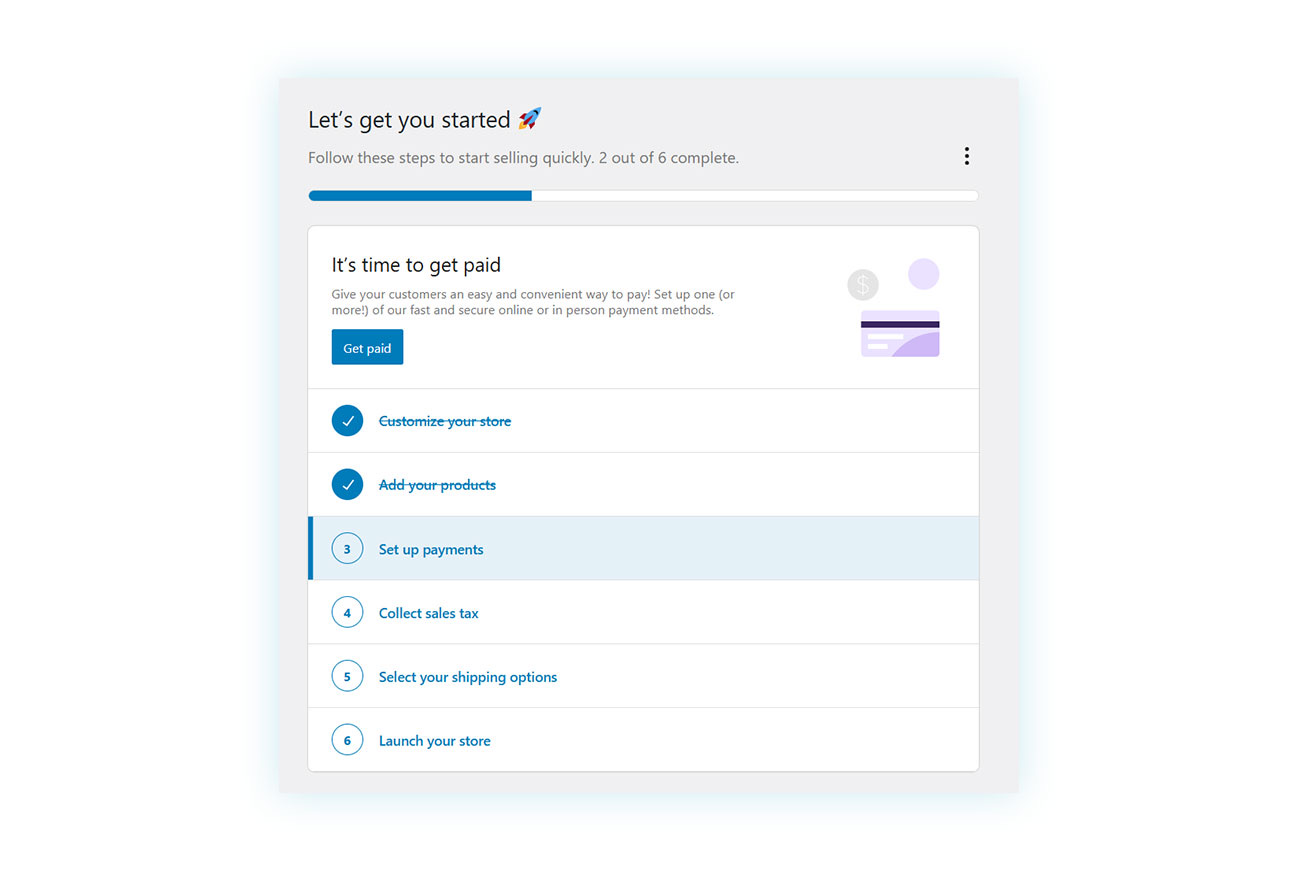
Click the “Receive payments” button to proceed. You will then be taken to the WooCommerce settings section dedicated to payment processors.
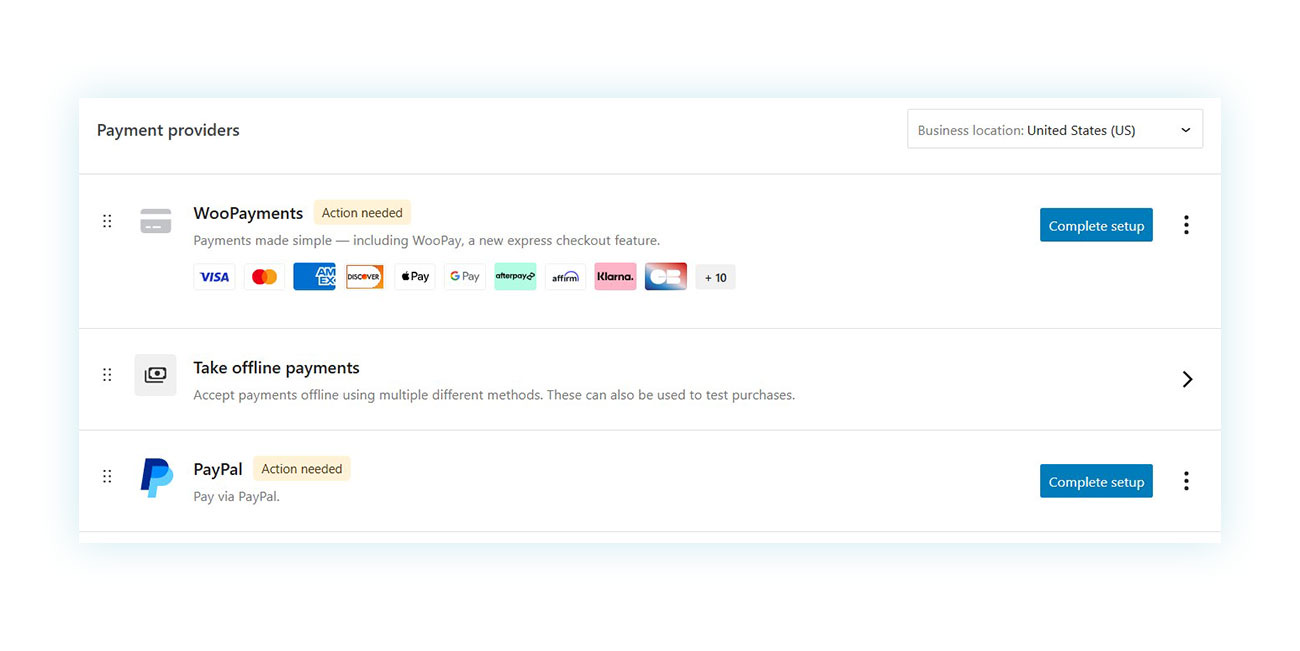
If you have enabled additional electronic payment features, you will find them on this page. Each payment gateway requires identification, which we will not discuss in detail in this tutorial. At the bottom, you will find the option “Accept offline payments”, which includes payment options already included in WooCommerce:

These include bank transfers, check payments, and cash on delivery.
After configuring the payment methods you want to offer on your eCommerce site, you can move on to sales tax.
Configuring Shipping and Taxes
The fourth recommended step is to apply sales tax rates:

Clicking on “Collect sales tax” will take you to a page where two potential tax partners are suggested: Woo and Stripe. Both have advantages and features, but signing up with either is not strictly necessary.
Further down, you will find two additional options: “Set taxes manually” and “Do not charge sales tax”.
Then, you can add the tax manually and proceed to the fifth step, which is the shipping settings.
Clicking on this option will take you through a three-step process to geolocate your store and set shipping costs:
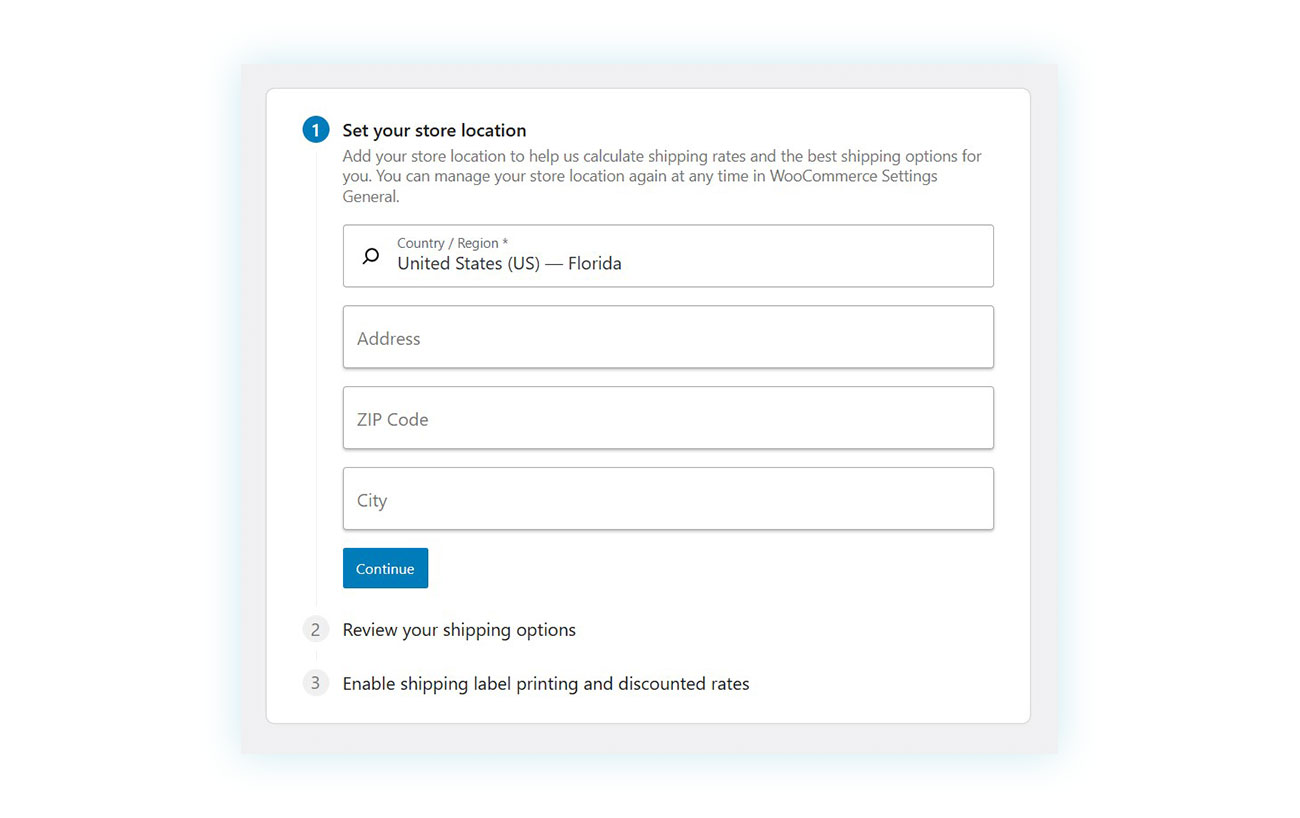
First, specify the location of your store. Don’t worry if it changes; you can modify it at any time in the WooCommerce settings.
Once you have defined the location, click “Continue” to move on to the next step:

WooCommerce will prompt you to set shipping costs for your country and the rest of the world. If you don’t know the exact cost yet, don’t worry. You can set different costs for specific countries or locations later in the shipping settings.
Finally, you will find the third, optional step:
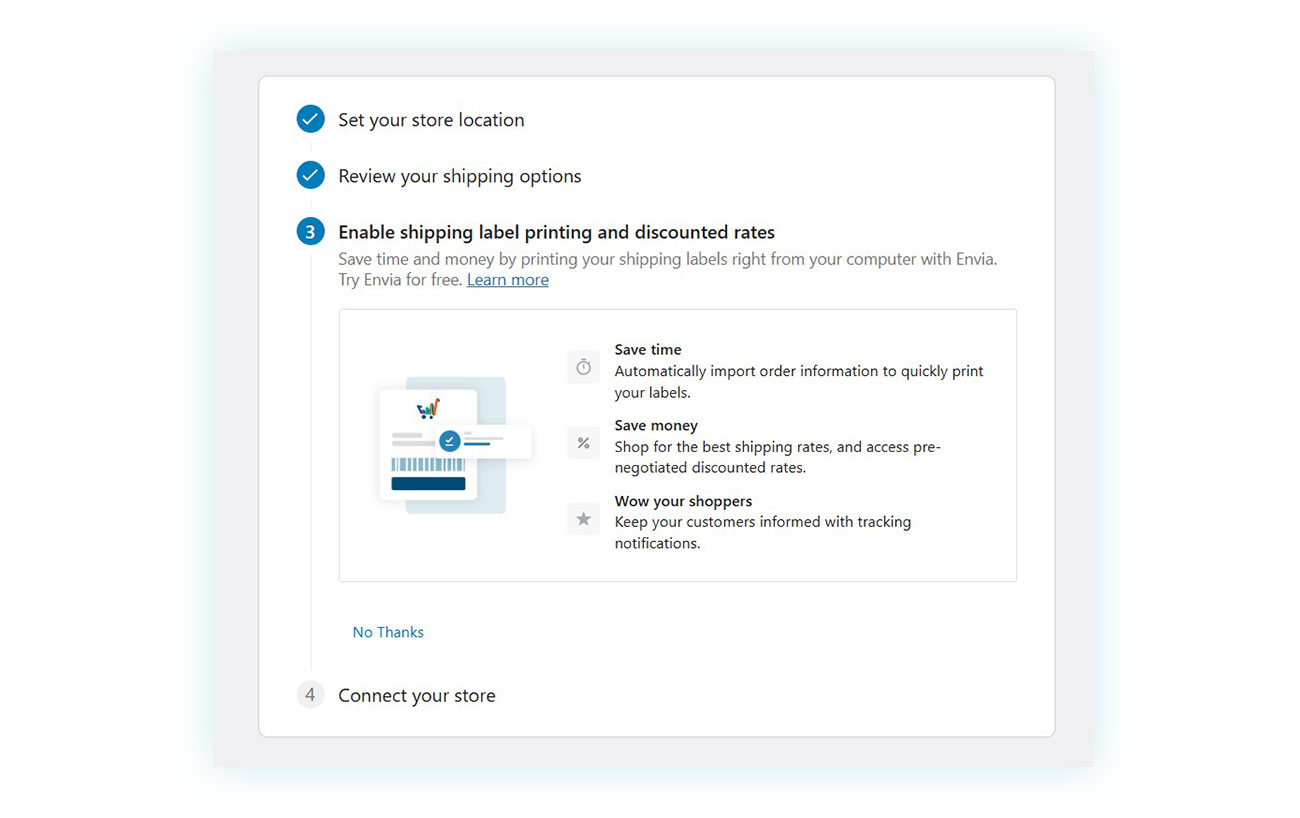
You have the option of linking your online store to a shipping label creation and courier management service. Alternatively, you can skip this step by selecting “No Thanks” at the bottom of the page.
The last step required at this point is related to launching the site:
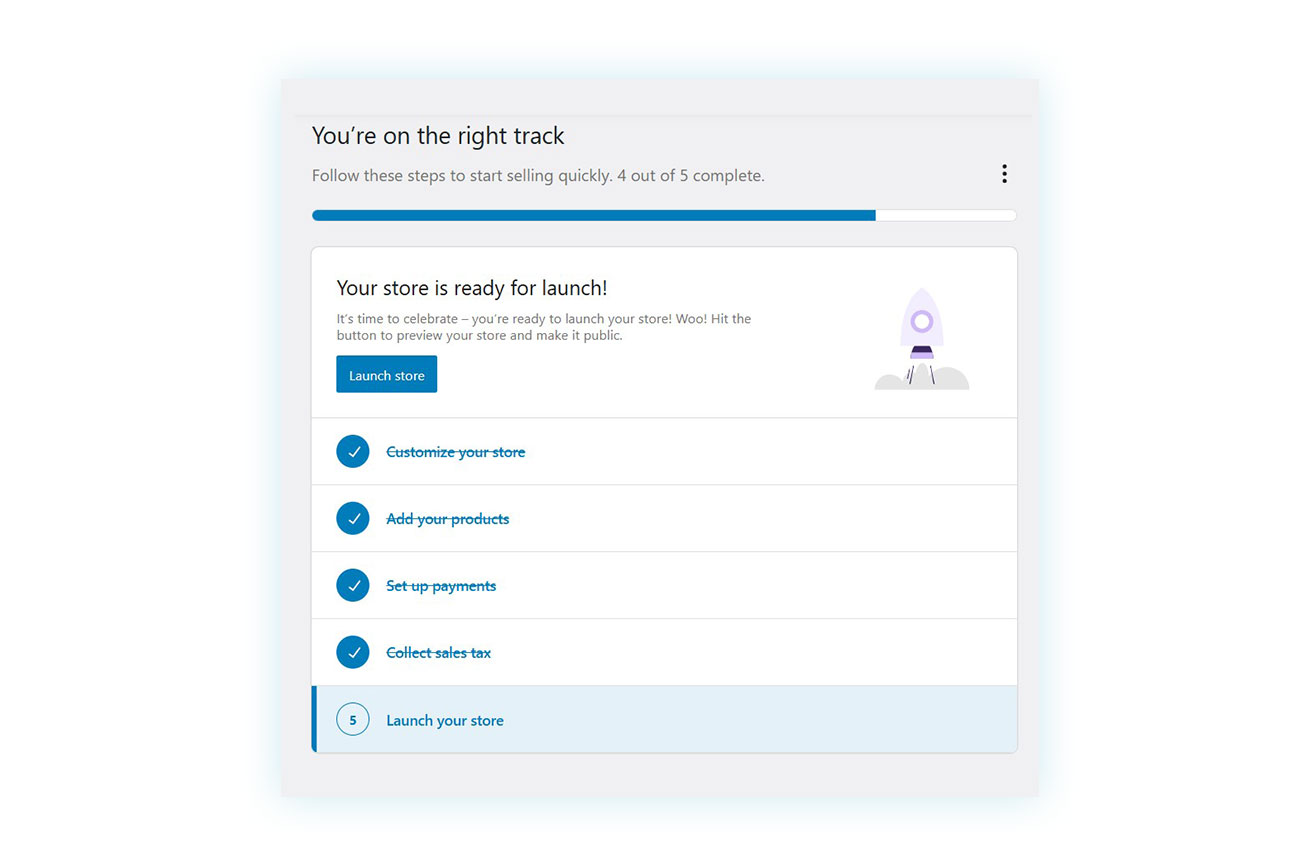
Before doing so, however, let’s take a look at a couple of other important aspects of your WooCommerce settings.
General Settings and Currency
Go to WooCommerce > Settings, where you will find tabs to help you customize your store. The “General Settings” tab is one of the most important because it contains essential elements for operating your business.
For example, if you want to change your site’s currency, just scroll down:
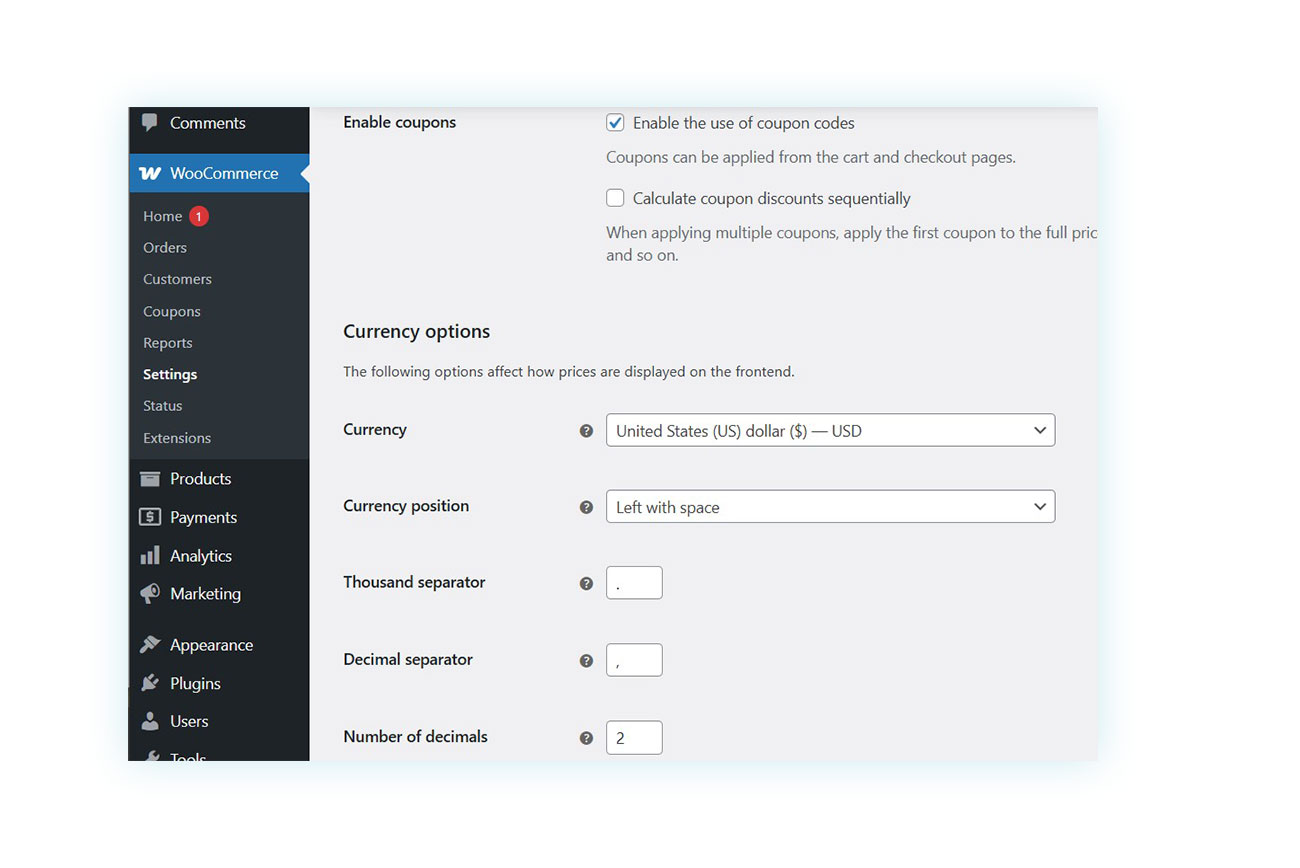
Choose your preferred currency and specify the number of decimal places, as well as whether to use a comma or a period.
Configuring Transactional Emails
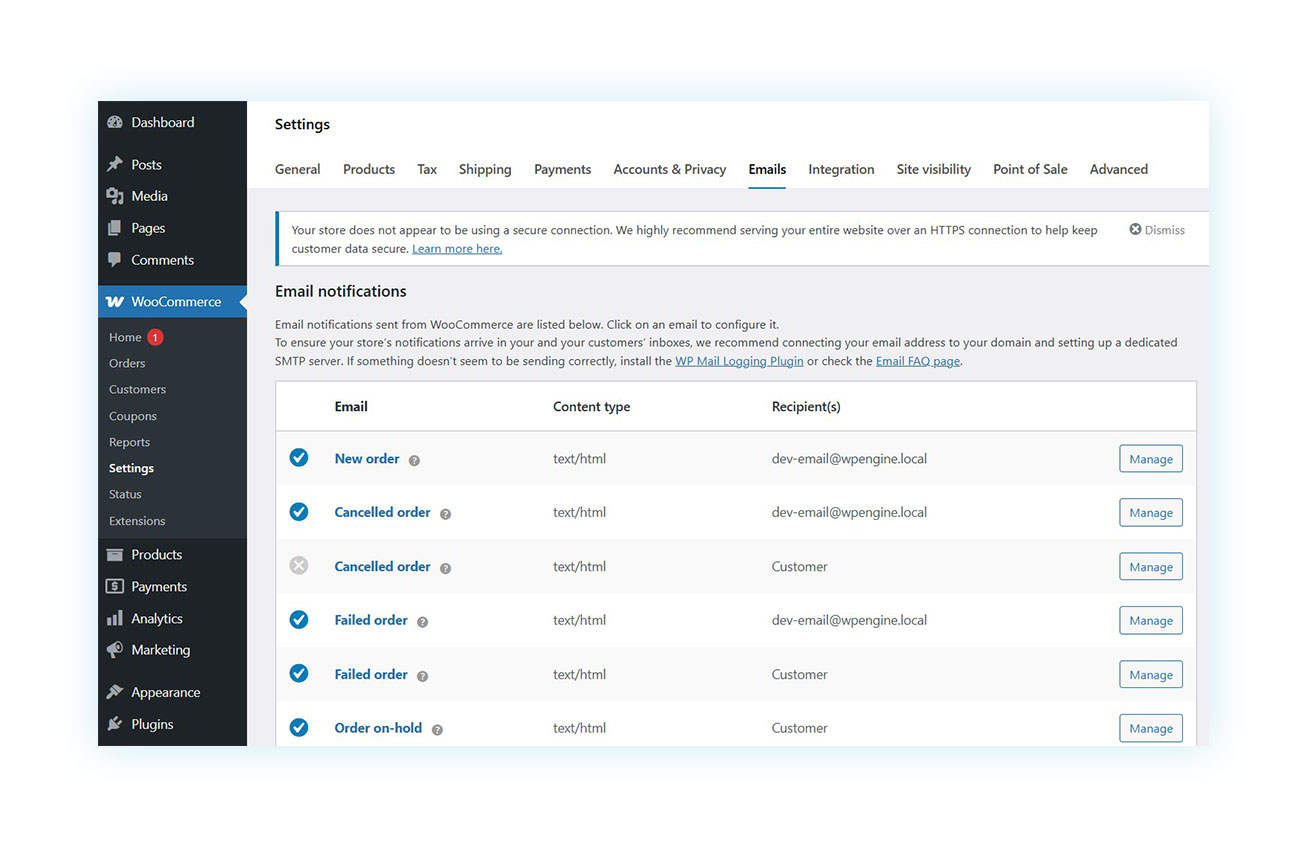
Another aspect to which we encourage you to pay attention is the email settings. Every time an order is created, WooCommerce sends notification emails to the seller and buyer to inform them of an order’s status.
While these emails cannot be fully customized without extensive programming knowledge or a dedicated plugin, you can still customize them to some extent. You can also choose which emails to enable and/or disable by going to Settings > Emails.
Final Testing, Launch, and Ongoing Maintenance
Once you have finished setting up your site and are satisfied with it, you can proceed to launch it by completing Step 6. You will then be taken to a summary page for your site where you can confirm the launch:
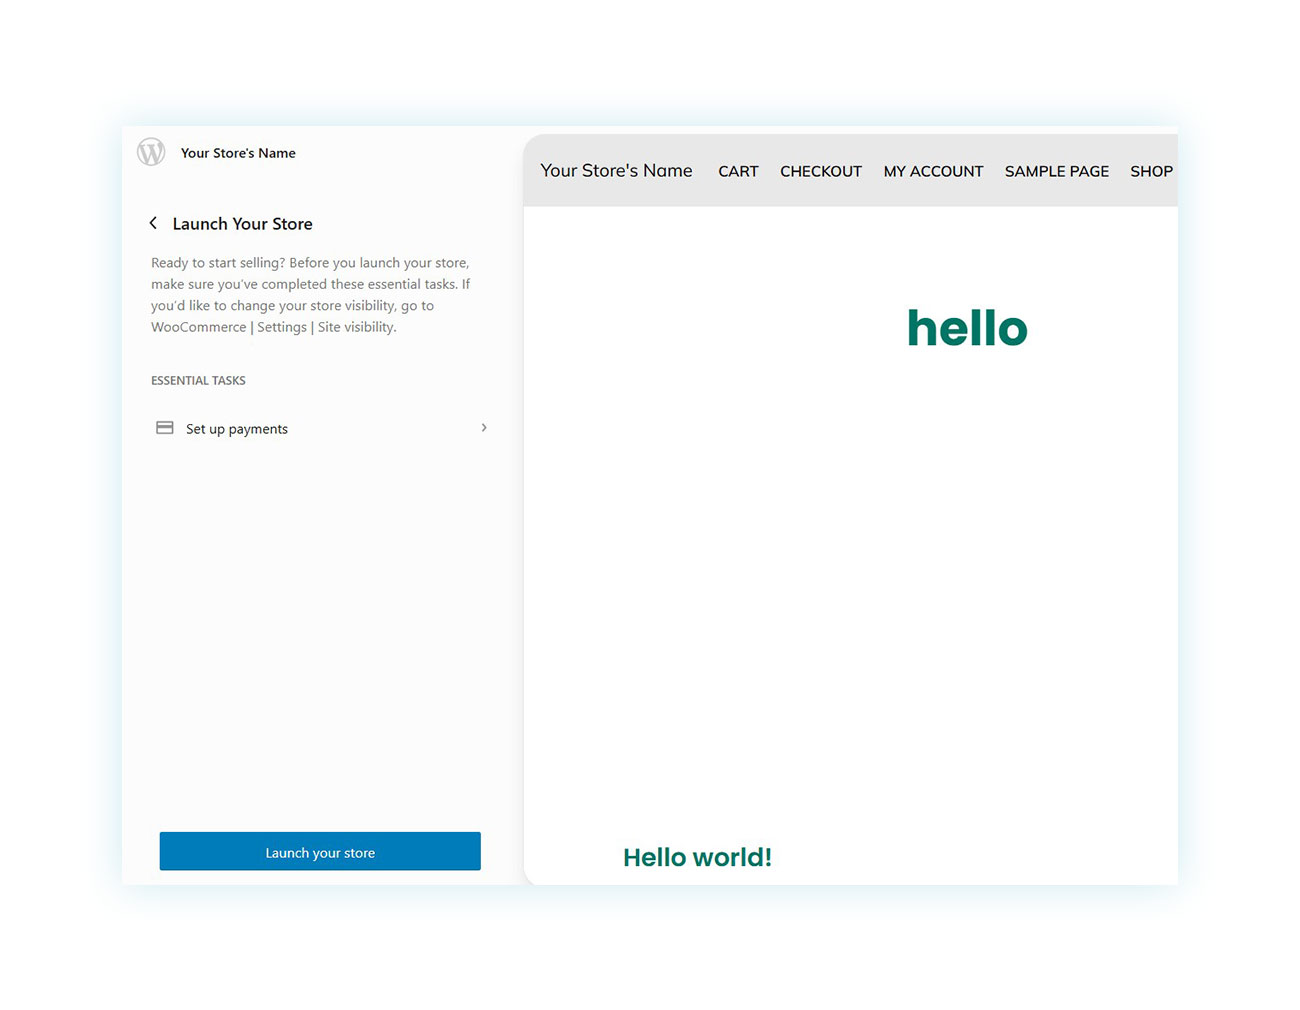
Before launching your site, ensure that every aspect is functioning properly, including testing the checkout process to verify that orders are processed correctly.
Don’t forget to perform ongoing maintenance on your store, including:
- Regular updates during periods of low user traffic
- Checking statistics to identify any navigation or purchasing process issues.
- Collect feedback to ensure your site meets the needs of your target audience.