If you’ve got an online store set up with WooCommerce, you know that every order goes through different “statuses” or stages from the moment it’s created to the moment it’s delivered.
But the statuses offered by WooCommerce often aren’t enough to handle the whole complexity of order processing, which causes problems for the seller and leaves the customer in the dark.
In this article, we’re going to take a quick look at the order statuses that are already included in WooCommerce. We’ll talk about their shortcomings and how to quickly introduce new statuses with the help of a simple plugin.
Table of contents
What is a Custom Order Status in WooCommerce?
Let’s start by looking at WooCommerce order statuses:
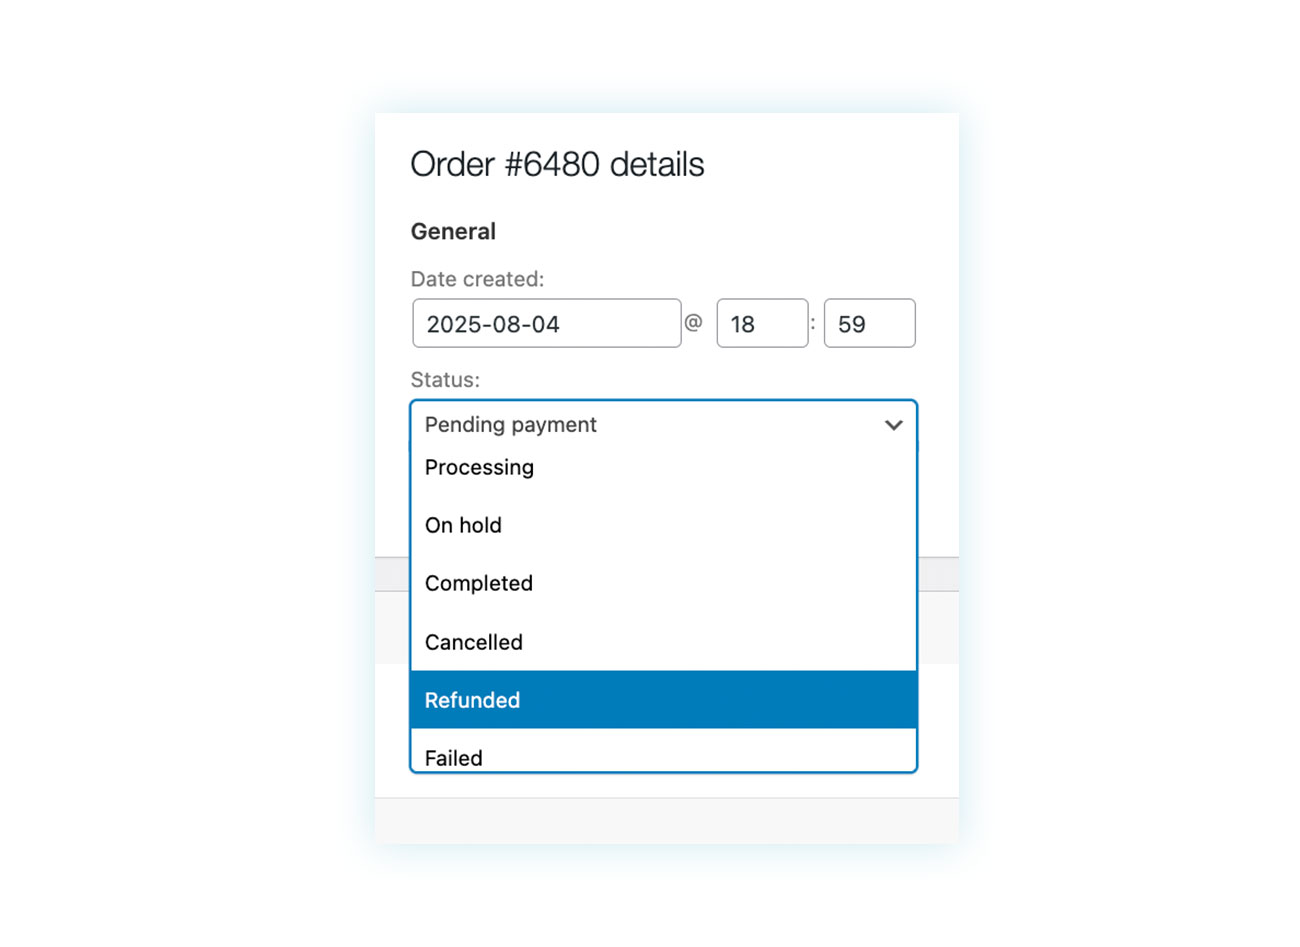
WooCommerce orders can basically be divided into 8 statuses:
- Draft
- Failed
- Refunded
- Cancelled
- Completed
- On hold
- Processing
- Pending payment
As you can see, most of these statuses are related to the purchase and payment process. Once the payment is processed, the seller has no choice regarding the order status, and the entire fulfillment phase must be enclosed in the transition from “Processing” to “Completed.”
However, this isn’t the best solution. It’s a mixed bag for the seller. On the one hand, they end up with orders in different stages of processing that all have the same status, which increases the risk of errors. On the other hand, customers who check their order won’t see any updates, even days after purchase.
For example, you might want to add a status like “Preparing for shipment” to keep track of which products are packaged and ready to ship and which ones still need to be packaged, or other statuses.
Let’s say there’s a store that sells customizable or handmade products. In this case, the order preparation phase will include a few important steps that are important for both your work and the customer’s peace of mind.
Offering custom order statuses generally allows for better management, which translates into a faster and more efficient store. It also provides greater transparency for customers, meaning greater satisfaction, fewer support requests, and less risk of return requests.
Now, let’s explore how to introduce new statuses within WooCommerce.
How to Create a New Custom Order Status in WooCommerce
As with all missing or incomplete WooCommerce features, you’ve basically got two options: modify the site code (which requires a deep understanding of the tool and can be risky) or use a plugin dedicated to that specific function.
Today, we’re going to use the YITH WooCommerce Custom Order Status plugin. As the name says, this plugin lets you make custom order statuses that you can use just like the CMS default statuses.
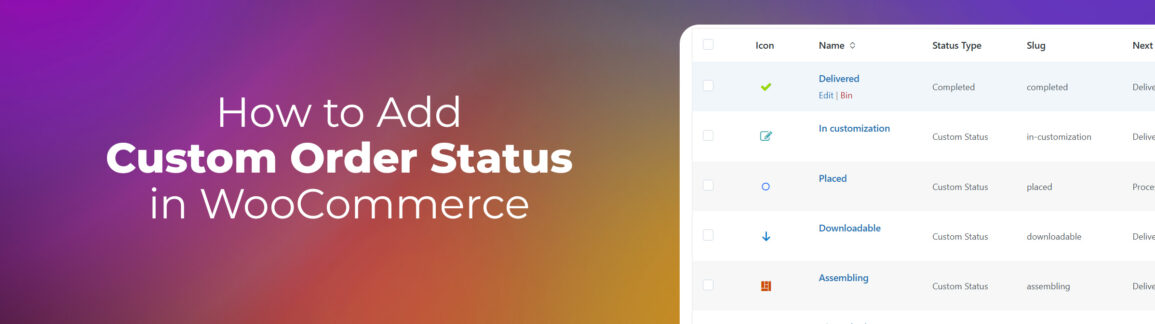
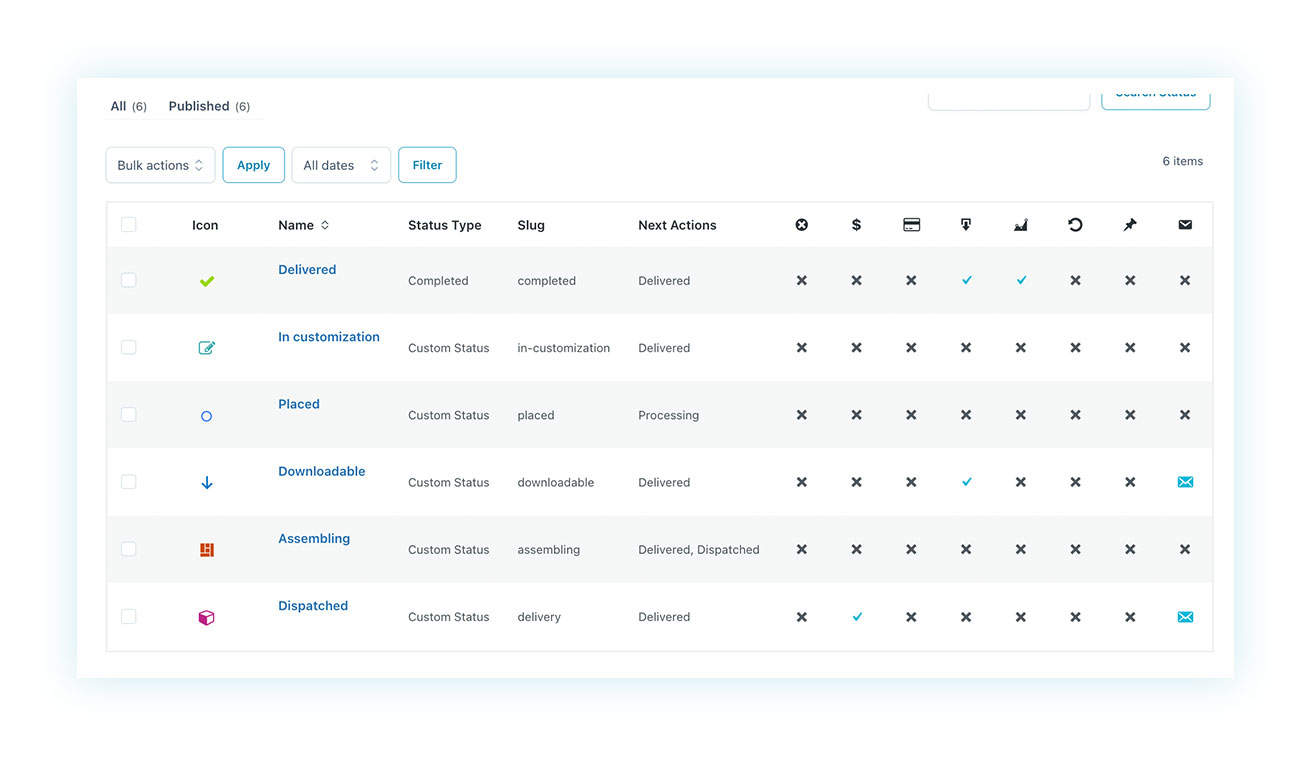
Once the plugin’s installed and activated, you can go to its dashboard where you can create new statuses and view all those created up to that point:
After creating a new custom status, you can select it on the order page. You can also set up a series of status levels and link them together to make it easier to transition between statuses.
Let’s take a look.
Manage Custom Order Statuses
When creating a new WooCommerce order status, you can customize multiple characteristics, such as the slug, name, and color that will appear on the orders page.
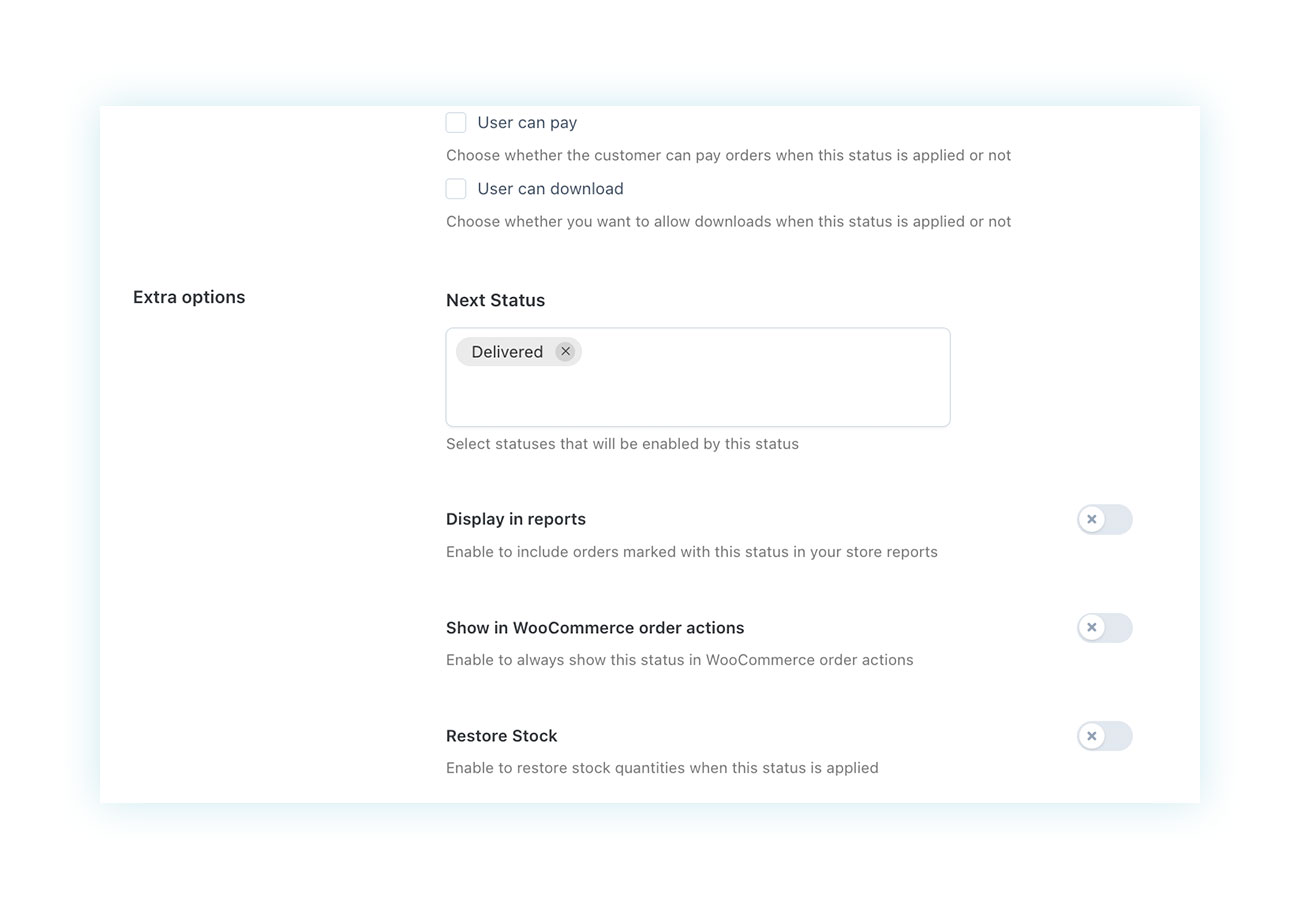
Among the available options, there is a field dedicated to the “Next statuses” section. This field is used to create a system of steps so that you can easily change an order’s status to the next logical one:
To better explain the concept, let’s look at a practical example. We want to create a state system that moves in this direction:
- Placed – Once the order has been submitted, it is put in “Placed”.
- Assembling – Once the product begins its assembly phase, the seller can press a button to mark it as “Assembling”.
- Dispatched / Delivered – Once the product is finished, there’s an option to mark it as “delivered” for customers who pick it up in-store or “dispatched” if it is shipped. In turn, “Dispatched” should have the option to become “Delivered” once it is delivered to the customer’s home.
So, to make a system that’s similar to this one, we need to put each of the statuses into the “Next statuses” section, so that when it’s all said and done, it’ll look like this:
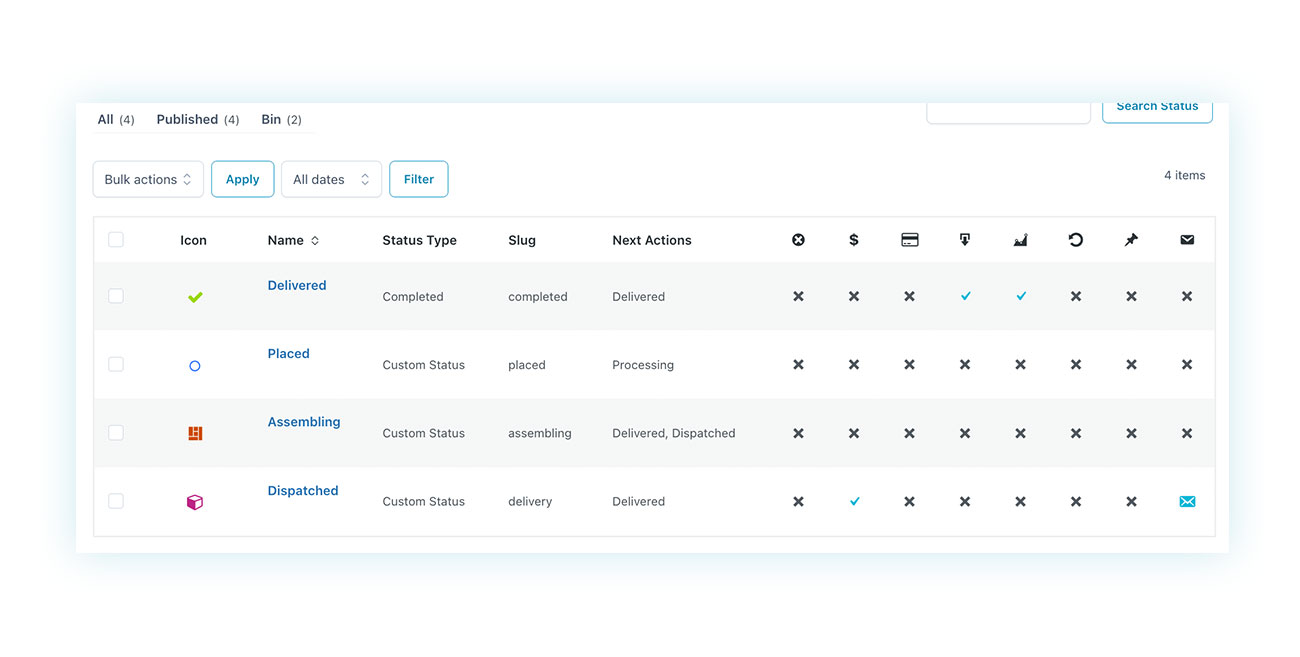
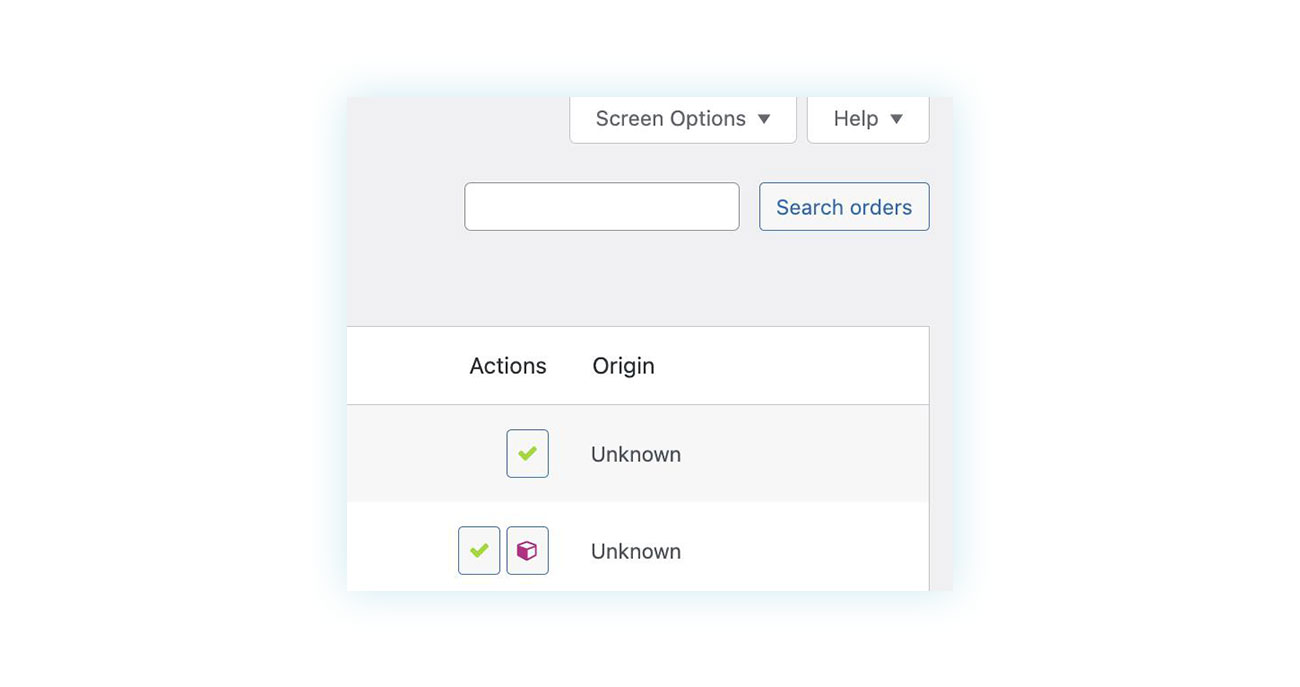
Once we’ve finished that, we should be able to go to the Orders page and fulfill the order like it says in the settings:
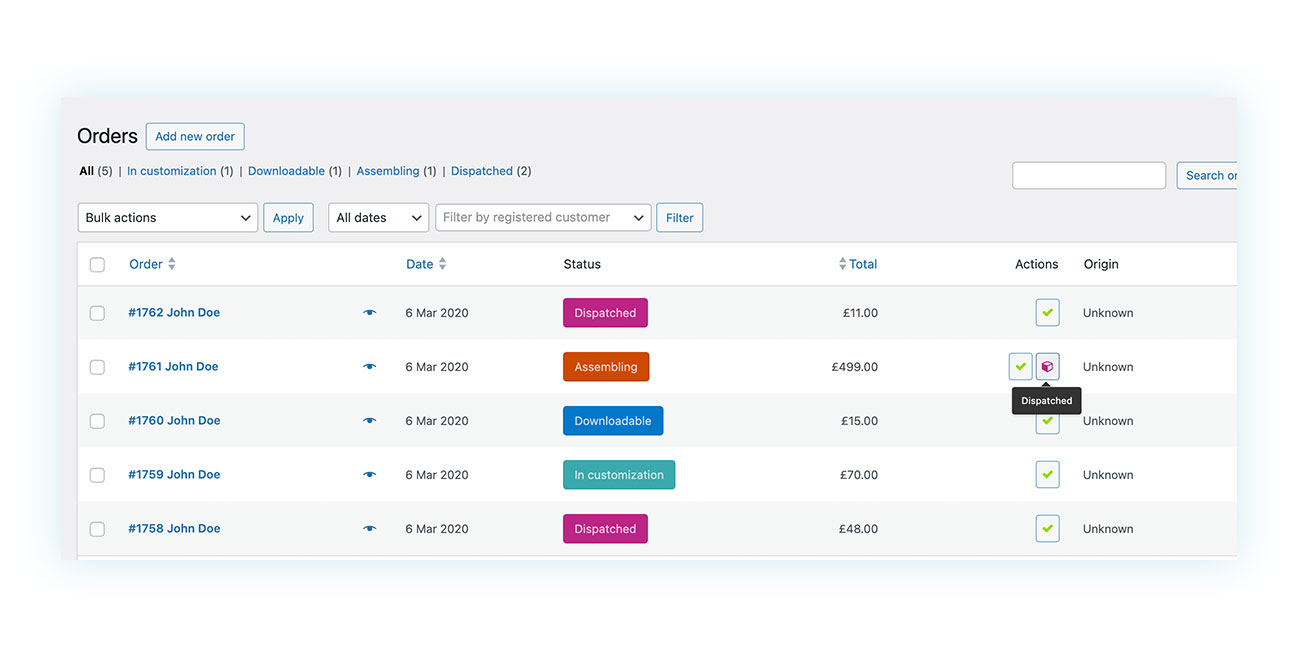
And, as you can see, among the actions we actually see are those we entered previously. An order that’s marked as “Placed” can be moved to “Assembling.” One marked as “Assembling” can become “Delivered” or “Dispatched”, and one marked as “Dispatched” can become “Delivered”.
It’s clear how handy this is for the seller, who can move an order to the next status with just one click, without getting confused by numerous options.
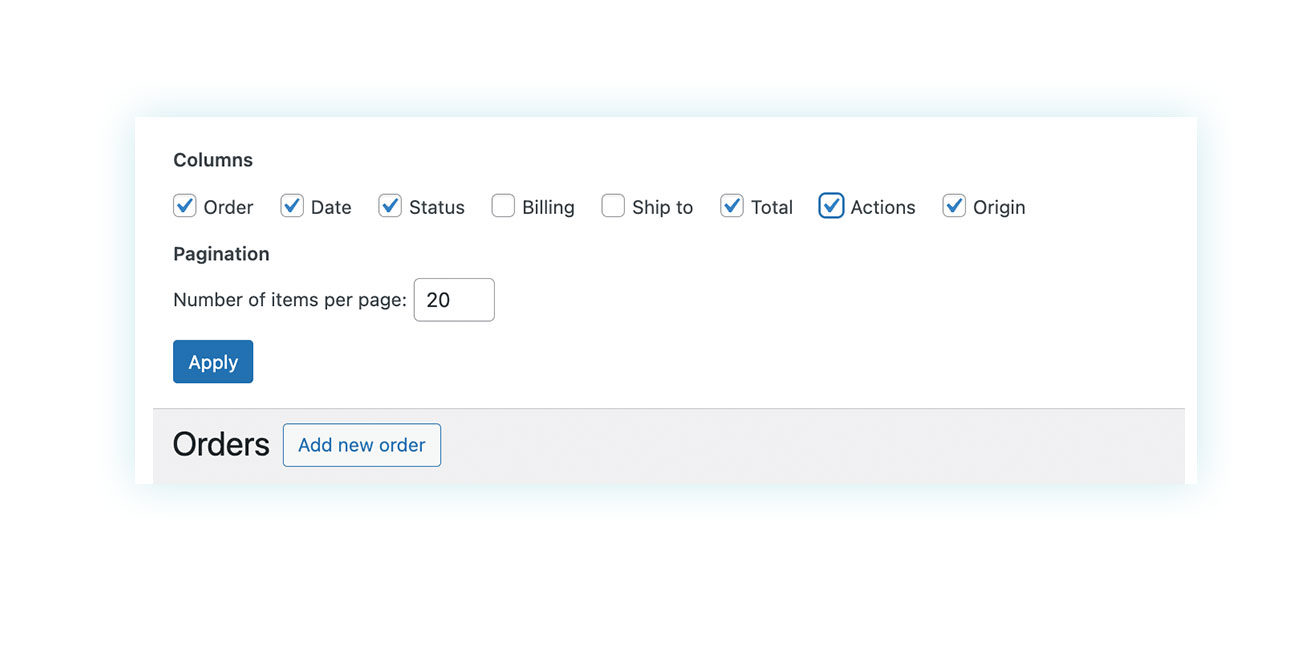
N/A: If you don’t see the “Actions” field on your WooCommerce Orders page, you simply need to enable it in your WordPress options. Scroll to the top of the Orders page and click “Screen Settings” in the top right corner:
In the pop-up menu that appears, make sure to check the “Actions” box so that these will appear on your orders page:
Notifications for Order Status Changes
Customer communication is a very important aspect when it comes to order statuses. As we saw earlier, one of the reasons behind creating new statuses is to keep users up to date.
While customers can log into their accounts to check the status of their orders, we recommend making the order management process easier by communicating the most important steps from one order status to another.
You can use the plugin’s features to do this. When you create a new status, you’ll see the “Email settings” tab next to the “Settings” tab. There, you can set the content of the email that’ll be sent to the customer when their order reaches each status:
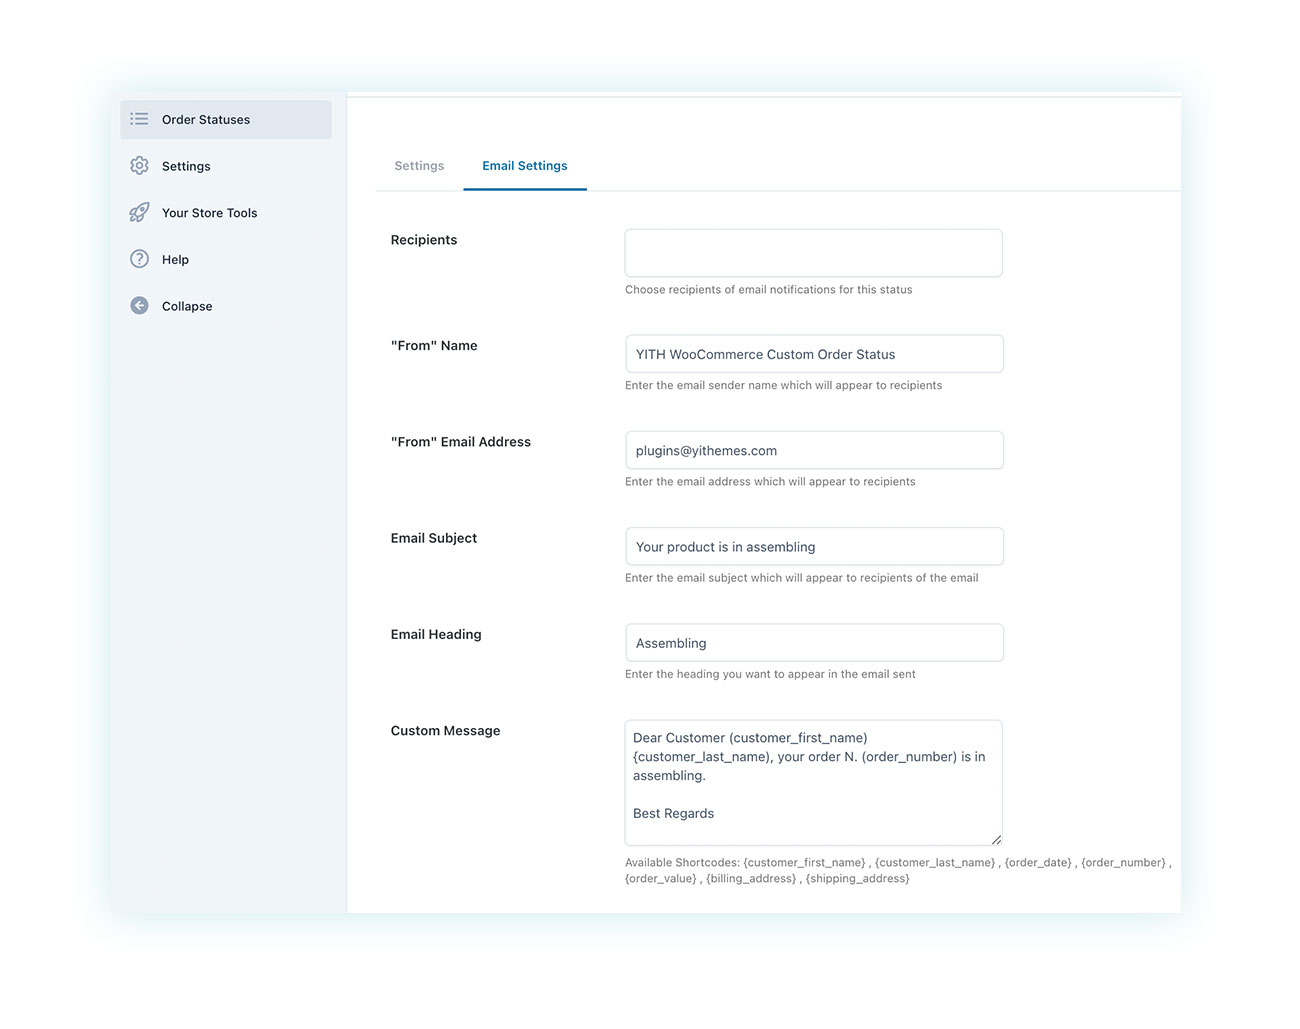
This feature is based on a WooCommerce feature that sends an update email to the customer for specific order statuses.
View Status Information for Users
These communications are obviously important for keeping customers informed, but you can also check the status of your order at any time on the My Account page:

Best Practices for Custom Order Statuses
Although custom statuses are important for the effectiveness of your eCommerce business, there are still some precautions you can take regarding order statuses to maximize the benefits of the plugin.
Now, let’s take a look at some of them together.
- Use of descriptions: It is important to assign clear and intuitive names to states (e.g., “In Process” rather than “Processing”). Even if you think your solutions are clear, this may not be true in the future, especially for your customers who see certain states. In general, greater clarity reduces the risk of human error, so it’s worth spending a few extra seconds on the naming stage.
- Testing statuses before implementing: Testing any features you introduce on your store that alter the basic functionality of WooCommerce in a staging environment where your theme and other plugins are located is essential to avoid any risks. While adding a custom status is unlikely to cause problems (especially when combined with other plugins from the same developer), it’s important to confirm in the back end before approving changes directly on your online store.
- Limited use of statuses: The ability to create an almost unlimited number of custom order statuses could lead to an excessive amount of them. It is important to implement only those statuses strictly necessary for the correct functioning of your site, both for those who will have to manage the store and the statuses and for customers who will have to immediately understand what they mean once associated with the order.You might also want to think about adding a legend to the customer’s account. That way, you can show where their order is in the fulfillment process and what’s next (along with the general timing for each step).
We suggest using your common sense when using each tool, no matter how good it is for your eCommerce business.
Conclusion
Introducing custom order statuses in WooCommerce is a great way to improve store management efficiency and the customer experience. With YITH WooCommerce Custom Order Status, you can set up new statuses that better match the different stages of fulfillment, making order management easier.
This gives sellers more control, reduces the risk of errors, and provides a seamless process.
It also has an advantage for customers: it lets them see the status of their order at every step, which is clear and makes them feel better. This reduces the number of questions they have and the number of times they ask for help, and it makes them happier.
Don’t forget to set up email notifications for each order. This, along with the order status that can be found in your account, will make things easy for your customers.