Online stores often have a one-sided and definitive approach. The seller offers an item for sale, the buyer buys it, and then the buyer receives it. This is the reality for many types of sales, but not all.
As a matter of fact, there are entire product and service categories that simply can’t be sold without consulting the customer to give them a choice of options. In the past, sending and receiving quotes was the way to go for these types of products and services. But with customers who are more impatient and who are making up their minds on the fly, the quote might not be as effective as it used to be.
It’s also a good idea to add extra options to many products so you can give customers a more personalized experience. More and more people are looking for stores that offer similar things because they want to stand out from the competition.
So, what can you do to make your store stand out? In this article, we’ll go over how to offer extra options on WooCommerce, how they differ from the variable products already on this platform, and find out what tool to use and how to use it.
Table of contents
What are the benefits of offering additional options on WooCommerce products?
There are also lots of other products and services that make this feature a great addition. In general, it brings the following benefits:
- Increase in the average order value (AOV) – Adding extra options with additional fees can really help boost the value of each order on your site. It’s important to remember that order value, customer loyalty, and increased traffic are three key factors in ensuring the success of your store.
- Differentiation – As we mentioned before, giving customers more choices lets them play a part in creating the product, which makes you stand out from the crowd and the competition.
- Higher customer satisfaction – The extra options give customers the impression that there’s a dedicated service for them, which makes them feel like their salesperson is paying attention to their needs.
- Cross-selling – You can also sell other products using additional options. Just picture this: you’re selling a camera, and you’ve got the option of selling it with an extra battery.
And much more.
If you’ve used WooCommerce before, you might be wondering what the difference is between the variable options that come with the platform and the additional options. Let’s quickly go over them:
- Variable options – These are changes that affect some basic product features (like size, color, and material) and are often used for products that come in different shapes (like clothes). Each variation may have a different fixed price, but it’s often the case that they’re priced similarly to each other.
- Additional options – These are extra features that don’t change the product itself. They’re usually used to add details or items to the product you’re buying, like accessories or custom engraving. When it comes to price, you can choose to add free options as well as paid options, which will make the order more valuable.
As you can see, the two features aren’t interchangeable, but they can often be used together. For instance, you could sell a T-shirt with different size and color options, as well as the option to add a design to the T-shirt.
You can usually add product variations through WooCommerce, but for the additional ones you’ll need to use a dedicated plugin. Let’s figure out how to do that.
Tutorial: Adding Extra Options Using YITH WooCommerce Product Add-Ons Plugin
Today, we’re going to look at WooCommerce Product Add-Ons & Extra Options. This plugin lets you add lots of different types of custom fields, giving you complete control over how they work.
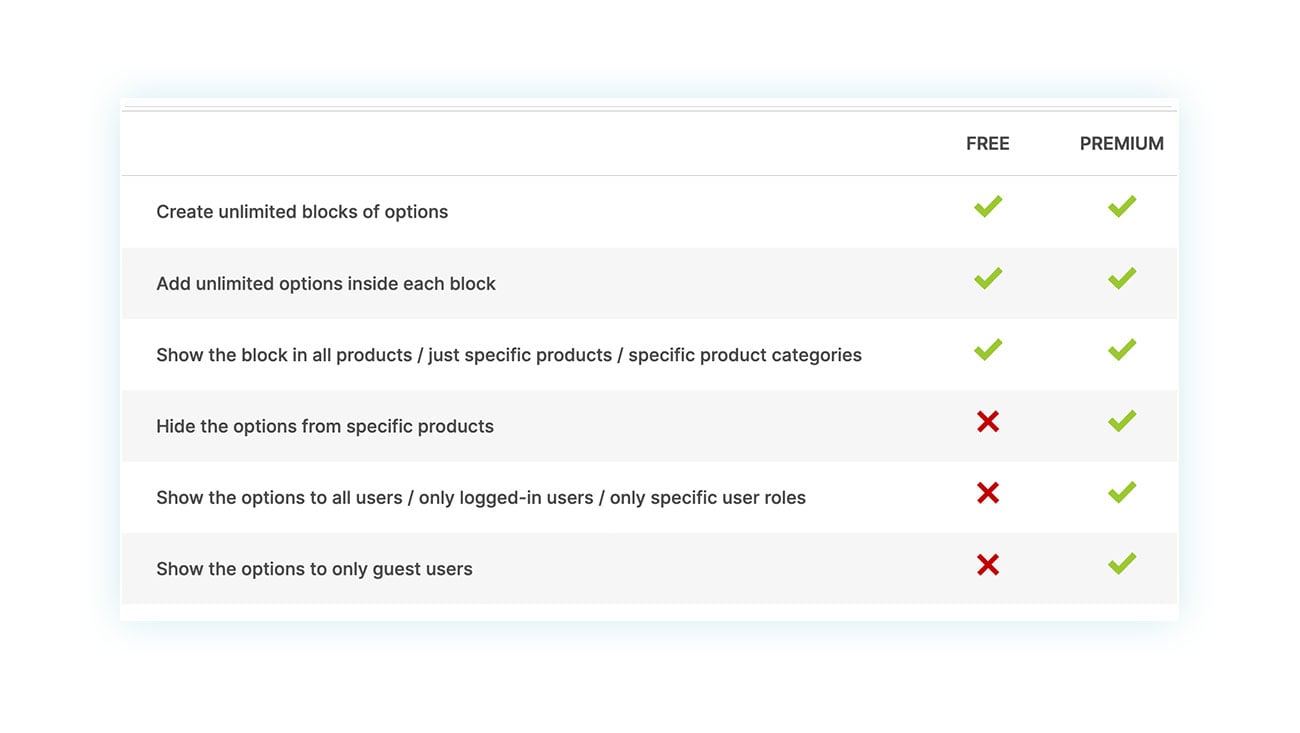
The WooCommerce plugin is available in two versions: a premium one with all the bells and whistles, and a free one with fewer features. You can test it out before buying it (there’s also a live demo on the site that lets you try out all its features):
Once you’ve installed and activated the plugin, just head to the WordPress side menu to find it. Next, head over to YITH > Product Add-Ons & Extra Options. This is where you’ll find all the blocks you can use to create new ones:
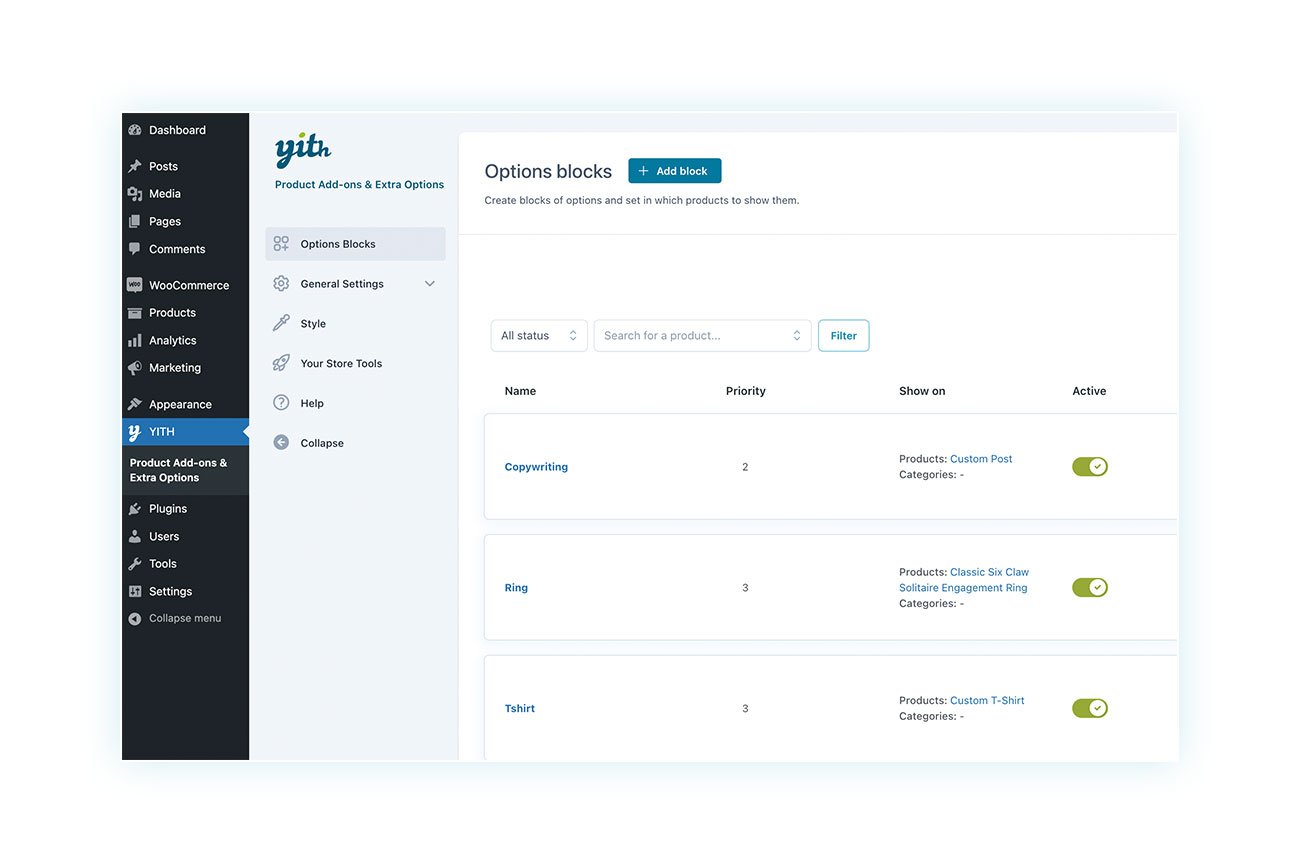
What are blocks? Blocks are groups of extra options that you can create to offer different solutions to multiple products. As we said before, we could create a “T-shirt” block with extra options like image uploading and custom text. You can use this block with any product that has these two extra fields.
To create a block, just click the “+ Add block” button at the top, and you’ll be taken to the creation page:
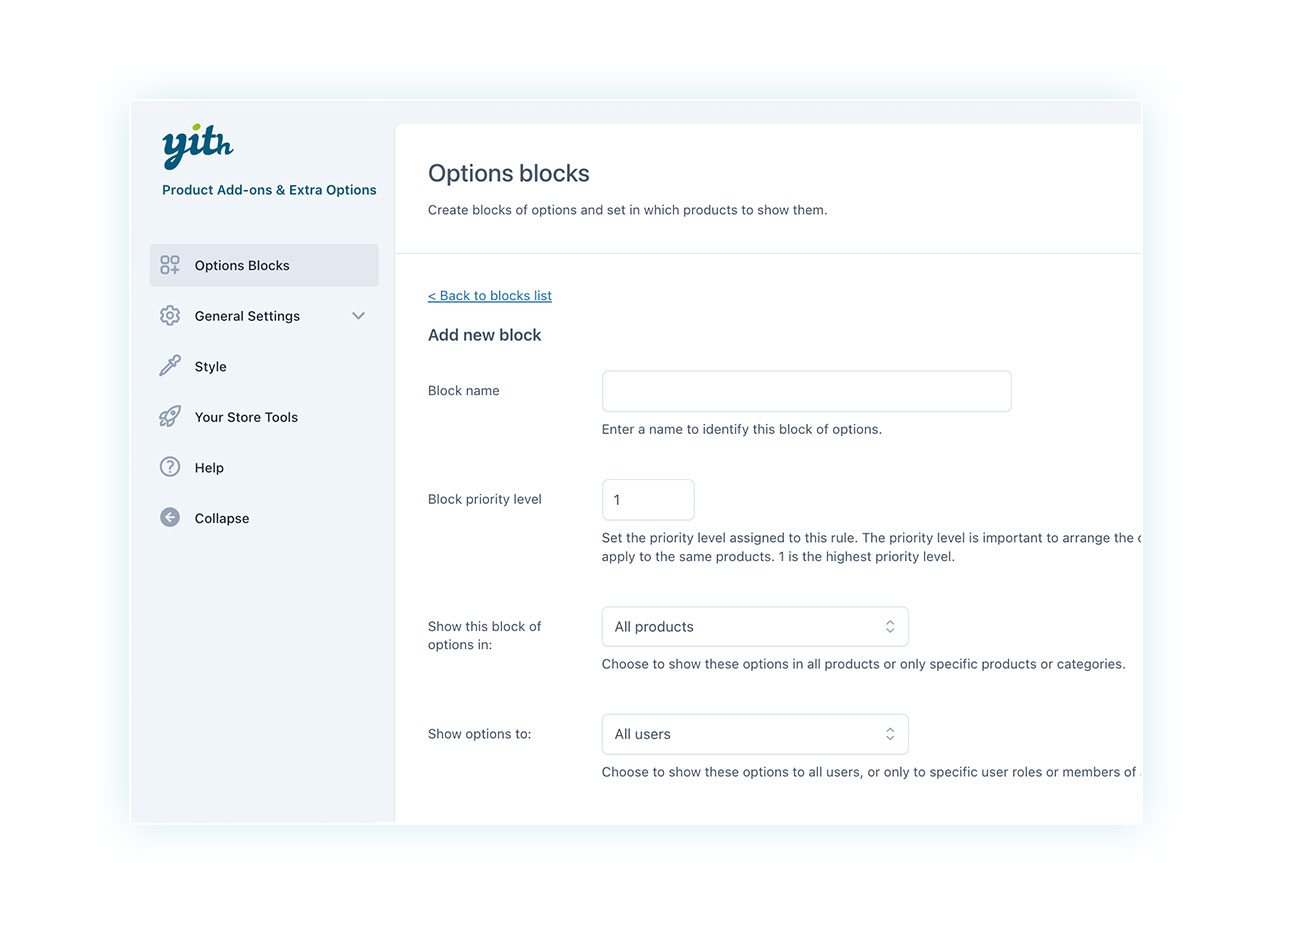
This page is basically divided into two sections. In the first section, you can give the block a name (so you can tell it apart from the others), set its priority (how it stacks up against other blocks for the same product), and choose which products to show options for and which customers to show them to.
At the bottom, you’ll find the “Options” section, where you can add them by clicking “+ Add option”:
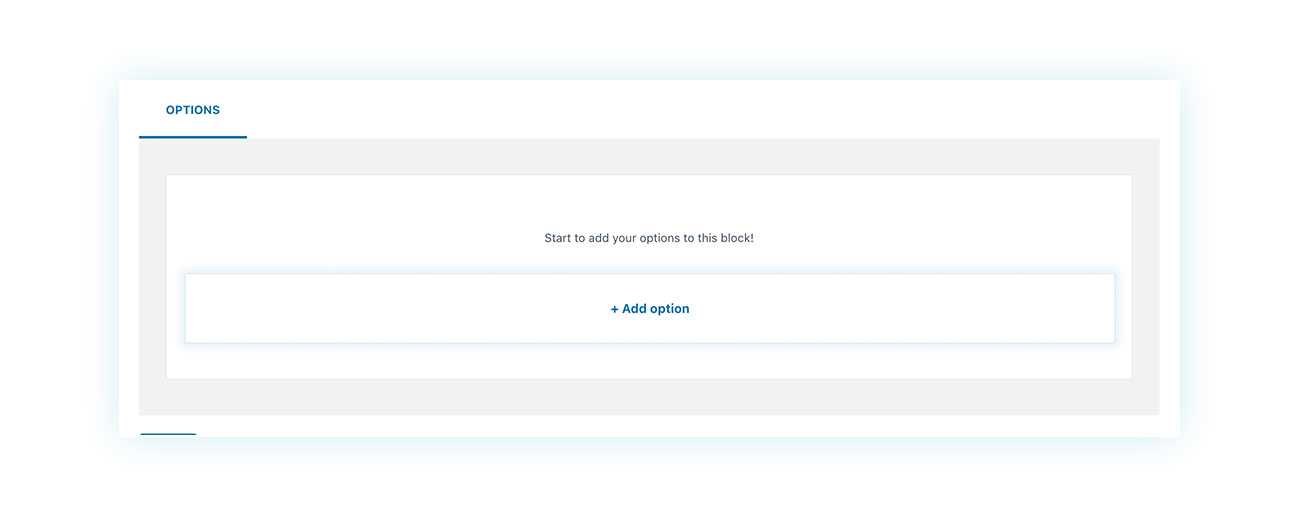
At this point, you’ll see all the extra product options you can choose from:
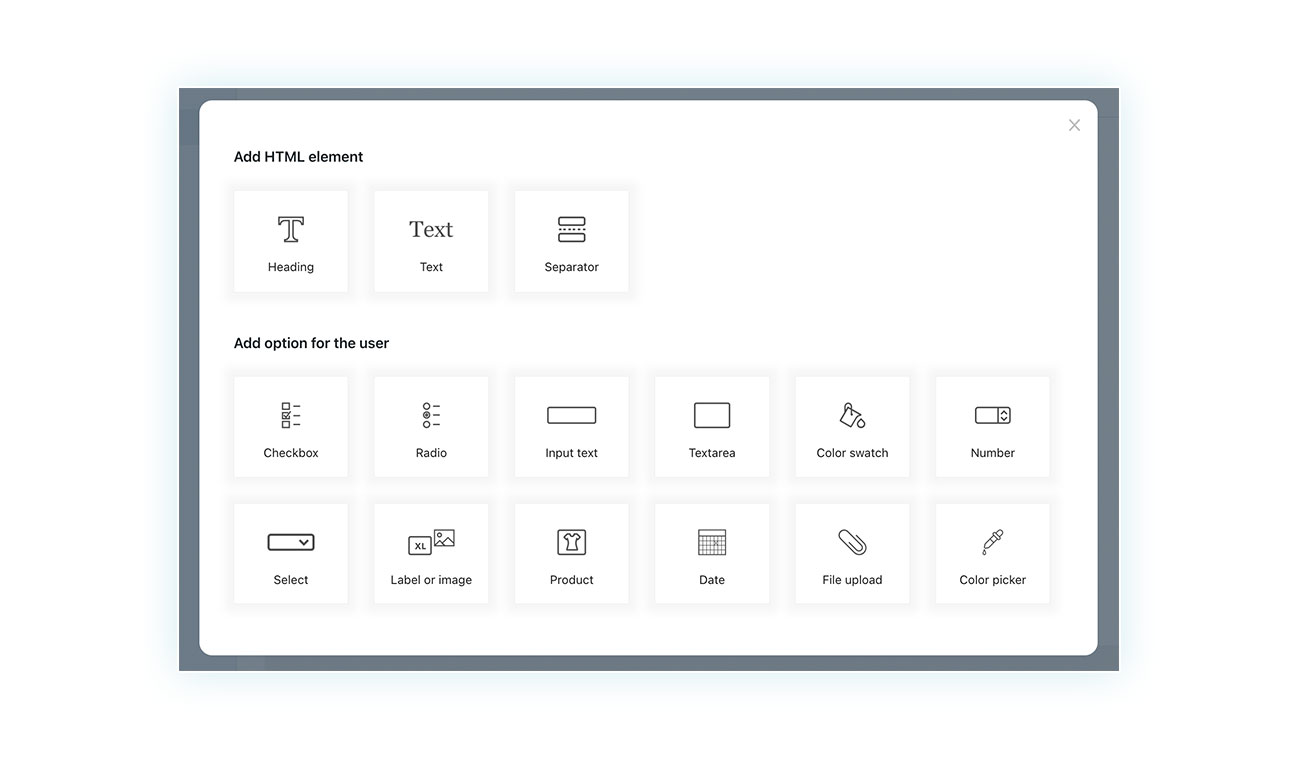
As you can see, you have lots of options to choose from, and some of them may cost extra, such as:
- Checkbox – Boxes that can be checked, and the client can select more than one of them (useful for entering a large number of additional options that add up to each other).
- Radio and Select – The client can choose just one option from the field (this is useful for offering several alternatives).
- Input text and Textarea – Let customer add their own text in a section (useful for customizing products and for sending requests to the vendor).
- Color swatch and Color picker – Allow the client to select a color within a palette.
- Number – Allows the user to select a numeric value (useful for certain services, such as copywriting).
- Label or image – Allows the customer to choose by showing related images.
- Product – For the user to pick additional products. Ideal for strategies that use related products.
- Date – It’s a great way to offer customers the opportunity to pick a specific date and time in the future.
- File upload – To upload logos or images for the product.
As you can see, the plugin gives a lot of freedom to customize the sales page.
Example: Customized T-shirt
Let’s dive into a few direct examples. For the T-shirt product, we’re going to add a text add field so customers can print text on top of their shirt. We also want to make this option increase the cost of the product by $5.
So let’s go ahead and select the Input text field and name the new option:
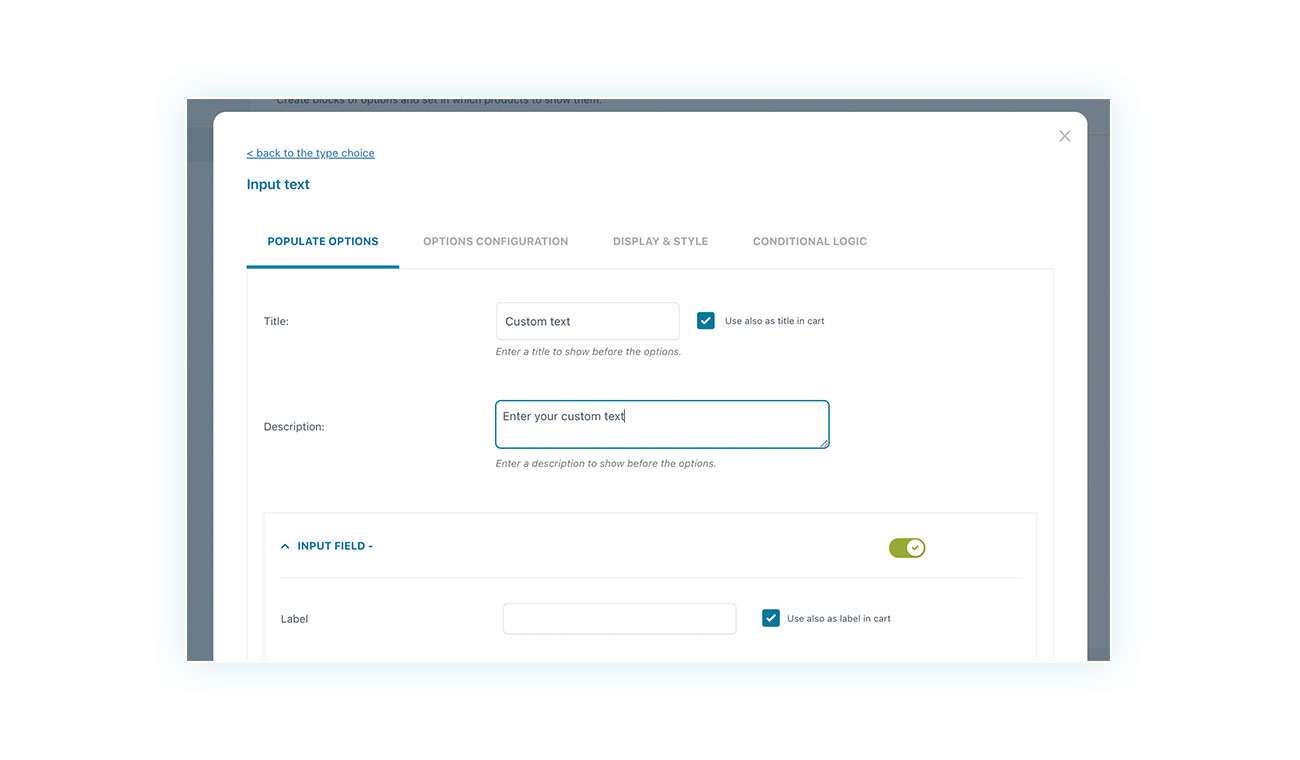
As you can see, the plugin lets you add a title and description that will show up before the option.
At the bottom of the creation page, you’ll also find the price section. Here, you can decide how the price will be displayed, whether to show a full and a discounted price, and whether to make the field required or not:
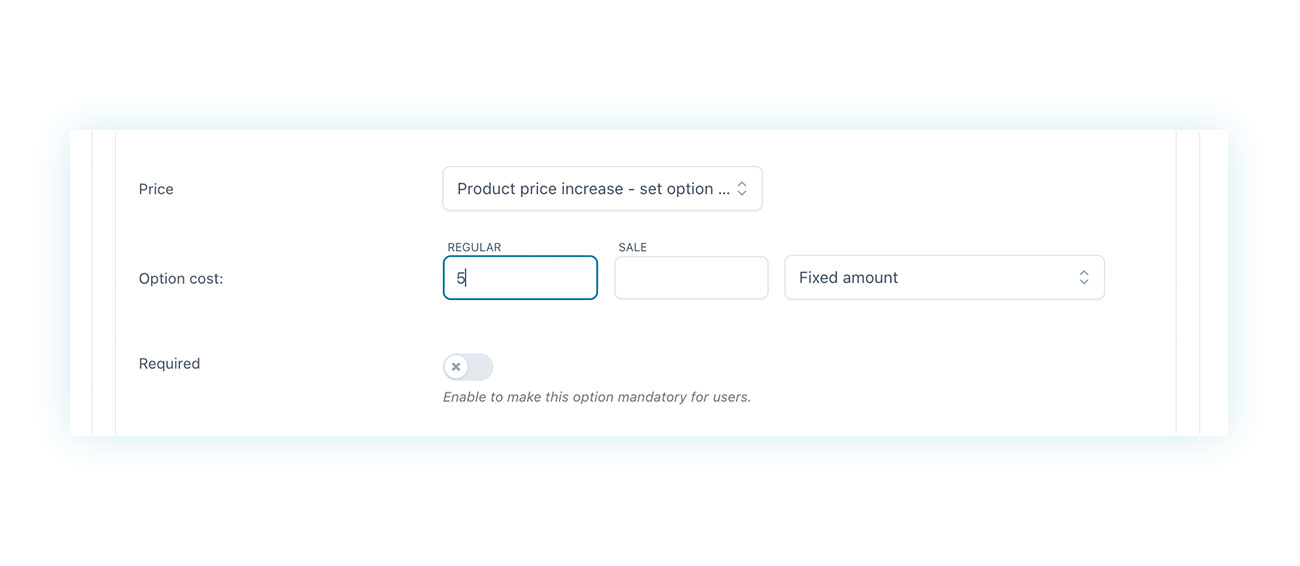
Once you’ve done this and saved the option, you’ll see it on the selected product when the block is created. We’ve also included a dedicated upload field, which is very common for T-shirt customization:
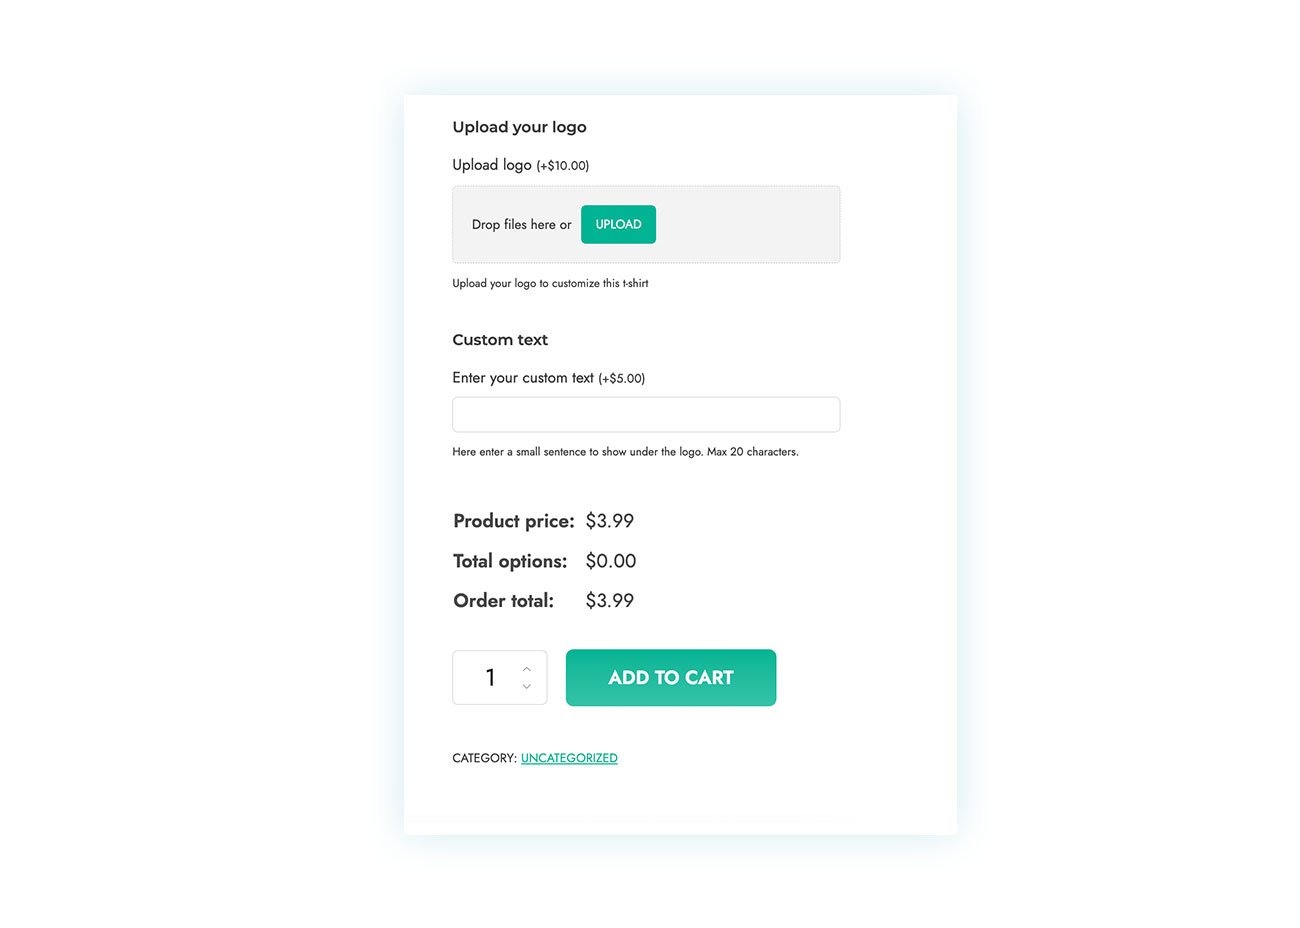
As you can see, the product price is $3.99 before we add text to the field. But that changes when we start customizing the product:
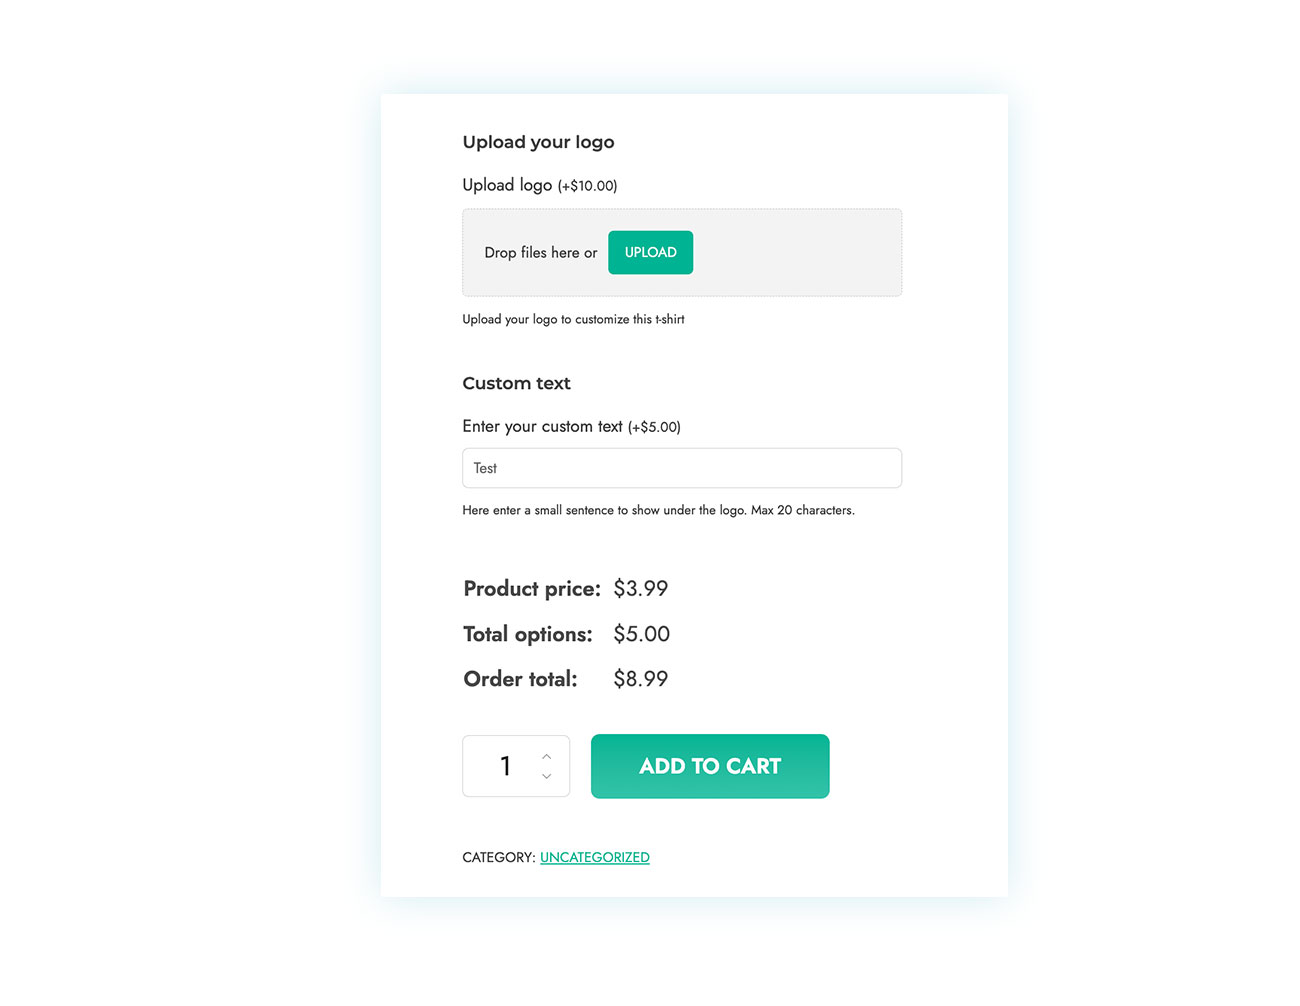
The price is now $8.99, which includes a $3.99 base cost and a $5 premium option.
The same goes for all the other multiple fields.
Advanced Customization Strategies
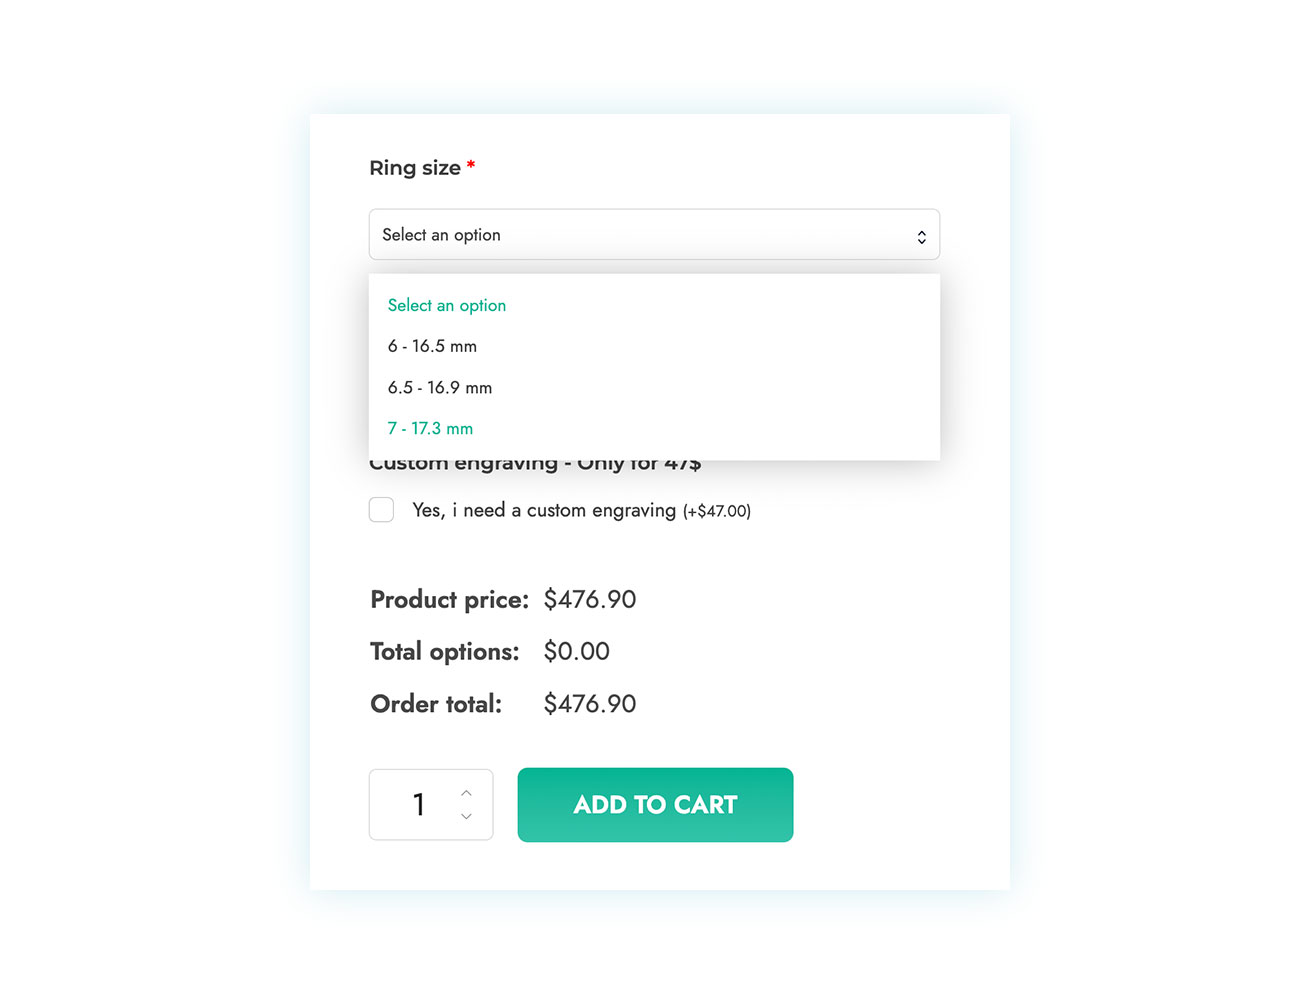
In the image above, we put together a sales page for a ring. As you can see, we added a “Select” field so customers can choose the ring diameter, and we added a “Checkbox” field so they can choose whether they want custom engraving or not.
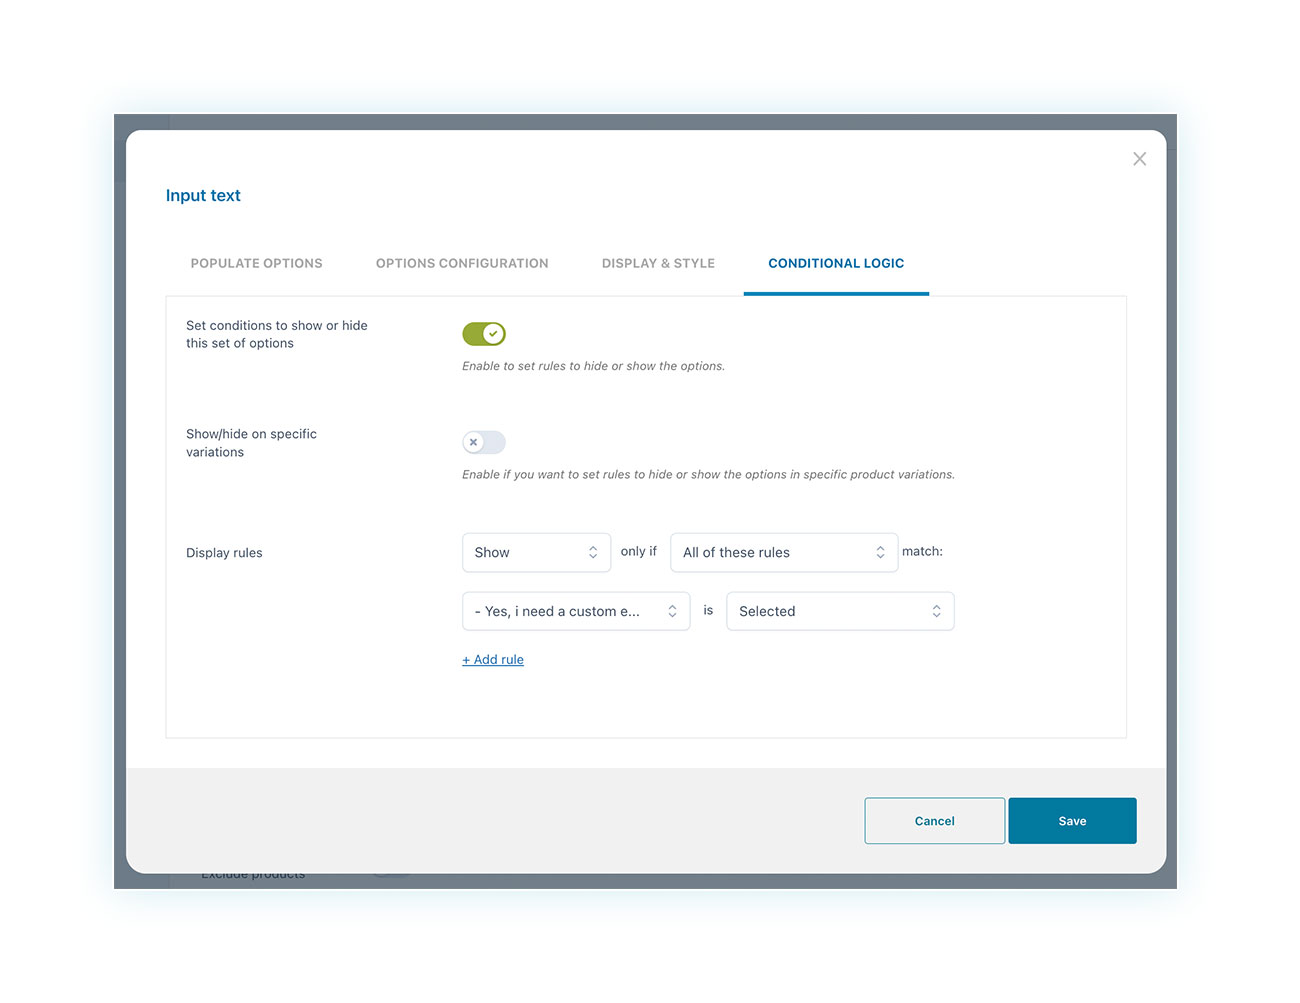
The plugin also lets you use conditional logic to make the sales page easier to navigate. For instance, when it comes to engraving, we wanted to make the text field for adding your own engraving only show up when the customer checks the dedicated checkbox:
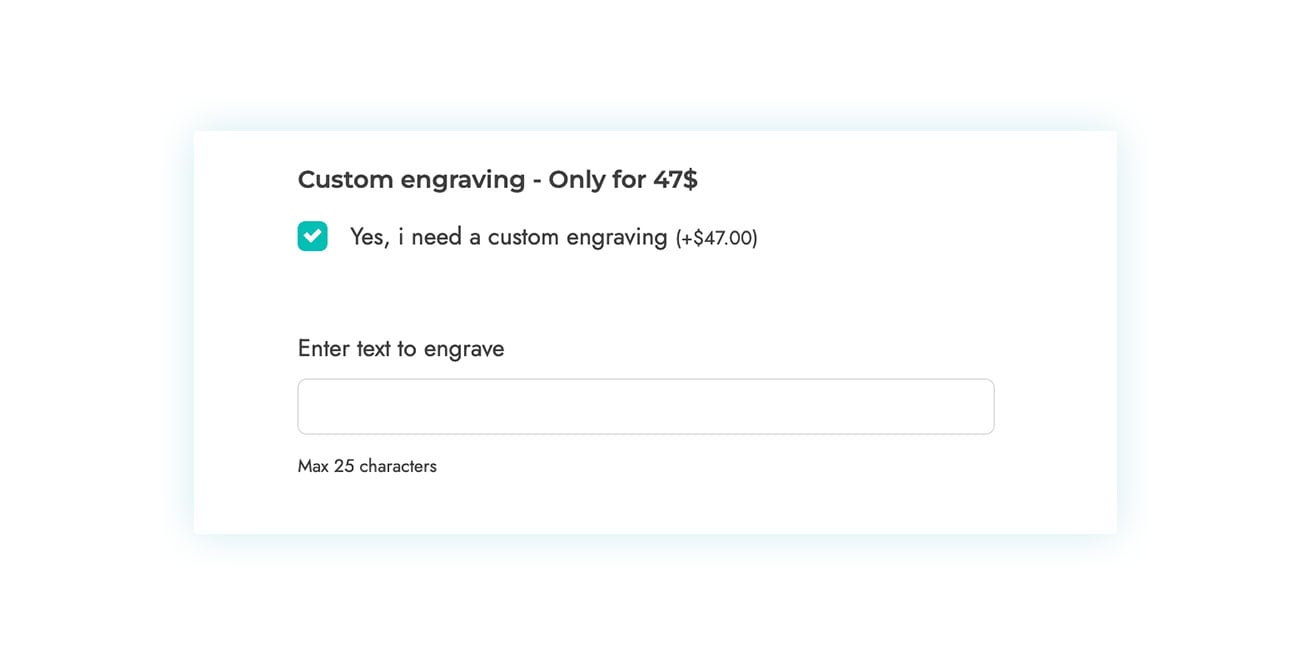
Doing this is very simple: When you’re adding the options to the block that’ll be used for the ring, just go to define the conditional logic for the “Input text” option. Make sure it’s only shown if the “Yes, I need a custom engraving” rule has been selected:
You can try out all the different combinations you can create with this plugin—there are thousands of them!
Conclusion
Extra options are great for selling certain products and services. They’re also a powerful tool for your eCommerce. They can increase the average value of each order, keep customers happy and loyal, and promote cross-selling.
Try out the many features of WooCommerce Product Add-Ons & Extra Options for free and see what you think. You can also check out the live demo from YITH to see all the premium features in action.


