Have you always dreamt of opening your own takeaway pizza restaurant, or have you had the challenge of creating products that have different ingredients or components? This tutorial is a good start on how to set up products like ‘make your own pizza’ using WooCommerce.
If you are new to WooCommerce, read the essential guides on how to set up your store.
Who is this tutorial on WooCommerce Product Add-ons useful for?
As the title suggests, the tutorial is about how to create your own pizza. We all know pizza is a personal favorite and not one person likes the same pizza when sitting around a large dining table. This can be particularly difficult for restaurants and take-aways. But pizza is just one dish with options and can easily be replaced with birthday cakes, burgers, or even non-food items.
If you sell any items with options, you will soon be able to put one and one together on how to apply the same types of options to different product types.
The challenge when creating a product like ‘make your own pizza’
If you have WooCommerce installed, you know it can be very challenging to create custom options for your products. Think of dropdowns and selecting simple options and you will probably be fine. When you start adding costs per selected item, create a custom text, upload a file, and upsell items, it soon becomes very complex, even for a custom post types plugin, as it often requires a lot of styling to make it fit within your theme.
When you add the YITH WooCommerce Product Add-ons and Extra Options plugin, you have made a good start, and you are about to solve the first part of the problem. Next, is to give a guide of the process to recreate the same options as in our demo.
The process of creating the add-ons and extra options in 8 steps
Step 1 – Add a WooCommerce base product
Create a product with a base price. Within this product, you add your description, images and possibly the stock quantity available. (useful if you have 30 pizza bases available for today)
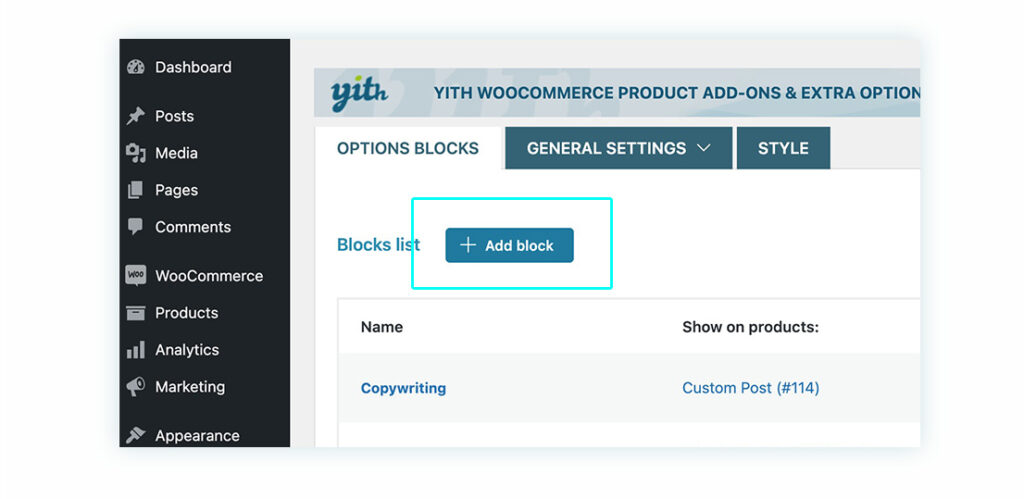
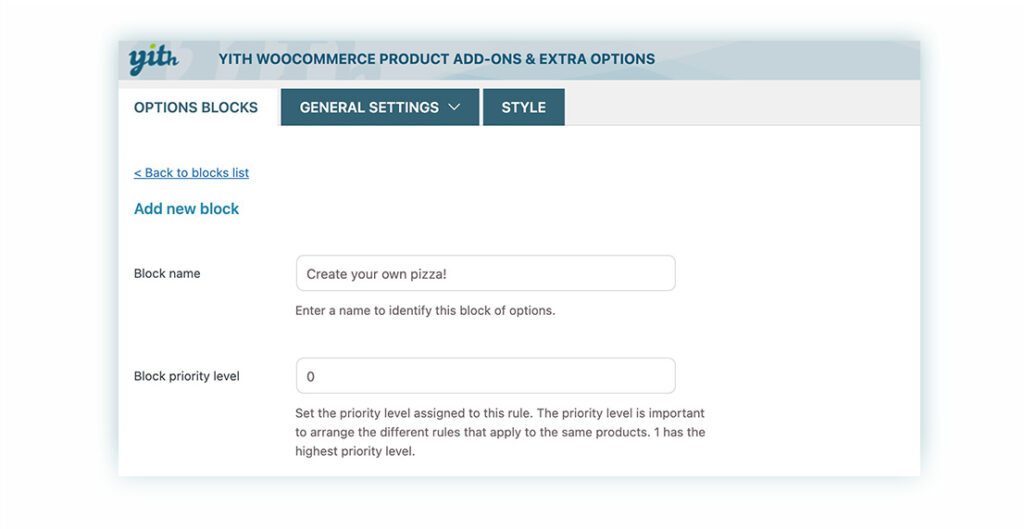
Step 2 – Add a block
Head to the YITH Add-ons settings and click ‘Add block’ to start setting up a new options block. Blocks represent the add-on options the product needs. After step 1, you can add as many blocks as you want according to your needs, and assign these to one or more products.
Step 3 – Add a Block name and set a priority
Setting a priority is very important when you create more than one block for a product and in this way, you control which one shows above the other options when creating more than one block.
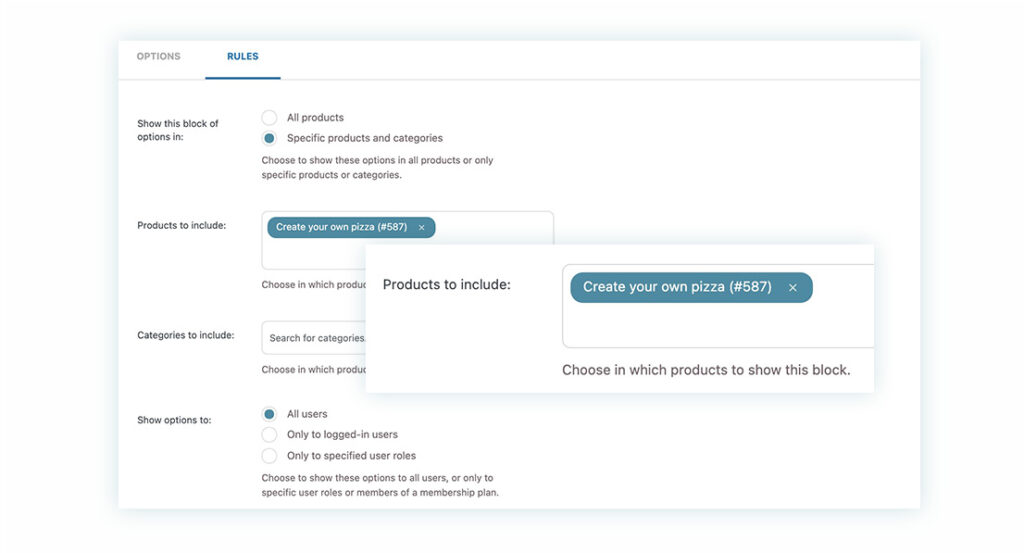
Step 4 – Set up display rules
In this section, you set which products have the add-ons displayed. In our example, we only have one product ‘Create your own pizza’. But if you want, you can display the add-ons in all products, or just within a category or tag.
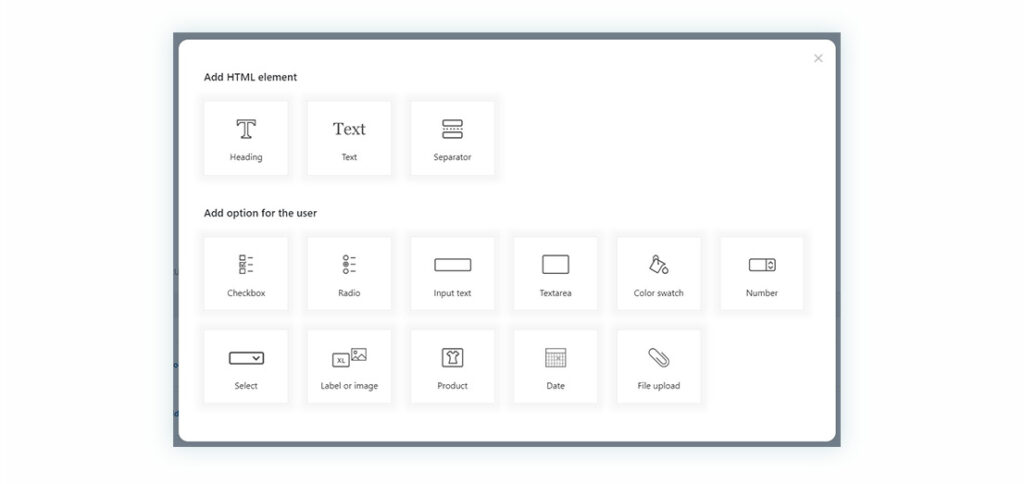
Step 5 – add options for ingredients
Back to the options tab and click ‘add option’, a pop-up window will show us the HTML elements and the options for the user – for the ingredients, we will create labels with an icon for easy identification of the different ingredients, so for that in particular we will choose ‘Label or image’.
We are going to create labels with icons that would allow us to easily identify the various ingredients. Next, we will give it a title (‘Choose toppings’), name the ingredient, choose an image that would represent the topping and, finally, set the price at €2.00.
Repeat the process for each ingredient by clicking in: ‘+ Add a new option’.
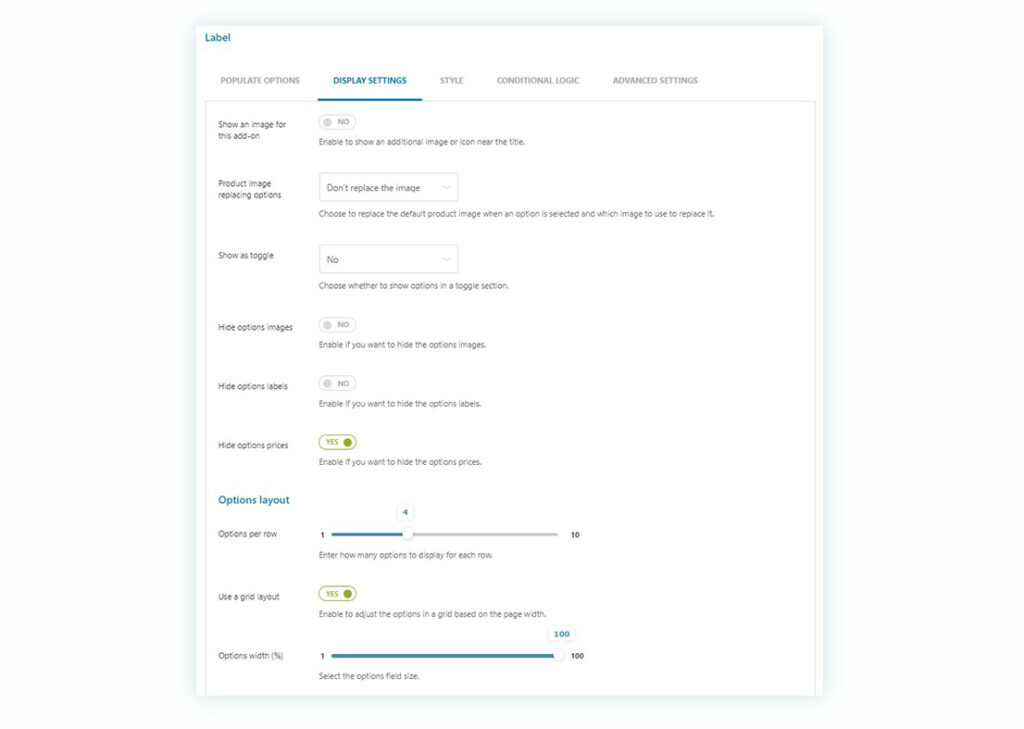
If we go to the ‘Display settings’ tab we will find new options, like hiding option prices. As we don’t want prices shown, we activate the toggle to ‘Yes’. In Options Layout > Options per row we set the value in 4. Then, we enable the grid layout so the options can be seen screen-wide.
We will leave the style and conditional logic tabs for what they are for now, but the advanced settings contain a vital part for this add-on. Within this section, we enable a specific number of options for free, in our case, the first 3 toppings. Following that, we select ‘Multiple’ so the customer can choose as many toppings as desired.
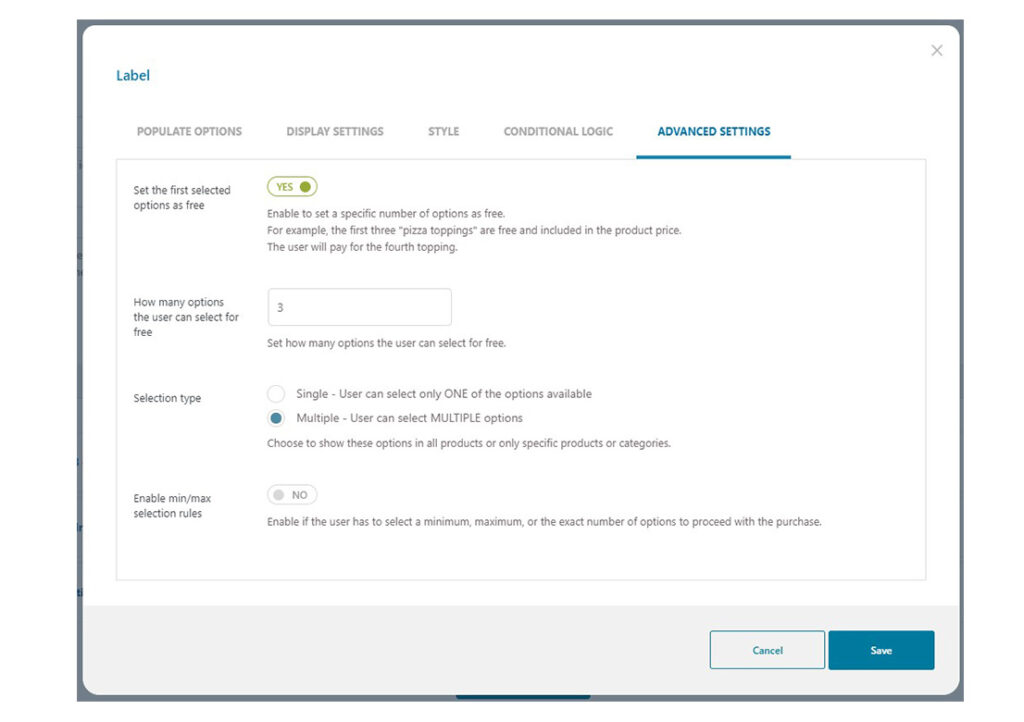
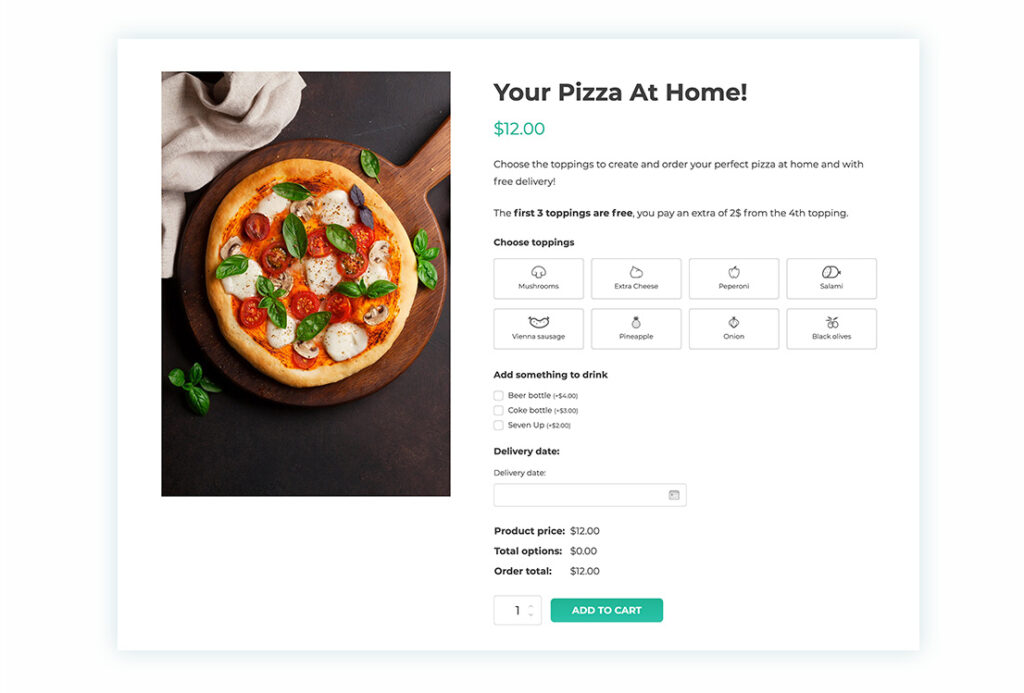
Once the process of adding ingredients is finished and the proper settings are in place, we must save the changes. The end result of our configuration will show like this in the product page:
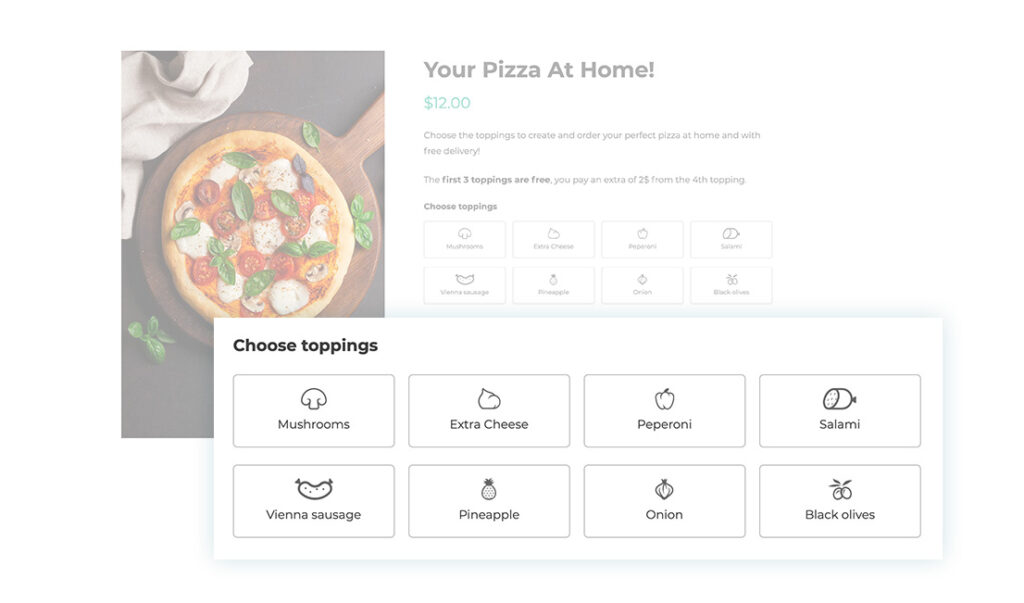
As you might have noticed, the customer can choose three free toppings and pay $2 for each additional one. We have set the cost for each topping at $2.00, and now we just set the ‘free options’ to three. Also, the customer can select more than one ingredient.
Step 6 – add a selection of drinks to upsell
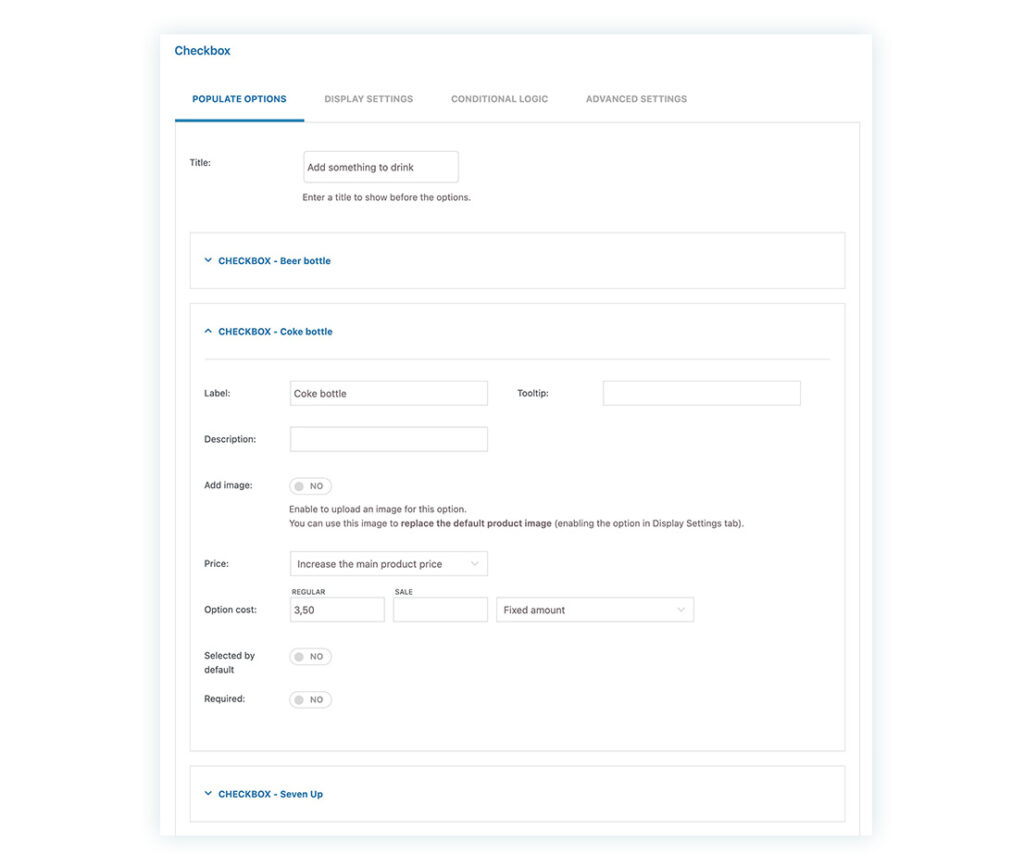
In this example, the customer can choose one of a selection of drinks. We click ‘add options’ like we did in the previous step, choose the checkboxes, and give it a title. Label the first checkbox with ‘Bottle of Coke’ and give it a price. Make sure you select ‘increase the main product price’. As different drinks have different values.
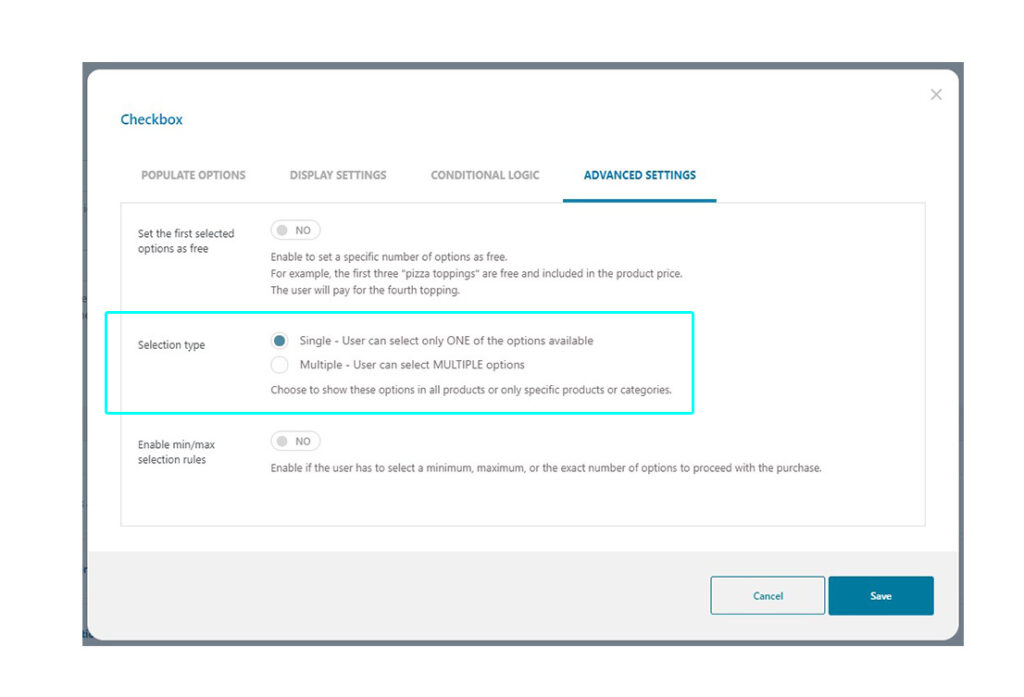
Once you have added all your drinks options, you can check the rest of the tabs and settings. In our case, we only allow for one option in the advanced settings.
Step 7 – Give customers the option to set a collection date and time
Thanks to another useful add-on option, a customer can select a date and time for ordering their created pizza from the product page. By now, you already know how to create another option, but this time you will have to select ‘Date’.
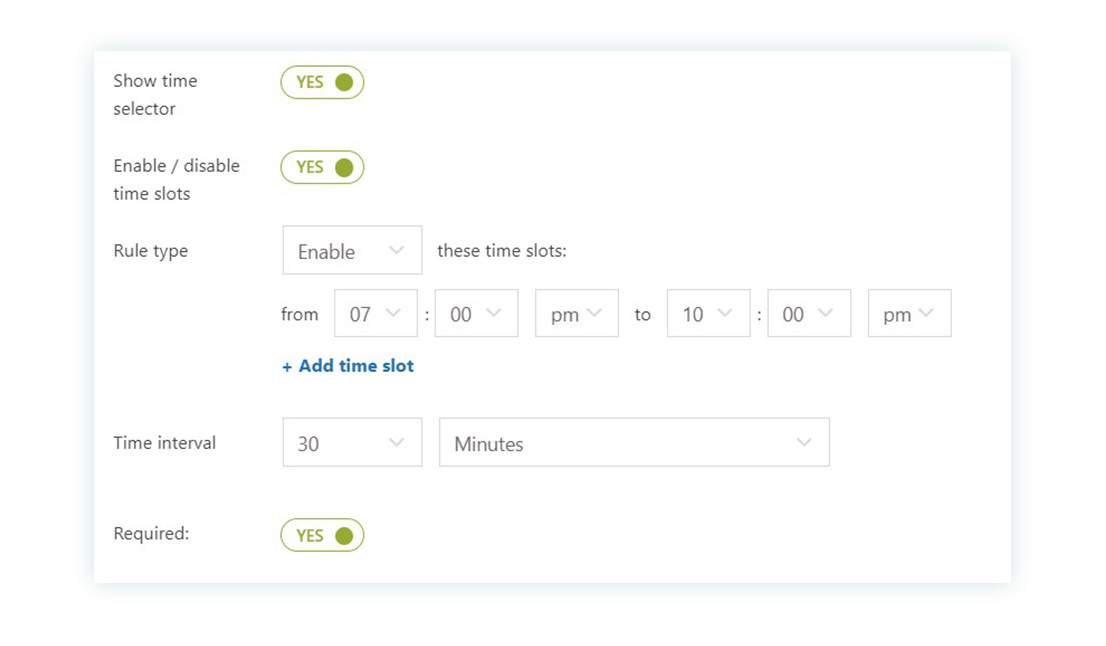
From these add-ons options, you can set some restrictions. Here’s how we did it:
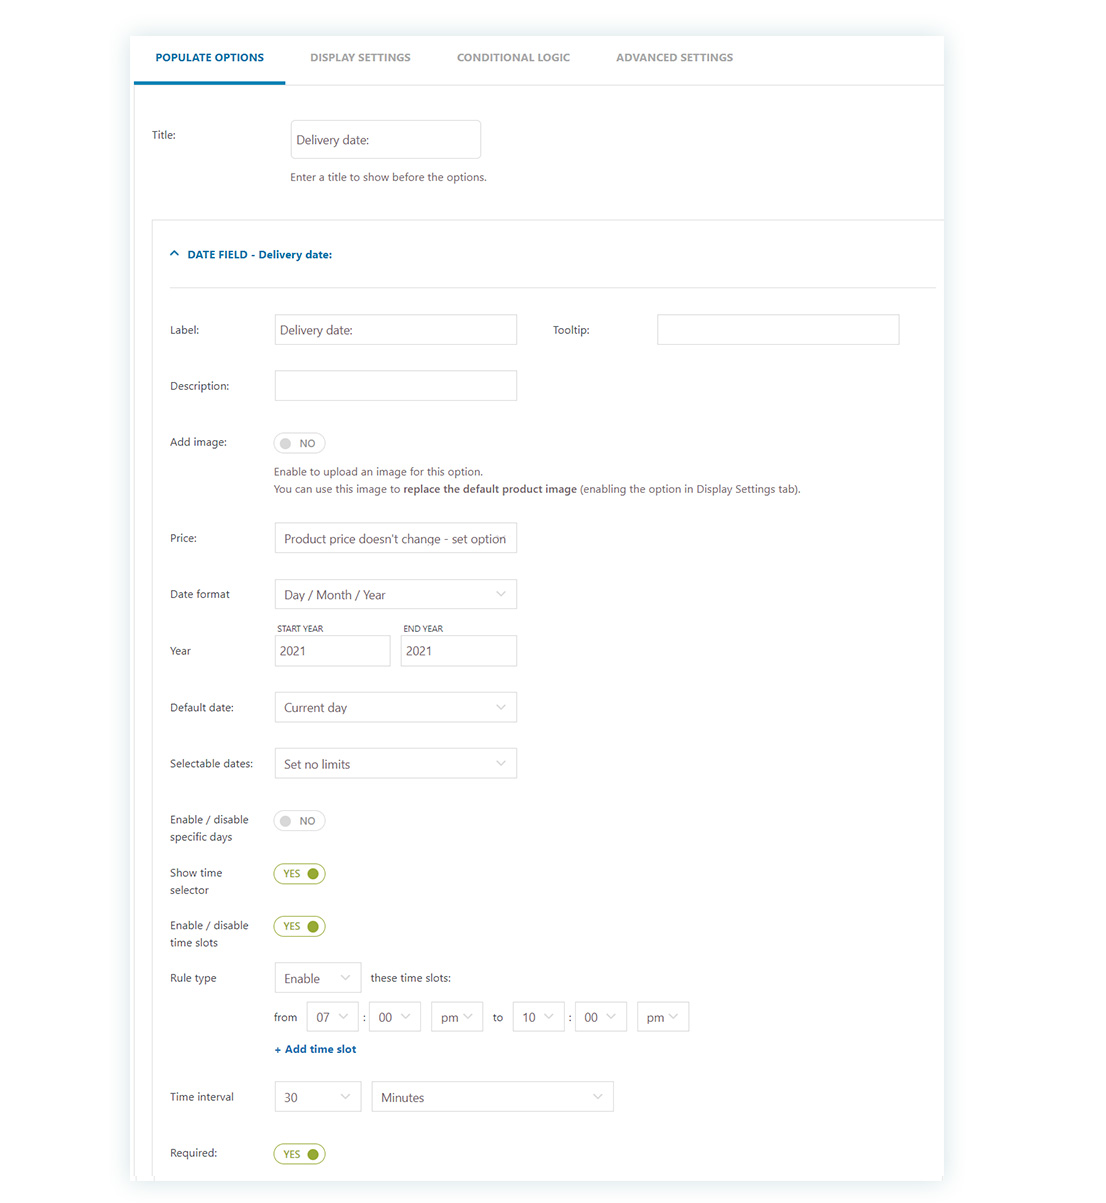
In the product page it would look like this:
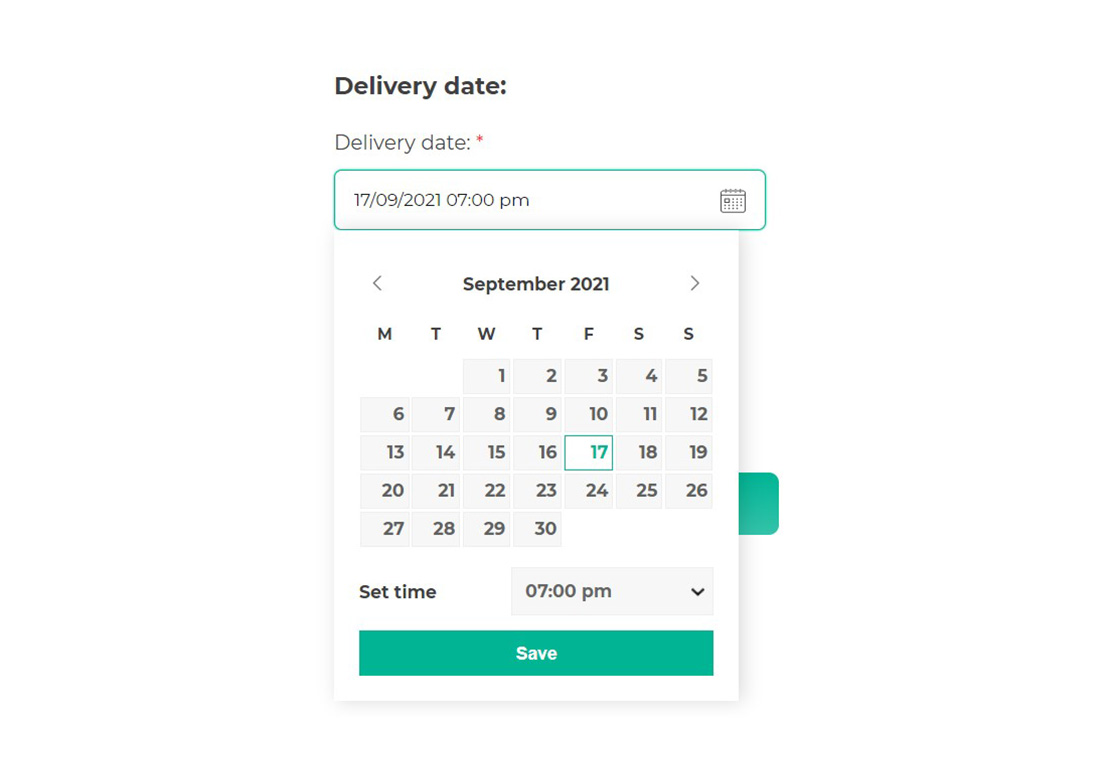
As you can see, you can allow users to select from a range of timeslots. Just enable the time slots options. In our case, we start from 19:00 and give an option for every 30 minutes.
Step 8 – Check the settings and improve the style of your add-on
You will have come across many settings that we did not show you yet. There are many more styling options and settings to create what you want to achieve. The best thing is, that you do not need a developer to get code and design it, each setting and option is described in great detail in our documentation.
Why use YITH Product Add-ons and Extra Options?
By now, we demonstrated that increasing options, labels, extra pricing and display settings is only managed easily with product add-ons. Whether you create food options or any other type of customization, we’ve only scratched the surface of what is possible with this plugin.
The options can be applied sitewide, per category/tag or per product. In this way, you can create and manage add-ons very efficiently. A price increase for salami toppings will be applied within seconds across all pizza products.
Our plugin has been integrated with at least 12 other plugins, including Request a Quote, Product Bundles, Deposits and Down Payments, and many more.
Find out more or get started
Get more details on the features and integrations from the plugin page, or try out the free and limited plugin from wordpress.org
To try a similar demo or many other ones, head over to this sandbox site.
For setting up the different settings we have extensive documentation created, or see one of the instruction videos in English, Spanish, or Italian on Youtube.