“Thank you”, one of the most important phrases we learn as children. Two words and 8 letters to express gratitude and recognition to those who deliver a kind message or a nice gesture to us.
According to statistics, we say an average of twelve “thank yous” a day in a variety of situations: to the coworker who offers us coffee, to the car that slows down to give way in a crosswalk, to the supermarket cashier who hands us change, to the person we ask for directions on the street, etc. We do it spontaneously, mechanically, without almost realizing it. And this is probably why the real potential of this phrase is mostly underestimated.
Table of contents
Why should you add a custom Thank You page in WooCommerce?
Did you know that a study reported in the Journal of Marketing showed that when a jewelry store called and thanked a group of customers, those customers subsequently spent 70% more than customers who were not contacted?
Having this in mind, even if you sell your products or services online, thanking your customers is a small gesture that can make all the difference (in retaining and rewarding them, and in prompting them to buy again).
So, whenever someone places an order on your eCommerce, be sure to:
- Send an order confirmation email that contains, in addition to the order details, a thank you message for their purchase;
- Display a personalized Thank You page for WooCommerce that fits the style of your shop and is functional, emotional, and useful for structuring an upsell and cross-sell strategy.
It’s also important to consider that customers tend to have questions right after they make a purchase. These can be about things like delivery times or other issues. After all, one might be feeling vulnerable after spending money, especially if it’s the first time buying from a site. This often leads to a lot of support tickets or messages.
If you notice something similar happening in your store, you can avoid this hassle and make it easier for your customer service team by including this information right on the Thank You page that appears after an order is placed.
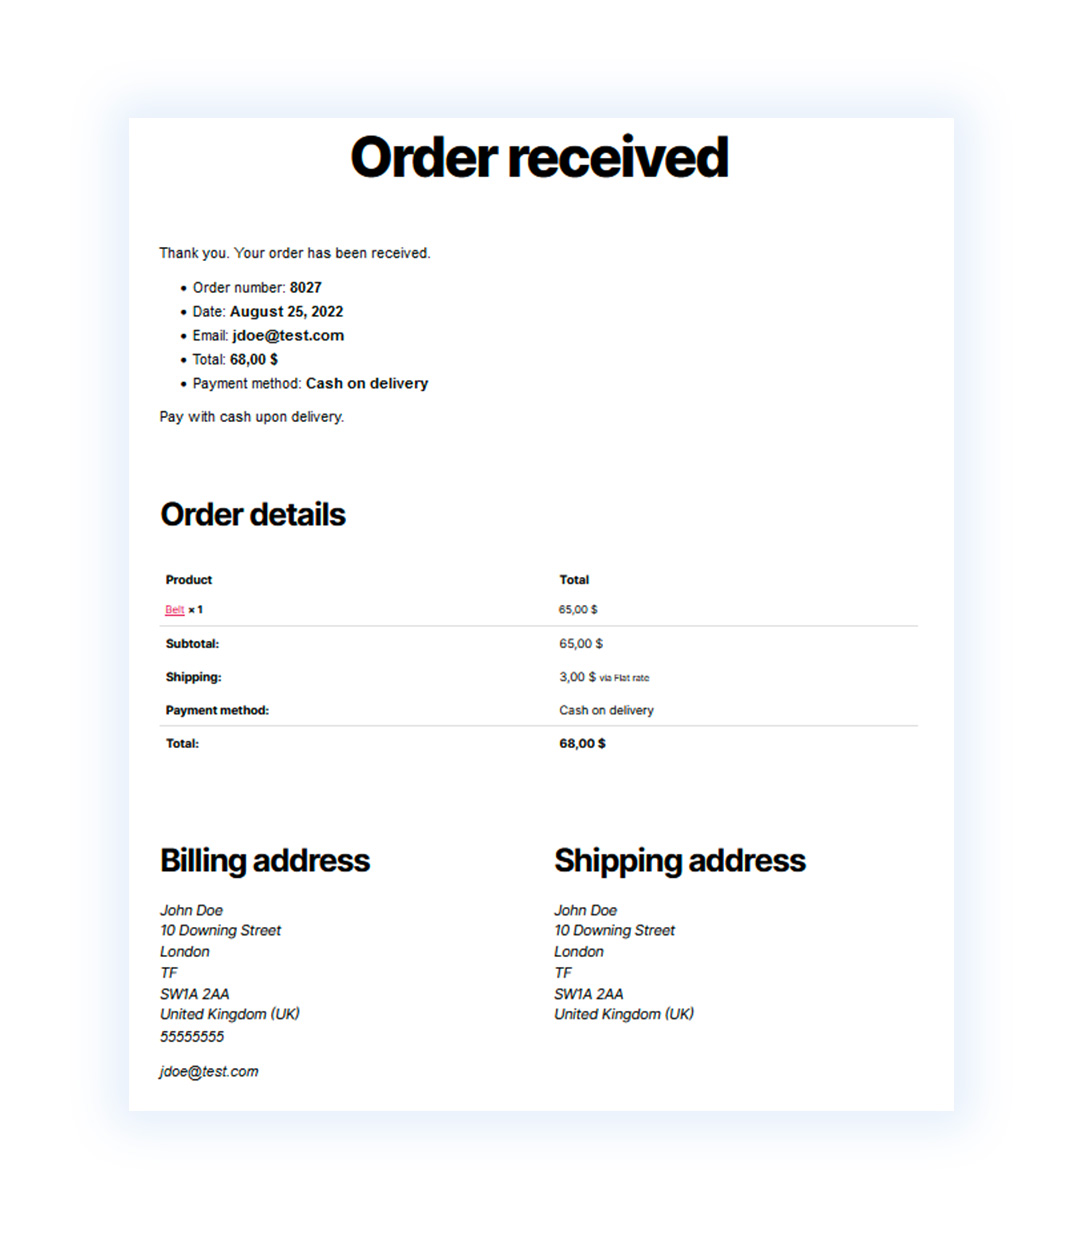
The default WooCommerce Thank You page
The default Thank You page available on WooCommerce is basic and superficial in its structure. And let’s face it, it can definitely be improved aesthetically as well:
Moreover, this page is not in the “Pages” section that you can manage in your WordPress installation. You can only modify it if you are a programmer and know how to code in PHP.
There are lots of online tutorials you can watch to learn how to customize this page. However, WordPress and WooCommerce are used by many people who are unfamiliar with programming languages (given how accessible and user-friendly they are).
For this reason, we’ll now see how you can edit this page in a simpler way and with just a few simple clicks.
How to use a plugin to customize the WooCommerce Thank You page
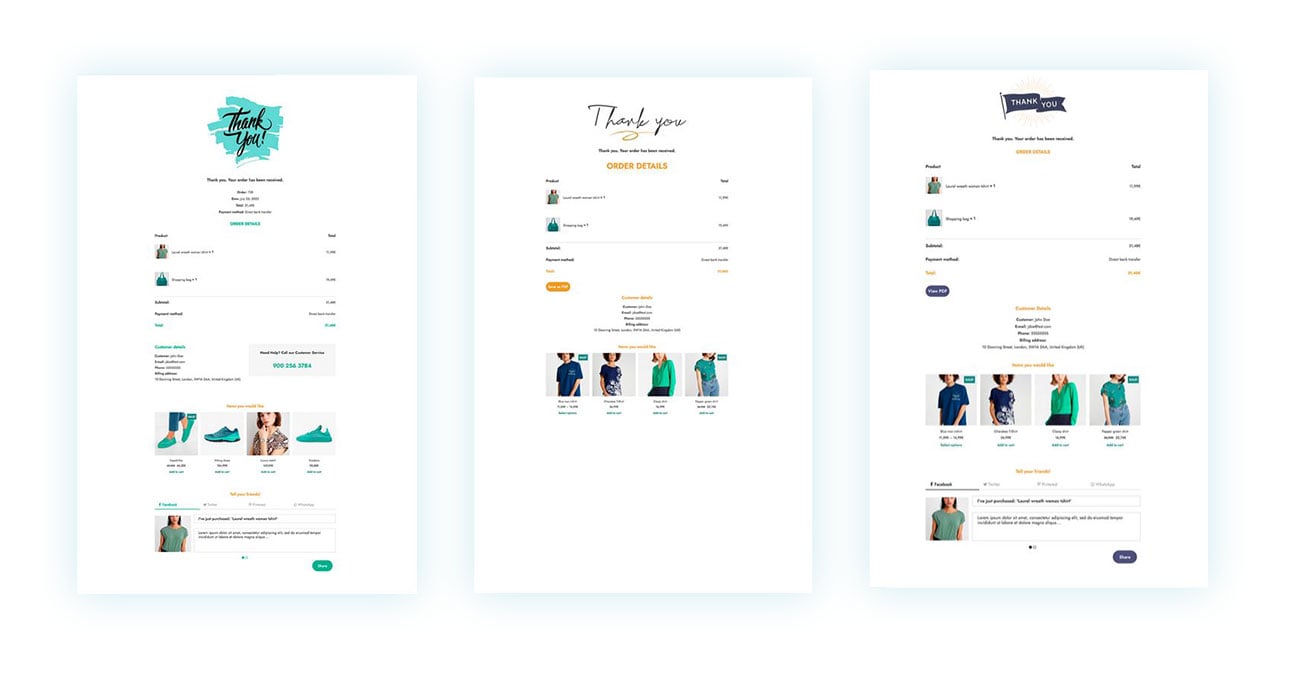
So, if you want to customize the WooCommerce Thank You page, and don’t possess the necessary skills to do so, there is an alternative that will make things easier for you: the YITH Custom Thank You Page for WooCommerce plugin.
This is the ultimate solution for creating and customizing effective and aesthetically appealing Thank you pages to show every customer who buys from your eCommerce site.
You will be able to:
- Create multiple Thank You pages to display based on what your customer bought or depending on the payment method used in their order;
- Customize the WooCommerce Thank You page using the Gutenberg editor. In this way, you can add icons, text columns, images, and photos to the page and manage any kind of advanced content;
- Add a discount coupon to the WooCommerce Thank You page to prompt users to place a new order within a specific time frame;
- Promote products in Upsell on the WooCommerce Thank You page and recommend ad hoc, best-selling, featured, or related products to users that have just purchased.
Let’s see in detail how the plugin works and how you can quickly set it up in your shop.
How to set up the WooCommerce Thank You page
Once the YITH Custom Thank You Page for WooCommerce plugin is installed and activated, you can find it in your WordPress side menu under YITH > Custom Thank You Page.
This is where you will find the plugin’s control panel. The first tab is called “Thank You Pages” and it’s where you can view, create, and edit existing pages.

Just click the “Add Page” button to choose an existing page as your Thank You page or create a new one from scratch. Don’t worry, you’ll find templates to work with that are very easy to modify.

To view a page and see what’s on it, just click the edit icon (the small pencil that appears next to each template when you hover your mouse over it). Once there, you can use the Gutenberg editor to make quick changes to the page. You can swap out text, images, and colors to match the style of your shop.

The different elements of the Thank You page (the section with the order data, the table of products purchased, the coupon box, and the section of products to be promoted in upsells) are blocks that you can freely insert into the page. In this way, if for example, you choose to customize Thank You page number 1, where there is no coupon section, you can add it by simply clicking on the “+” icon and selecting the correct block from the different ones available.

If you want to see all the blocks the plugin includes, just type “thank” into the search bar, and you’ll see all the options available.

Once you have made your changes, click the “Update” button to save them.
How to replace the default WooCommerce Thank You page with a custom one
Now, you just need to make sure that once your customers have placed their orders, they see your new custom Thank You page.
To do this, just go over to the “General Options” tab and, under “By default, when the order is placed”, choose “Show a custom Thank You page”. Then, in the following option, select the page you’ve customized.

Configuring the style of the Thank You page
It’s not only the Thank You page content that you can freely customize but also its style. In fact, in the “Customization” tab, you will find multiple elements of the page that you can customize, such as order details, upsell options, the presence of a coupon, a social box, and more.
For example, in the Upsell section, you can define the number of products to show, the type of products (featured, best-seller, or related products, or even select specific products to promote), and set the color and typography options.

This plugin is a great option for anyone looking to make a few simple tweaks to the Thank You page templates, as well as for those who need more advanced changes.
If you have specific needs and want, for example, to create several Thank You pages and decide which one to show based on what the user bought or the payment method they chose, then YITH Custom Thank You Page for WooCommerce is the plugin for you. You’ll be able to create advanced rules to cover all kinds of cases.
Create rules to choose which Thank You page to display in WooCommerce
In the “Rules” tab, you can click on “Add Rule” to create a new one.

At this point, you can start customizing the rule by entering the primary information, which is:
- Rule name – Choose a name to identify the rule;
- Rule type – Define whether it is based on the products or product categories purchased by the customer or whether it is based on the payment method they used;
- Set how the rule works – You can choose to show the default WooCommerce Thank You page, one of the custom Thank You pages, or redirect the user to a specific URL (such as a landing page or a digital product download page).
In the image below, we have created a rule so that when a user purchases products from the “Accessories” category, they will see the template and the content of the Thank You page number 3.

Conclusion
Thanks to the YITH Custom Thank You Page for WooCommerce plugin, you can show a Thank You page to your customers which is:
- Functional: containing all the information about the order they’ve just placed (products purchased, prices, order total, billing and shipping address, etc.).
- Positive: containing information that can help you create a bond with the customer, such as an emotional text thanking them for trusting your shop — some companies even show a thank you letter with the administrator’s signature and photo, have you ever noticed? You can also show the Customer Care phone number, the delivery time information, and more.
- Sales-oriented: containing information that will prompt the customer to buy again in your shop (discount coupons, products on sale, upsells of products related to those they already bought, etc.).
And you could do it all very easily and in just a few minutes, without ever having to get your hands on WooCommerce code.

Want to learn more?
Go to the Live Demo of YITH Custom Thank You Page for WooCommerce to try out the features for yourself — remember to click on “Launch Admin Demo” to access the admin panel and have fun with all the plugin options!