Welcome back to our WooCommerce configuration guide!
In the previous chapter I showed you how to configure the shipping options, today I’m going through the configuration of the “my account” page for your customers.
This step is particularly important, since this is the place your customers will spend most of their time and have access to their orders: a wrong configuration of the “my account” page can damage your store’s image and your relationship with your customers.
But don’t be afraid, it’s a simple process, and we are just about to see it in detail!
In order to configure the “my account” page, go to WooCommerce > settings > Account and you will find this screen:
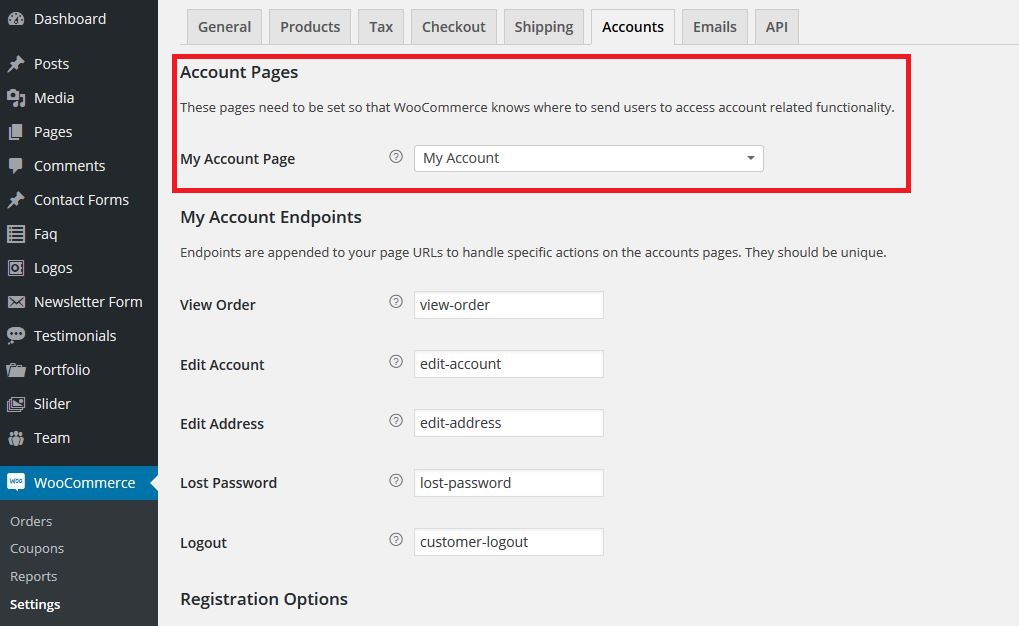
As you can see, the very first option you should configure is the one that allows you to decide which page is going to work as the “my account” page on your website.
It is usually automatically generated by the WooCommerce installation, but just in case you need to create it or change it, remember that all you need to do is to create a page and enter the [woocommerce_my_account] in it.
Once you have created the page, you are going to need to set it as “My Account”.
Now you need to set the Endpoints of the page:

Endpoints are custom endings for the “My Account” page url that will change according to the user’s actions.
In the example above, if customers change their address, the address bar url will be: woocommerceguide.com/mio-account/edit-address
You can customize these endpoints however you prefer, just remember that they need to be unique so that they won’t create conflicts within the page.
Then, you find the Registration Options:

The first field is Enable Registration, where we can find three options:
- Enable registration on the “Checkout” page – Allows customers to register directly in the checkout page.
- Enable registration on the “My Account” page – When users that are not logged in visit the “My Account” page, they will find the registration fields.
- Display returning customer login reminder on the “Checkout” page – When users that are not logged in reach the checkout page, they will be displayed a message inviting them to log in (but only in case they already bought from your website).

Now you need to set the two final option concerning the Account Creation:
- Automatically generate a customer name from the user email
- Automatically generate customer password.
These two are rather self explanatory.
And this was the last section in this configuration guide about user accounts.
See you in the next chapter!