Welcome back to this WooCommerce configuration guide!
In the previous chapter we finished configuring the tax section of our store, today we are going through the checkout options.
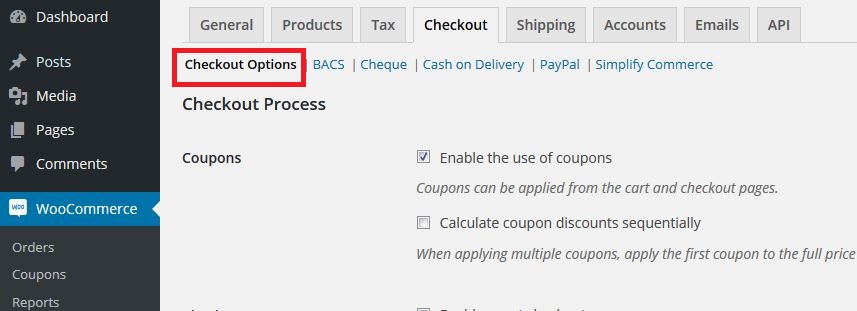
Let’s move to WooCommerce > Settings > Checkout > Checkout Options:
Let’s see how to configure these settings, step by step.
Checkout Process

In this section you can set the general options regarding coupons:
- Enable the use of coupons – Allows your customers to use discount codes within the basket page and in the checkout page.
- Calculate coupon discounts sequentially – Allows your customers to apply more than one discount at a time.
For instance, if a product costs 50$ and two 10% off discounts are applied, the first one is going to affect the 50$ price, bringing it down to 45$.
Now the second discount applies to the 45$ price (so 4.5$ off) which brings it down to 40.5$.
Be careful: A discount system is extremely important for any online store, and it’s universally known as one of the most powerful marketing strategies.
Now you can set two of the most important checkout options:
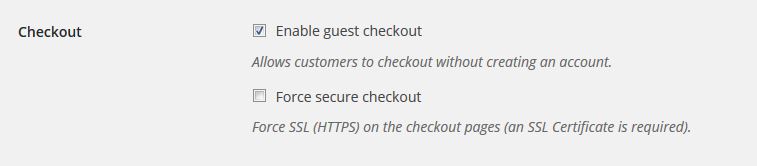
- Enable guest checkout – Allows customers to buy your products without having to create an account on your website.
- Force secure checkout – Forces the SSL certificate and the HTTPS encoding in the checkout page.
Why are these options important? The first one is important because there are types of products that, in case they were bought from unregistered users, they wouldn’t be accessible from the users themselves (such as paid subscriptions).
Forcing an SSL certificate in the checkout page is essential in order to offer specific payment methods, such as using a credit card.
In case you don’t know how and why to install an SSL certificate on your website, I invite you to read this article.
Checkout Pages

Now you should specify which pages are the basket, the checkout page and the terms and conditions page.
Usually once WooCommerce is installed, the first two pages are automatically created, but in case you wish to create new ones and/or set them manually, you need to go to this section:
- Cart Page – Chose the page that is going to be displayed once customers see their own basket. In order to create a new one, add the [woocommerce_cart] shortcode in it.
- Checkout Page – Chose the page that is going to be displayed once the customers is going to pay for their orders. To create a new one, insert the [woocommerce_checkout] shortcode in it.
- Terms and Conditions – Create the page users are going to see when they click on your “Terms and Conditions” button.
Unlike the first two, the Terms and Conditions page is no automatically created by WooCommerce and will not be present in your website until you create it.
Creating a Terms and Condition page is very important to protect yourself and your customers, that’s why you need to create a custom page and apply it into this section.
Checkout Endpoints
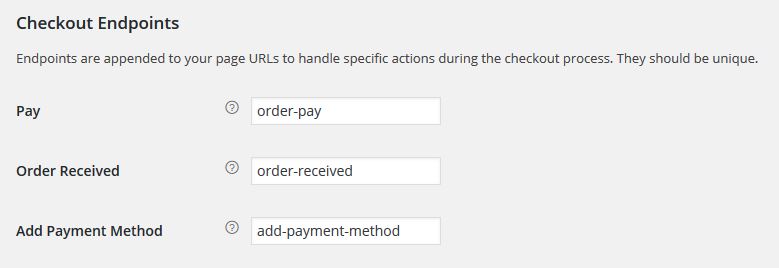
You can use this section to set the Endpoints, which is how the URLs in your website are going to end under specific conditions (each one has to end in a different way, so that there won’t be conflicts), as follows:
- Pay – The URL displayed during the payment process.
- Order Received – The URL displayed once the order is received.
- Add Payment Method – The URL displayed once a new payment method is added.
Payment Gateways
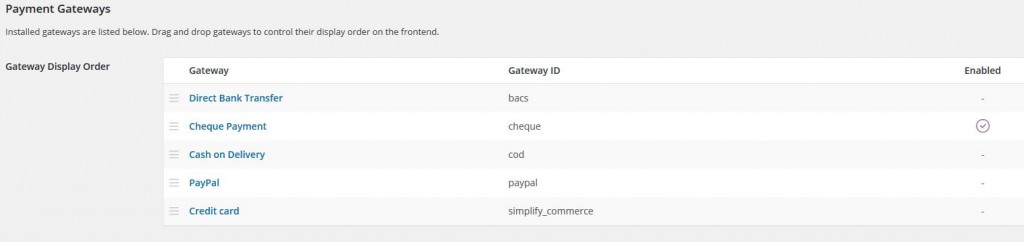
You can use this section to move, edit and enable/disable different payment systems we are going to learn how to set in the next chapters.
Don’t forget to click on “Save Changes” to avoid losing your changes.
See you in the next chapter!