The taxes you may want to add to your store might fall under three different categories:
Standard Rates
It’s the default taxing system offered by WooCommerce to its customers and the most commonly used in online stores.
This section allows us to create tax rules for all those products that require no specific action in terms of taxing.
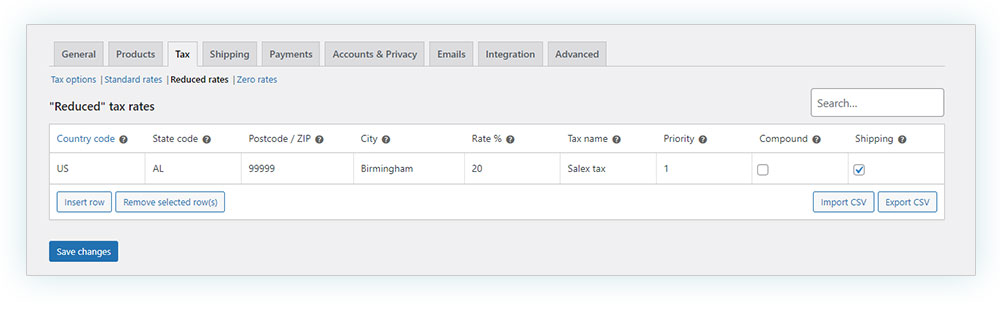
Reduced Rates
Not all categories of products fall under the same tax rule, that’s why if your store deals with different kinds of items, you may require a reduced tax rate to cover all of your products.
For instance, electronic products have a different tax rate in comparison to other basic necessities such as clothes.
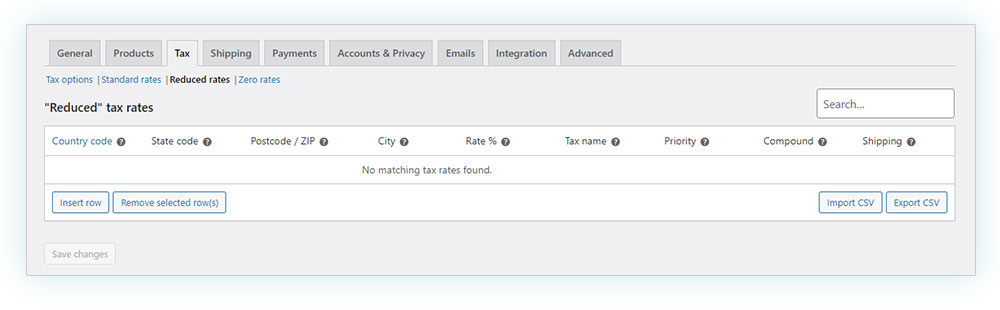
Zero Rates
There are also products that don’t need to get taxed, if your store sells these kinds of items, you’ll need to create a specific rule.
In any case, the process of creating a tax rule is the very same one. That’s why in this tutorial I’m going to create a standard tax rule for my store.
As I’ve done in previous articles, I’m going to use an online store that’s based in Spain as an example.
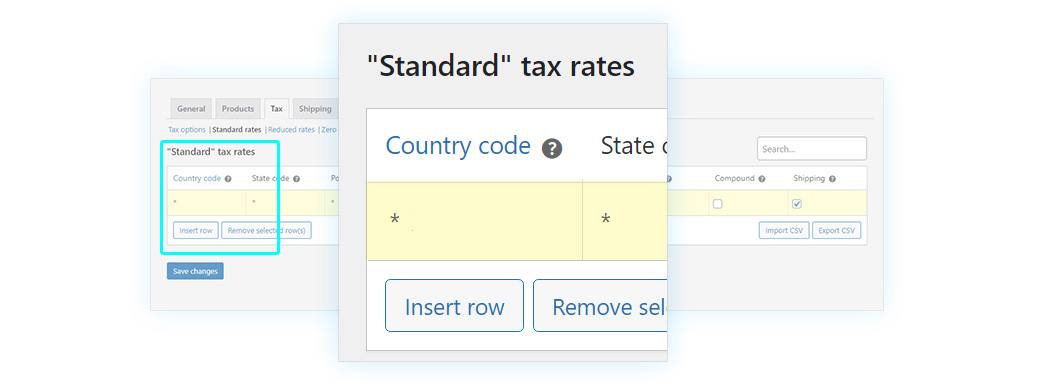
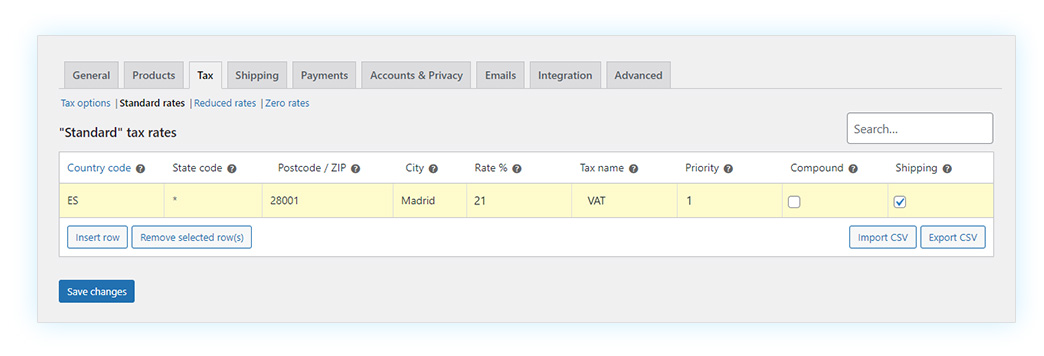
To create a new tax rule go to WooCommerce > Settings > Tax > Standard Rates:
Once we access it, we find an empty box. To start, we must click on Insert row to create a fiscal rule.

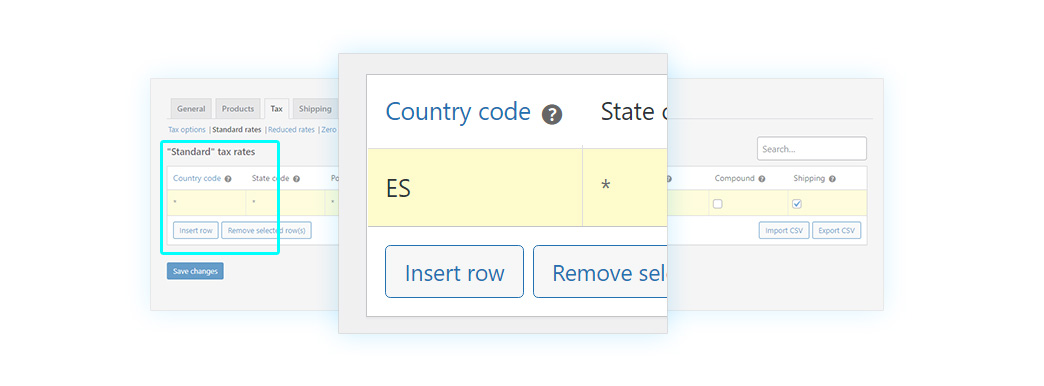
Now you must fill in a series of fields. The first one is the Country code.
The country code is an alphabetic code made of two or three letters which identifies the specific tax rule that applies to different countries (you can find the complete list here). WooCommerce uses the ISO 3166-1 format. This is an example for Spain.
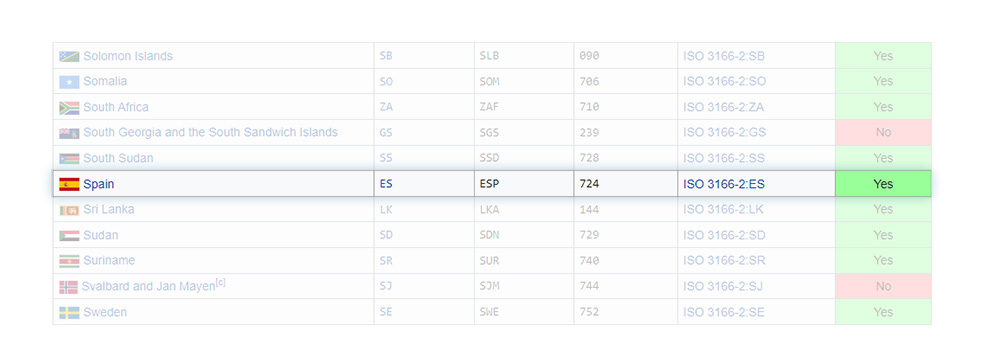
In the case of Spain, we choose ES. If we wanted to apply it to all, we would leave it blank.
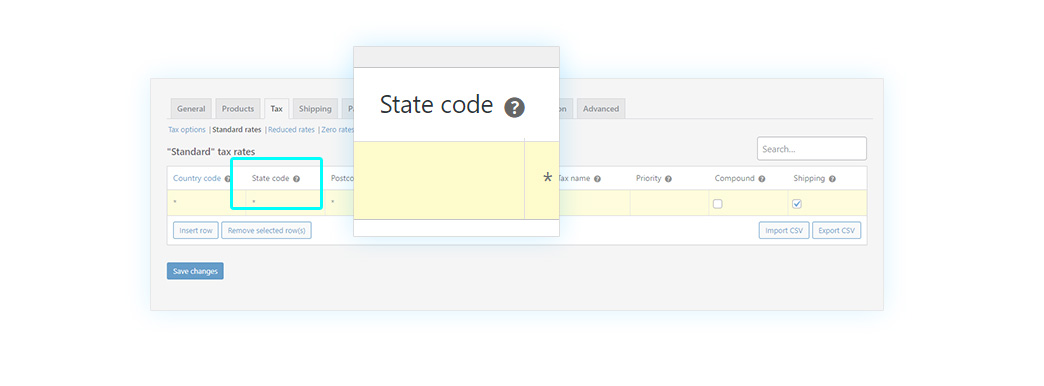
For the next point, we must configure the State Code. This code is required in case the country you entered is part of a federation (such as The United States). You can find the full list here. Supposing it’s not required or you want to include all states, just leave the field empty. In this case, we will leave it empty.
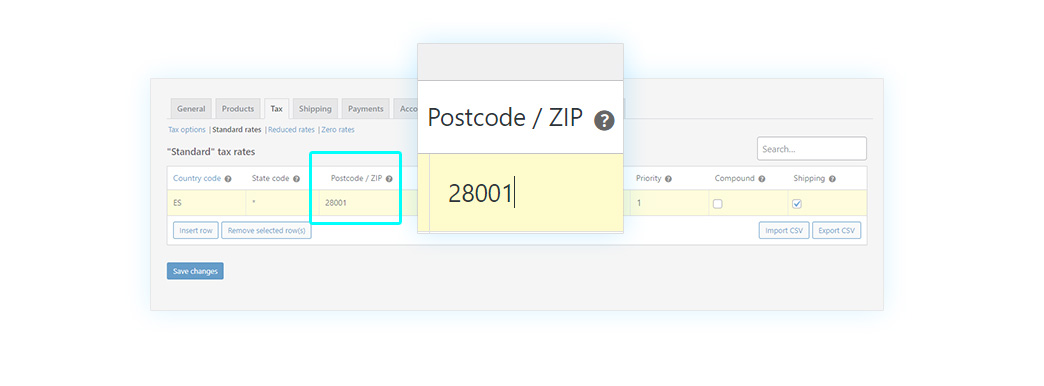
Then we add the Postcode/ZIP. This has a different format for each country, you can view the whole list here. There is also the possibility to enter a code range (i.e. 1000-2000), use a semicolon to separate multiple values (12345; 54321), or leave this field blank to apply to the entire country as you can see in the image.
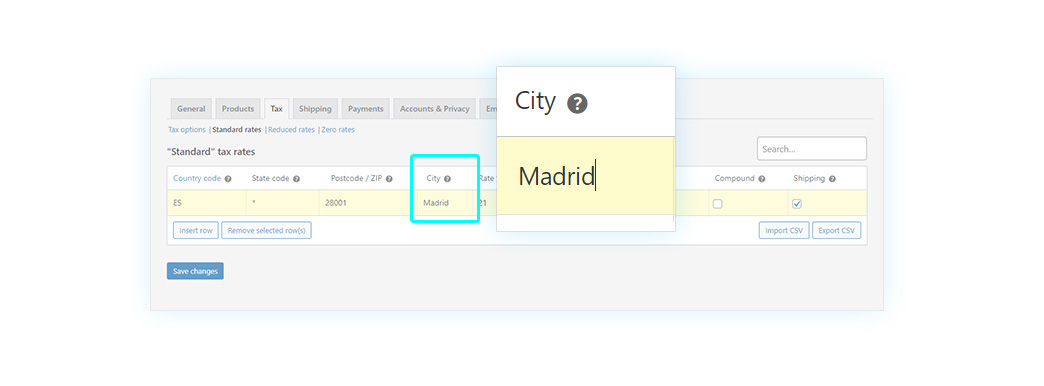
The next item is the City. You can choose whether to apply your rule to a city, to more than one, or to all. In the latter case, leave this field empty. Also, you can always use the semicolon to specify different cities (i.e: París; Lion).
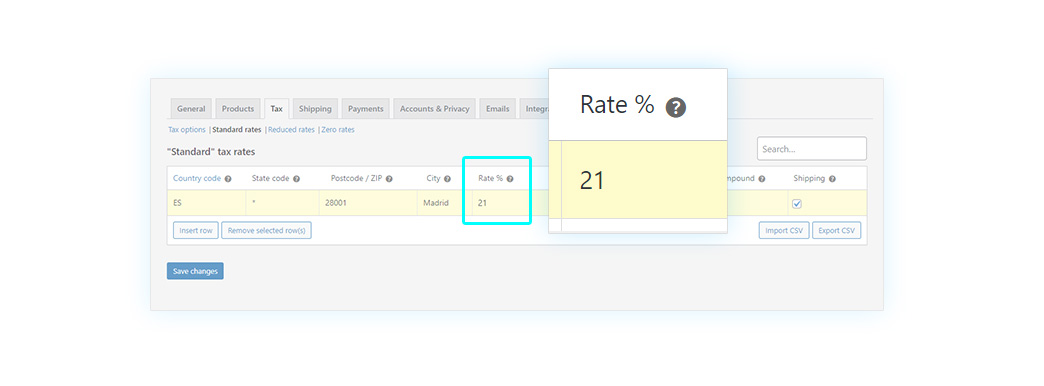
Then we must add the rate required to buy your tax rule in the Rate % section. You might not know the required rate, especially if you are selling to countries outside your own. In which case, you can find the complete list of worldwide tax rates here. Keeping in mind that Spain has a 21% VAT rate, that’s what I’m going to enter in this field.
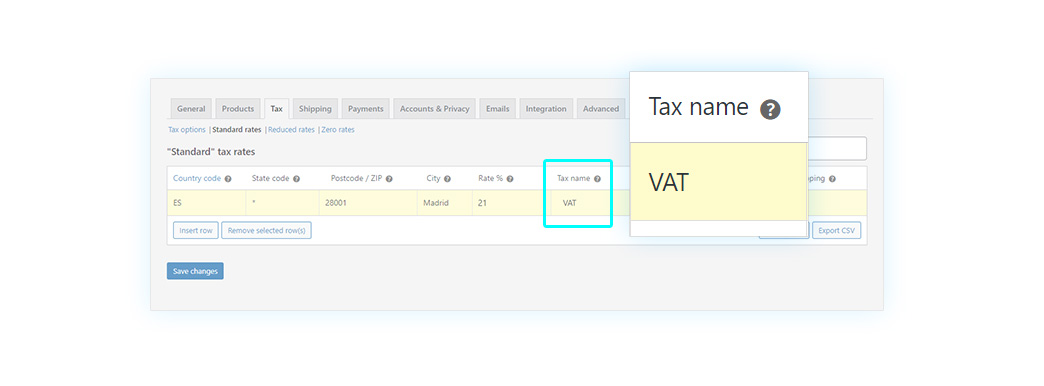
Now you must choose your Tax name. There are three different types of taxes, so the name can be very important. In this case, we might call it VAT.
Let’s move on to another point: Priority. You can set different taxes for the same parameters: in this case, it’s important to set the order of priorities to be used once they are applied. For example, if we have a 10% tax and a 7% tax applying to the same products, we can pick which one is going to be applied first (assigning 1 to the first one and 2 to the second one, so that 1 has priority).

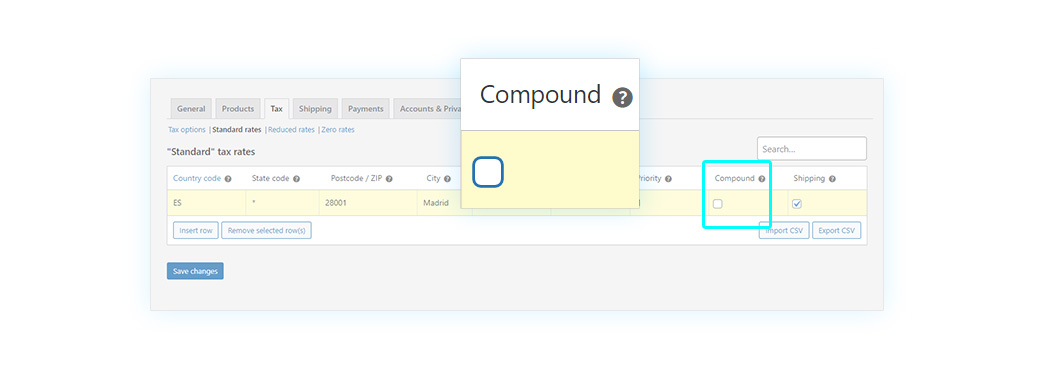
In the penultimate point, called Compound, you may consider it as a tax on taxes. Actually, it’s a specific kind of tax that applies to other taxes and you can activate it by checking its dedicated box.
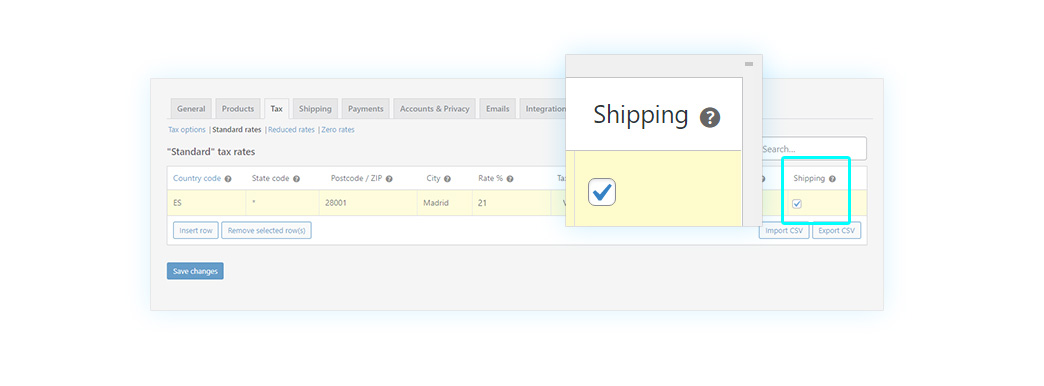
Finally, Shipping option. It’s a good idea to offer free shipping whenever possible, but in case you want your customer to pay the shipping costs, you can tax the shipping costs by checking the box for this function.
This is the result of our configurations:
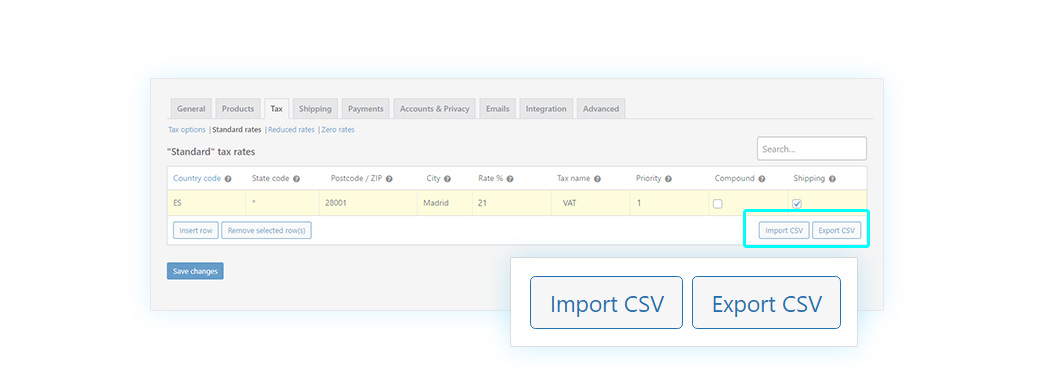
What you have seen so far is how to manually set a tax, but in case you already have the required tax information in a CSV file, you can import it with a few clicks and apply it to one or more states. In order to do this, click on Import CSV. You can also do the opposite process: by clicking Export CSV you can export your own configuration to use it again elsewhere.
Now you know how to set up your store taxes and also how to create tax rules. Remember to save your changes before leaving so you don’t have to configure them again.
You can access additional tax classes at the top as shown in the image.
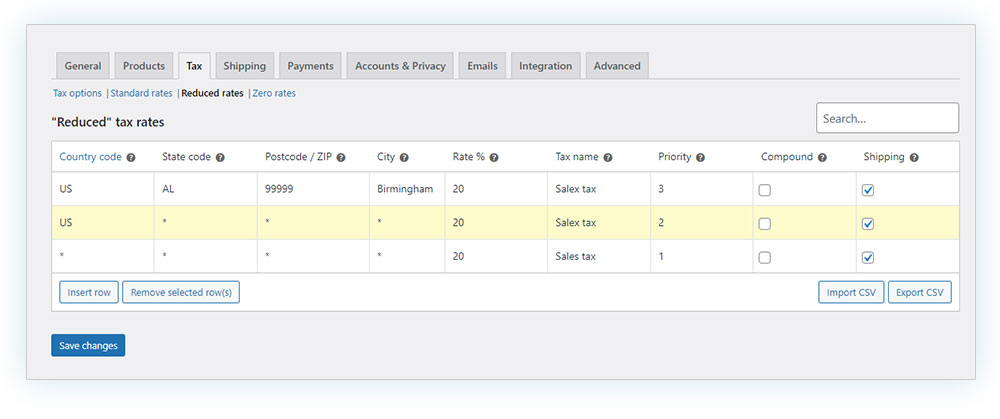
Imagine you want to create a rate for your state, one for the rest of the country and one for the rest of the world. What could you do? Very simple.
You must create a rule for your own state, then set the country code and the state code.
After that, you can create other rules for the rest of the country by setting only the country code and a similar process for the rest of the world.
After that, you can set the priority. I have given it to worldwide sales, then national and finally state.
That is all for this tutorial. Don’t miss the next WooCommerce Essential Guides.