Little by little, we have been learning how to properly configure WooCommerce. In other articles, we learned how to configure categories and product tags to improve browsing through your website and increasing the chances of sales.
All this is really important, but it’s also good to know how to configure the attributes. Let’s consider the example of a clothes store. You may want to add categories like “Men”, “Women” and “Children”, and tags like “Cotton”, “Wool” and “Synthetic”. But there are other aspects that are just as important, such as size, color, etc.
In this case, we are going to use attributes that allow us to create several levels of features that you can link to your products. There are several plugins, including YITH WooCommerce Ajax Product Filter, that allow you to insert one or more filters on the store page. And do you know how important filtering by color and size is when buying a shirt online? Well, that should give you a good example of why this section is so important.
The process of creating and configuring attributes is very simple: the first thing to do is to go to Products > Attributes.

In the image, you can see on the right the attributes already created and on the left the form to create new attributes. We have already created the “Color” attribute, and now we have the opportunity to configure it thanks to the option found under Terms, in the last column on the right: Configure terms.

Once we click on “Configure terms”, a new screen similar to the previous one will open displaying a form on the left to add a new term and on the left a box with the terms already entered.

As you can see, in the summary screen you can find the name, the description (if entered), the slug (name of the attribute appearing in the website URL), and the number of products with that specific feature, in Count.

Once you have created the attributes you need, you can assign them to each object from the product page. You will need to go to Product > All products and, once you have chosen the one you are interested in, click on Edit. You will need to scroll down to Product Data, a feature box. You should click on the Attributes tab.
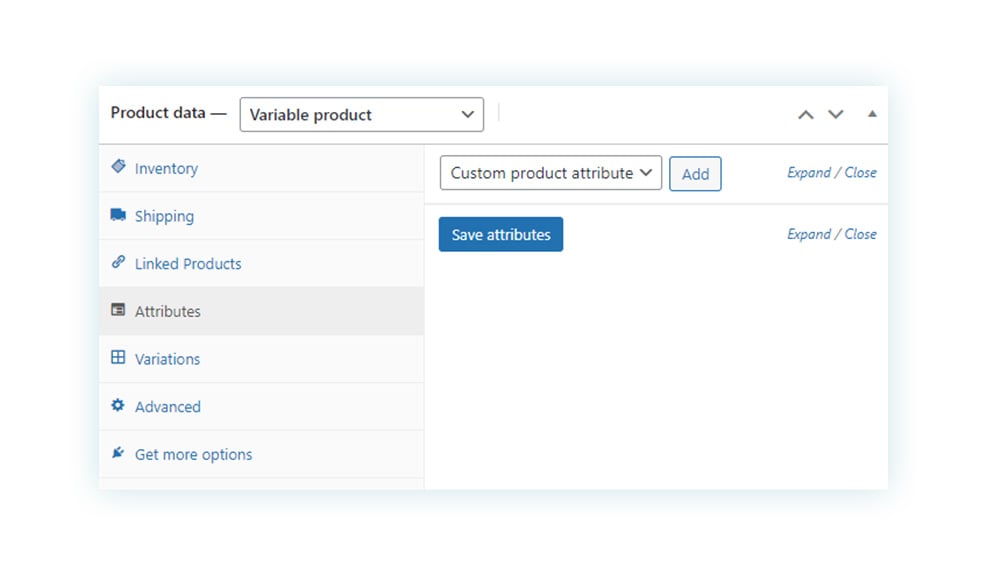
You should go to the “Custom product attribute” section, and from the drop-down menu choose “Color”. Once you select it, you can add the values you want to assign to the product.

Once selected, save it by clicking on “Save attributes“. And don’t forget to update the product on the top right, in the “Publish” section.
Now, if you have chosen the “Visible on product page” option, the attributes will appear on the product page, to inform customers of the product details.

It’s the same procedure for each attribute, you can assign multiple ones to each product in order to shape the store just the way you like!
But the integration of another plugin can give better results in the case of a color filter. The integration of Ajax Product Filter and Color & Label Variations is a perfect mix if you want to use a filter by color. The latest version of the first plugin works with presets, within which we add the filters we consider appropriate.
Normally, we create color filters with the color selector in the following way: we would enter the corresponding filter, enable the Customize terms option, and in Terms, we would add the corresponding color.

This is how you would see a filter by color after adding the colors, saving the changes in the filter, and saving the preset:

But this process can be too tedious if we add new colors on a weekly basis. So we must go back to Products > Attributes.

As we can see, the page has changed slightly and a new option has been added: Type. Here we can select between three options: color picker, image, and label. We are interested in a color picker to create the color attribute.

If we go to Configure terms, we will find these colors that we have just created.

You will find the color picker option once you’ve entered a term. Now just add the corresponding color and go to the next one.

Now do the same with all remaining colors.

Once we have them all, we go back to the filter and disable the Customize terms option. Once done, the option below disappears (Terms options).

The filter will look the same way, but we are able to skip one step: we won’t have to go to the filter and add the colors one by one. The moment we add the term to the attribute, we can directly assign a color to it and it will be automatically included in our store.
Now you know a little more about attributes. See you in the next guide!