Obtaining your customer’s trust is an essential step for every seller since: no trust > no sales.
There are many things we can do for this purpose, but none is more valuable then a SSL (Secure Sockets Layer) certificate.
The SSL security protocol allows secure online data transfer, since the connection is directly established between the server (and the applications running on it) and the user’s browser.
Why is this certificate so important?
- Most businesses use them, which is why it became popular for security. If you install one on your website you are going to reassure your users, while if you don’t, you’re likely to lose their trust.
- There are several different types of certificates, all with different costs and functions, to best suit your needs.
- Allows credit card payments directly on your website, granting a high level of security, which is essential for any e-commerce store.
- Security = Visibility – Google recently announced it’s going to increase the visibility of websites with https protocols at the expense of uncertified ones for this very reason.
In this tutorial, I’m going through the different types of SSL certificates and how to install one on your website with cPanel.
Types of SSL certificates
SSL certificates are divided in four main categories:
- SSL Domain Validated (DV) – It’s the quickest, cheapest but least professional one: the Certificate Authority checks the activation rights for this certificate on a specific domain. It can be activated online, generally within 24 hours and your website will become “https” and acquire a certification symbol in the URL bar, which is different according to which browser you are using.

- SSL Domain Wildcard Validated (DVW) – Extends the DV features to the subdomains in your website
- SSL Organizational Validation (OV) – Is an intermediate type of certificate, Certificate Authority verifies both ownership and personal data from the owning company who asks for one, this data will then be displayed to customers once they click on the website’s security seal.
- SSL Extended Validation (EV) – Is the most comprehensive (and expensive) type of certificate. Both the domain and the company are going to be verified and some documentation is required in order to prove a most accurate control over the company that’s asking for one. Once this certification is obtained it may take up to a week to be activated, your website’s URL then obtains the green background and all the most important data from your company is going to be displayed.

I am now going to show you how to install a DV type of SSL certificate on your WooCommerce store using cPanel.
First of all, let’s see where to get your certificate.
Step 0 – Certificate Signing Request
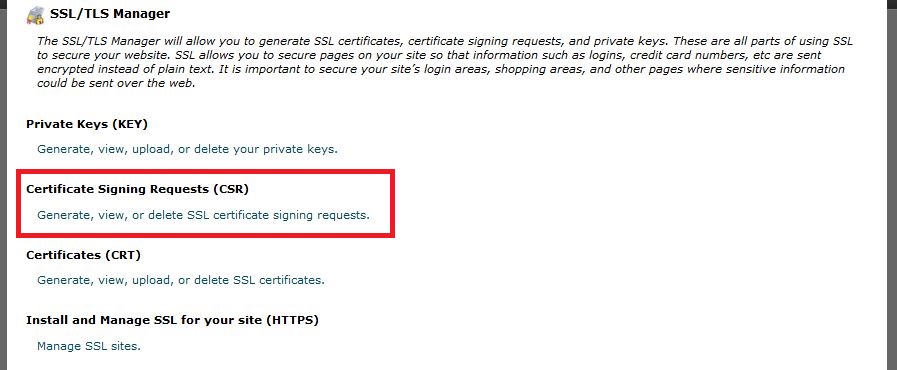
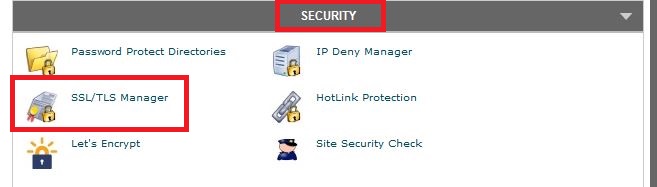
The first thing you should do is open the cPanel of your website and create a CSR in order to be able to install the certificate you are purchasing. To do this, go to cPanel > Security > SSL/TLS Manage > Private Keys and generate a unique key for your website by following the wizard and entering your data.
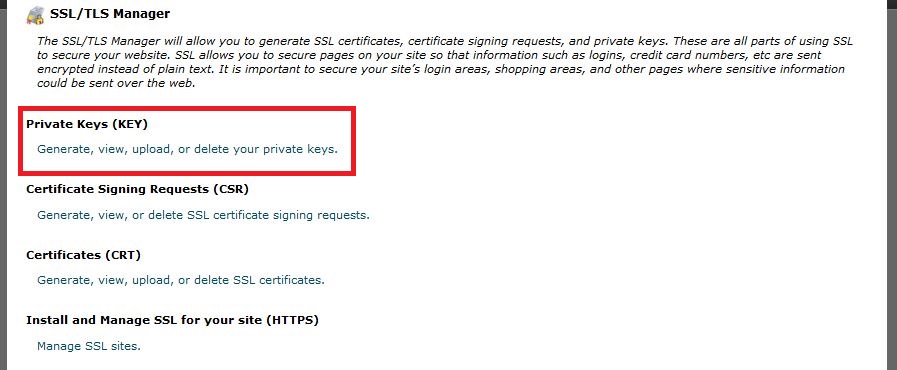
Now you can use the Key you just created to generate a CSR in the option right underneath. You are going to be asked for your company information.
Purchase the SSL certificate
There is a number of website who offer this kind of service, here’s a short list:
Once you have chosen the certificate you wish to install according to your needs and what these websites have to offer, let’s see what you should do step by step.
Before buying it you might need the CSR certificate you have previously created, in order to automatically identify the websites that are going to need a DCV verification (see below).
Installing your SSL certificate
The first thing you should do once you bought your certificate is to confirm that you are the legitimate owner of the domain you are going to activate it for.
You have three ways to do this:
- Domain Control Validation (eMail DCV) – The domain is going to be verified through an email being sent to the email address associated to your website, such as [email protected]. Every email contains a unique link and confirmation code.
- DNS Control – In order to verify the ownership of your website you are going to be asked to add a few records to your domain’s DNS. You can do this through the dedicated panel of your hosting service, however, this requires time before the DNS spreads and becomes visible to the whole web.
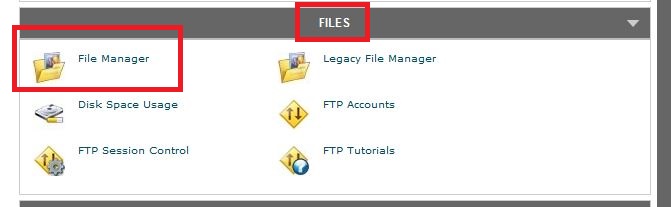
- HTML file control – You will receive an HTML file you should upload into your website so that it can be automatically verified. To load this file using cPanel, go to cPanel > Files > File Manager.
Confirmation is generally received within an hour.
Once you have confirmed ownership over your website, you can send your previously created CSR and receive two files that you’re going to need to load the certificate on your website. They usually come in .crt and .ca-bundle format and/or as a line of text.
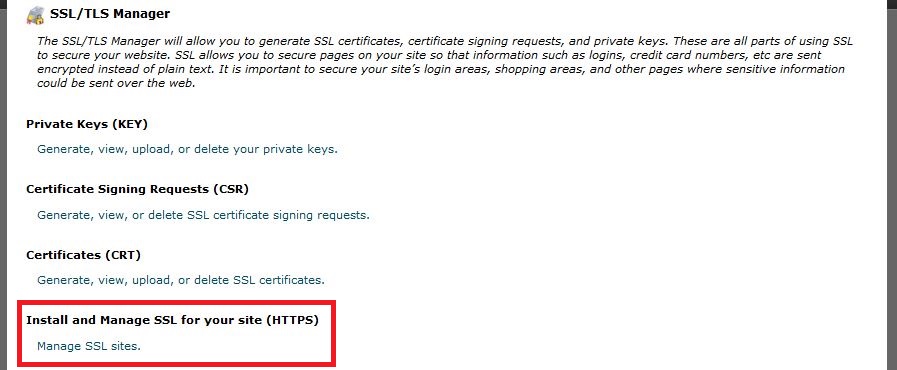
To download the certificate on cPanel you need to go to cPanel > Security > SSL/TLS Manager.
Now go to Certificates (CRT) and upload the certificate you just purchased.
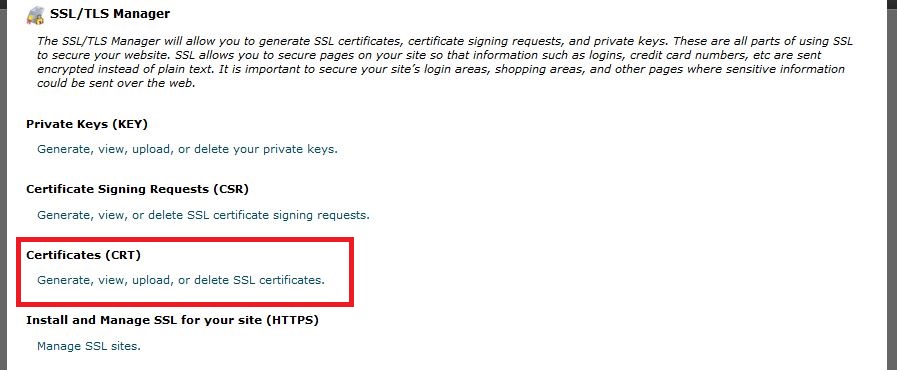
Once this step is done, all you have left to do is to activate the certificate on Install and Manage SSL for your site.
You have now completed all the required steps and secured your website, just bare in mind the changes might take up to 24 hours to become effective.
In case you are still not seeing the security seal after this amount of time, I suggest you delete the browsing cache since you might still be viewing the previous version of your website.
Also remember to rename the URL of the pages in your website to https, either manually or using a plugin that will do it for you, such as Easy Https (SSL) Redirection.