One of the main characteristics of WooCommerce is its ease of use: with a little time, patience, and basic knowledge of the WordPress dashboard, anyone can create their own shop and learn how to manage it.
Among the various aspects related to this world, adding a product to the catalog is surely one of the most important and recurring tasks you will have to deal with. This is why we have decided to create a complete guide on how to add a product in WooCommerce, analyzing all the options and all the types of products you can offer in your online store.
Let’s start by adding a simple WooCommerce product, and then we can discover more advanced options.
Table of contents
How to add a simple product on WooCommerce
First of all, what do we mean by a simple WooCommerce product? We are talking about a particular product that, once added to the catalog, can be purchased by your customer. We will later see how to create a shop page, how to manage stock (to avoid the risk of selling an unavailable item), define the products’ weight and dimensions, etc.
Those already experienced in using the WordPress dashboard will find out that the process of configuring and managing products is not too different from creating a blog article.
To start adding a product to your catalog, all you have to do is go to the sidebar to the left. Under “WooCommerce“, you will find “Products“. Click on this section.
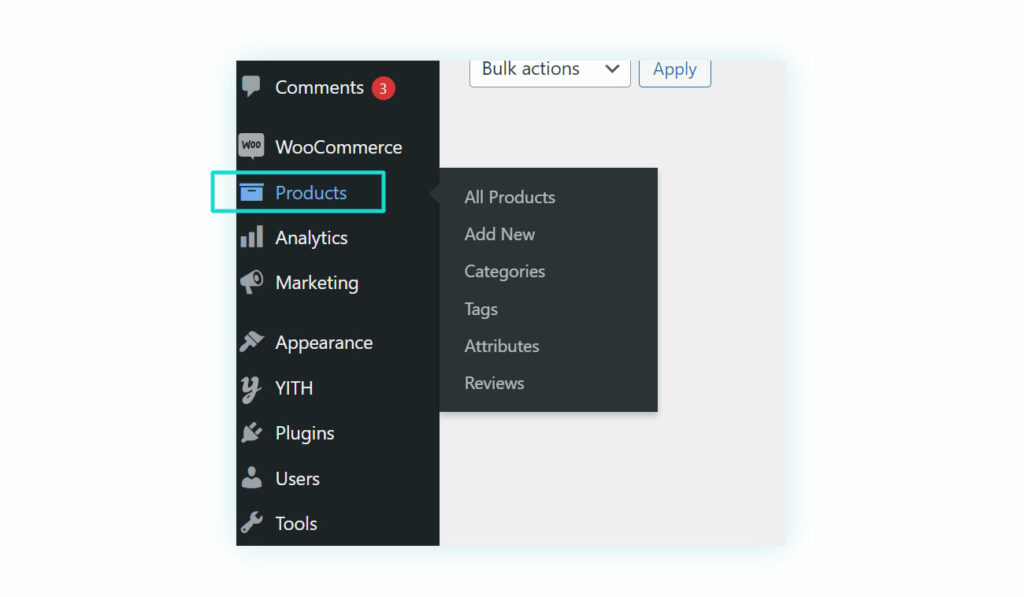
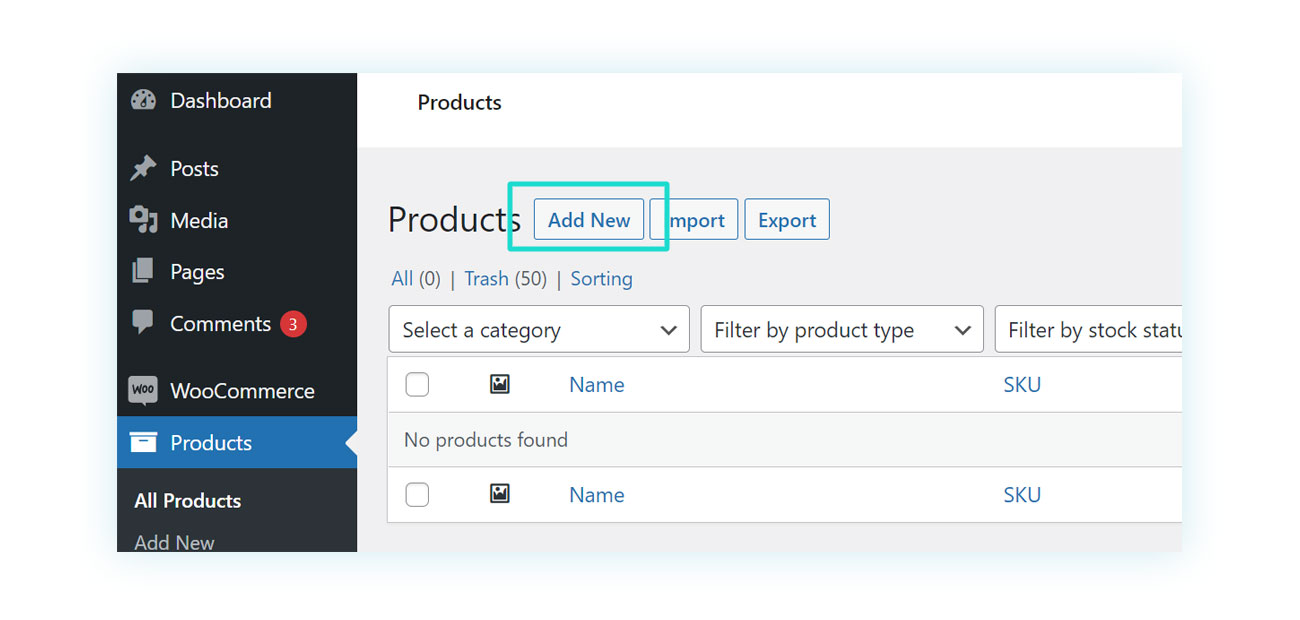
This will open the products section where you will find all products for sale (once you have added them), if this is the first time, the list will be empty.
In this case, click on “Add New” at the top.
You will then find yourself on the product creation page. To simplify the process, we have separated it into steps, starting with the name.
Name, description, and short description
The first element you will need to decide on for your WooCommerce product is its name. This, of course, will be the name under which it will appear in your shop and through which it can be found using the search function, so choose it carefully.
To decide on a product name, all you have to do is fill in the first section that appears on the page opened above, just below “Add new product“:
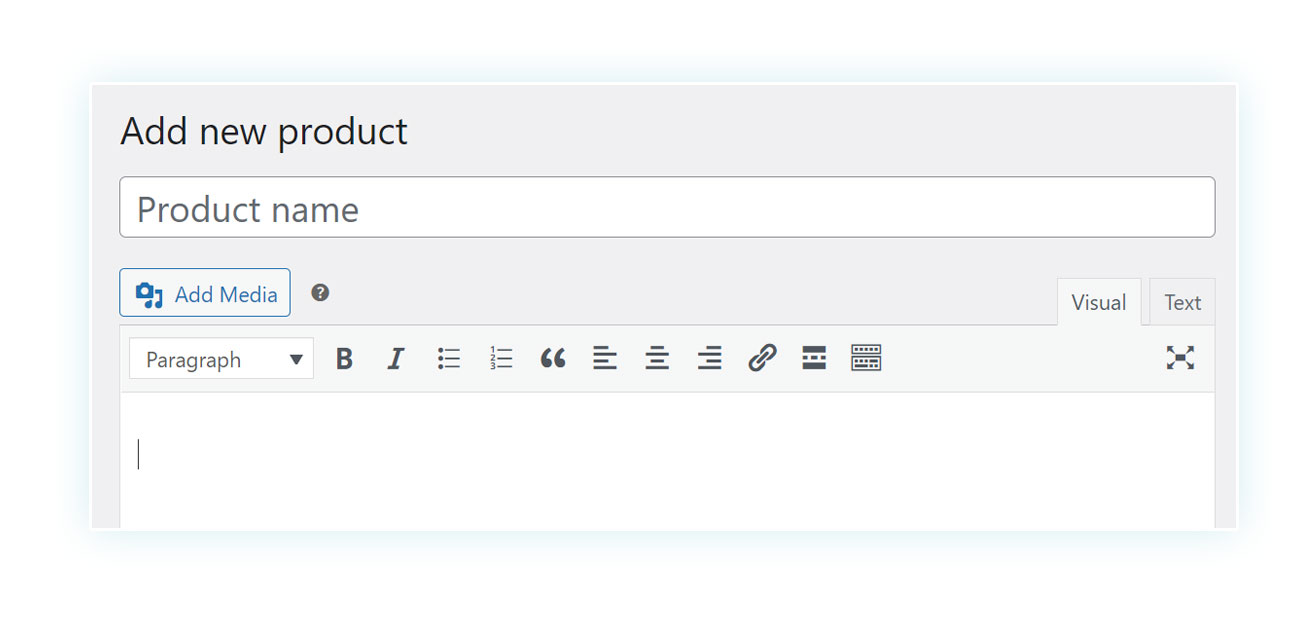
Once you have decided on the name, you must enter the description in the product description tab. It should not include the price, weight, or dimensions, as this information will be displayed elsewhere.
Pay attention: a very common mistake is to consider this description as the one that normally appears next to the product, but unfortunately, this is not the case.
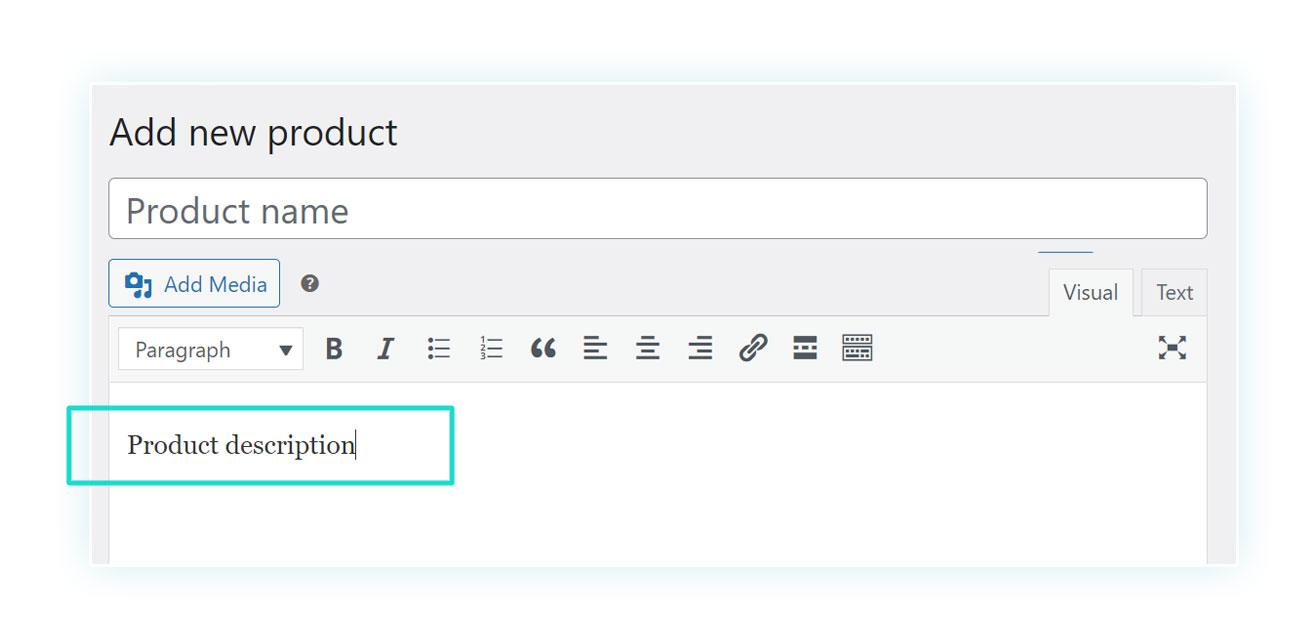
In fact, products in WooCommerce can have two in-depth texts: a short description of the product that will be found next to the image (and will be among the first texts to be read) and a longer description that will be found below.
Therefore, the text you are going to write in this section will appear here:
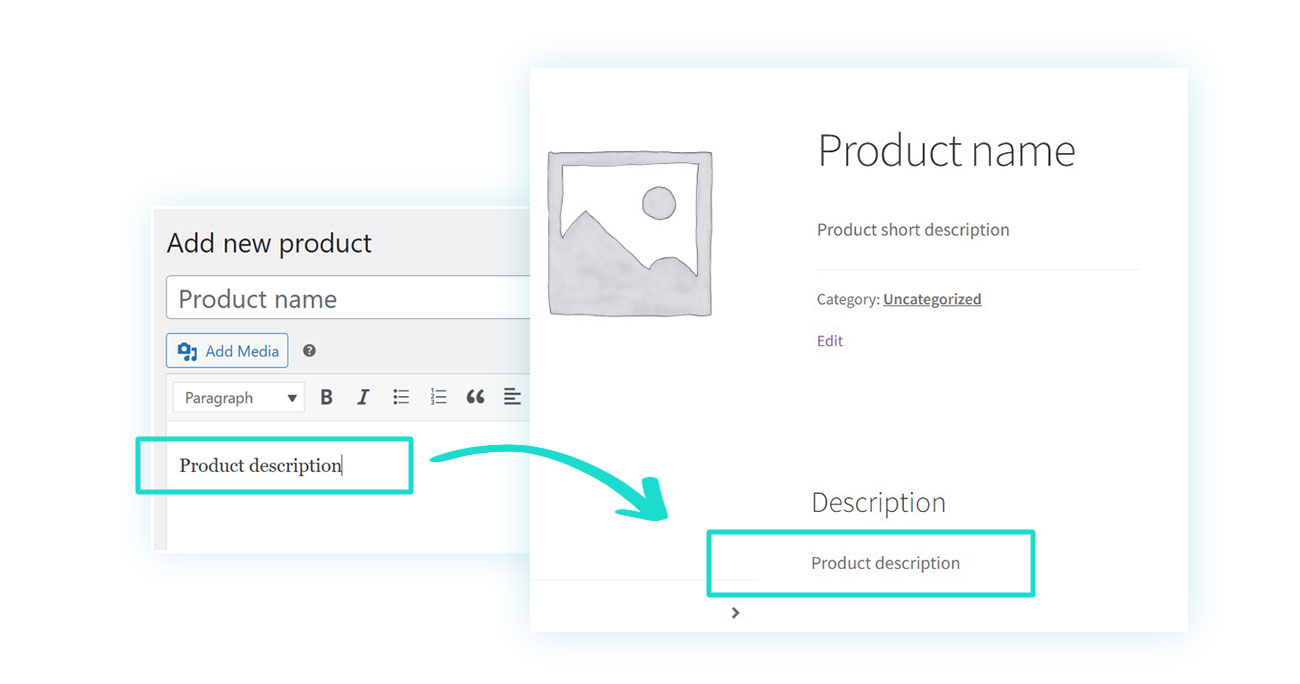
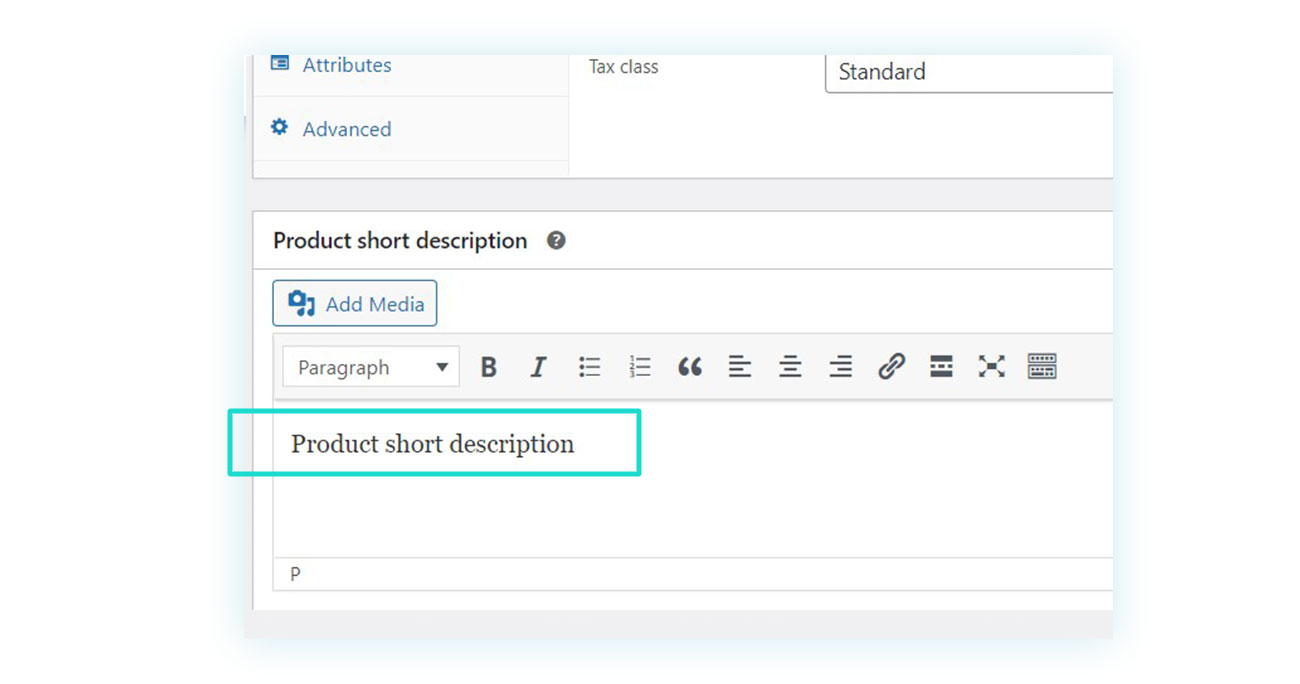
Whereas, if you want to add the upper description, you will have to scroll to the bottom of the page and enter it in the “Product short description” section:
It will then appear in this position:
Which will then appear in this position:

Product image and product gallery
While the name and description are key elements of WooCommerce products, the image that will be shown to the customer while browsing your shop is one of the most crucial factors when converting a sale.
Consequently, it is important not only to choose a good cover image but also to add (if possible) a gallery to show the customer more pictures of the product before buying it.
So let’s see how to do this: first, you have to move to the right side of the page. Under the “Publish” section (which we will look into later), you will find the “Product image” and “Product gallery” tabs:
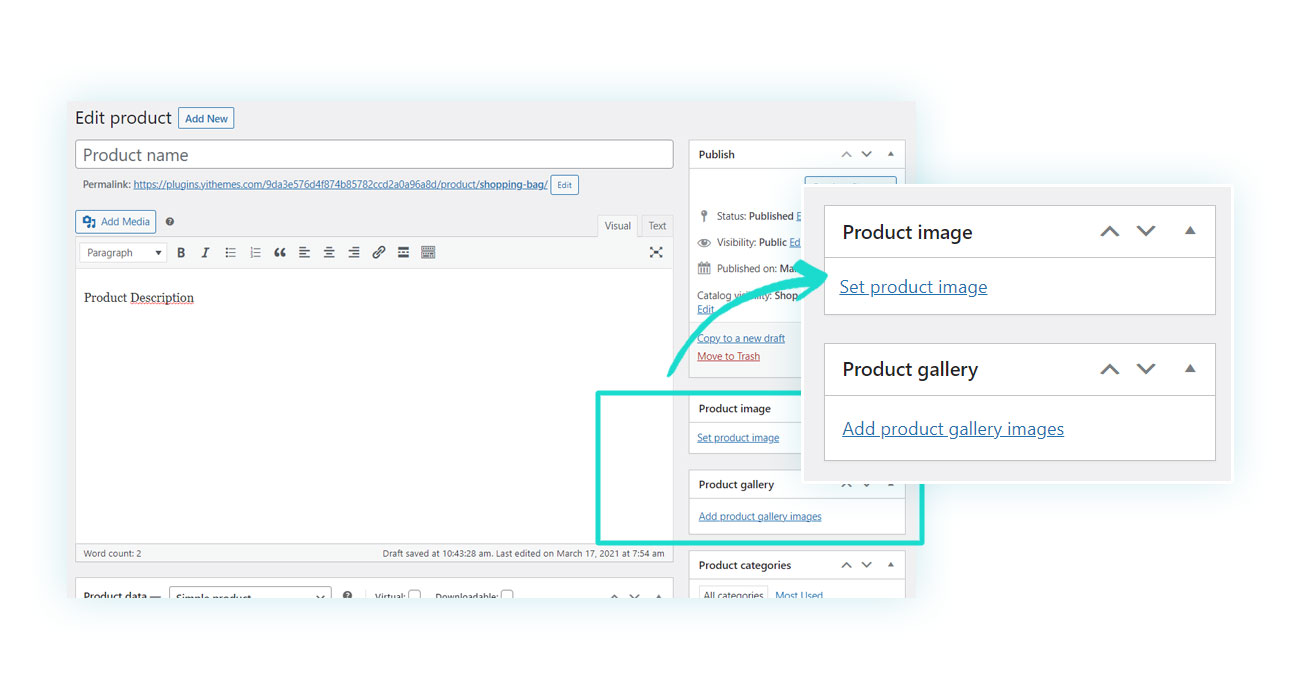
What’s the difference? The product image is the main one, the one that will appear as a “cover” in the sales catalog and then will be shown in a larger size on the single product page.
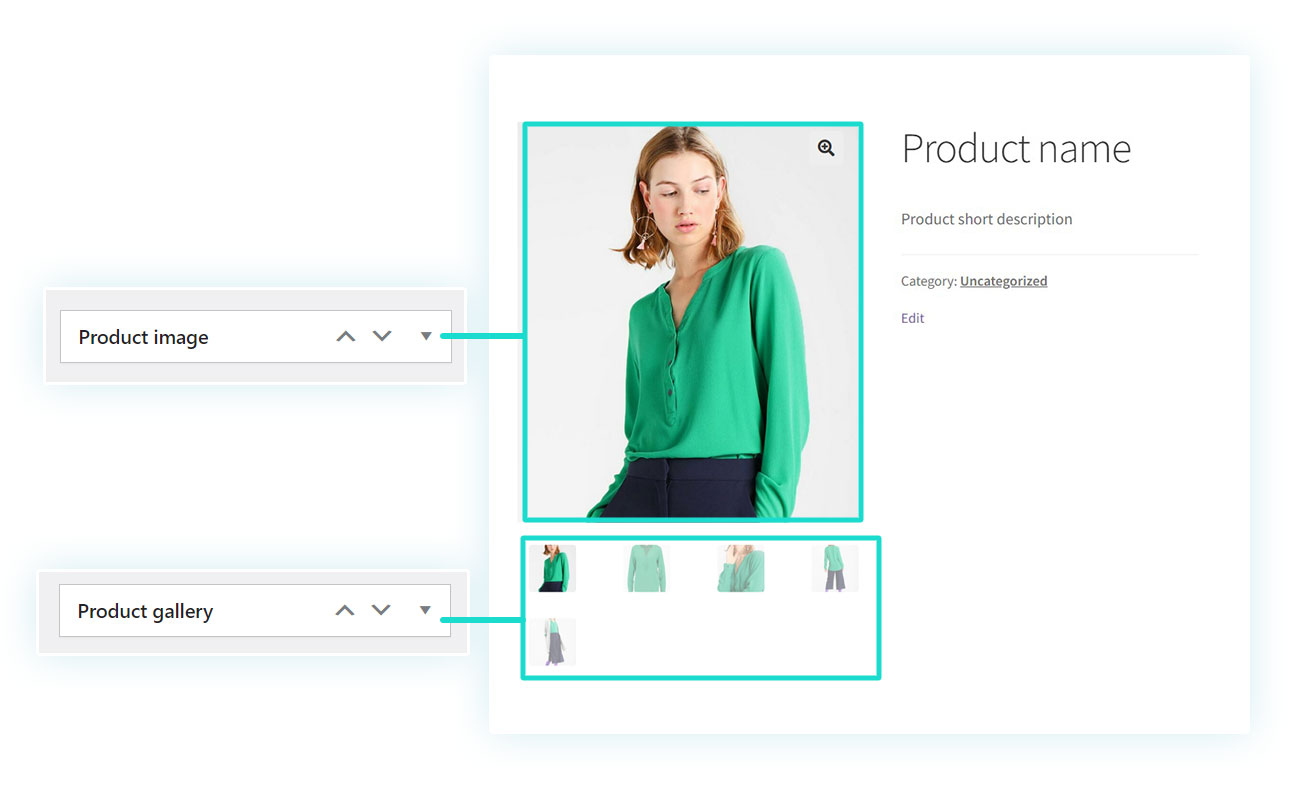
The gallery, on the other hand, contains all the images made available of the product, with the possibility of being enlarged and viewed by the customer in a better resolution (avoid adding the main image to the gallery so it is not repeated).
For example, if you are selling shampoo, the main image will show the bottle with the label and, in the gallery, you could show another image with the ingredients and instructions.
Once you have inserted the necessary images, you can continue with the WooCommerce product creation.
Product categories and tags
Since we are on the right side of the page, let’s complete this part of the guide by talking about the last two tabs that you can find below the “Product gallery” tab. We are talking about WooCommerce “Product categories” and “Product tags”:

Both of these elements improve the shop page navigation by giving customers the possibility to filter products visiting the category or tags associated with them.
Product categories are, as you might guess, a division of products according to their types. In a clothes shop, for instance, you might find categories such as “Trousers”, “T-shirts”, “Shirts”, and more.
In this way, if a customer is in need of a particular product, he could visit the category pages instead of randomly browsing the shop.
Additionally, product tags perform the same function but are usually more specific than categories. Following the example above, if the product category is “Trousers”, the tags could be “Bermuda”, “Shorts”, “Jeans”, and so on.
Clearly, this distinction changes from vendor to vendor: there are shops that only use categories and others that also use tags, it is up to you.
Product data
This brings us to the last section of the product page: the product data. It is located between the two descriptions and is divided into six different tabs, which we will see later on.
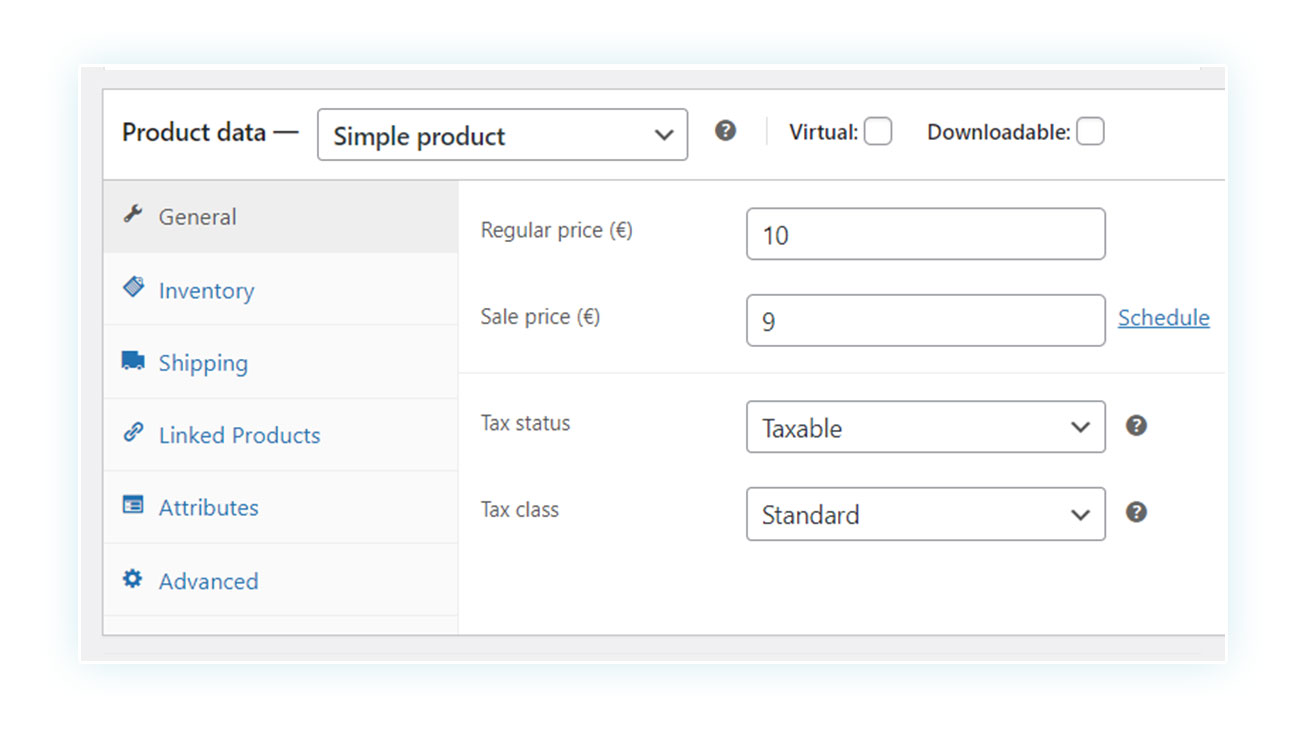
Before delving into the various tabs, it is important to look at the upper part of this section as it is fundamental to the product creation: next to the “Product data” heading, you can choose what type of product you are selling in the drop-down menu.
As this part of the guide is about creating a simple WooCommerce product, we have chosen that product type, but we’ll see what other options there are later on.
Also, next to this drop-down menu there are two options: “Virtual” and “Downloadable”, both of which are necessary options for selling virtual products (also addressed later).
General section
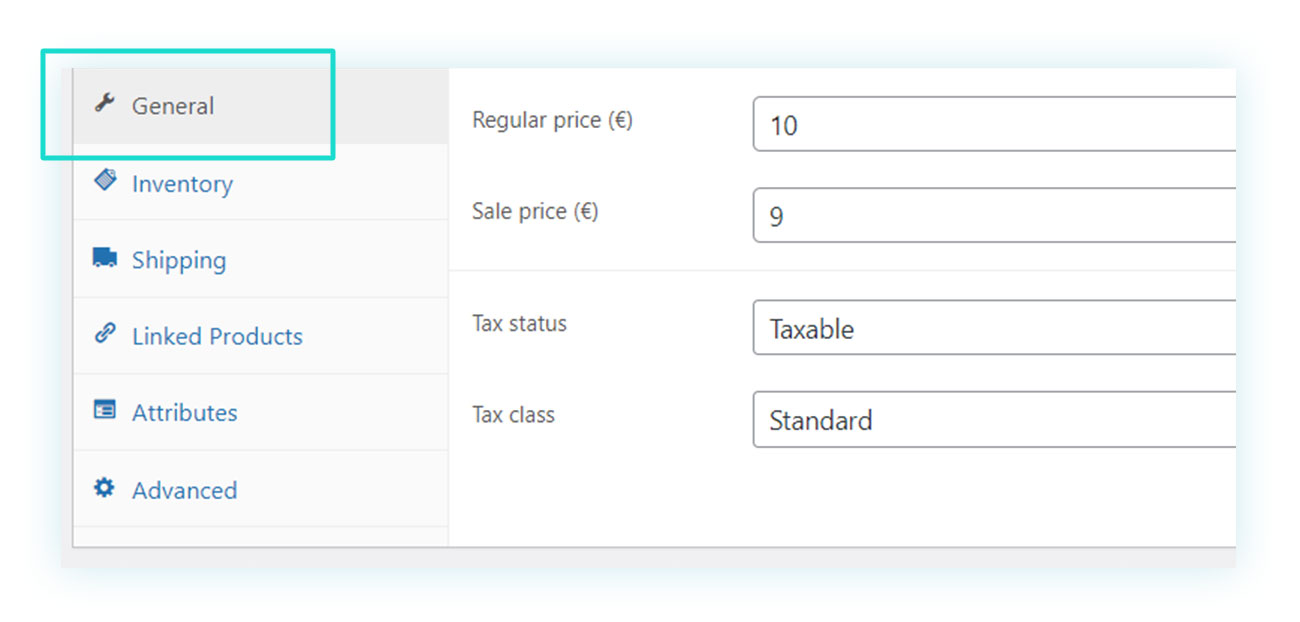
In the first section, the following values can be set:
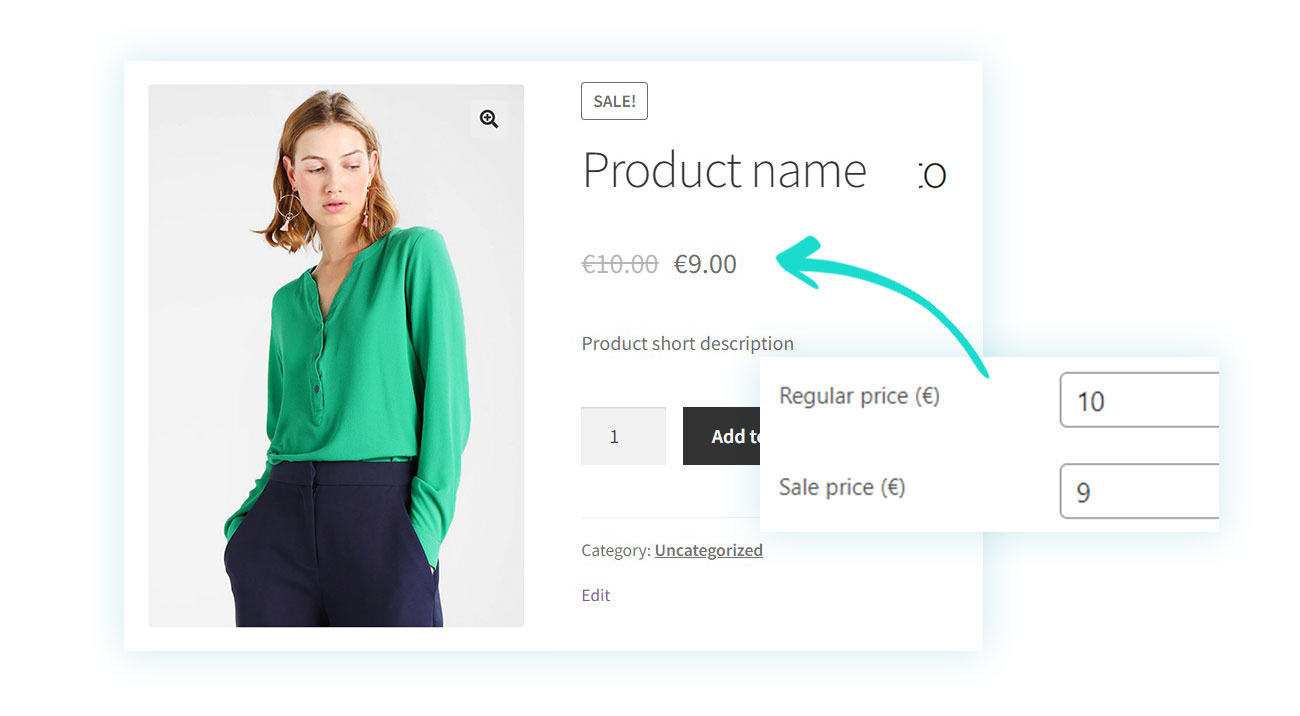
- Regular price – i.e. the standard price of the product.
- Sale price – i.e. the discounted price of the product (optional).
- Tax status – where you can determine whether taxes apply to the entire product price, only to the shipping cost, or not at all.
- Tax class – where you can choose the type of tax that applies to your product.
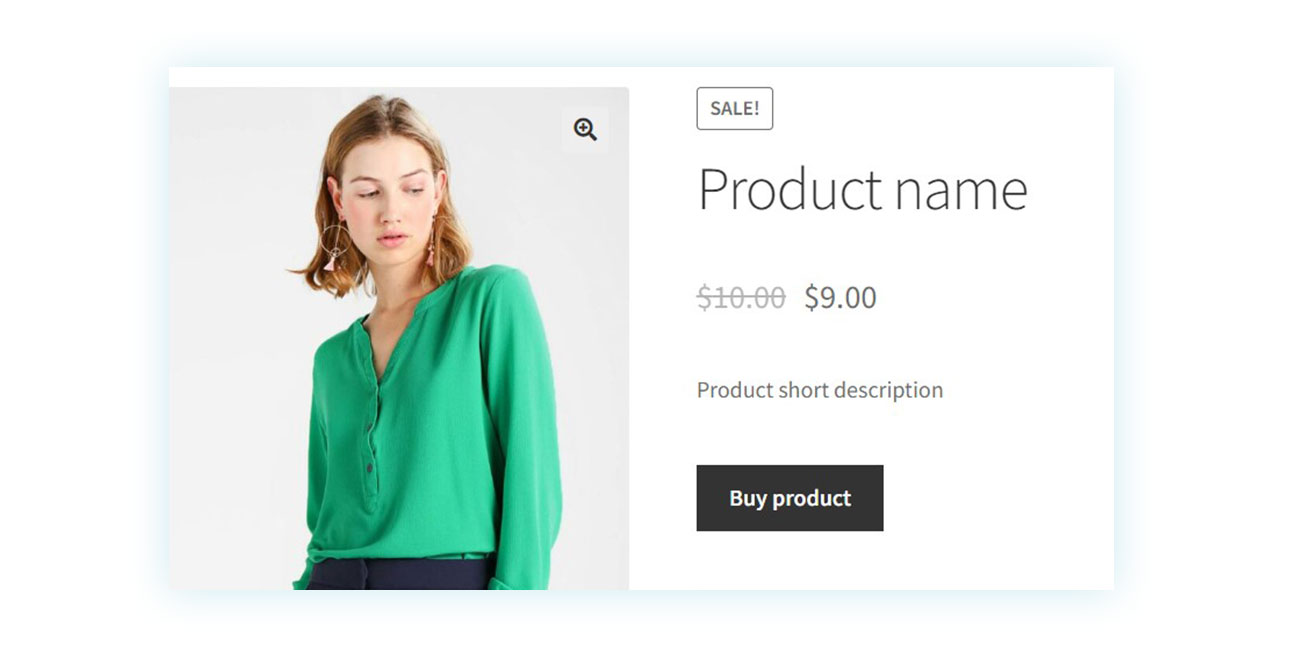
If you set a regular price of €10 and a sale price of €9, this is how you will see the product:
Inventory section
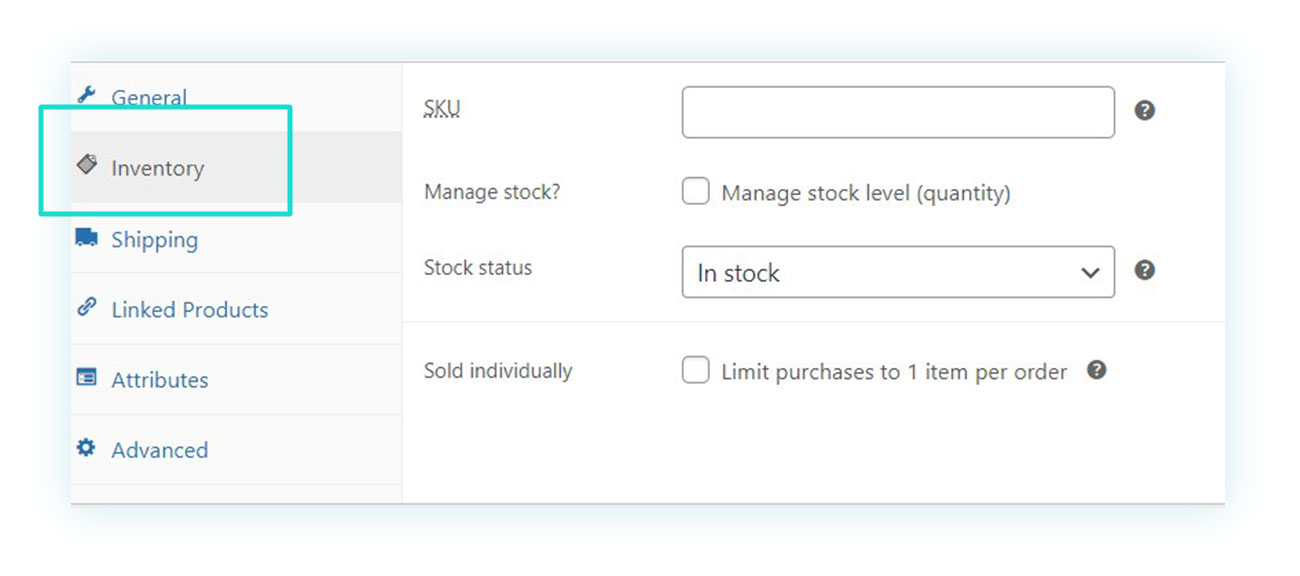
The second section allows inventory management. Basically, there are four items in it, namely:
- SKU – it is the acronym for “Stock Keeping Unit” and it is a unique identification code that is given to products.
- Manage stock? – this option allows you to activate management of the stock quantity (we will see how this works shortly).
- Stock status – this option is disabled if you enable stock management. It allows you to specify whether the product is available for sale or not.
- Sold individually – this option does not allow customers to purchase the same product multiple times in a single order.
Usually, an item is sold individually in the case of a limited edition or handmade product.
If you have enabled stock management, this is how the section will appear:
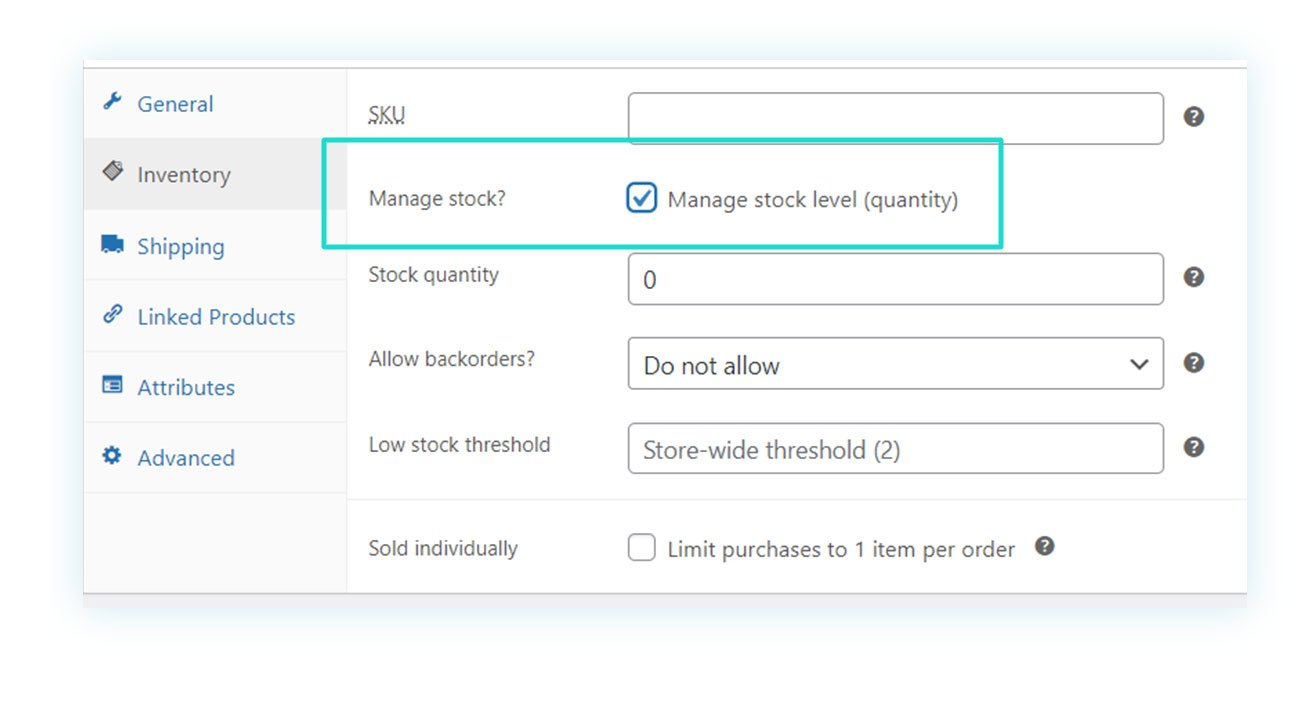
As you can see, by enabling this option you can enter the stock quantity, which will be updated automatically according to the sales in the WooCommerce store. You can also allow backorders and set a low stock threshold.
The latter option allows you to indicate a stock quantity value which, when reached, will send a notification to you to remind you to replenish the stock.
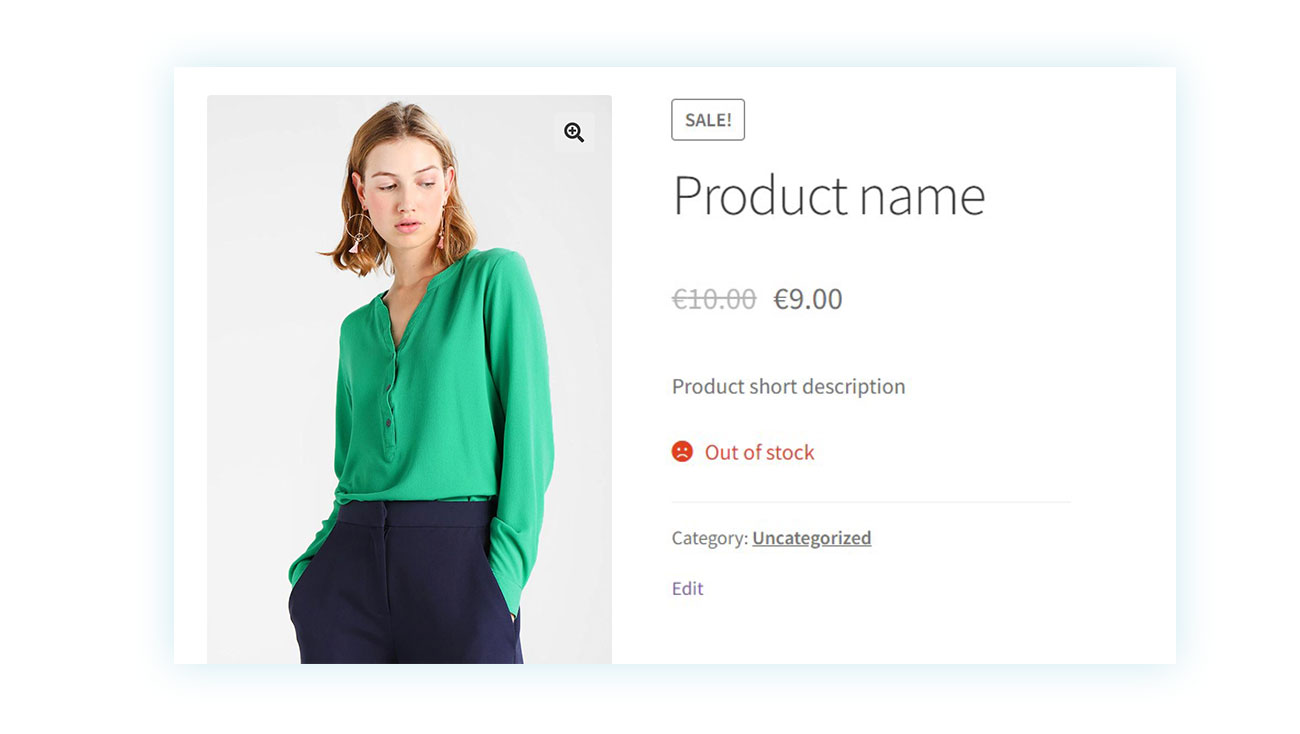
If the stock status reaches zero, this is how the customer will see the product:
Shipping section
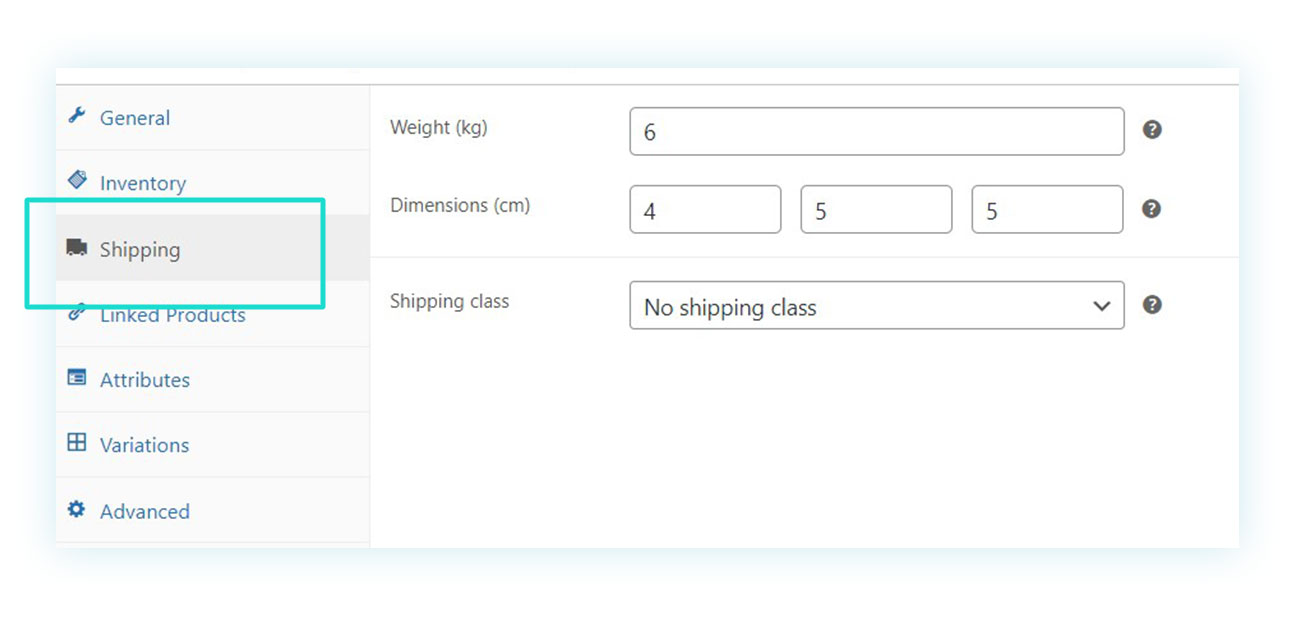
In the article about WooCommerce initial configurations, we went over how to set the shipping class for your products. In the “Shipping” tab, you can assign the shipping class to ensure the correct sale of your WooCommerce products.
In this tab, you can determine the following shipping details:
- The weight of the article;
- The dimensions (length, width, and height);
- The shipping class.
The weight and dimensions of the item are important in two aspects: first, you may want to use an external plugin to allow you to change the shipping costs according to the weight or dimensions, and second, you may also want to just display these attributes on the product pages, as they are important to the customer.
Particularly for certain objects, such as furniture and household appliances, size and weight are crucially important when purchasing a product.
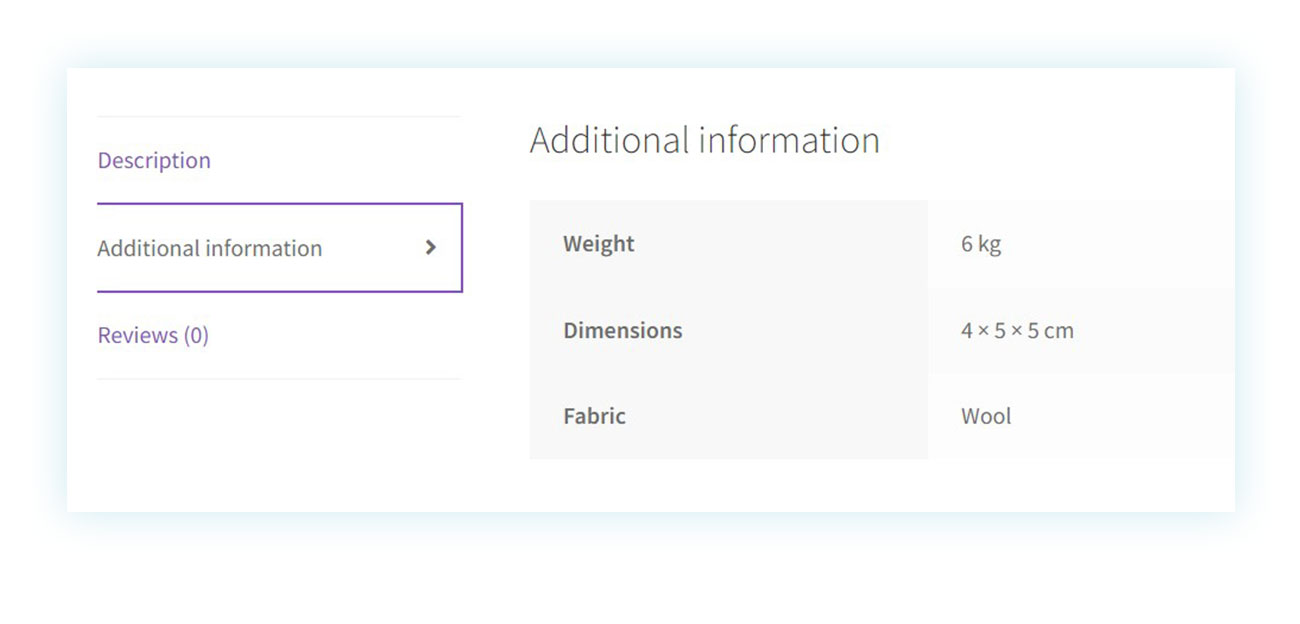
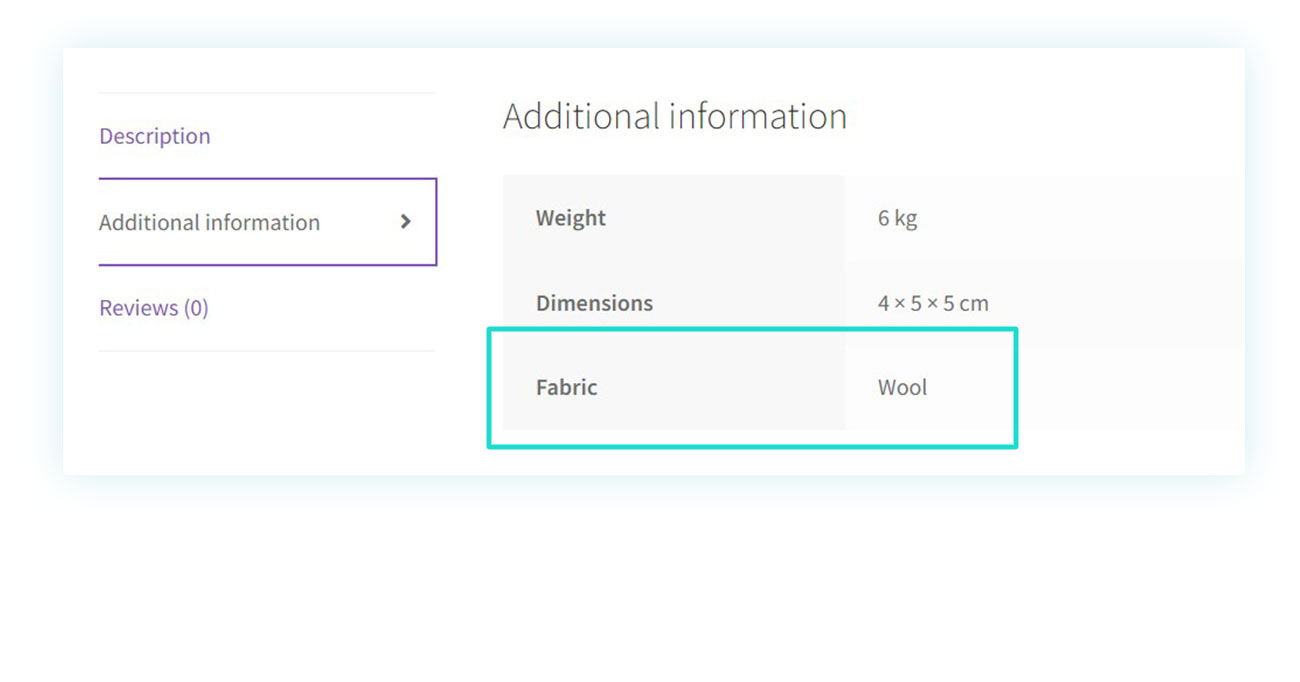
This information will be displayed like this on the product page:
Linked products section
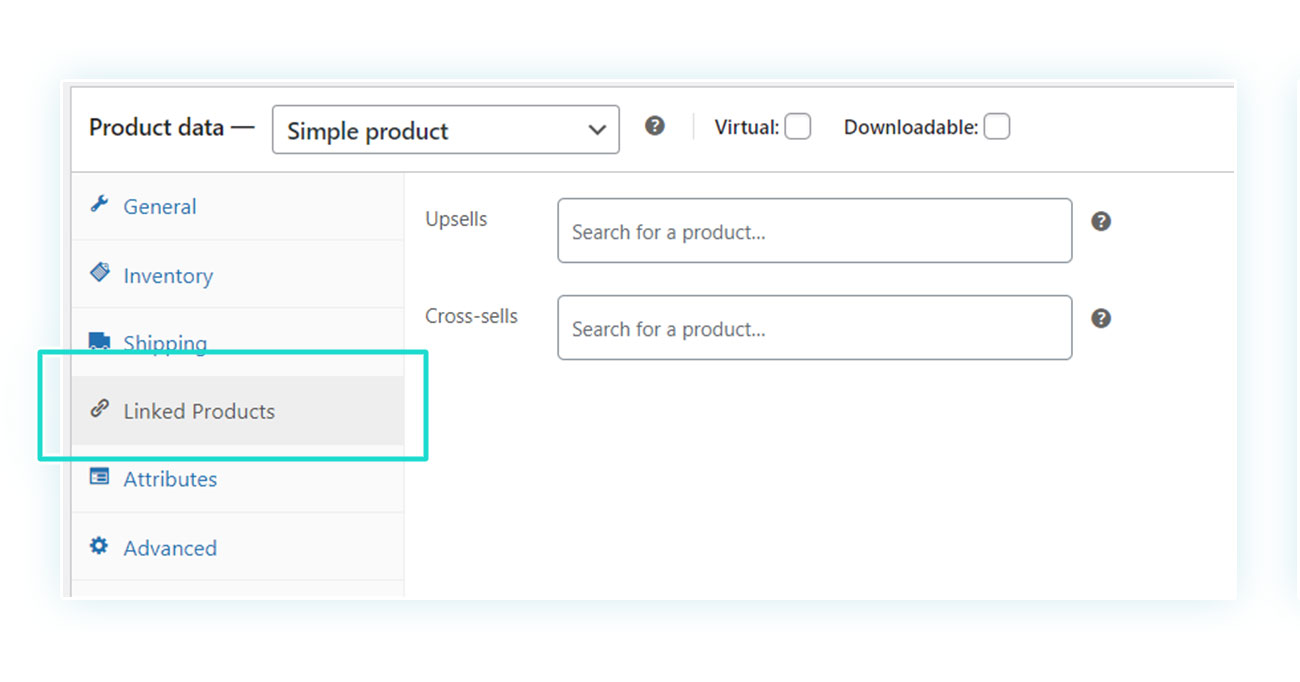
In “Linked Products” you can benefit from two of the most popular online marketing techniques: up-sells and cross-sells. In both cases, you can specify products that will be offered either as alternatives to this specific product (up-sells) or as additional purchases in the shopping cart (cross-sells).
Attributes section
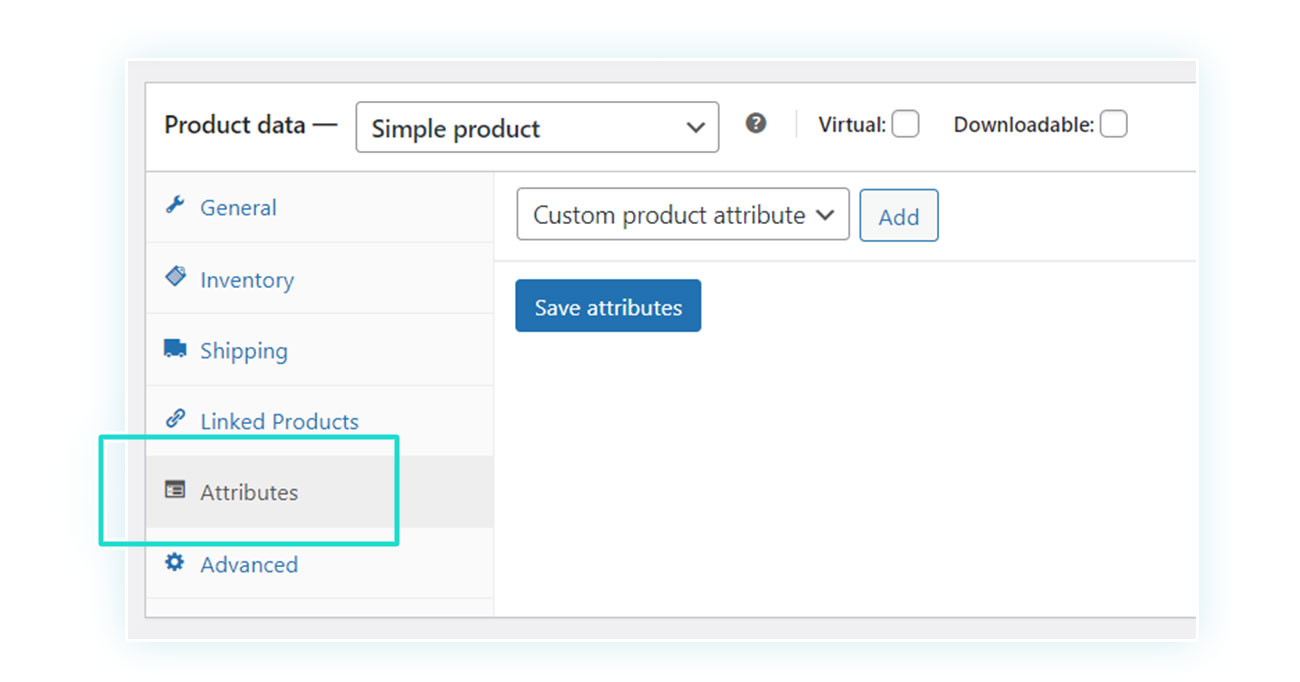
In addition to size and weight, the attributes tab allows you to enter custom attributes that will appear in the same position as the size and weight information. If, for example, you are selling a T-shirt, you may want to create a custom product attribute.
In this case, all you have to do is click on “Add” and the two following fields will appear:

Once you have entered the values you need, next step is to click on “Save Attributes” and they will appear like this:
Advanced section
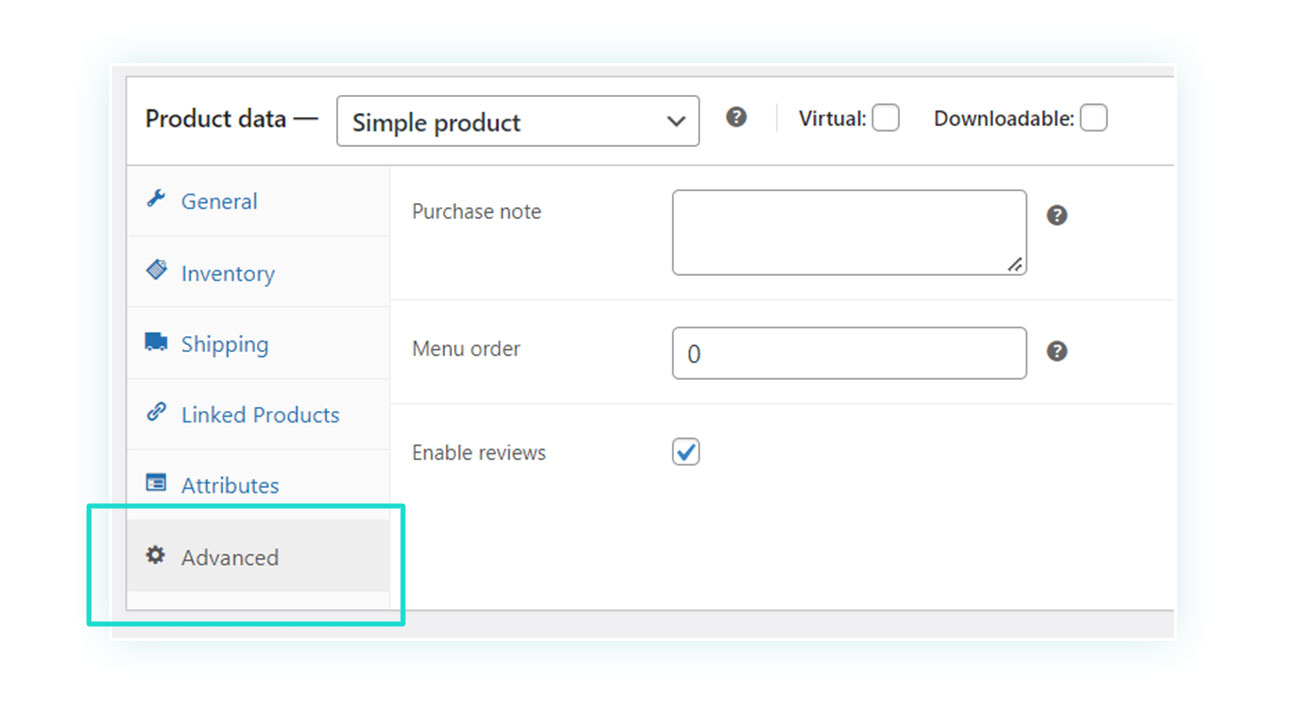
Finally, there is the “Advanced” section, where you can decide on two very useful functions.
The first one is to enter a purchase note that the customer will receive at the time of purchase, and the second one is to enable or disable reviews.
Once you have finished setting this up, your simple WooCommerce product will be completed. As you will see below, if you know the procedure for creating simple products, you will also have the knowledge to create all other types of WooCommerce products, as they are based on it.
How to add a grouped product on WooCommerce
At first, grouped products may seem to be the least intuitive to configure but, as you will see, it is actually very simple to understand.
Grouped products are simply collections, that take one product sold individually and combine it with others and selling them together.
You could, for example, sell an electric razor, shaving foam, and a comb as individual products and then group them all into one grouped product called “Shaving Kit”.
To do this, you have to create all simple products according to the procedure we saw above, and then create a grouped product by selecting it in the “Product data” section:
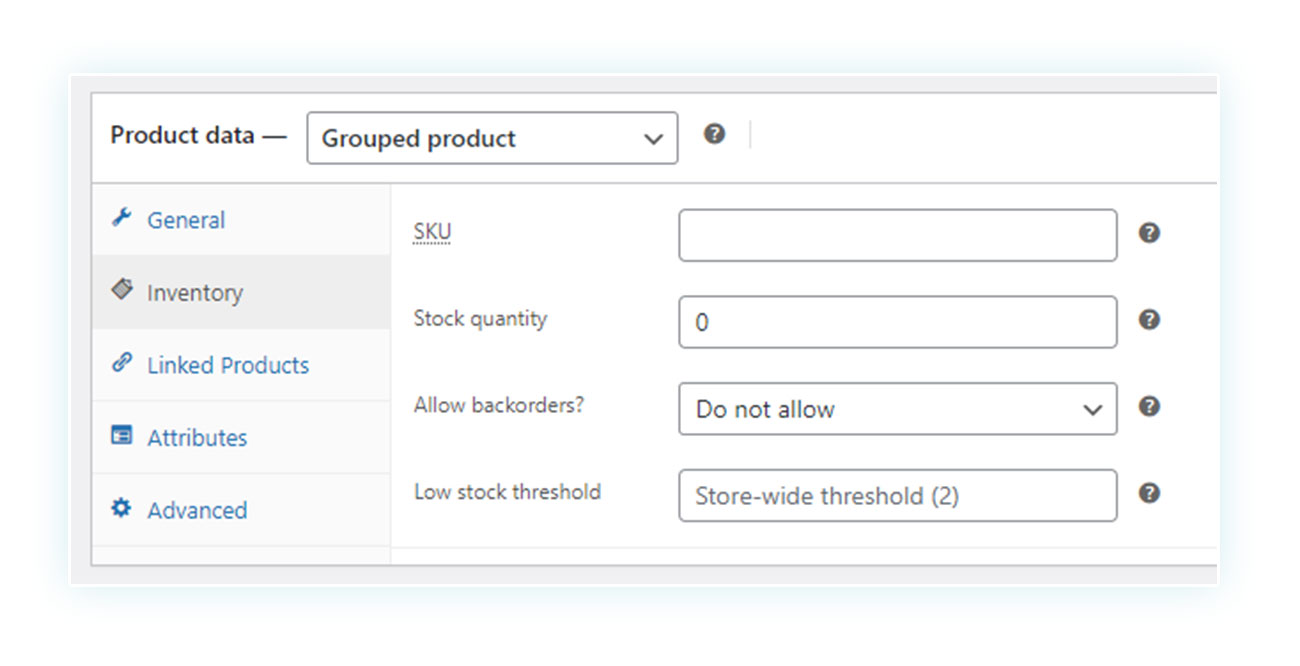
As you can see, most of the sections seen previously are empty or have disappeared: after all, shipping, price, and inventory are all linked to the individual products, so you don’t need to define them at this time.
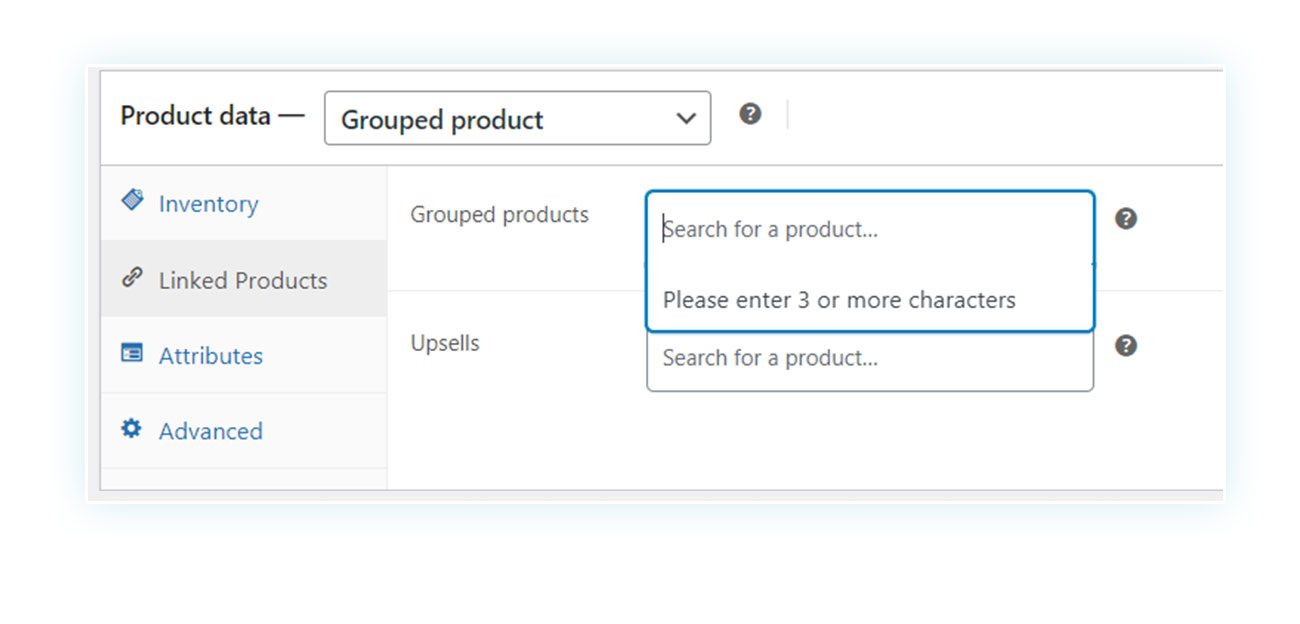
Once you have created your grouped product and completed it with information and photos, all you have to do is go to “Linked Products” and choose the products to be included in this collection:
How to add an external/affiliate product on WooCommerce
A third category of products in WooCommerce that you can offer is affiliate products. This is an external product and, therefore, it is not sold directly in your shop, but it can be presented as if it were.
In this way, you can customize it with a price and description, and then redirect the customer to the affiliate link so you can earn a percentage of the sale.
To do this, you need to go back to “Product data” and in the drop-down menu choose “External/Affiliate product”:
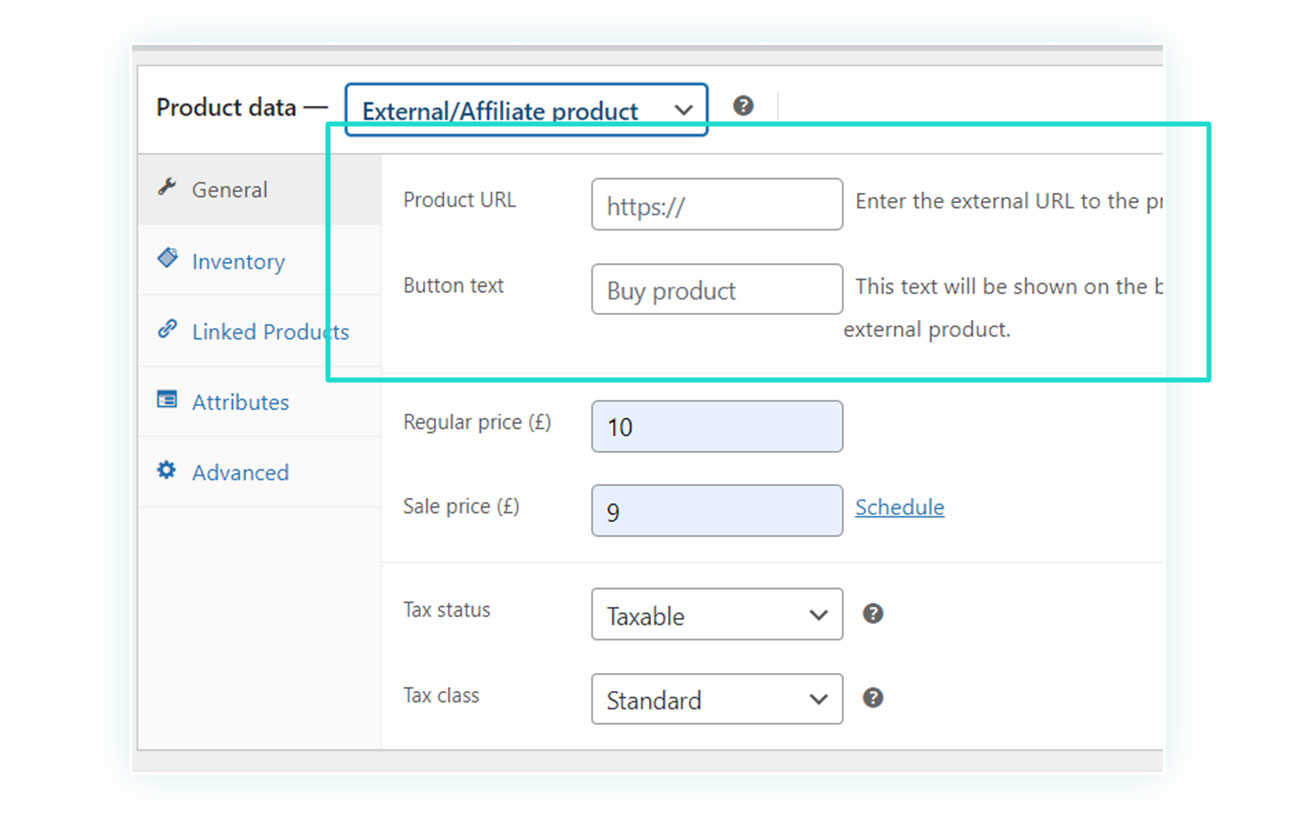
Moving on to this WooCommerce product type, you will notice that several things change in this section. Among the most important changes, the “Shipping” section disappears (given that the product will be sold elsewhere) and new fields are added to the “General” section of the product data.
The new fields include:
- Product URL – where you are going to insert the affiliate/external link.
- Button text – to specify what label will appear on the button: it could be the classic “Buy product” or a more specific label of your choice.
For the rest, adding these products is no different than adding a simple product.
How to add a variable product on WooCommerce
What is a WooCommerce variable product? These are products that can be sold in different forms. Think of a shirt: the same product is sold in different sizes and colors but, fortunately, you don’t have to create a new product for each one of these variations.
All you have to do is go back to the data dropdown menu to select the product type and choose “Variable product”:
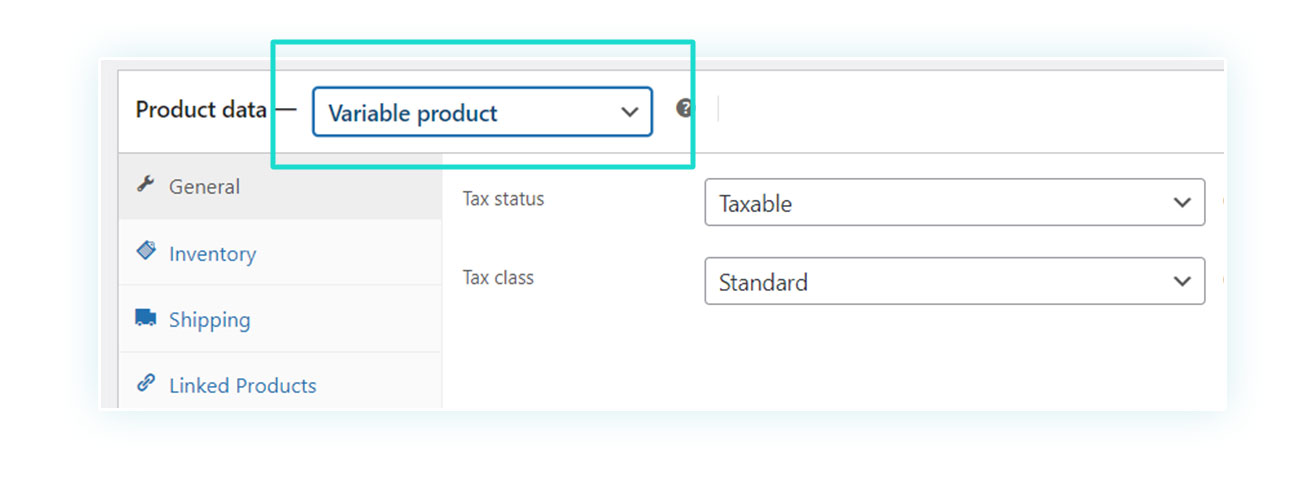
You will immediately notice two things: the first thing is that the price has disappeared from the “General” section (this is because each variable product will have its own price) and the second thing you will notice is that there is a new “Variations” tab.
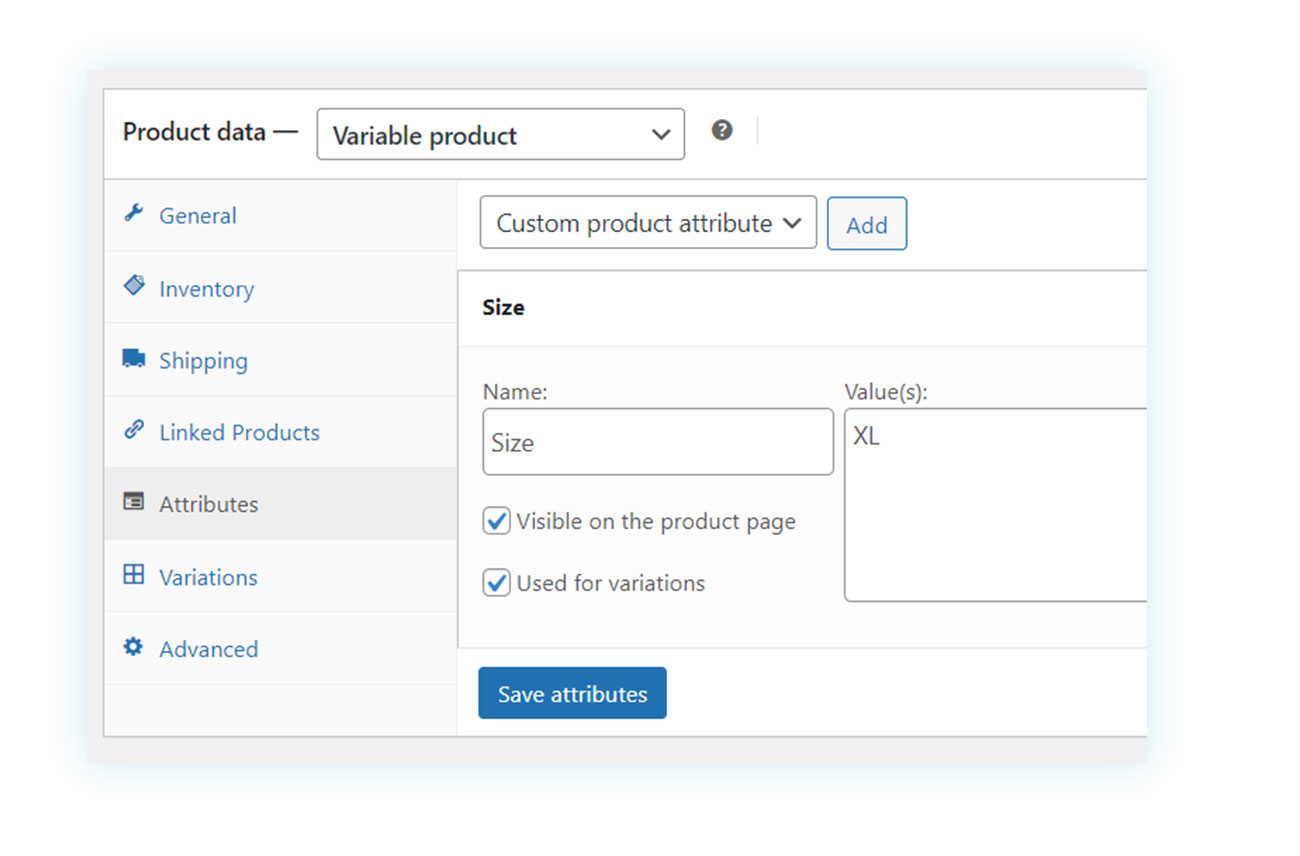
The variations are closely linked to attributes, which we have already talked about before. This is why you can create variations for each attribute. In the example shown, we created the attribute “XL” linked to the size type:
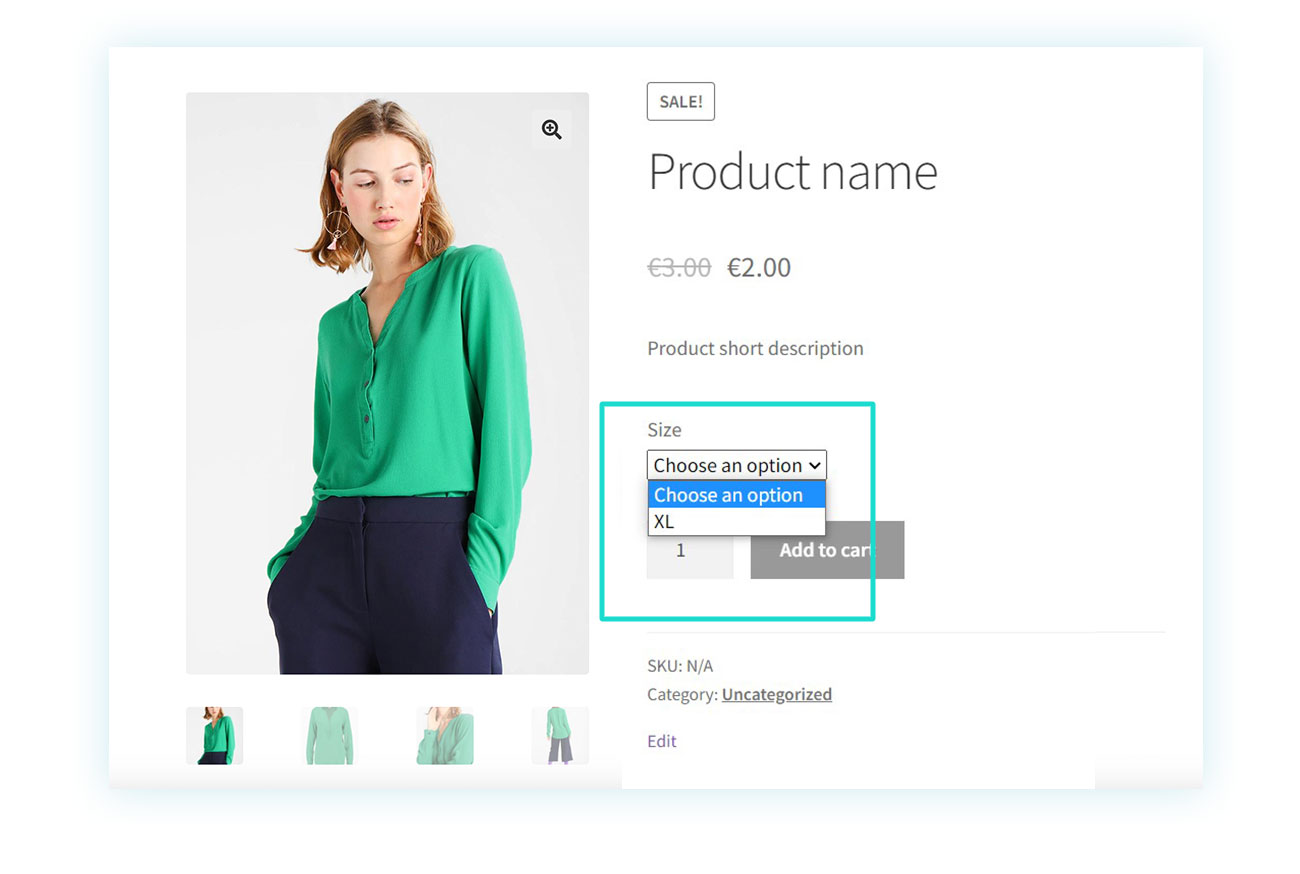
Once you have created the product variations, you can enter all the product data as you would normally do for a simple product and it will appear to customers with a menu to choose the variation from.
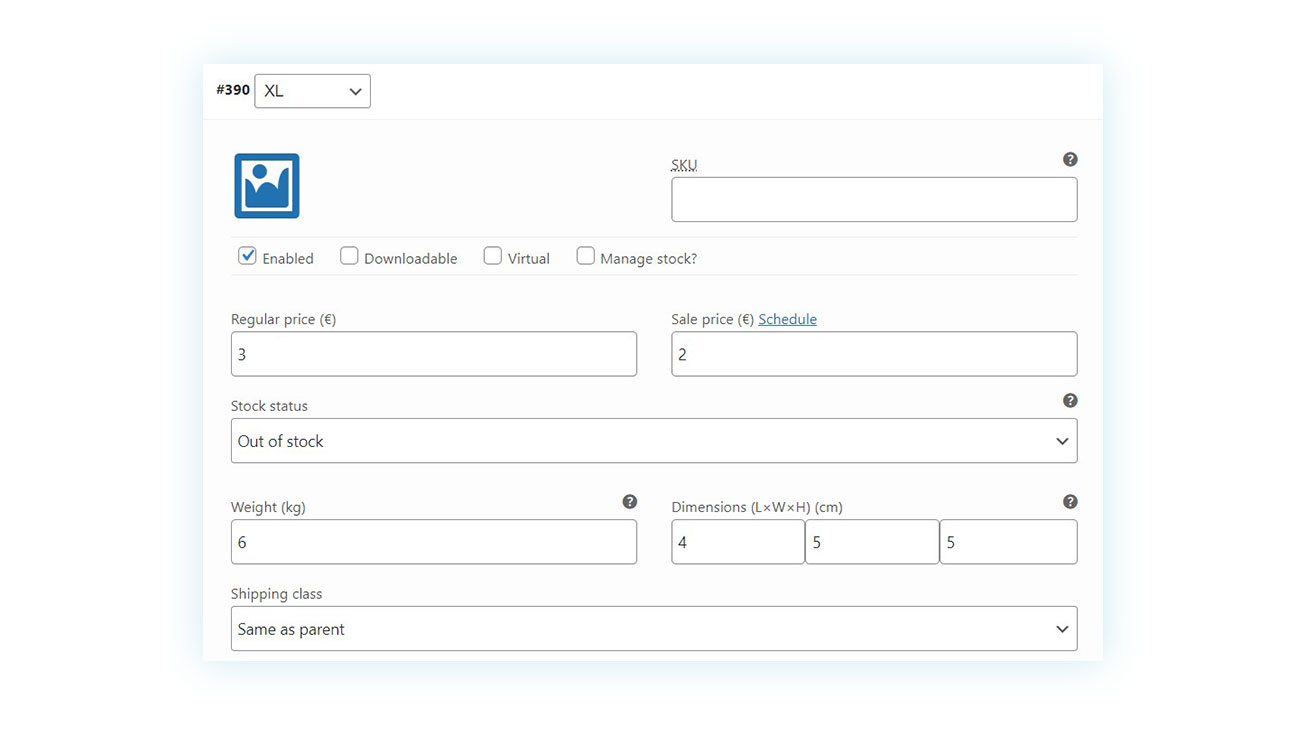
All that remains is to repeat the operation for all the sizes present, your variable products will look like this:
How to create a digital product on WooCommerce
As mentioned before, the process of creating a virtual product in WooCommerce is very easy. All you have to do is decide whether you’re selling virtual and/or downloadable products and select “Virtual” and/or “Downloadable” from the given options to enable the additional features:

As soon as you have a virtual product, the “Shipping” section disappears, as it will be sent virtually to the customer. If you do not wish to do so, you can select “Downloadable” to offer a downloadable product and provide the customer with the files:
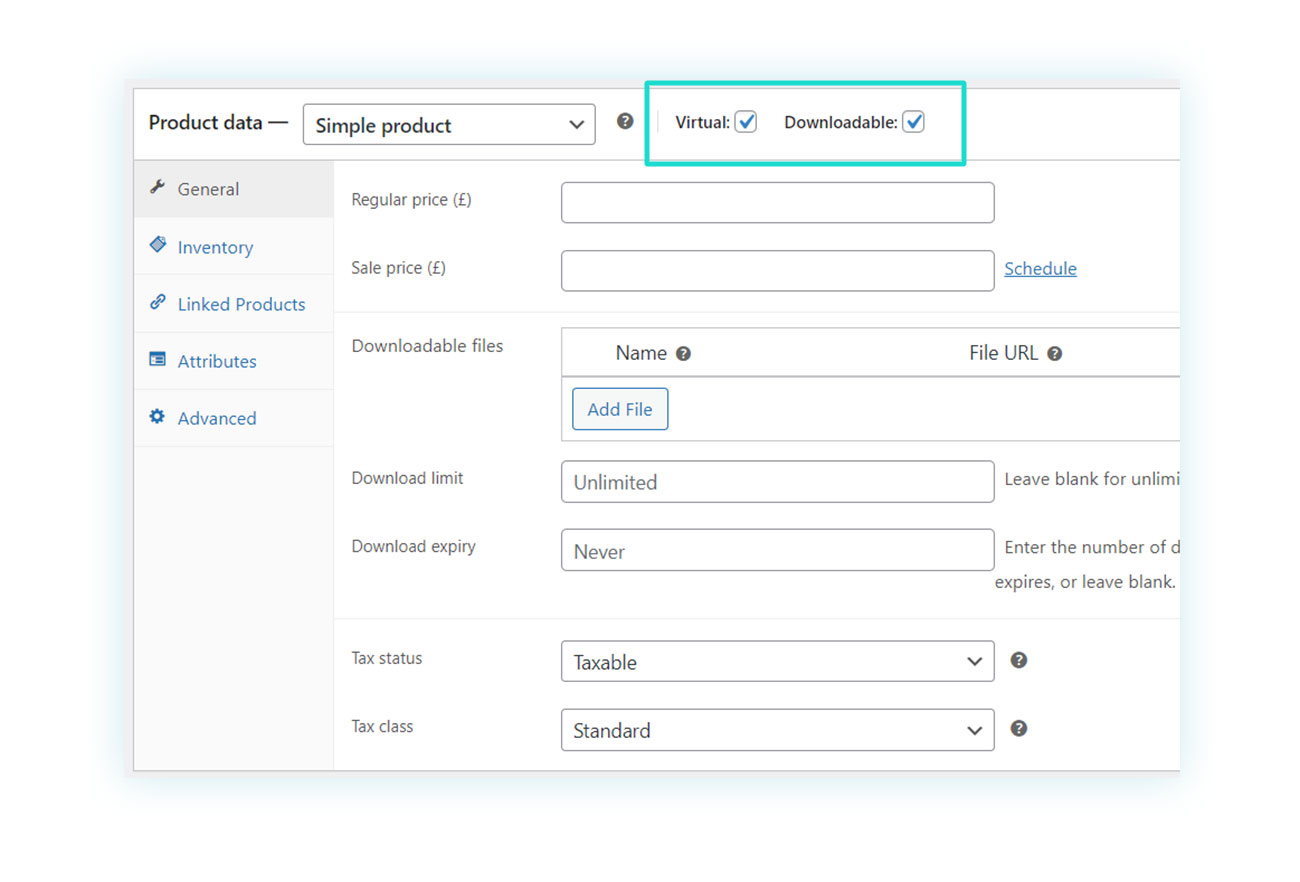
This way you can add the file directly to your server and decide how many times it can be downloaded by the customer and whether the download link will have an expiry date.
We have succesfully seen how to add a product in WooCommerce and publish it for sale in just a few clicks. Of course, there are more complex options that often require the installation of additional plugins but, fortunately, WooCommerce tools and all the associated resources continue offering ease of use as their main mission.