Creating invoices is a very important element of managing a business, even though it is often considered a hassle. For this reason, it is crucial not to underestimate it in your eCommerce and, above all, you must ensure your invoices are complete by freely customizing them. We’re talking about a simple bureaucratic process that can be the key to improving your customers’ experience and the image of your business.
In this article, we will explore why customizing invoices is important and how you can easily do it by just using a WooCommerce plugin.
Table of contents
Why Customizing Your Invoices Is Important
There can be many reasons why you should customize invoice templates. Paying more attention to their format and content allows you to:
- Enhance the image of your store – Every online order requires a certain level of trust. This trust is increased if the store has been visited before or if it is a well-known eCommerce site, but it is still important to use every tool at our disposal to convey a professional image to our customers. A well-designed and customized invoice that matches your business style, and is clear and easy to read can increase customer trust — especially right after buying and while waiting for the product when doubts might arise.
- Ensure that you meet all legal requirements – Above all, an invoice is a vital tool for the proper functioning of your business and for the tax compliance of your store on WooCommerce. However, the criteria that an invoice must meet can change depending on the time, type of business, the country of the seller and the buyer, and much more. For this reason, having full freedom to customize and create invoices means not having to rely on a generic and potentially unsuitable tool that could impact the future of your business.
- Enhance the user experience and stand out from the crowd – In general, the last thing you want is to create a store that is just like a thousand others. For this reason, it is important to customize every element of the site, including invoices. Clean, clear, and tailored invoices not only make you look professional and memorable but also end the customer’s shopping experience on a particularly positive note.
This can be beneficial on so many levels, you can even take the opportunity to answer common customer questions about shipping or push for additional sales.
How to Customize Invoices in WooCommerce Step by Step
Does WooCommerce include an invoicing system for its stores? Technically yes, although, as we will see next, it is quite basic and sometimes superficial.
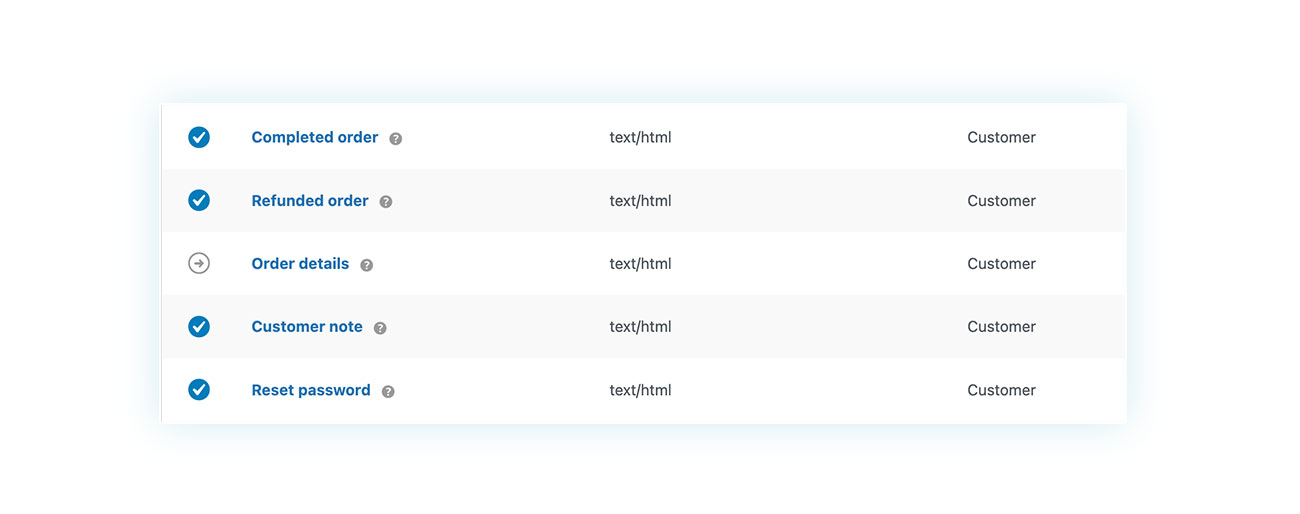
If you go over to WooCommerce > Settings > Emails, you can see that among the various communications generated by the platform, there is one specifically related to invoices and order details.
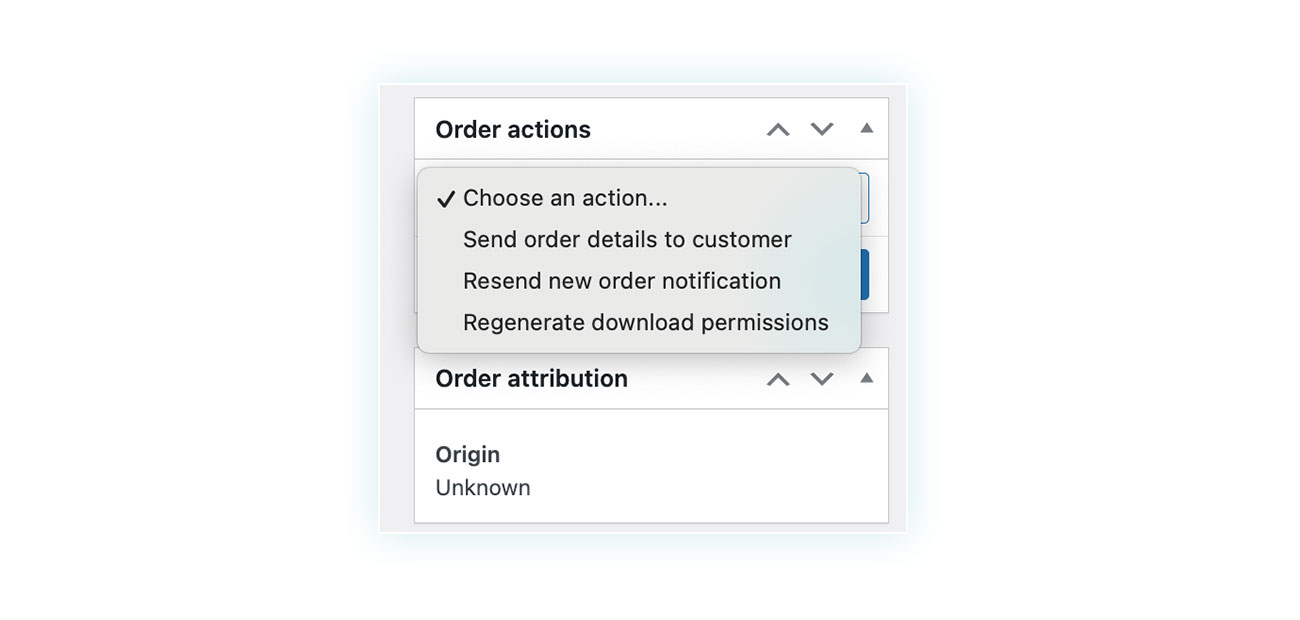
By going to an order details page, you can manually send the system-generated invoice to your customer from the top right corner:
And the customer will receive an email with an invoice similar to this:
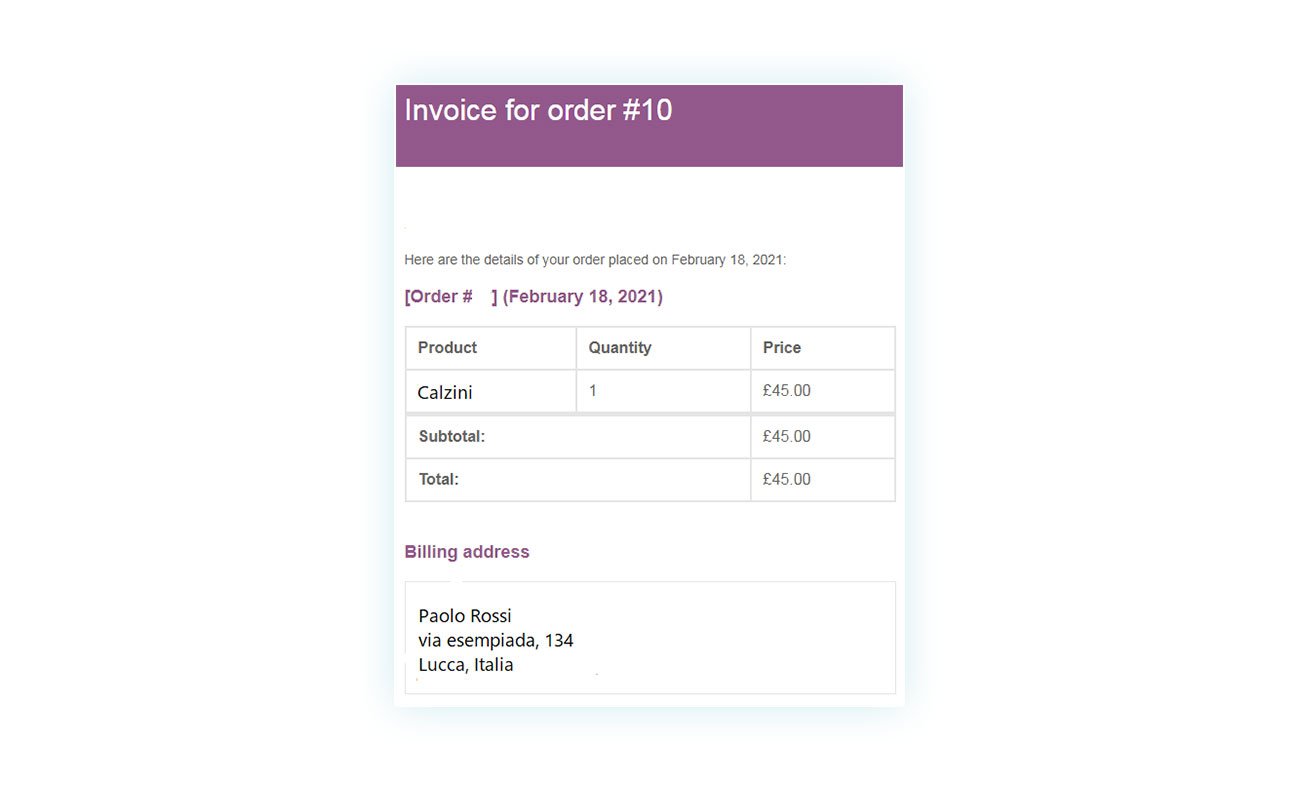
As you can see, this type of invoice is not particularly elegant or user-friendly and is very difficult to customize (unless you modify the HTML template in the site’s PHP files, which is beyond the capabilities of most sellers).
For this reason, we recommend using the WooCommerce PDF Invoices & Packing Slips plugin, which gives you full control over managing invoices and shipping communications with minimal effort. Let’s see how to use this plugin.
Installing the Plugin to Design WooCommerce PDF Invoices
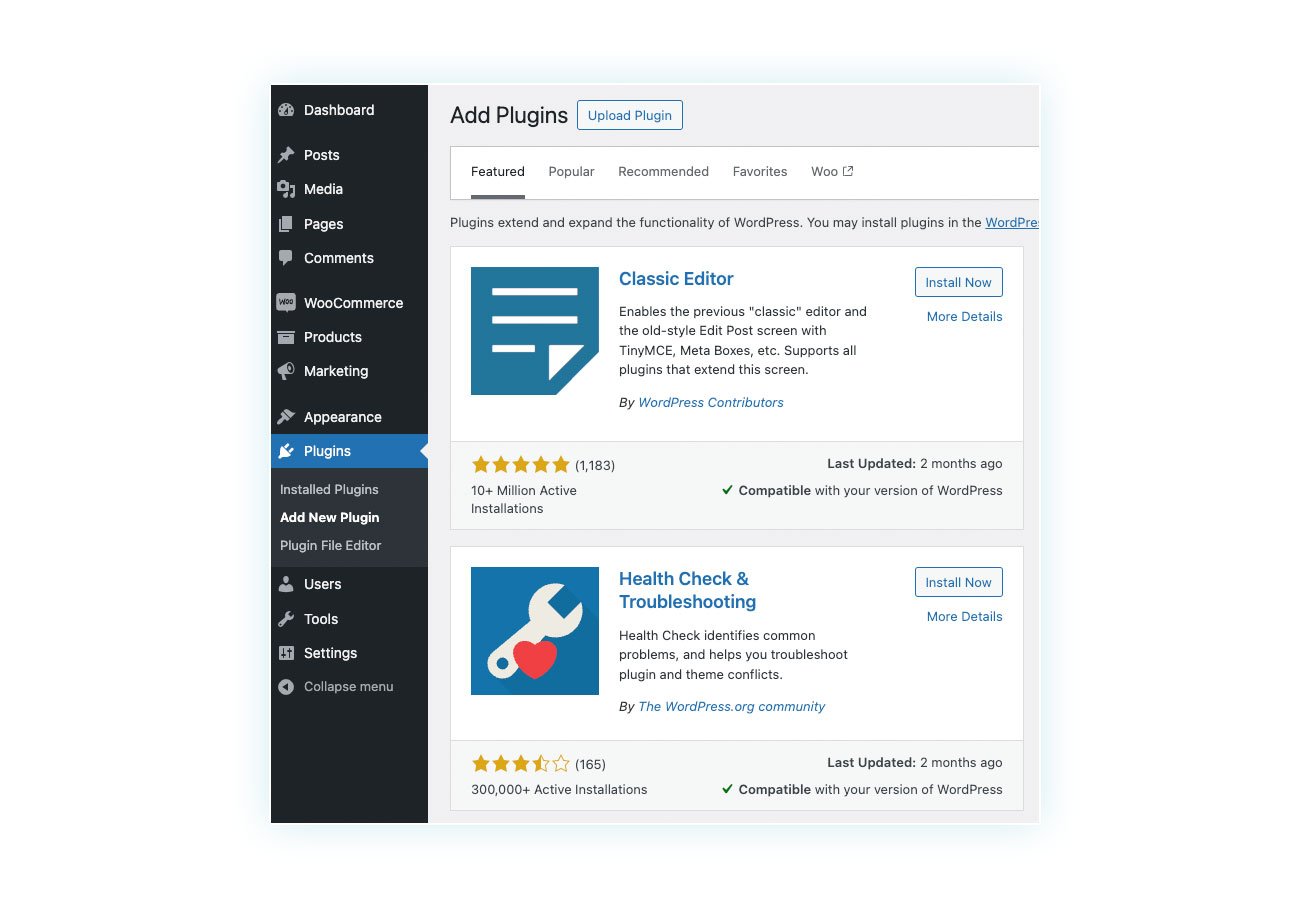
Installing WooCommerce PDF Invoices & Packing Slips is very simple. Once you’ve downloaded the plugin, all you need to do is go to your WordPress/WooCommerce site, then to Plugins > Add New:
All you need to do next is click on “Upload Plugin”:
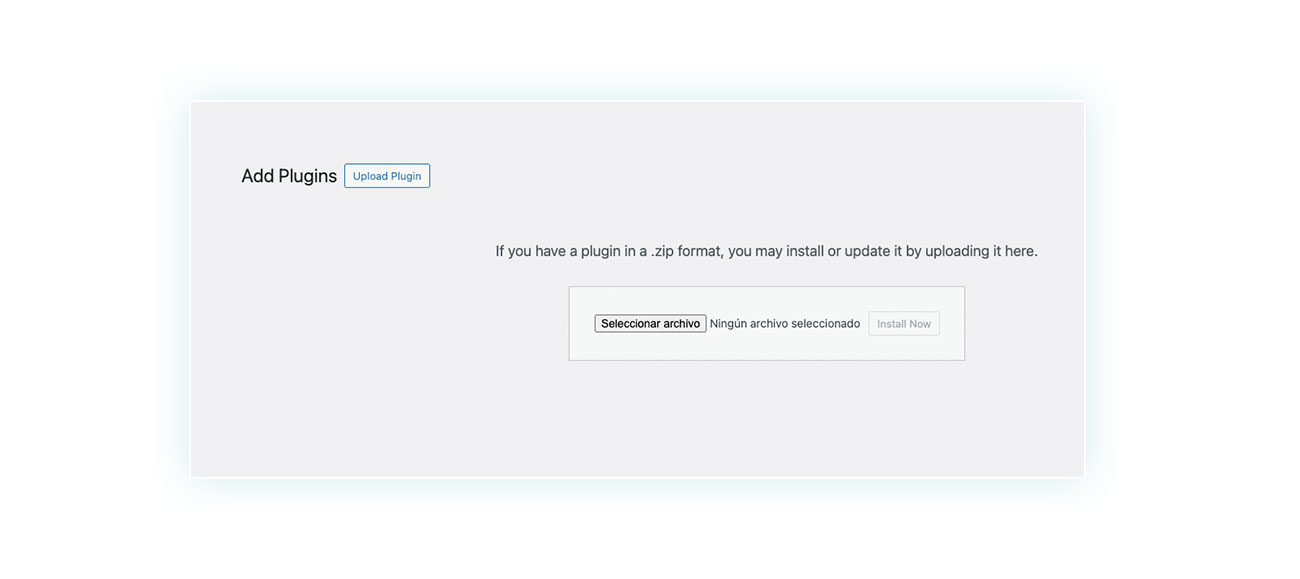
Select your .zip file and upload it. Remember to activate it once it’s uploaded. After that, you can proceed to the control panel of WooCommerce PDF Invoice & Packing Slips.
Designing Your WooCommerce Invoices Tutorial
Once activated, you can manage the plugin by going to the sidebar menu and clicking on YITH > PDF Invoices & Packing Slips:
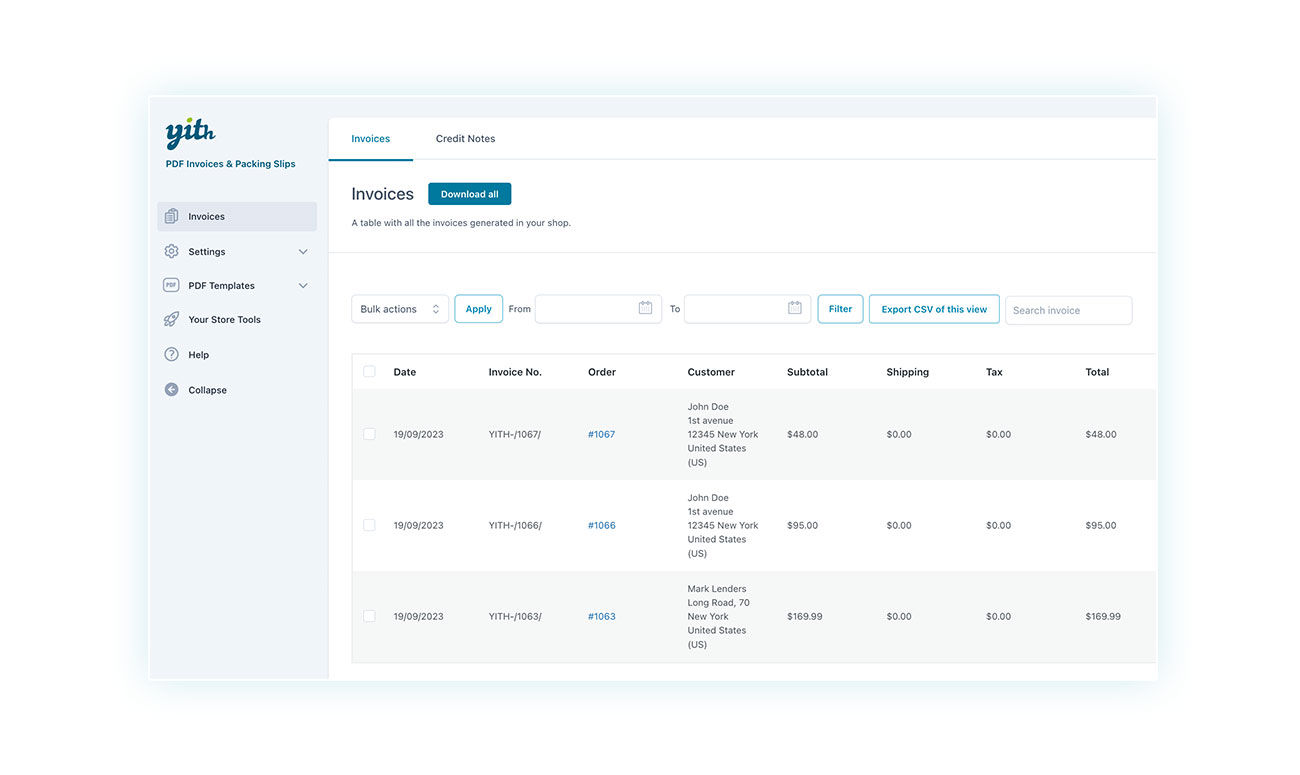
In the first section, called “Invoices”, you will find all the WooCommerce invoices generated by the plugin. You can download them all at the top with a simple click, or you can go through the list and choose the ones you’re interested in.
Each invoice shows the date, invoice number, order number, customer details, subtotal, shipping cost, taxes, and the overall total of the order.
By going to the right of each invoice, you can find the available options for it:
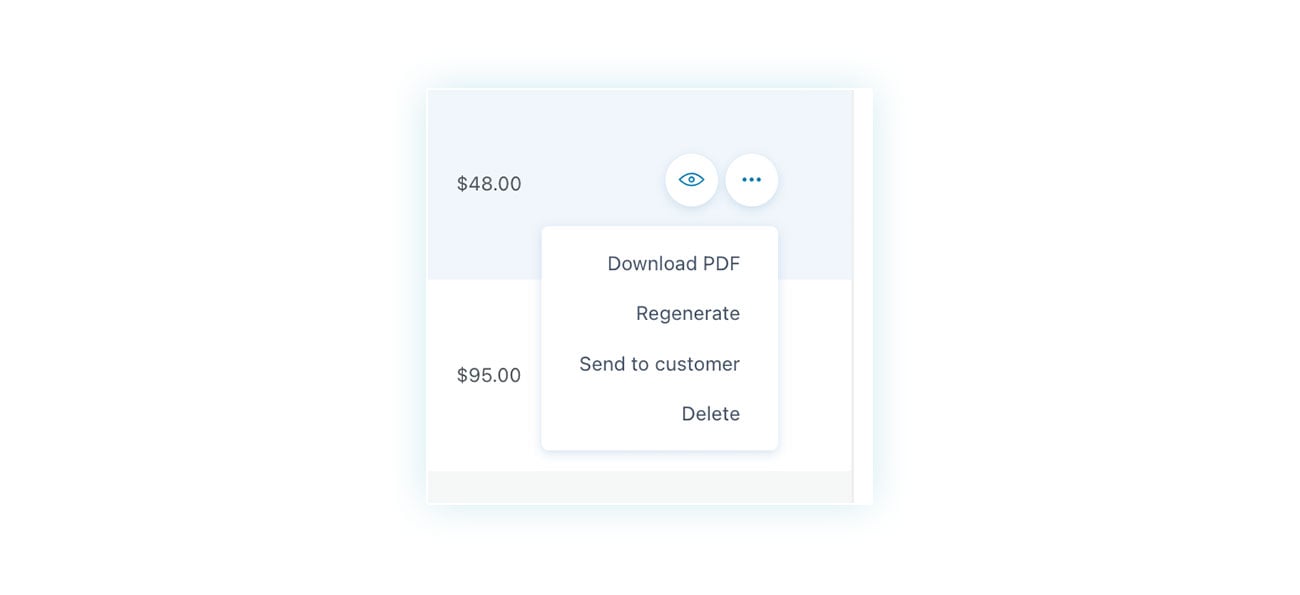
You can view each invoice, download it, regenerate it, send it to the customer, or delete it. Now, let’s see how to manage and customize them.
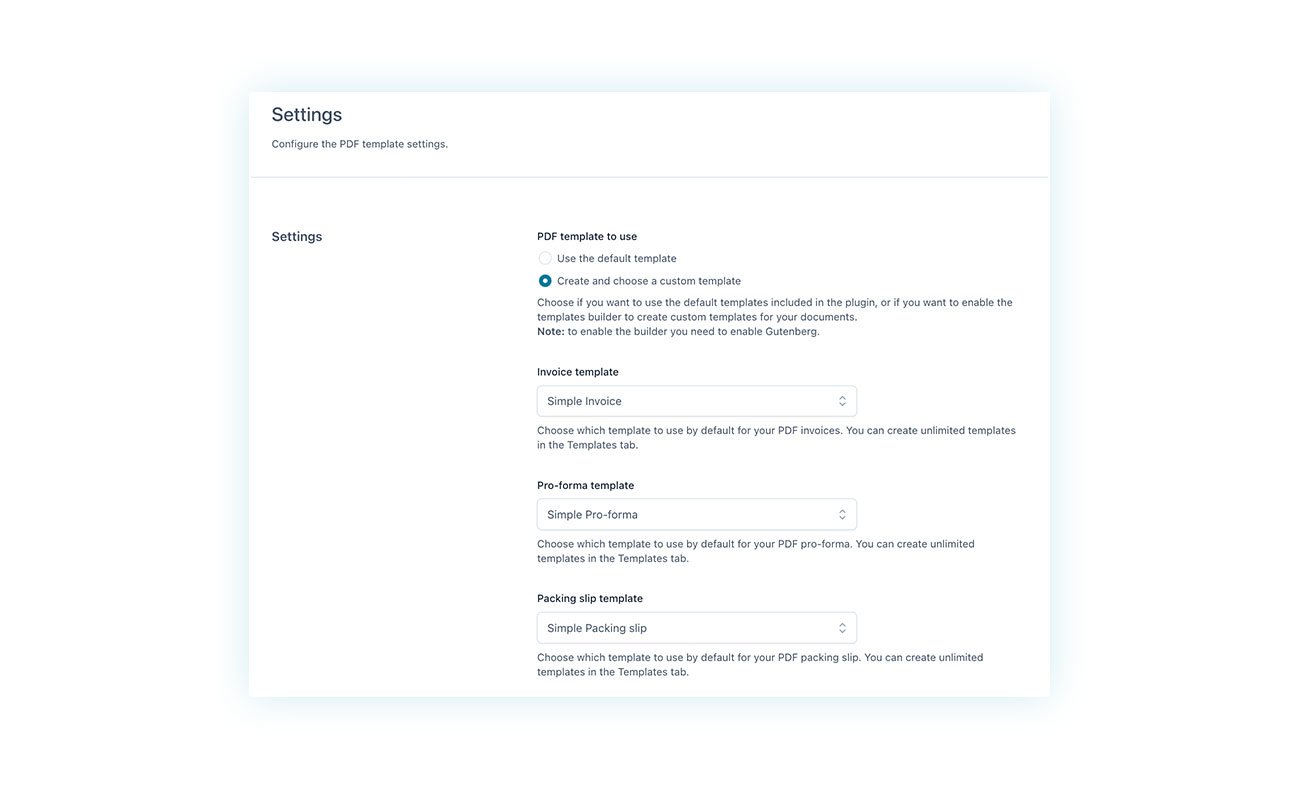
General Settings for Invoices
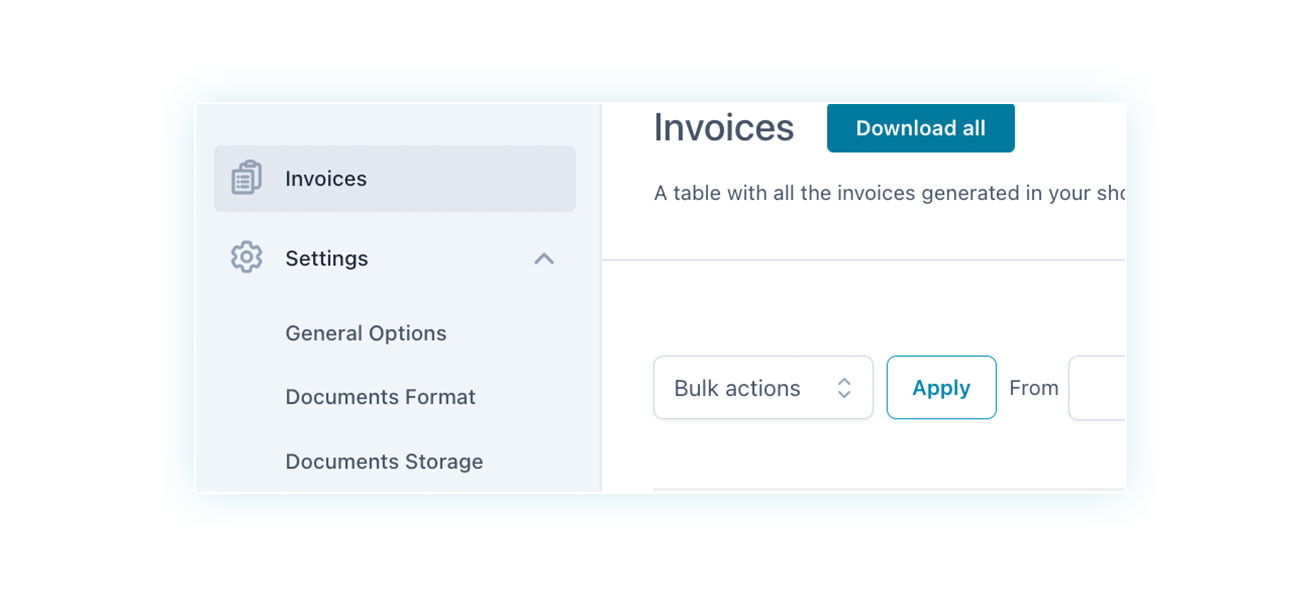
By going to Settings in the plugin’s internal menu, you will find three sections:
Let’s take a quick look at them.
General Options
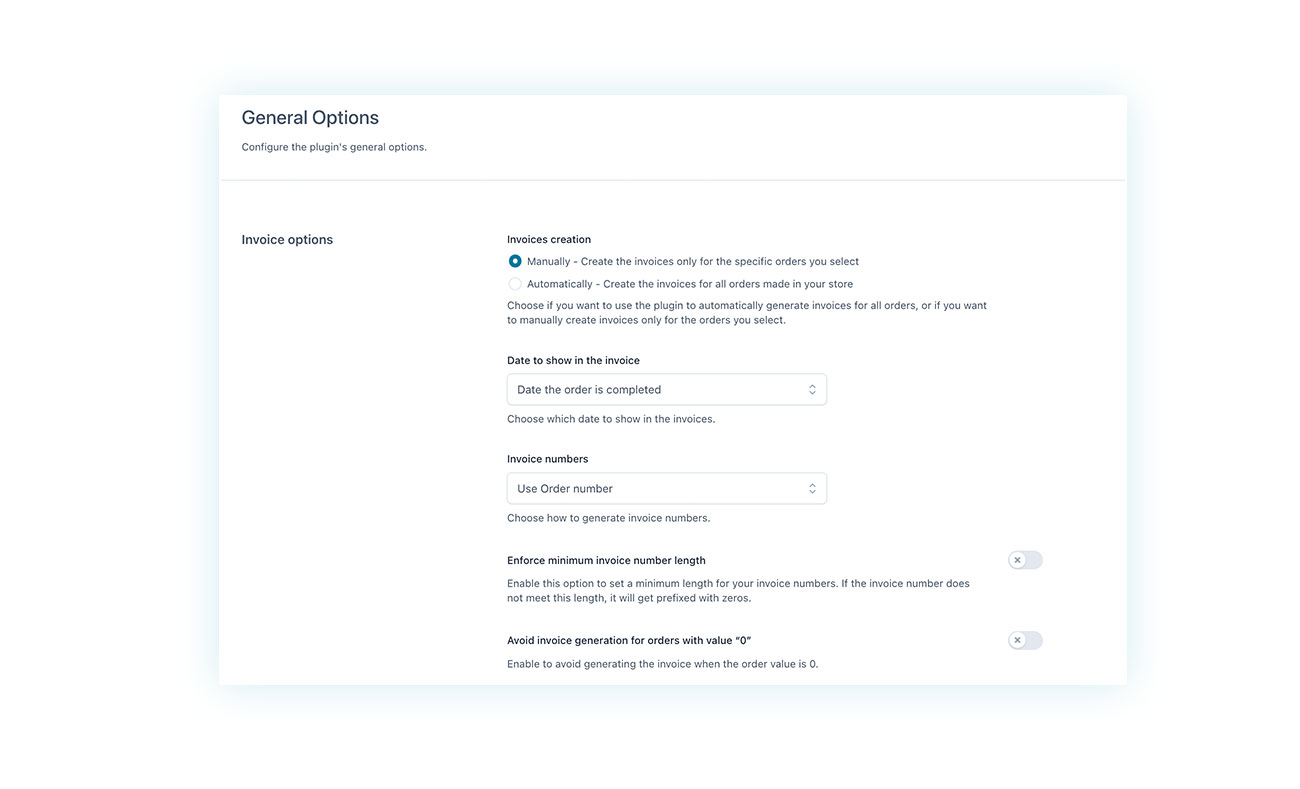
In this section, you can define the plugin’s behavior, with options such as:
- Invoice creation – You can choose whether invoices will be generated automatically for every order in the store or manually by you so you can create them only for certain orders
- Which date to show on the invoice
- How to manage invoice number generation
- How to view the generated documents
- How to manage and create receipts, proforma WooCommerce invoices, and credit notes
And much more.
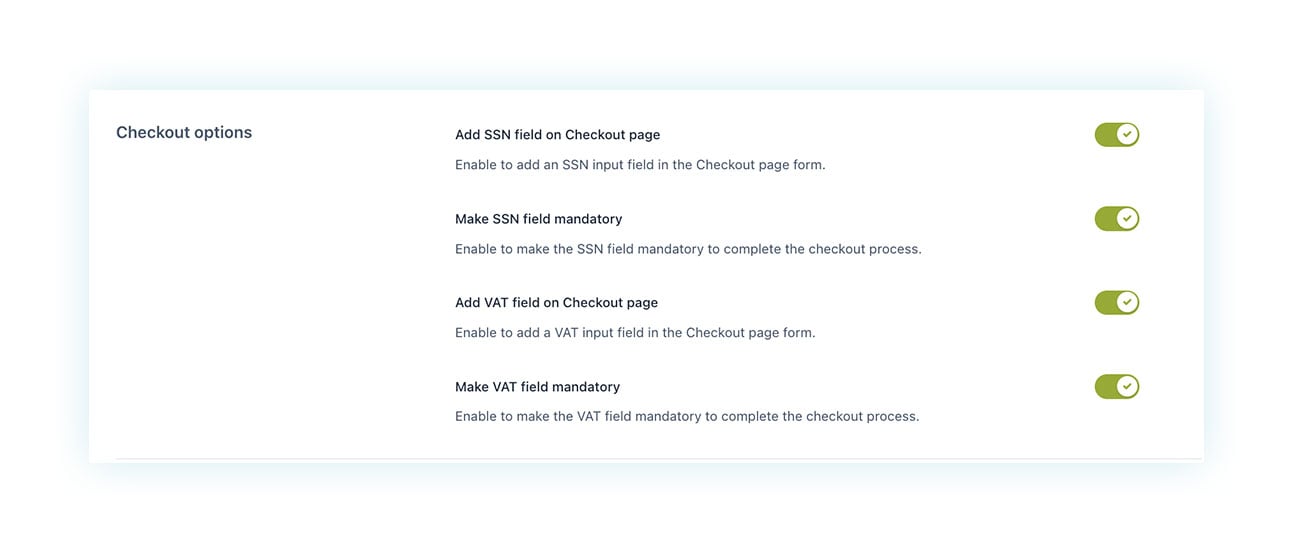
The plugin also allows you to add fields to the checkout and make them mandatory to ensure the correct completion of invoices:
Documents Format
In the second tab of the plugin settings, you can decide on the format used for the invoices:

Here you will find options to set:
- The date format
- The prefix and suffix used in the invoice numbering
- The format of the invoice number and file name
Not only that, you can also choose the format for the proforma invoices, credit notes, and packing slips.
Documents Storage
In the last tab, you can configure the document saving settings, including where invoices will be saved and whether to automatically upload them to Dropbox and/or Google Drive:
Now that we have seen all these options, let’s go over how to create your own invoice template.
Create Your WooCommerce Invoice Templates
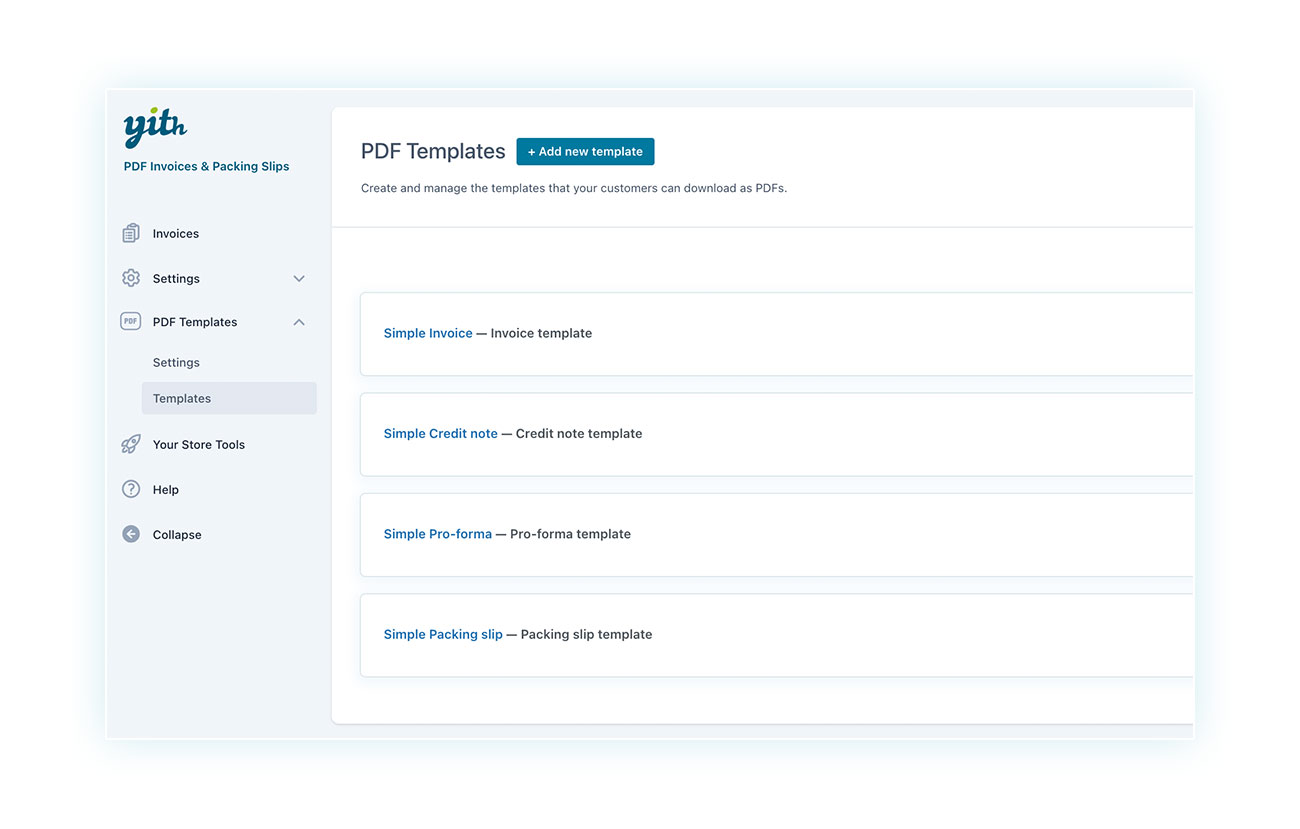
In the plugin menu, you will find the PDF Templates section which is further divided into two subsections: Settings (where you can decide which templates to use and for what, as we will see later) and Templates (where you can find all the usable templates and create new ones).
How can you create a template? Just click on “Add new template” at the top.
Use Gutenberg to Customize WooCommerce Invoices
By clicking the button at the top, you will be taken to the creation page where there’s a fully customizable block system to decide what your invoice will contain.
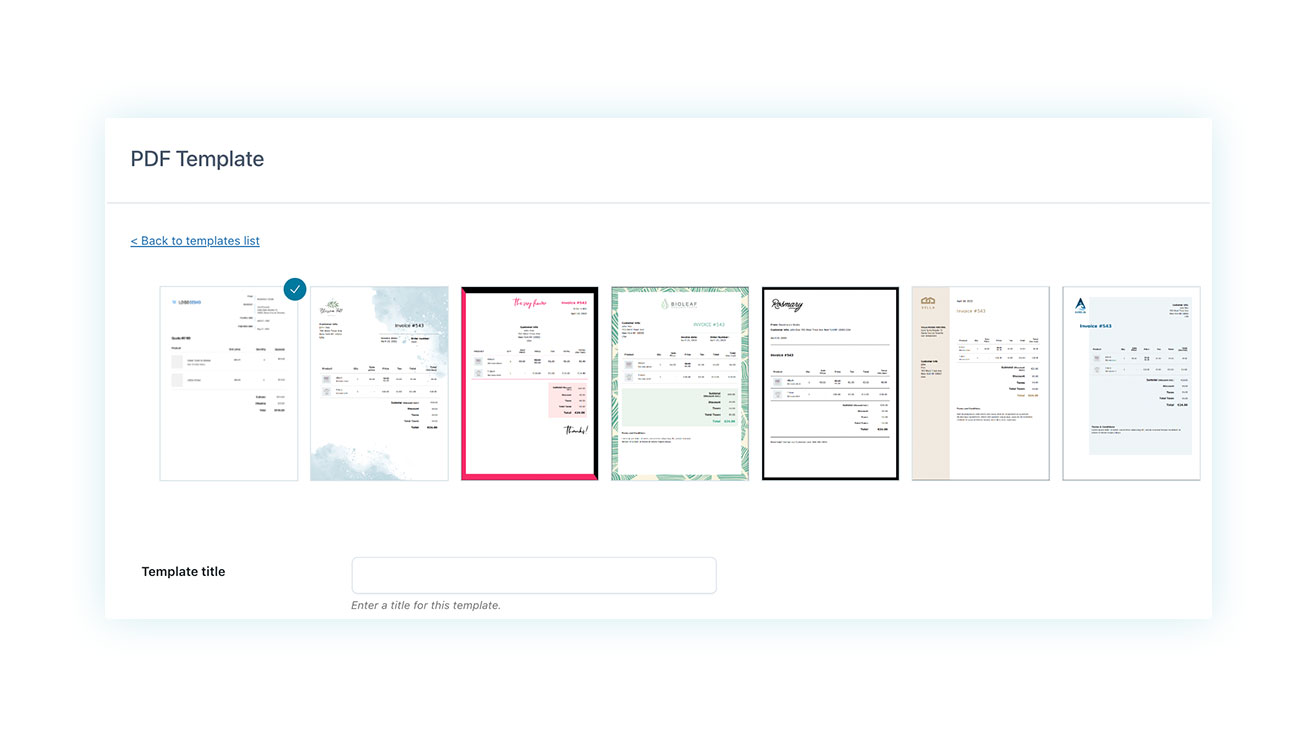
If you don’t want to start from scratch, you can choose one of the many templates already included in the plugin:
Once you’ve chosen your preferred template, you can scroll down to find its structure with each section represented by a customizable block:
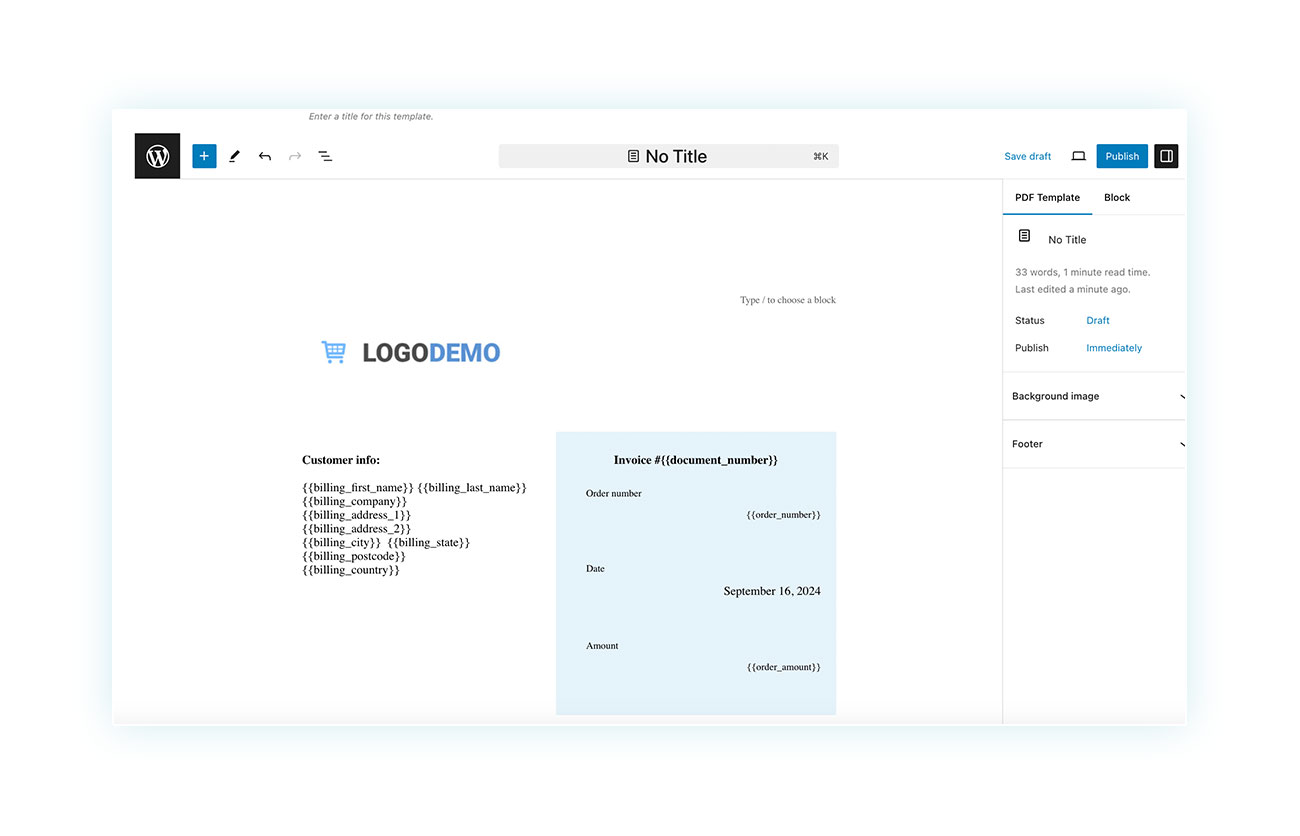
All this is done using the numerous placeholders provided by the plugin, such as:
- {{_customer_note}}
- {{_customer_user}}
- {{_order_key}}
- {{_order_currency}}
- {{_billing_first_name}}
- {{_billing_last_name}}
- {{_billing_company}}
- {{_billing_address_1}}
And many more.
Not only that, but the plugin also includes specific blocks to make the job easier:
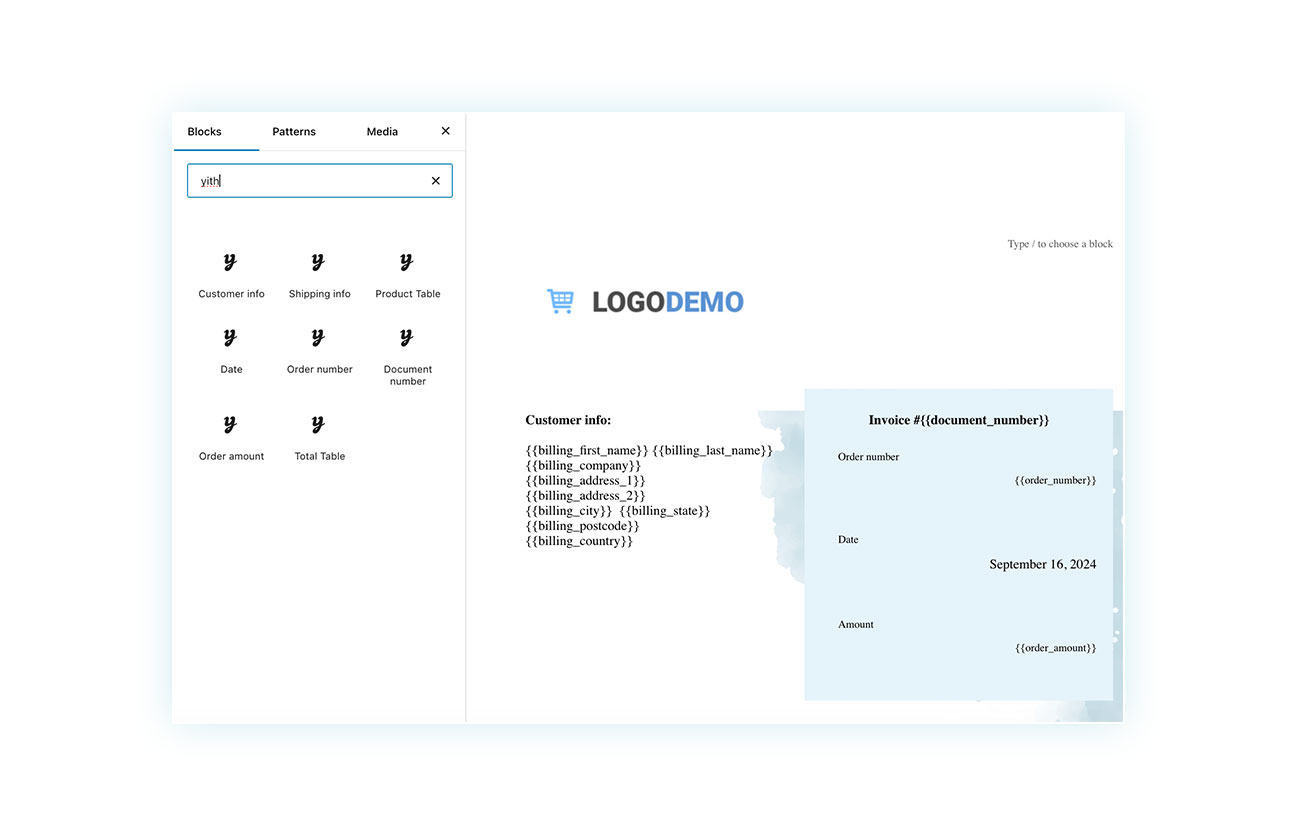
So not only do you have full freedom to include whatever you want in this invoice, but you can also do it with just a couple of clicks, without requiring any programming skills. You just need to learn how to use the placeholders we’ve seen above.
Save Invoice Templates and Use Them Wherever You Want
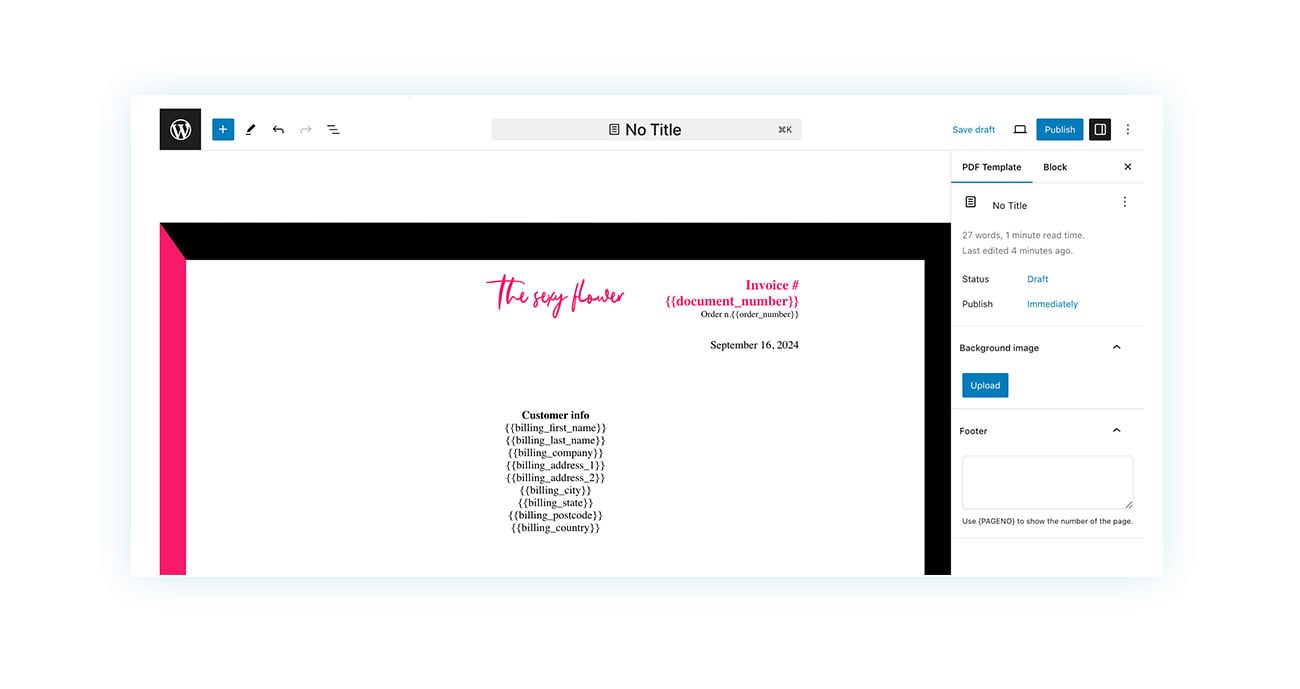
Once you’ve customized the invoice to your liking, all you need to do is give it a name to identify it and click “Publish”:
But how do you use the template you just created? It’s very simple, go back to the plugin menu > PDF Templates > Settings:
By clicking in the invoice template field, you can type in the first few letters of the name of the invoice you previously created to search for it:
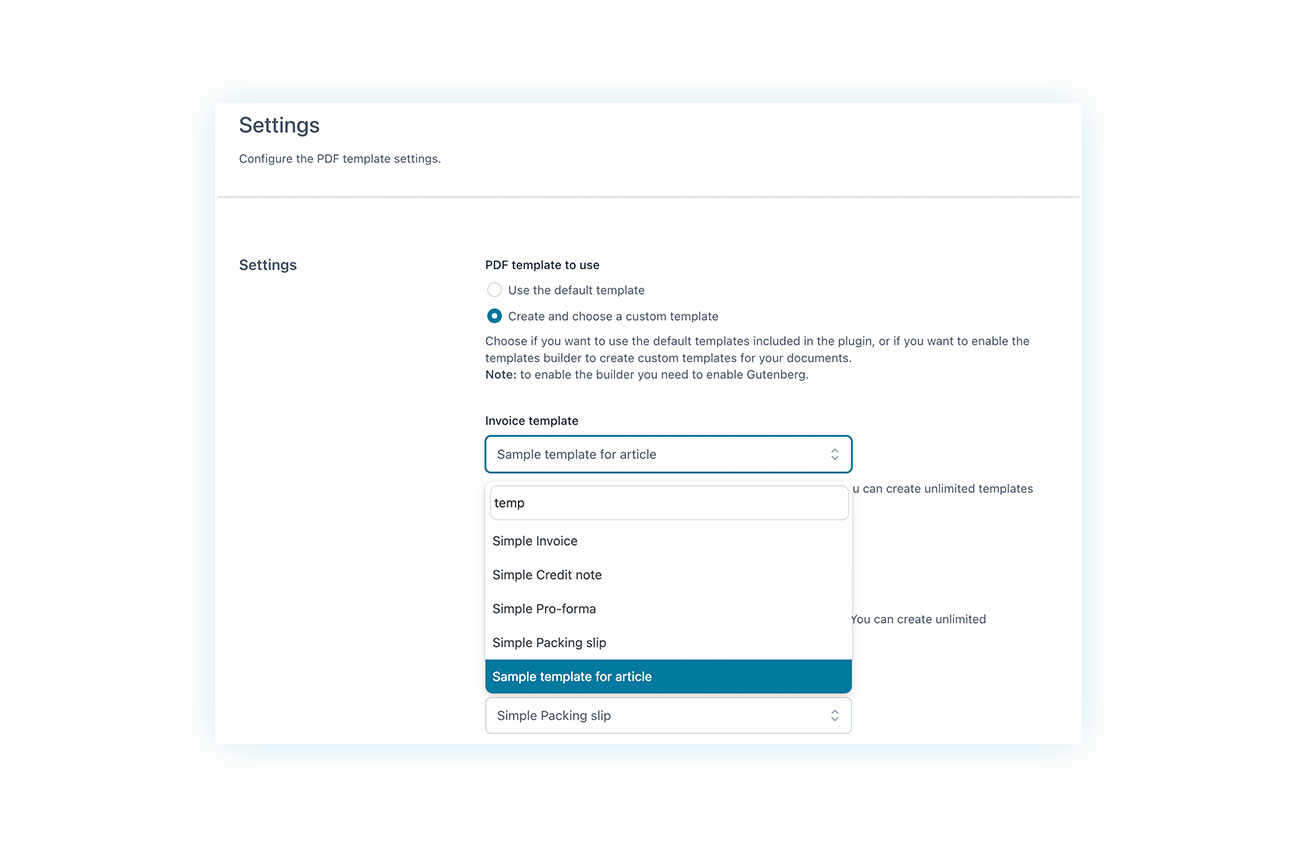
Once you click on the template and save options, it will officially be in use.
Examples of Customized Invoices for WooCommerce
As we’ve seen, you have complete freedom to include whatever information you want in your invoices, but it’s important to note that even just the visual changes offered by the plugin can make a world of difference.
This becomes evident when comparing a basic WooCommerce invoice with one generated by the plugin, both of which provide information such as the order number, products, total, and the customer’s address:
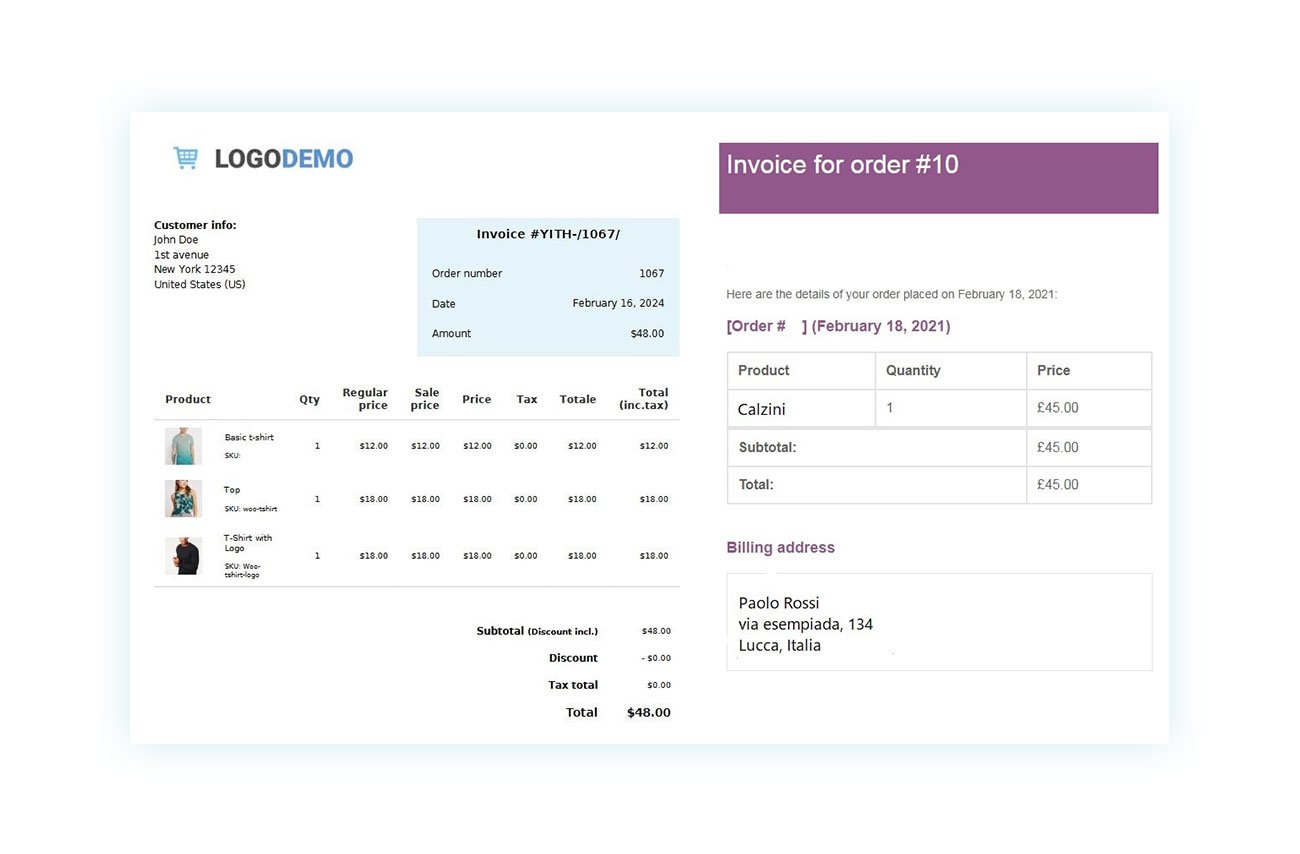
As soon as you start using the plugin, your shop will look more professional and the invoices will be easier to understand, even for the most distracted customers.
Conclusion
Don’t settle for the invoices created by the basic version of WooCommerce. Although this is an essential and appreciated feature, it is often insufficient for a successful business. Customize your invoices to ensure they are accurate, contain all the necessary information, comply with the law, and project a more professional image of your business. Look no further, this can all be done with WooCommerce PDF Invoices & Packing Slips.