Welcome back to this chapter in the guide about a correct WooCommerce installation and configuration.
In the previous chapter we have seen how to edit the email template for emails that are automatically sent by WooCommerce to users and managers, according to and changes in the order status and many other factors.
As I’ve mentioned before, in orde to customize the body of the email a certain degree of knowledge of PHP coding is required, and many customers don’t have that, which is why we won’t talk about this type of customization.
But if I can’t edit the body of the email, then what are you free to do within your store?
This content is pre-set, so this tool grants you the freedom of customizing email templates and each single one of their features.
Since we studied the template in our previous article, today we are going to see the fields that we can edit in each email:

In order to customize a single email, click the gear icon you find on its left.
A new screen will open, displaying the option screen of that specific email:

Let’s see in detail what each field is about and what we should fill them with:
Enable/Disable
The first option we encounter is Enable/Disable which allows us to activate or deactivate this notification for a specific state of the order (in this case Order Completed).
Subject
Then we find Subject which allows us to set up tue subject of the email (I don’t need to tell you that this field is particularly important as it will be the first thing customers are going to see when they receive this email, together with the sender name), as you can see you can use tags as {site_title} to automatically insert the website name and order number.
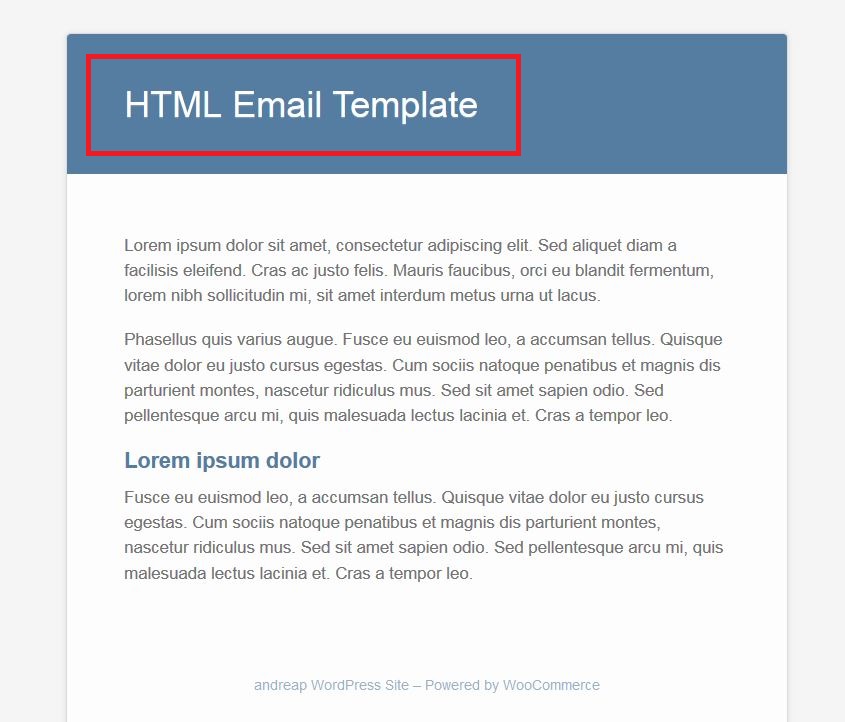
Email Heading
The third and last option is the Email Heading, where we can decide what to insert in the email header, meaning the one that is going do appear here:
Now let’s move on to the options that we will find on this page:
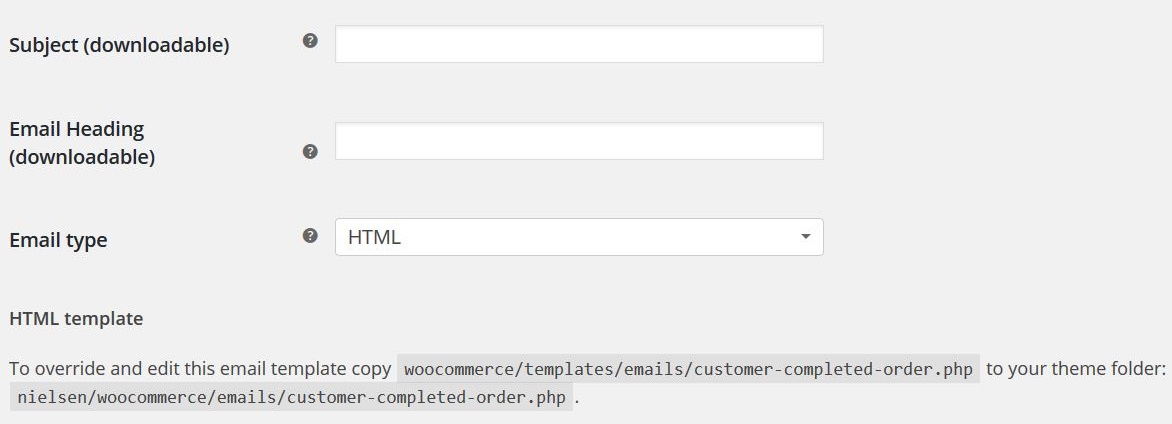
Subject (downloadable) and Email Heading (downloadable)
The first two options are exactly the same as the two previous ones, Subject and Email Heading, but in this case they are specific to downloadable products, as they require a different message.
Email type
Then you can choose the email type from:
- HTML – Emails will have a simple kind of graphics, based on HTML code, with images and an overall look that resembles a website.
- PLAIN TEXT – Emails contain only text with no formatting and no graphics.
- MULTIPART – Both email formats are sent, then the service or email reading software of the recipient will choose which one to display.
And this was the last piece of information in this guide for the general WooComemrce settings, but we are not done just yet! See you in the next article!