In a previous guide, we learned how to properly configure the general settings of our WooCommerce based e-commerce store. We added information about the store address, general options, and currency options.
However, a store is useless without products. In this essential guide, we are going to show you how to configure the general options for products in your WooCommerce-based store. To do this, head over to WooCommerce > Settings > Products. In there you’ll find 3 parts: General, Inventory, and Downloadable products.
1. General
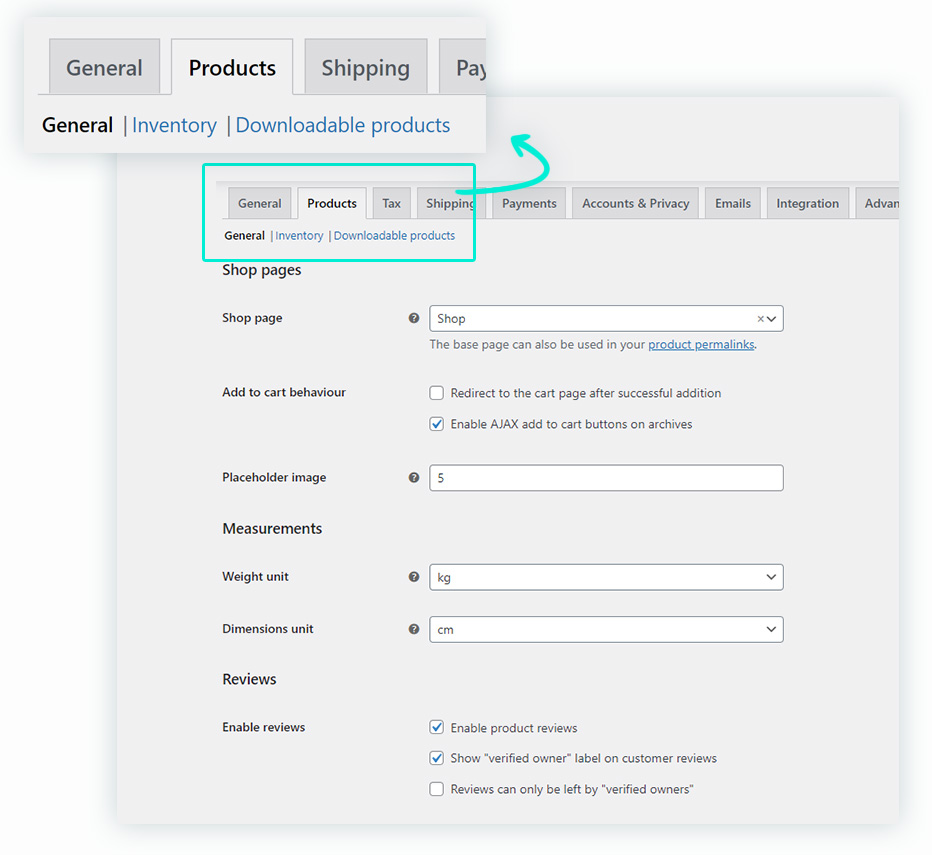
In the General part, there are three sections: Shop Pages, Measurements, and Reviews. Let’s start with the first one.
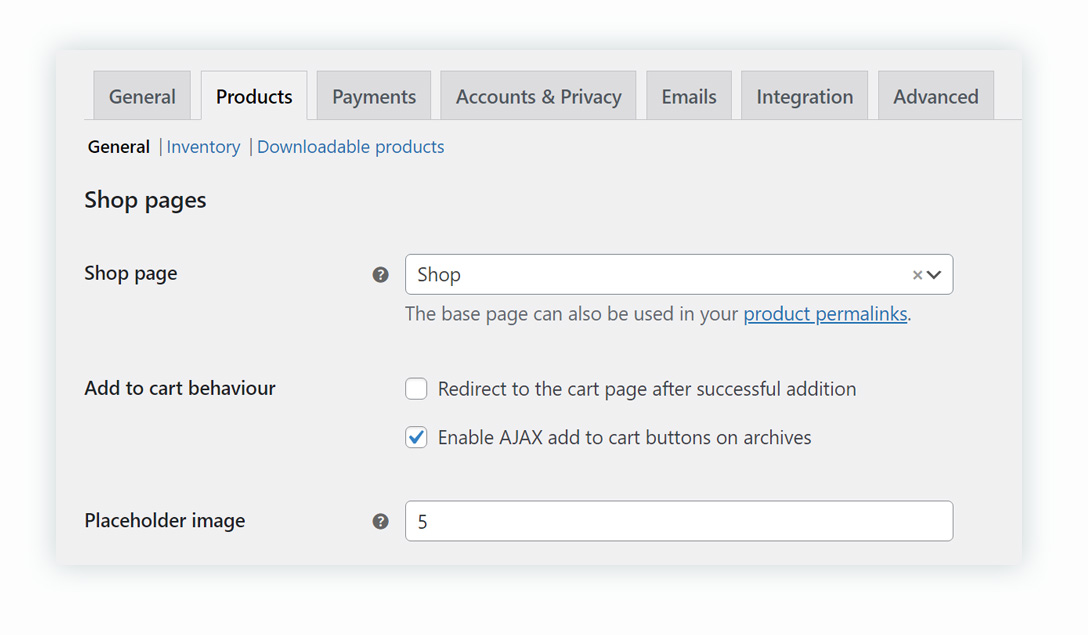
Let’s take a look at each of these settings individually, starting with Shop Pages:
- Shop Page – With this option we set the base page of our store, where the product archive will be.
- Add to cart behavior – Here we find two options: a) redirect to cart page after successful addition, b) and Enable AJAX to add to cart buttons on archives. We can choose both of them without any problem.
- Placeholder Image – The attachment ID, or image URL, used for placeholder images in the product catalog. Products without an image will use this.
Now that we know the options on the store page, let’s move on to the Measurements, which is essential to calculate the shipping fees.
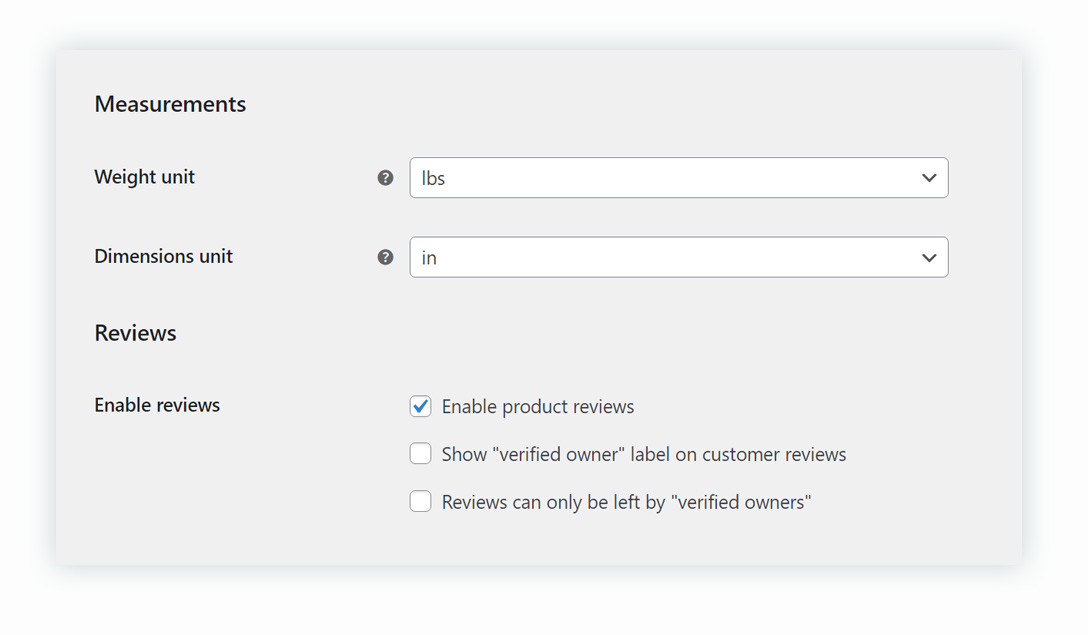
- Weight Unit – Indicates the unit of measurement used to display the weight of the item (kg/g/lbs/oz).
- Dimensions Unit – Indicates the unit of measurement used to display the size of the item (m/cm/mm/in/yd).
We can now check the Reviews section, in which your settings will define the reviews displayed on your website:
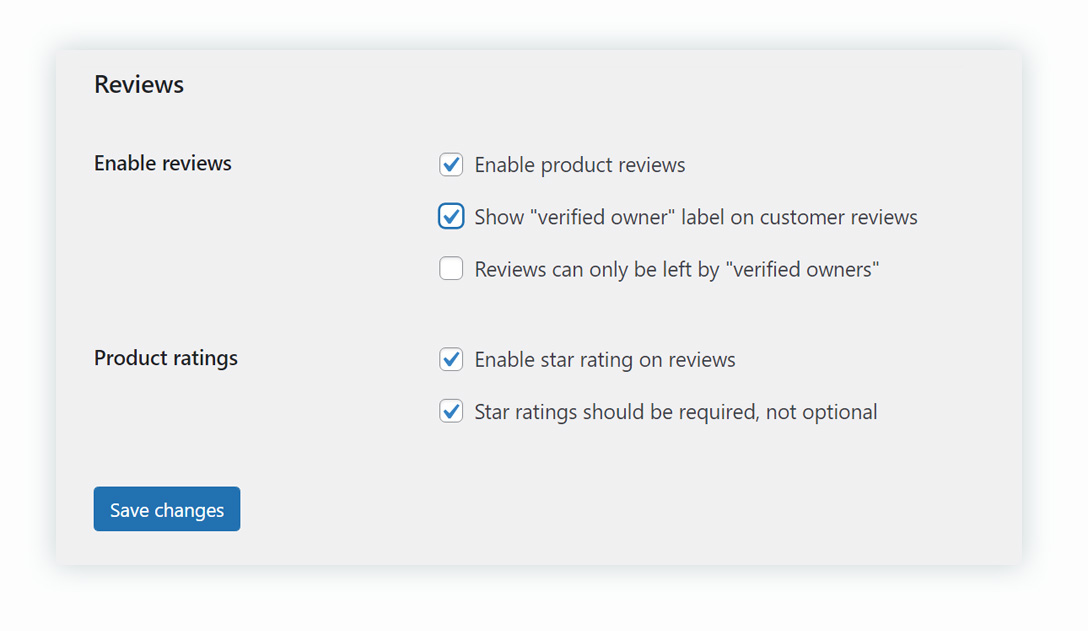
Here we will find two options with different subsections:
- Enable reviews – We can select different options:
-Enable product reviews – Allows the option to leave a rating within a review, from a one to the five-star system.
-Show “verified owner” label on customer reviews – Displays whether or not the review writer has bought the item.
-Reviews can only be left by “verified owners” – Allows only genuine buyers to review the products.
- Product ratings – Here we can select two options:
-Enable star ratings on reviews.
-Star ratings should be required, not optional – Customers are bound to leave a rating when they write an item review.
2. Inventory
In this subsection, you will find the inventory options.
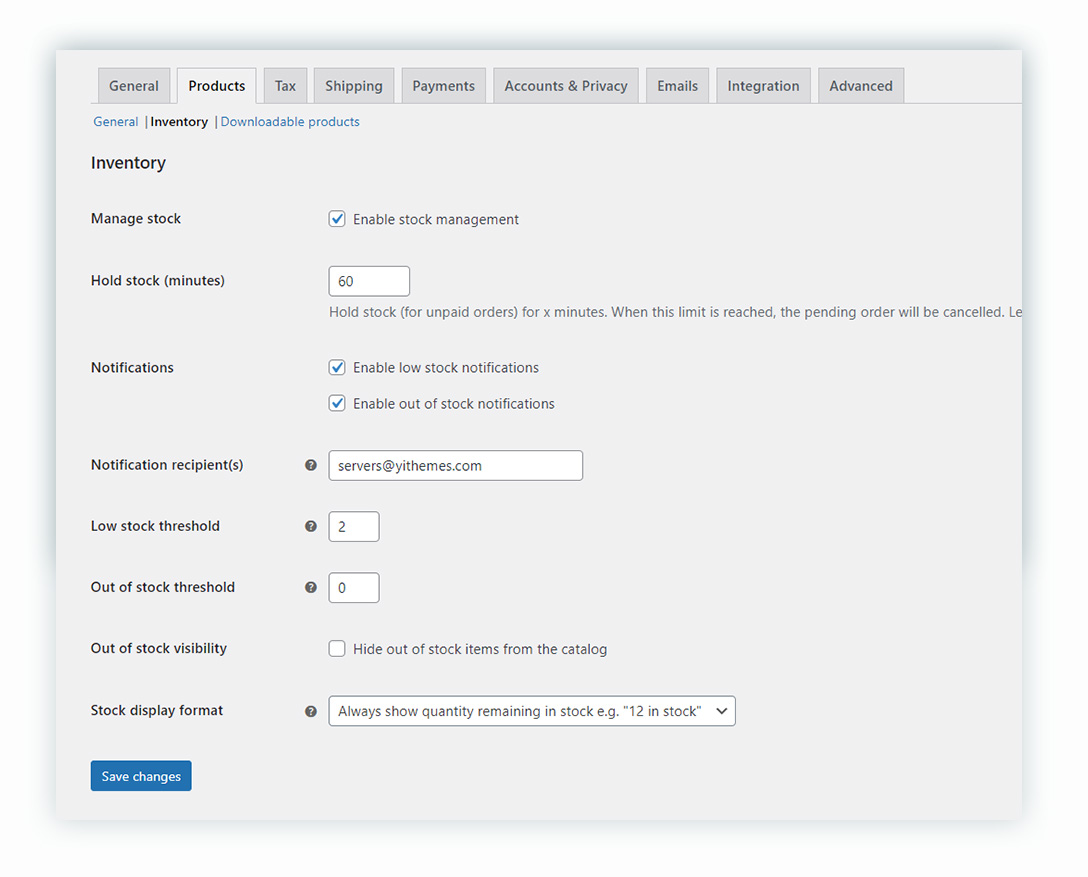
- Manage stock – Here you can activate the inventory management.
- Hold stock (minutes) – Here we specify the time to keep the inventory (backorders). When this limit is reached, the pending order will be canceled. To disable it, just leave blank.
- Notifications – There are two options: enable low stock notifications and enable out-of-stock notifications. We can select both, one or neither.
- Notification recipient(s) – To place the mail of the recipients of notifications. It can be an email account or several. If they are more than one, they must be written in the same box separated by commas.
- Low stock threshold – When product stock reaches this amount you will be notified via email.
- Out of stock threshold – When product stock reaches this amount the stock status will change to “out of stock” and you will be notified via email. This setting does not affect existing “in stock” products.
- Out-of-stock visibility – This option allows you to hide or display out-of-stock items from the catalog.
- Stock display format – This option controls how stock quantities are displayed on the front end. You can choose from three options: a) always show quantity remaining in stock, b) only show quantity remaining in stock when low, or c) never show quantity remaining in stock.
3. Downloadable products
The last section we need to learn more about is the Downloadable Products section, but only if you intend to make use of downloads:

- File download method – Forcing downloads will keep URLs hidden, but some servers may serve large files unreliably. You can choose from three options: a) Force downloads, b) X-Accel-Redirect / X-Sendfile, or c) Redirect only (insecure).
- Access restriction – Here we can find two different options: downloads require login (this setting does not apply to guest purchases), and grant access to downloadable products after payment. The latter option is enabled to grant access to downloads when orders are “processing”, instead of “completed”. You can select both options, one or neither.
- Filename – Here you can append a unique string to filename for security, not required if your download directory is protected.
Display:
Previously we could find another section inside WooCommerce > Settings > Products. This was called Display. Now this can be found in Appearance > Customize > WooCommerce > Product Images.
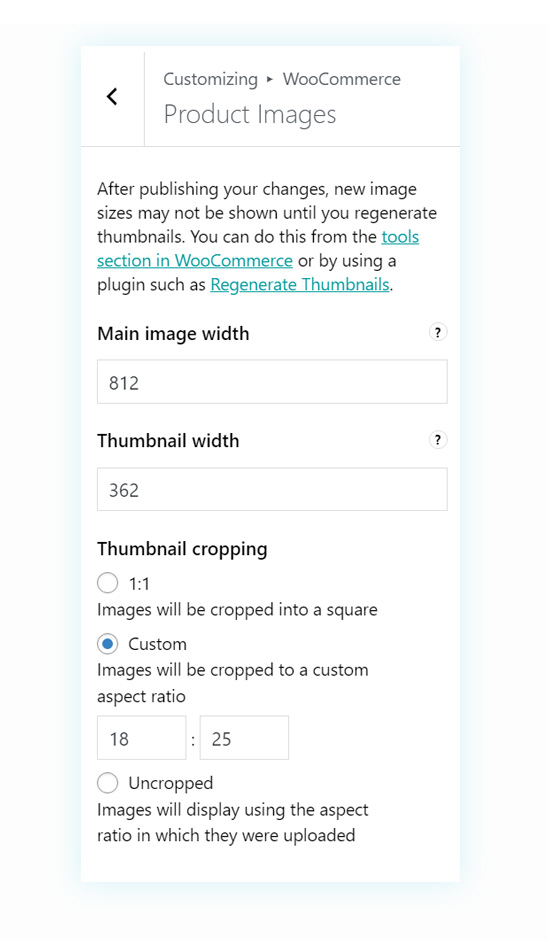
There we will find the following options:
- Main image width – Image size used for the main image on single product pages. These will remain uncropped.
- Thumbnail width – Image size used for products in the catalog.
- Thumbnail cropping – There are three sizes: 1:1 (images will be cropped into a square), custom, and uncropped.
Once we have all this part configured the way we want, don’t forget to save the changes! In the next guide, we will look at the general store and product page settings.