In previous tutorials, we were able to learn the procedure of installing a theme on your WooCommerce store. Next, is to configure your store’s general options.
To better understand how to do this correctly, let’s look at a practical example. In the following settings, we are going to set some choices in order to create an e-commerce store that:
- Is based in Spain but sells worldwide
- Uses the dollar ($) currency to sell its products
- Sells fashion for women and men – we can use the classic Proteo demo store
Once we clearly have in mind what kind of e-commerce store we want to create, let’s proceed with your store configuration by selecting WooCommerce > Settings in the main menu. We find three different sections: Store Address, General options and Currency options.
These settings are important to get right as it can affect shipping and tax rules, or the way currencies are displayed.
Let’s start with the first section: Store Address. In this space, we must include the information of where our business is located. This way, tax rates and shipping rates will use this address.
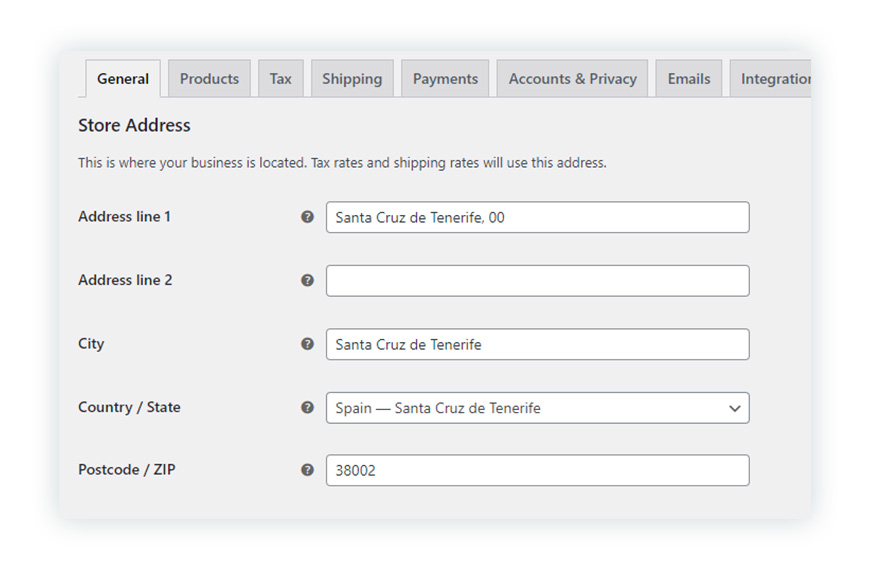
Let’s go through the most important elements on this list one by one:
- Address line – This is the physical location of your store (the tax qualification is based on the laws of this country). Here you would have to put the address of your store, even if you only sell digital products online, it is important to have this for GDPR and transparency.
- City – City where your store is located.
- Country/State – Country where your store is located. In my case I chose ‘Spain’ as a country and ‘Santa Cruz de Tenerife’ as an autonomous community.
- Postcode/ZIP – Postal code of your store.
The second section contains the general options.
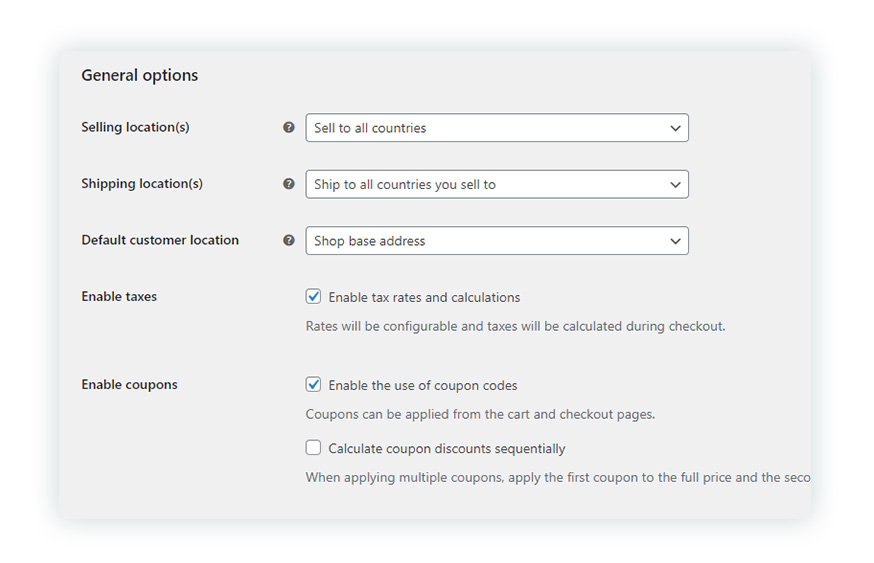
In this section, we find the following elements:
- Selling location – This parameter allows you to choose whether to sell worldwide or limit your sales to selected countries.
- Shipping location – This parameter allows you to choose between selling worldwide or limiting your sales to selected countries.
- Default customer location – In the default customer location we select ‘Geolocate’.
In addition, we can also enable two options to activate taxes and activate coupons, the latter with two subsections to activate the use of coupon codes and calculate coupon discounts sequentially.
Remember this section in case you don’t want to use coupons from the start, but later on you might want to.
Once we finish with the general options, we can fill in the currency options, options that affect how prices are displayed in the store.
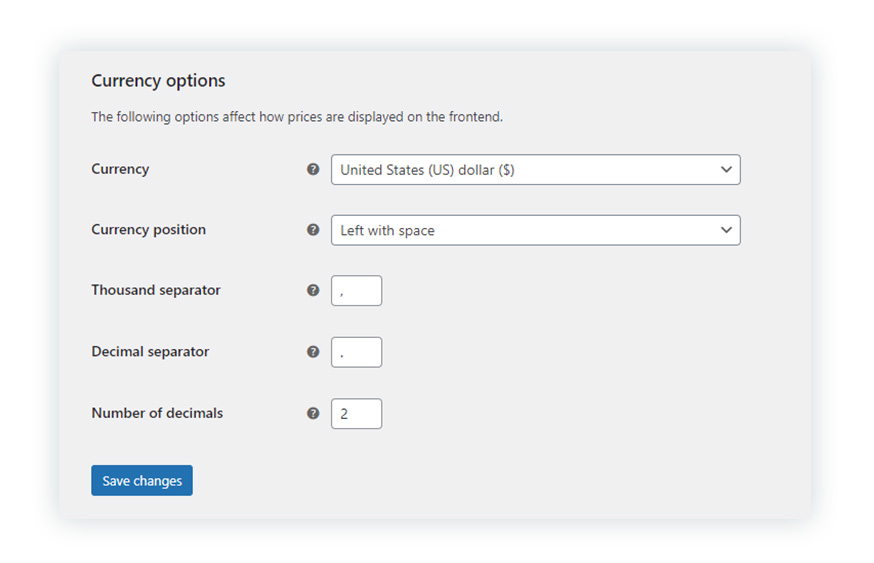
Here we find more options:
- Currency – The default currency used by your store that will be displayed on your prices and used for payments.
- Currency Position – Shows the position of the currency symbol (left or right) and whether or not it needs to be preceded by a space.
- Thousand Separator – The punctuation mark used to separate the thousand, in our case it’s a comma.
- Decimal Separator – The punctuation mark used to separate the decimals, in our case it’s a dot.
- Number of Decimals – The number of decimals that follows the integer, in our case it shows up to the hundredth.
You will only have to save the changes at the bottom left, something you should never forget to avoid losing the changes made, and that’s it! In a few steps, we have configured the general options of our WooCommerce based store. The next part of the WooCommerce Guide is: WooCommerce: How to properly configure the product options in general settings.