The great part of online stores is that, as customers, we have a much wider choice than the one we would have in the store next door.
We can chose from a wide range of sizes, colors, models… but we still have one limitation: say I don’t like a certain design, logo or artwork and I wish to use one of my own.
Well, this is something that, as vendors, we can offer our customers just like we would in a real life store.
There are many advantages in offering a customization service for the products you sell, first of all the chance of spreading the word about your store to the huge customer pool potentially interested to a customized item (companies, events, presents etc…) and if you are wondering “How can I offer a service like this in my e-commerce store?” then you are in the right place.
In this tutorial you are going to find out how to easily implement this kind of service on your WooCommerce based store thanks to a simple plugin.
Required Plugin:
Plugin Configuration
This plugin allows you to set up additional fields within the product page, that will be used to offer extra services.
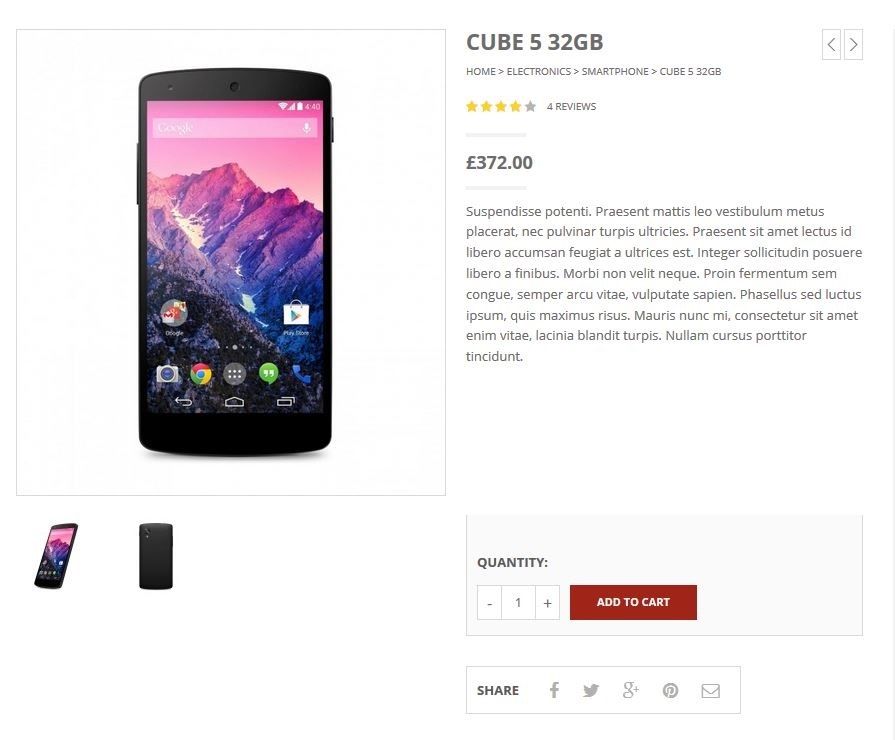
Any product can offer a customization service, that’s why in this tutorial I’m going to use the example of a “Smartphone CUBE 5” with the following features:
- The chance to choose the amount of memory
- The chance to choose a custom case color
- The chance to apply a custom logo to it
The fist thing you need to do is to create a “Smartphone” product in your WooCommerce store, just like you would with any other product in our store.
Once the product is created, it’s going to look like this:
Now you need to add a customization service.
Once the plugin is installed and activated, go to YITH Plugin > YITH WooCommerce Advanced Product Options and you will find the plugin’s general options:
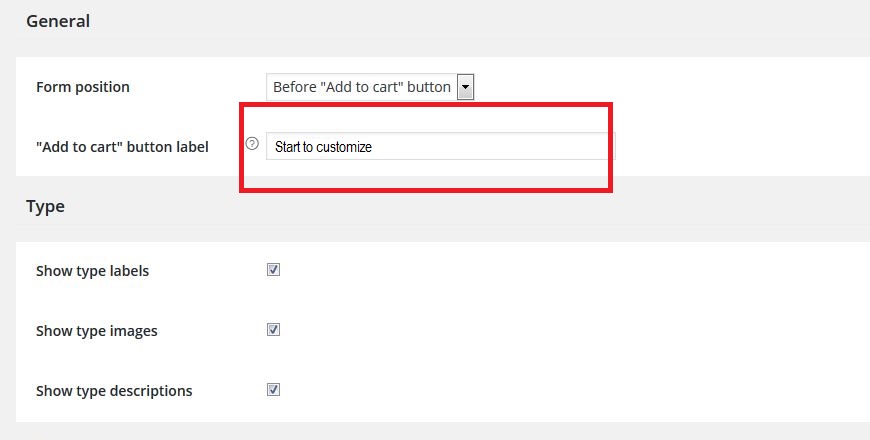
In here you can set the general options, specifically:
- Where you want to display the extra options, whether before the “Add to Cart“ button, in the example or later. In this tutorial they will be displayed afterwards so I’m going to pick “After Add to cart button”
- You may also customize the “Add to cart” button text in the store, to indicate which products are customizable
- What to display in the customization options: title, images and description.
Once you have configured these options, you can move on to the second tab, “Variations”:
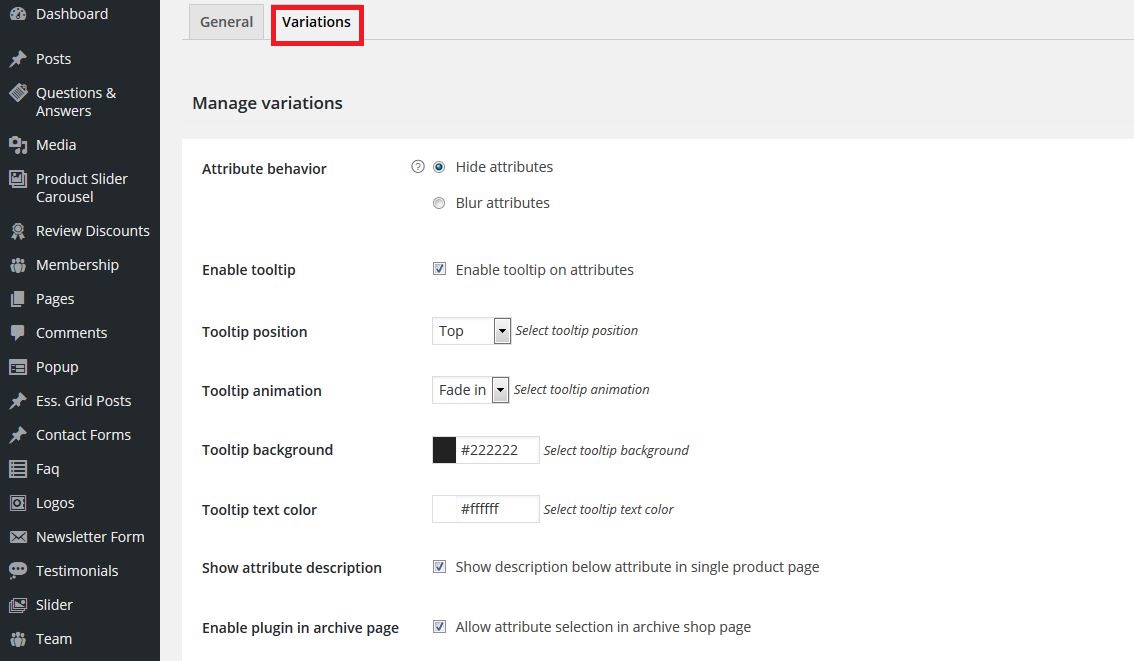
In this section you will find other settings, including those regarding the aspect of the tooltip of each feature in the product page.
At this point you should have a clear idea about the product you intend to sell and what kind of customization you want to offer.
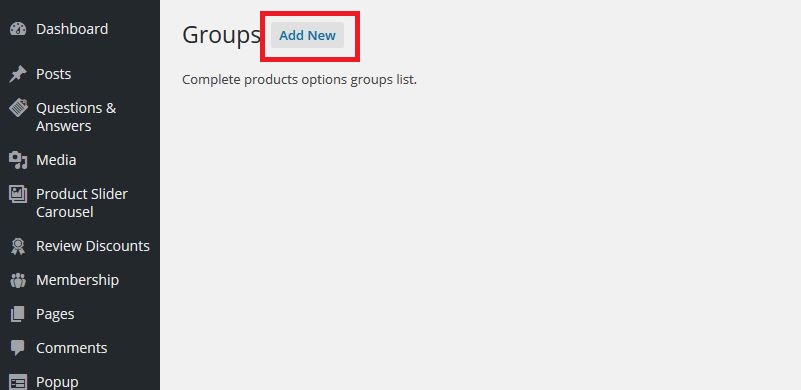
So let’s create the rules of your customization service now, by going to Products > YITH WooCommerce Advanced Product Options > Add Group:
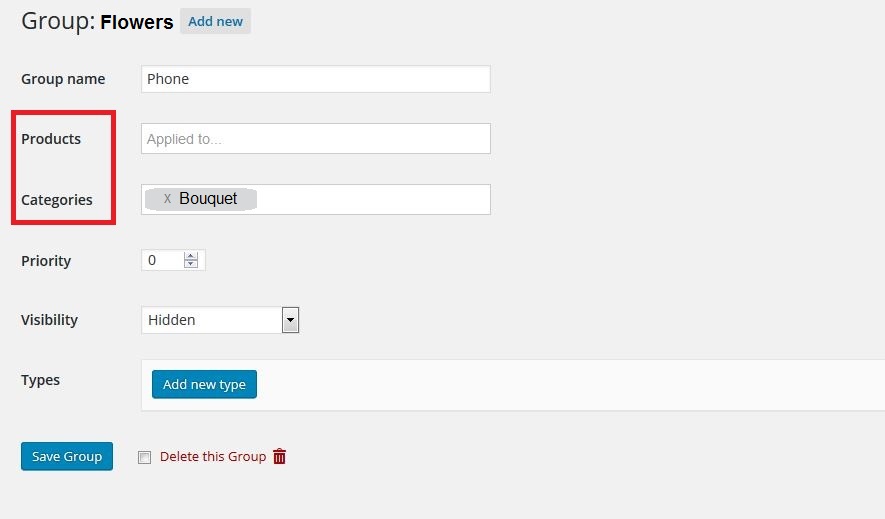
Let’s create a group and call it “Phone” and then you can decide if you wish to apply the rules you created to single products or whole categories (this is particularly useful in case you wish to create one single range of products with customization options):
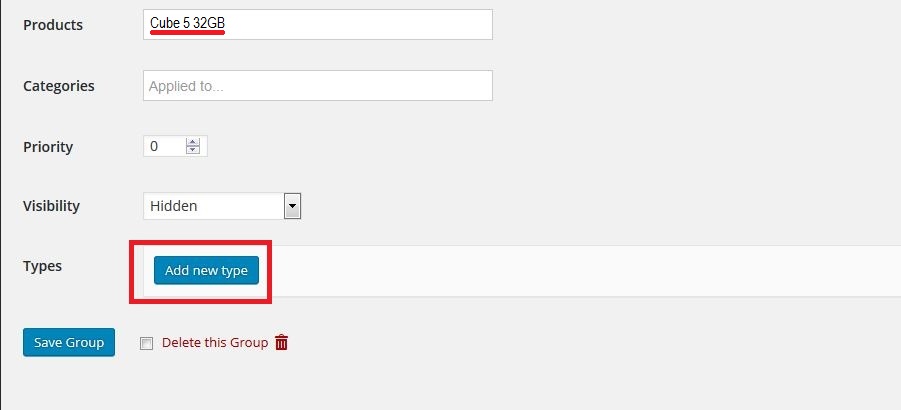
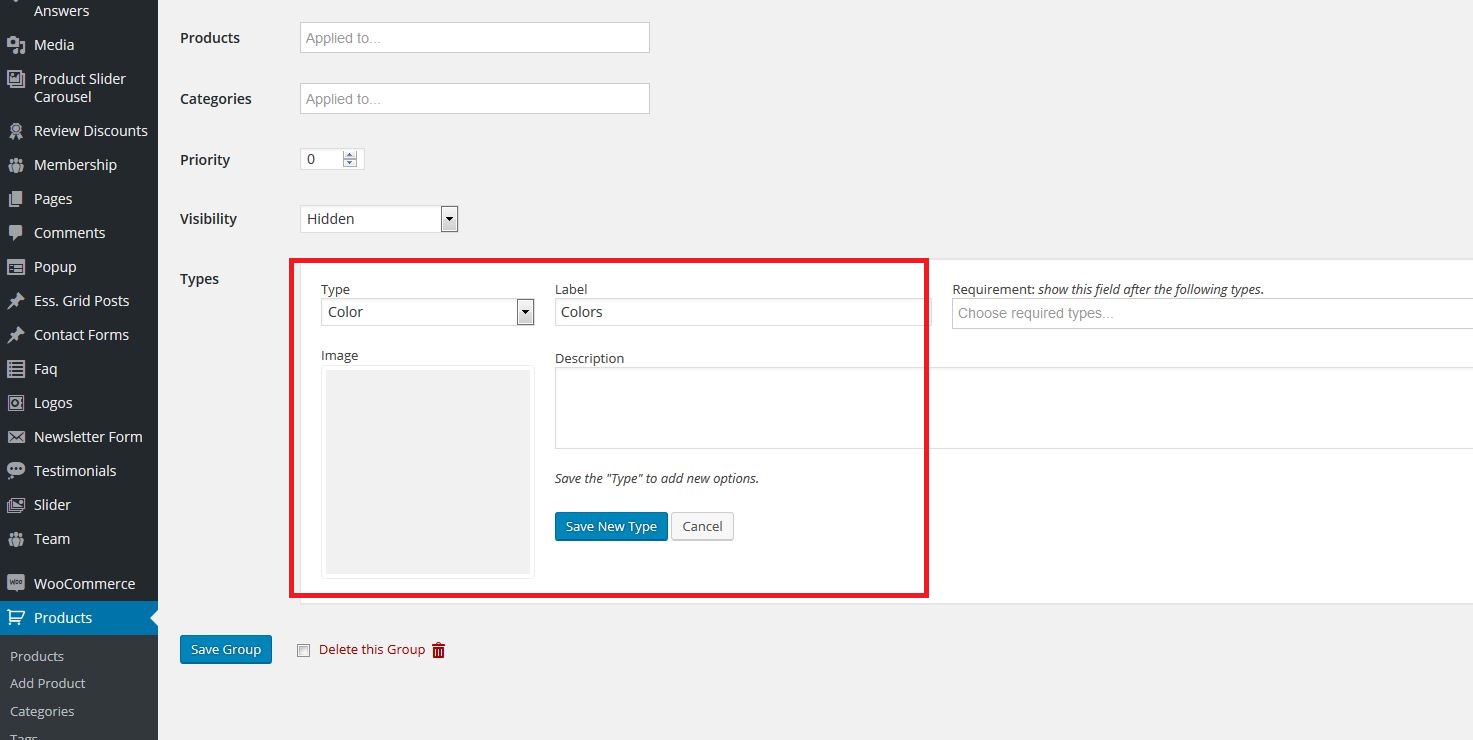
Now let’s add the product you wish to offer your customization service for and let’s create its customization options by clicking on Add new Type:
As you can see, you are free to create the kind of customization you wish to offer:
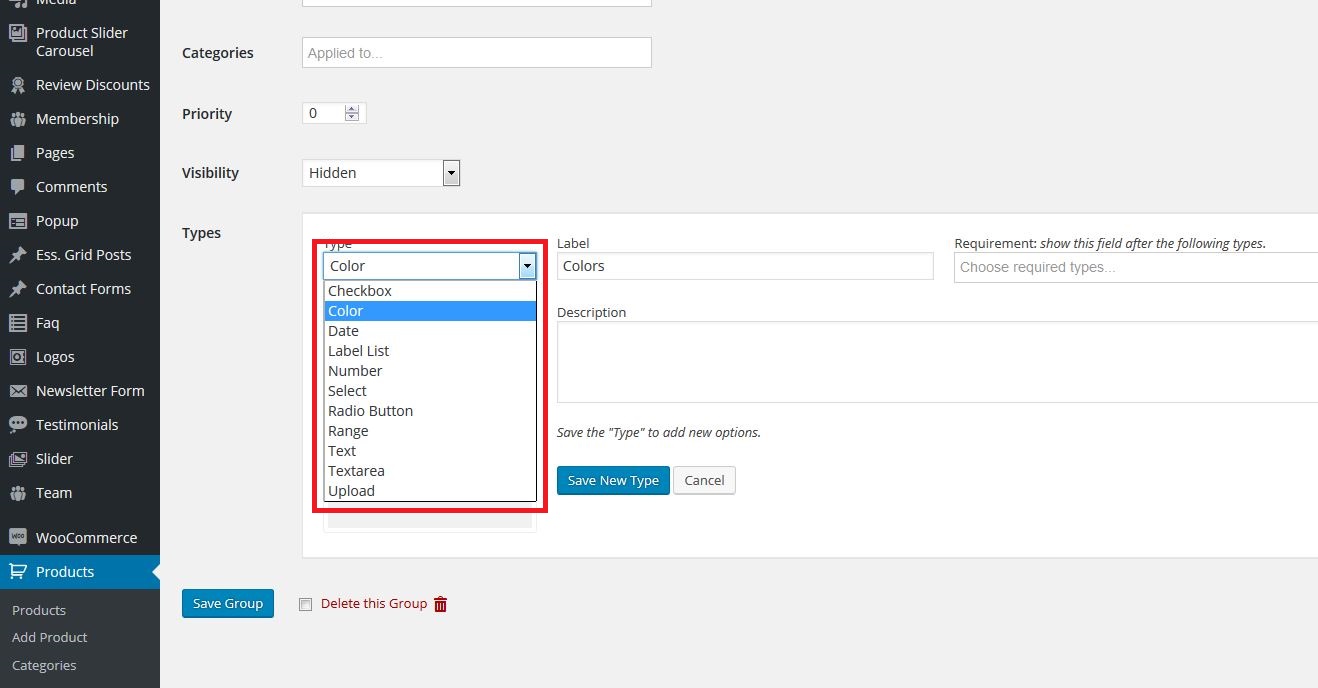
Before setting the variation options, you need to decide how they are going to be displayed to customers. In this tutorial I’m going to set the three different memories as always visible and hide the other options under a checkbox that needs to be checked in order to reveal them.
Let’s set up the three different sized memories.
- Memory size
In order to set up the choice between different sized memories, you need yo create a “labels” field in which you will enter the related options and their prices:

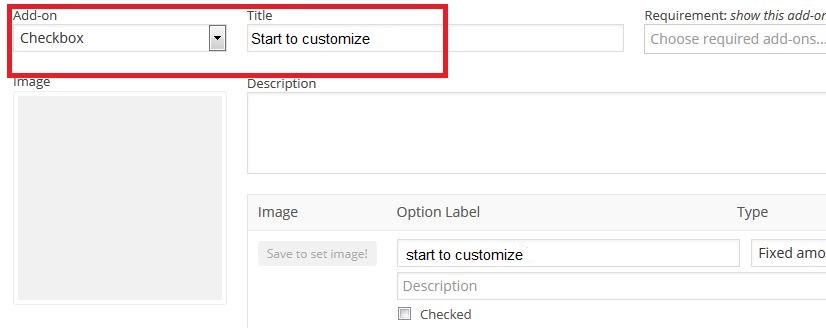
Now insert the checkbox and assign a specific name to it (in my case “start to customize”):
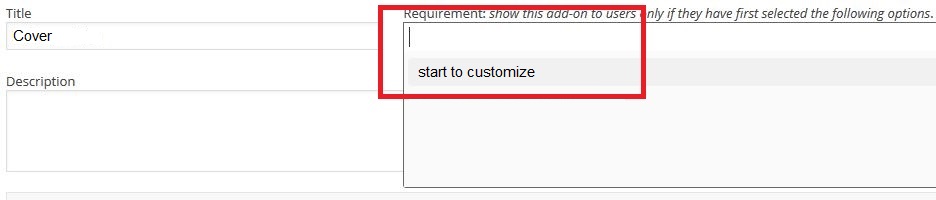
Now you can insert the other variations, carefully inserting “Start to customize” (or however you called it) in “Requirement”, by doing this these options will be visible only if the checkbox is checked:
As I’ve stated at the beginning of this tutorial, I wish to offer the chance to customize the color of the cover and offer the customers the chance to apply their own logos to it.
So let’s start with the color and create a rule for it:
As you can see you can customize the label, description and the image for this kind of customization. Once you have done this, you can also add more choices and assign a price to each:

Now let’s allow users to customize their product using artwork of their own, by using this WooCommerce plugin “Upload” function:
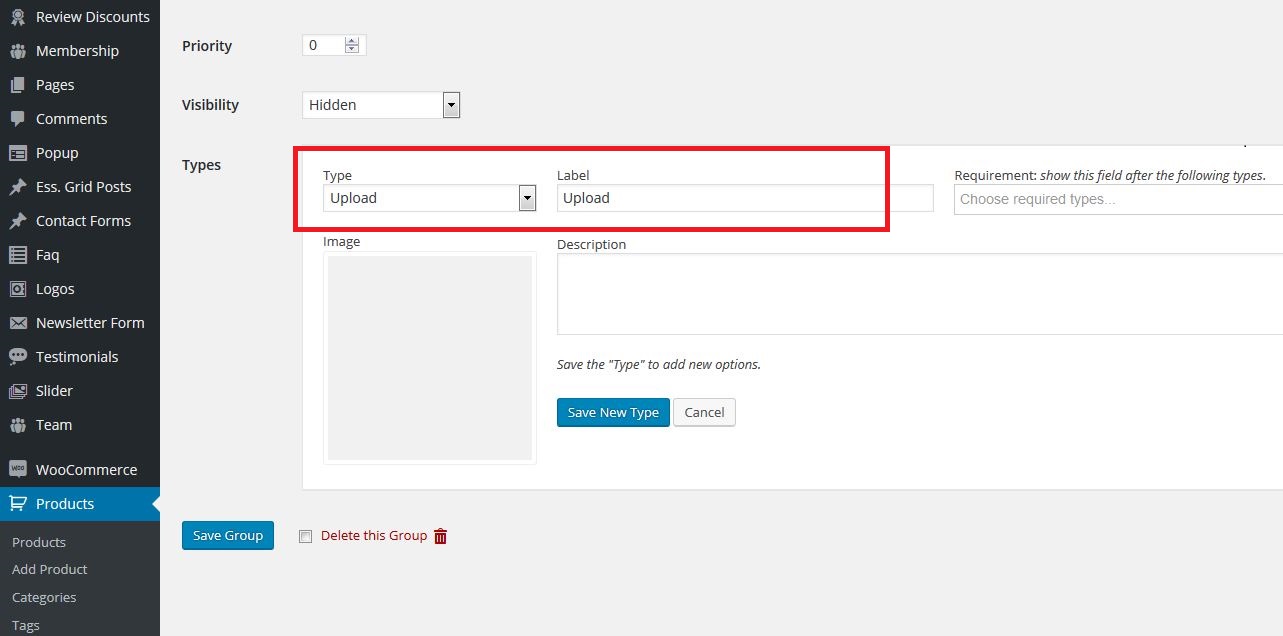
As you did before, you are going to create every possible choice and assign them a price first.
IMPORTANT: Remember to change the visibility option of the group from Hidden to Public once you are done, or your settings are not going to be displayed for this product.
Once these parameters are set and their options are saved, these customization options are going to appear in the product page.
As you can see, the size of the memory cards is still visible, while to access the other customization options, customers need to click on the checkbox:
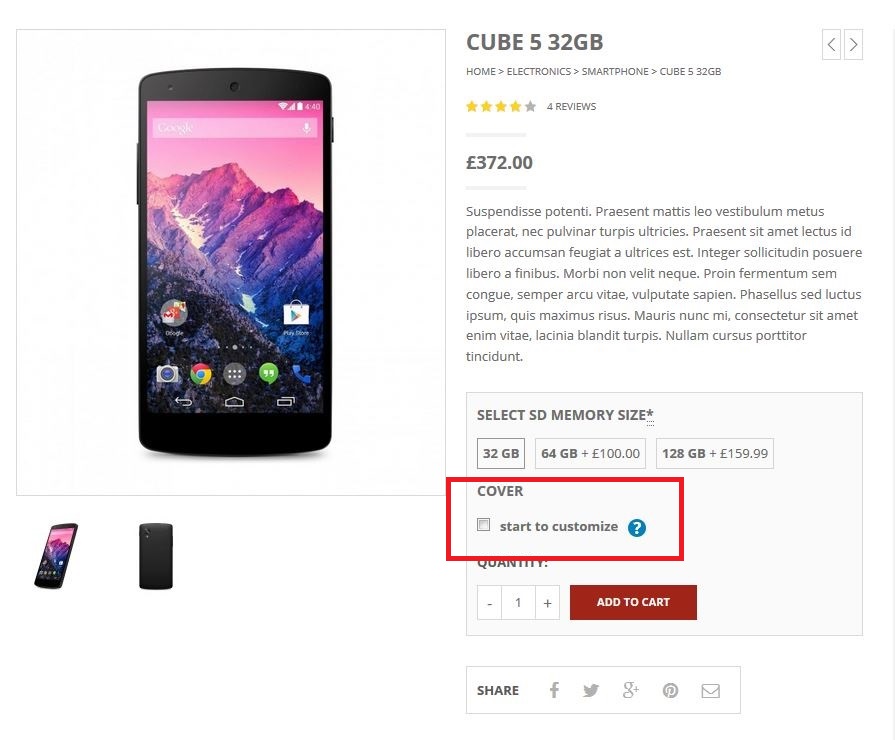
Once customers have picked the product they are after, they can click on “Start to customize” to see the customization options you offer for a specific item.
Having this option clickable or not allows your customers to see your products in their basic state, which allows those who aren’t after a customization service, to be able to buy the product nonetheless.
As you can see, this part of the plugin displays swatches of the colors that can be used for customization:

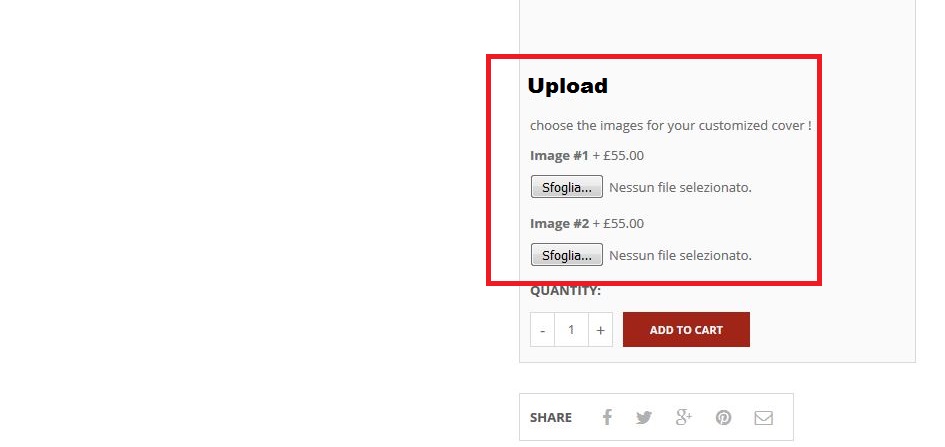
And then the option to upload custom photos and artwork:
Once the customers decide which customization options they wish to buy, they will see the total price split between base product and added services:
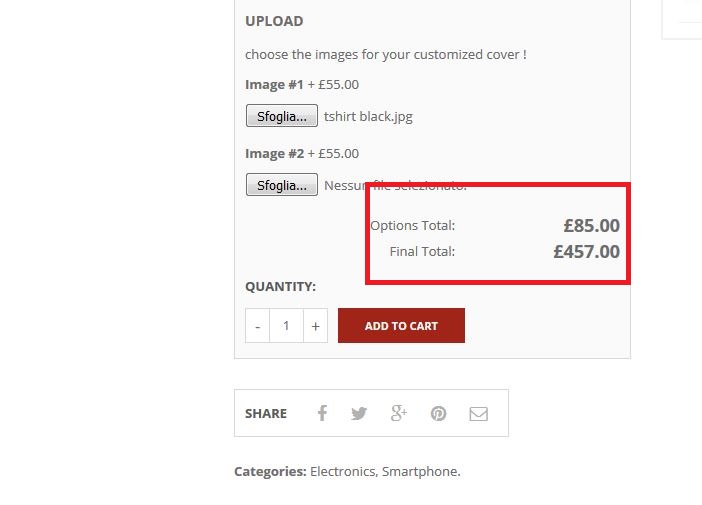
And that’s how you can offer customizable products and have a price for each single customization option, increasing the average transaction value on each single purchase on your store.