The flower language is so old and ingrained in our culture that even today, despite technology made interpersonal relationships colder, there is no better gift than a flower arrangement.
And I’m not just talking about women, that usually are the target of this kind of gift: a bouquet is a welcome gift in many cases: a graduation, a degree, a birthday, a promotion, a birth and so on.
I’m not going through the potential displayed by a store that appeals to such a big customer pool, I’d rather use this article to explain to you how to properly exploit this potential.
Clearly, despite the fact that it’s nice to receive flowers from people we love, it’s not always possible to visit a florist shop, buy a flower arrangement and then personally deliver it to our loved ones.
We tend to travel and get further from them, that’s why services like Interflora are born.
The interflora service is internationally known: just go to their website, choose the kind of floral composition you are interested in, the date of delivery and content of the card and they will handle the rest.
Interflora was so successful that their service is offered in over 100 countries worldwide, which may lead us to thing that the way this service works is complicated and hard to carry out.
But as you can see in this article, things often seem harder then they actually are.
Required Plugins:
Plugins Configuration
So, what’s Interflora’s strength? It’s the chance to add a custom message to your bouquet, turning a generic and cold gift into something heartwarming and personal.
It’s also important to be able to specify when and where to deliver it, to avoid losing it or late deliveries (which is very bad for gifts).
Rather then setting a fixed price or a quote system (which needs exchanging emails and it’s a time consuming process for both you and your customers), you are going to insert these variations straight into the product itself.
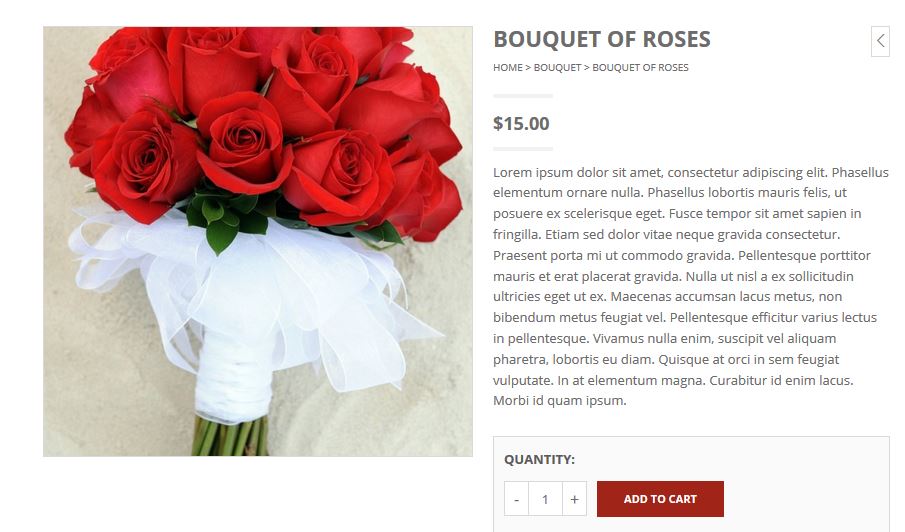
As always a direct example is the best way to understand how it works, that’s why I’m going to create a “bouquet of roses” item that will include the following customization options:
- Varying bouquet size
- Destination
- Delivery date
- Preferred time of delivery (morning, afternoon, evening)
- A card including
- Special instructions
So let’s create the “Roses bouquet” product, as you would with any other product:
Now you should add the required fields for the customization of your product.
Once the plugin is installed and activated, go to YITH Plugin > YITH WooCommerce Product add-ons and you will find the plugin general settings:
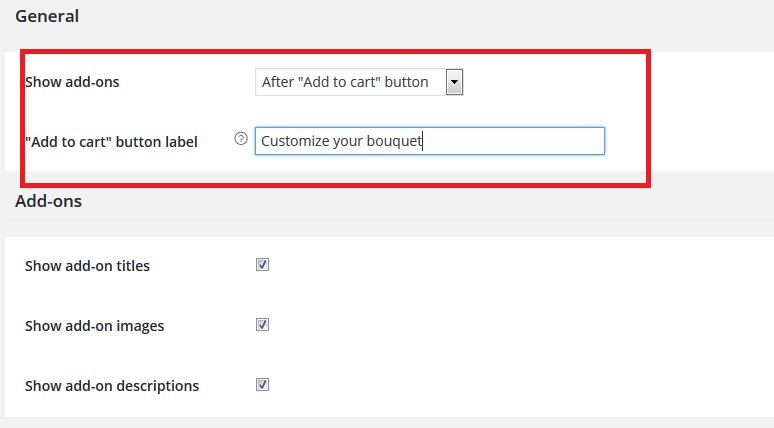
In here you can set the general configuration of the plugin, specifically, you can choose:
- Where to display the extra options, whether if before or after the “Add to Cart” button. In this tutorial they are going to be displayed afterwards, so I’m going to chose “After “add to cart“ button”.
- You can also customize the text of the “add to cart” button in the catalog, to indicate which products are customizable: by entering, for instance, “customize your bouquet”, the product in the shop page is going to look like this:
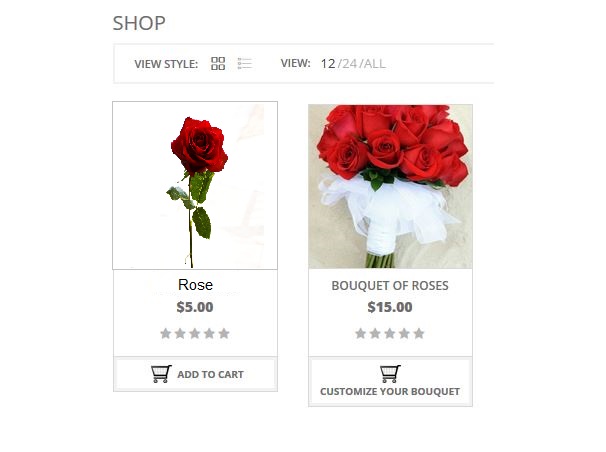
- Choose what to display in the customization options: title, images and description.
Once these options are configured the way you want, you can move to the second tab, “Variations”:
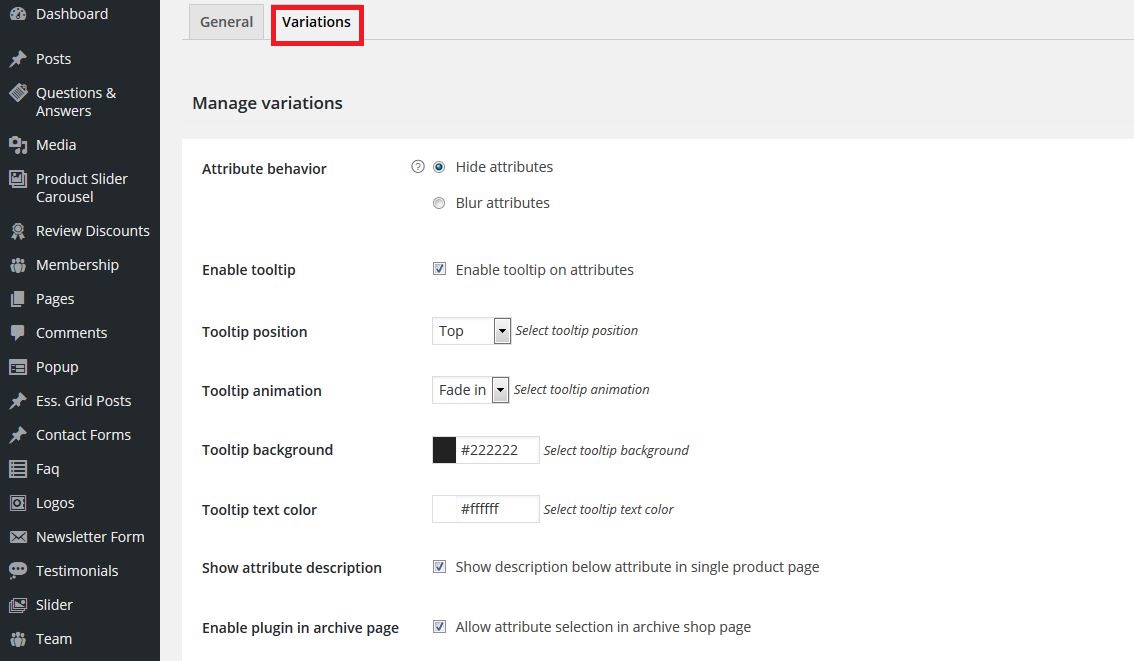
In here you will find the other settings, including how the tooltip for each feature is going to look in the product page.
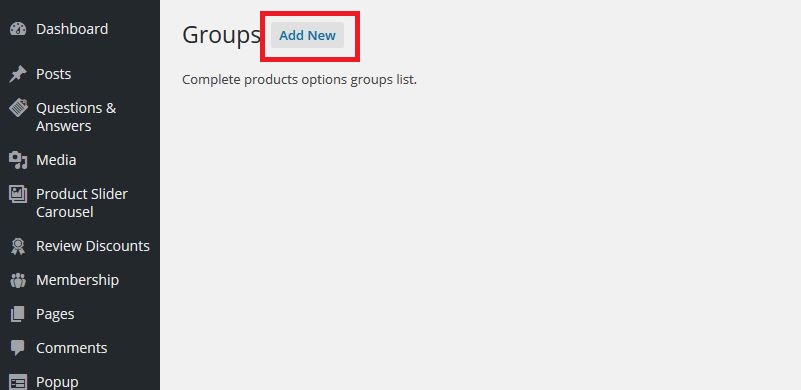
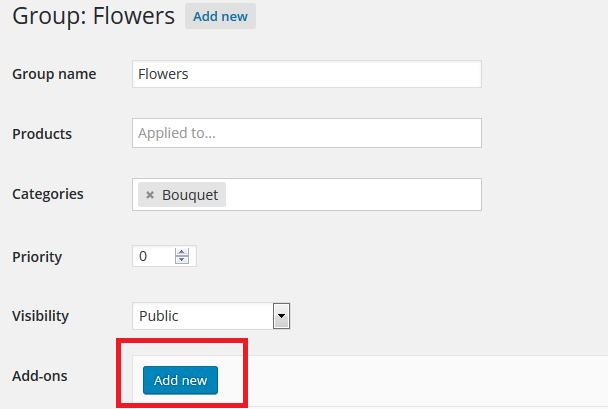
In order to create additional fields your customers can use to customize their order, you need to go to Products > YITH WooCommerce Product add-ons > Add Group:
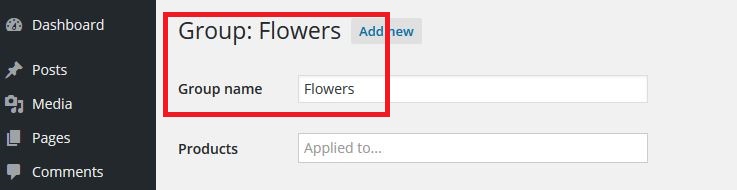
In this tutorial I’ve called this group “Flowers”, but you can obviously name it however you like.
You can also add extra fields to single products or whole categories.
In case you want to offer the same service on all the plants in your website, you can do it by entering all of your products into the same category and then assign a customization option to it.
In this tutorial I entered all the products in the “Bouquet” category:

After picking the category, select it in the group you are going to create:

Now you need to enter the customization option you established earlier, by clicking on Add new:
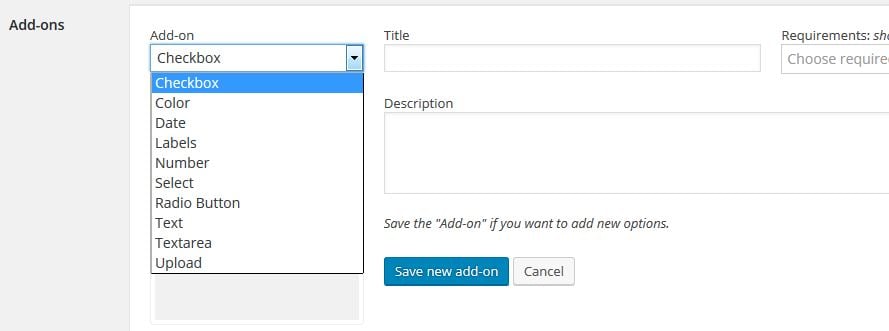
Using the drop down menu you’ll see a list of the type of fields you can create:
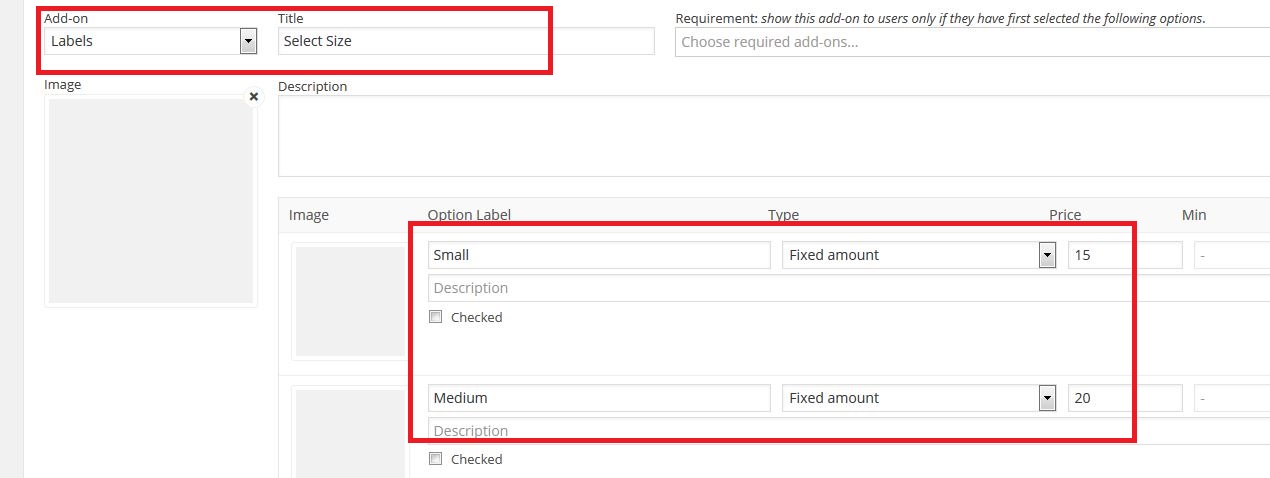
Now you need to decide how to display your customization options. In this tutorial I want to set the three bouquet size options as always visible and hide the other options under a checkbox users need to check to see.
Bouquet Size
To set up the choice among different sizes, create a “labels” field and enter the options and their related prices in it:
Add a checkbox and assign a specific name to it (in my case it’s Customize your gift):
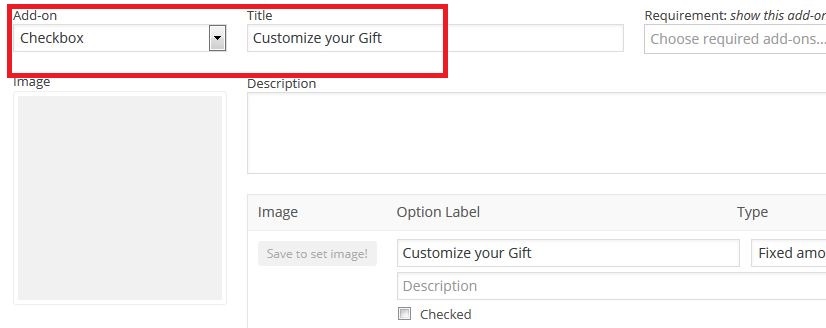
Now you can enter the other variations, carefully entering “Customize your gift” (or the text you entered) into “Requirement”, so that those options are going to be visible only if users check the “Customize your gift” checkbox.
Destination
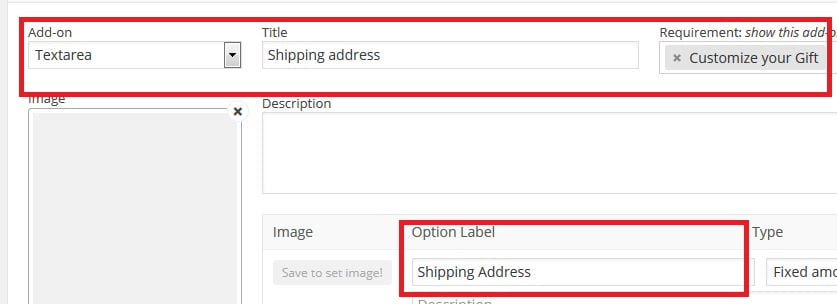
Now you should create a field that will let customers add the shipping address, that’s why you need to create a “textarea” field and rename it as you see fit, for this tutorial, I picked: “Shipping Address”.
Remember to put “Customize your Gift” under Requirement to make this function appear only after clicking the checkbox.
In the Option Label enter the text you wish to display on the side of the option and, if you wish, also the added costs that specific option comes with.
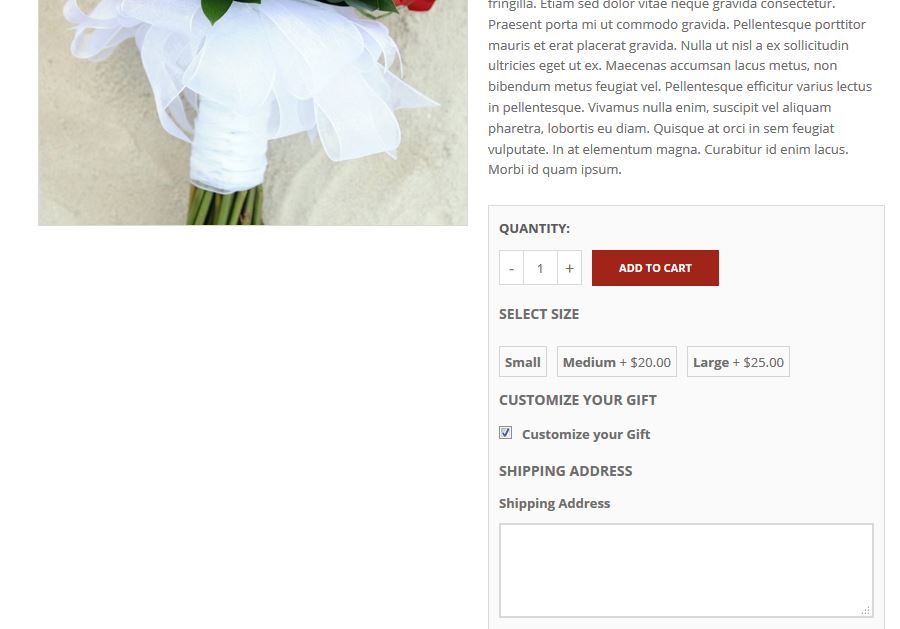
And that’s how your product is going to look so far:
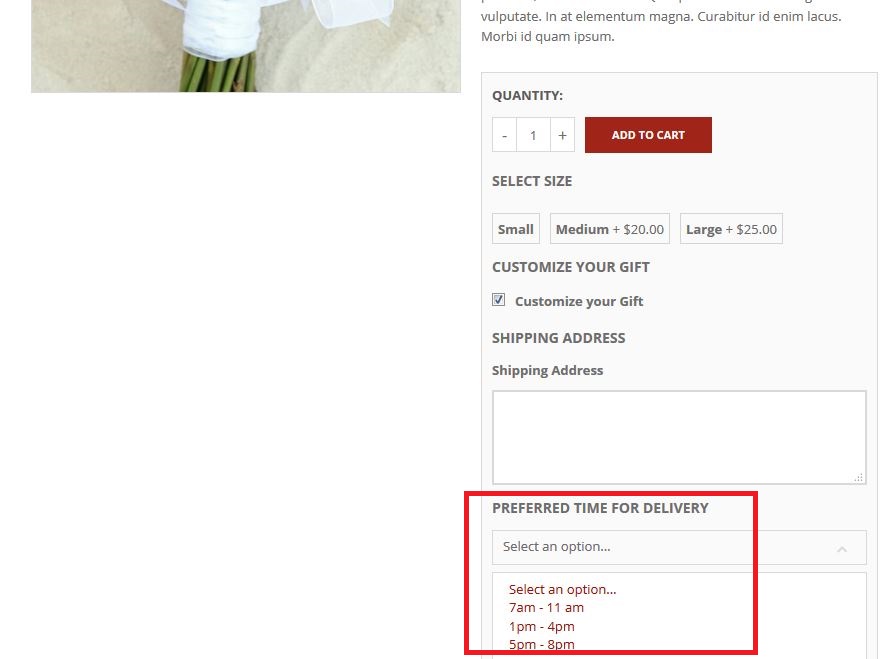
Delivery Times
One of the most handy aspects of this kind of service is being able to choose the time slot we prefer, in order to avoid missing the recipient.
To offer this option, create a “select” option that will offer tour customers the chance to choose between different time slots, in this tutorial I’ve set three of them:
- 7am – 11am
- 1pm – 4pm
- 5pm – 8pm
Always remember to put “Customize your Gift” under Requirement to make this function appear only after clicking the checkbox.
In the Option Label field, always add the text you wish to display beside the option and, if you want, the extra cost that options comes with.

And this is how your product is going to look so far:
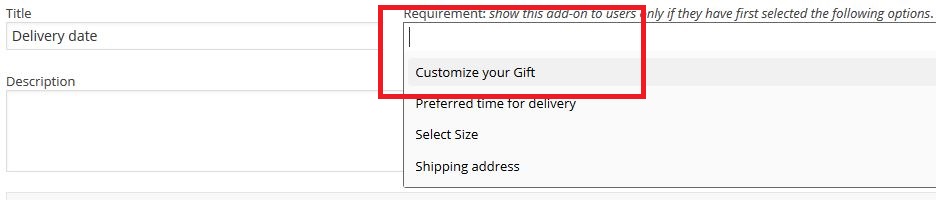
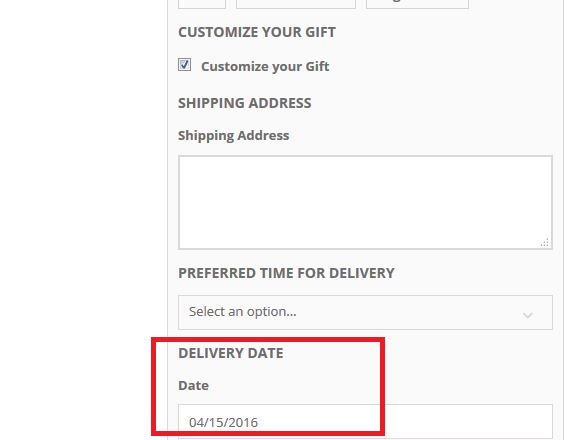
Shipping Date
Customers need to be able to choose the day their bouquet is going to be delivered, so create a “Date” field and add it to the three previous ones.
Remember to put “Customize your Gift” under Requirement to make this function appear only after clicking the checkbox.
In the Option Label field, always add the text you wish to display beside the option and, if you want, the extra cost that options comes with.

And this is how your product is going to look so far:
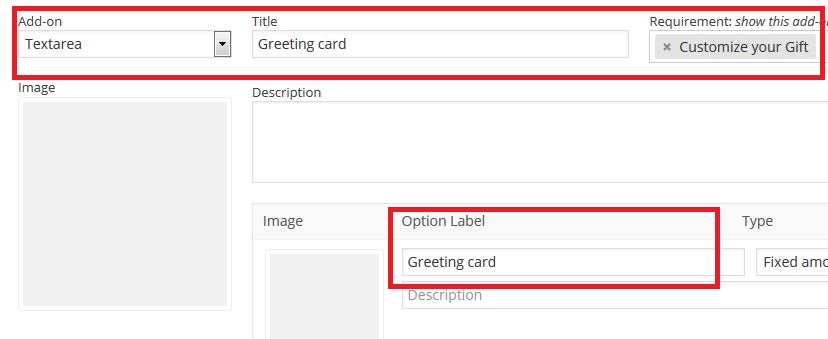
Card with a dedication message/ Special Instructions
In both of these cases you can chose the “textarea” field in order for customers to be able to add what they want in the card and also delivery notes.
Remember to put “Customize your Gift” under Requirement to make this function appear only after clicking the checkbox.
In the Option Label field, always add the text you wish to display beside the option and, if you want, the extra cost that options comes with.
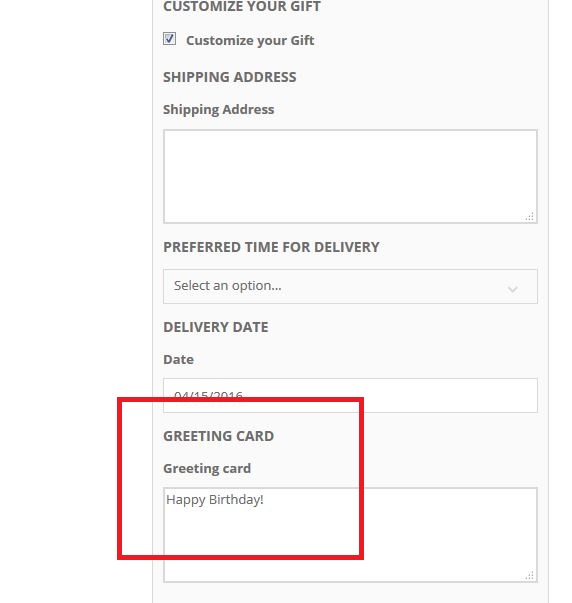
And this is how your product is going to look so far:
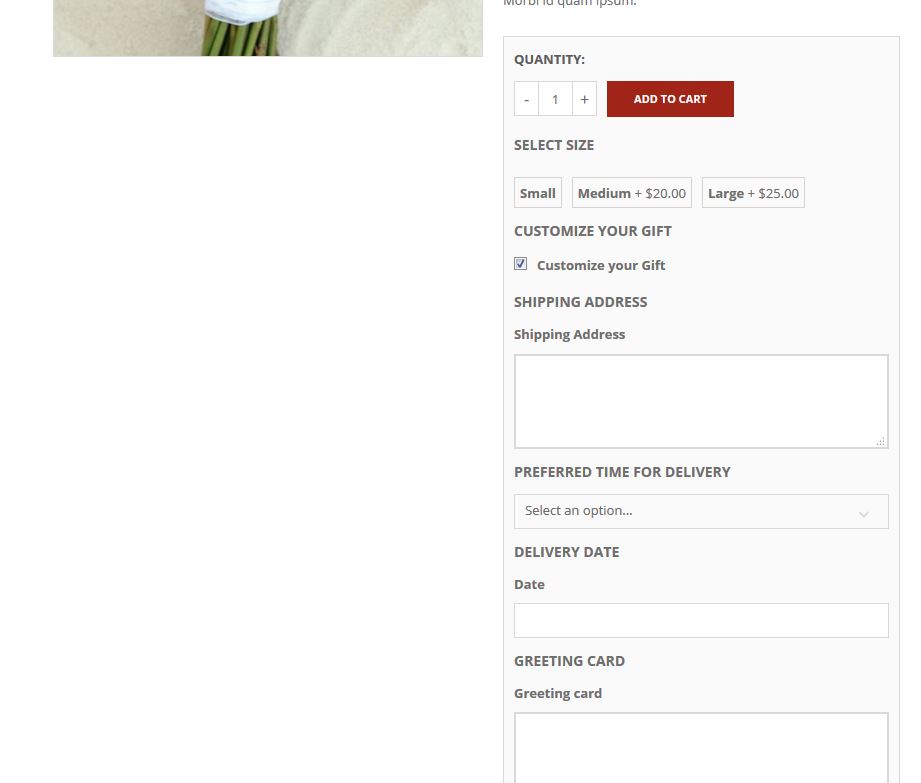
Once these parameters are set and their options are saved, these fields are going to appear in the product page.

As you can see the three bouquet sizes are always visible, while in order to see the other options, customers need to click the checkbox:
See?
In just a few steps you are now able to use your WooCommerce based store to sell and distribute flower arrangements into a much bigger market, thanks the WooCommerce Product add-ons plugin!