In previous chapters, we learned how to configure downloadable products, how to create a virtual product, among other things. Today we are going to learn about tax options.
This section should be marked in red because it’s really important. If you have just started your online business, you can’t afford to risk tax issues. To make sure you charge the correct amounts, please consult a local tax expert.
To configure tax options, go to WooCommerce > Settings > Tax. Here we will find the Tax Options and Standard Rates. We access the first option and we would see the following.

If you don’t see the Tax section, you need to go to WooCommerce > Settings > General, and check the option called “Enable tax”.

Now we are going to configure the first three options on this page:

1. Prices entered with tax
There are different kinds of e-commerce stores, and they all have to pay taxes according to the services and products they sell. But you may not want WooCommerce to handle your taxes directly because the country where your store is located doesn’t have different tax rates or because your store is special (and has a donation-based payment system). Also, some store owners calculate the taxes owed by the accountant each month.
With this in mind, our first option appears: prices entered with tax. This option is essential, as it will affect how you input the prices. Note that changing this option will not update the existing products. We can select either of these two options:
–Yes, I will enter prices inclusive of tax. Once you add a product to your catalog, you will set a price that already contains a tax rate. For example, a shirt is worth $5, and the tax rate is 10%, which means you will set its price to $5.5, including taxes.
–No, I will enter prices exclusive of tax. In this case, you will enter the net price and the tax rate will be added in a second step.
2. Calculate tax based on
This option determines which address is used to calculate tax. We will have three options: customer shipping address, customer billing address, or shop base address.
This choice is especially important in the case of international stores where customers are subject to different tax rates.
3. Shipping tax class
This option is an optional control that tax class shipping gets, but we could leave it if the shipping tax is based on the cart items themselves. So here we will find two options: Shipping tax class based on cart items or standard.
Now that we have the first three options configured let’s look at two more.

4. Rounding
Checking the option “Round tax to subtotal level, instead of rounding per line” allows you to approximate taxes to the nearest digit to the subtotal, instead of rounding by the amount entered.
5. Additional tax classes
WooCommerce allows you to choose from several standard tax rates but also gives you the chance to create new ones you will then be able to add to the Additional tax classes section.
In this case, we are going to add two more classes: reduced rate and zero rate. We will explain later how to configure these options.

Now we are going to learn about the last four options.

6. Display prices in the shop and display prices during cart and checkout
Now that we know what taxes to add to our products we must inform our customers: both in “Display prices in the shop” and in “Display prices during cart and checkout” we can choose between two options:
-Including tax
-Excluding tax
Its meaning is pretty obvious, but we recommend you to be careful: customers don’t like to find themselves having to deal with unexpected extra costs. This is why it is always better to add taxes to our products. However, if you sell B2B it is common practice to exclude the tax or VAT in your prices.
7. Price display suffix
Fortunately, we can add the text displayed after the product prices in the Price display suffix option. It could be, for example, “VAT included” to explain your pricing policy.
If you display your prices Incl of Tax, you can add a shortcode of {price_excluding_tax} to display this right next to the price. If you display incl tax, use: {price_including_tax}

8. Display tax totals
In the last option, you can decide what your tax rate is going to look like:
–As a single total – It shows the amount of taxes due on the total of the products in the cart.
–Itemized – This shows the amount due for each item.
When you have everything set up, don’t forget to save your changes, so you don’t lose your settings.
Finally, this is our tax section:

How to set the standard tax rate
To create any standard tax rule for our store, we must follow the same process. Before, we pointed out two additional tax types: reduced rate and zero rate. We have already included it in our configuration and now let’s see how we can create a standard rate.
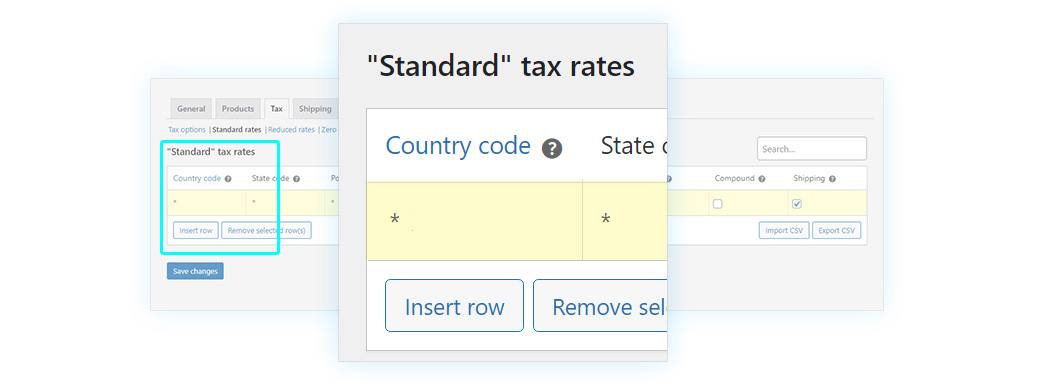
We need to go to WooCommerce > Settings > Taxes > Standard rates. Once we access it, we find an empty box. To begin, we must click on Insert row to create a fiscal rule.

Now you must fill in a series of fields. The first one is the Country code. If you want to make it count for ‘all,’ then keep the asterisk * in place.
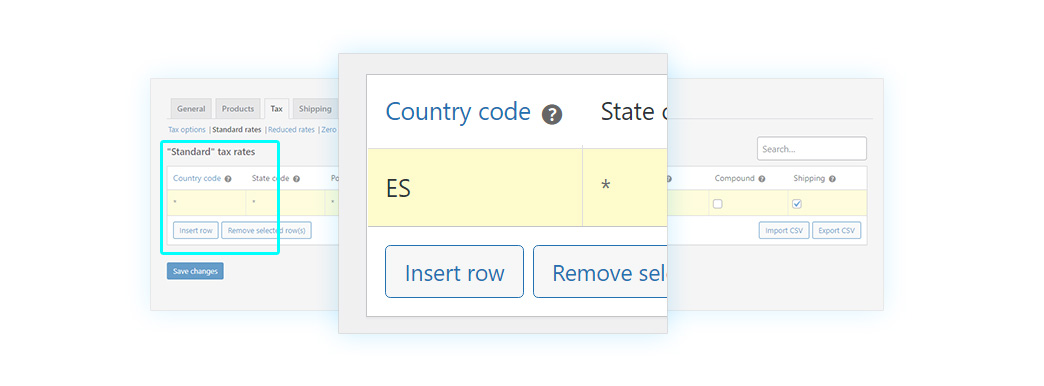
The country code is an alphabetic code made of two or three letters that identify the country a specific tax rule applies (you can find the complete list here). WooCommerce uses the ISO 3166-1 format. This is an example for Spain.
In the case of Spain, we could ES. If we wanted to apply it to all, we would keep the asterisk * in place.
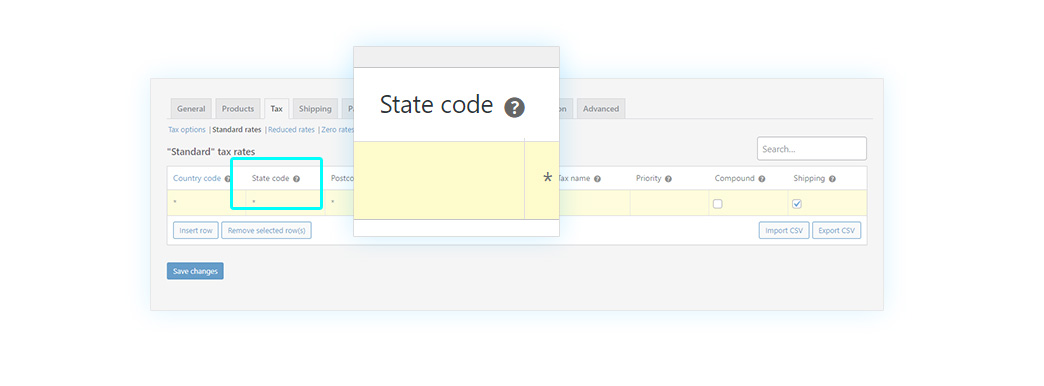
In the next point, we must configure the State Code. This is another code that is required in case the country you entered is part of a federation (such as the United States). You can find the complete list here. In case it’s not required, or you want to include all states, just leave the field empty. In this case, we will leave it blank.
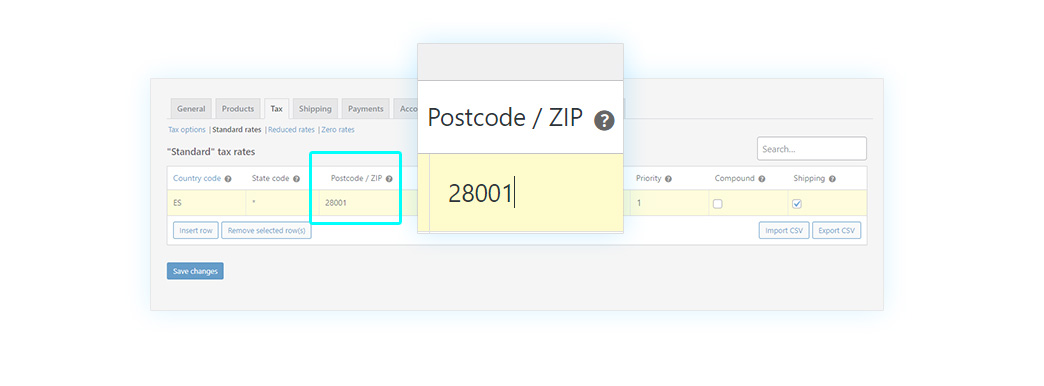
Then we add the Postcode/ZIP. This has a different format in each country; you can view the complete list here. You can also enter a code range (i.e., 1000-2000), use the semicolon to separate multiple values (12345; 54321), or leave this field blank to apply to the whole country, as you can see in the image.
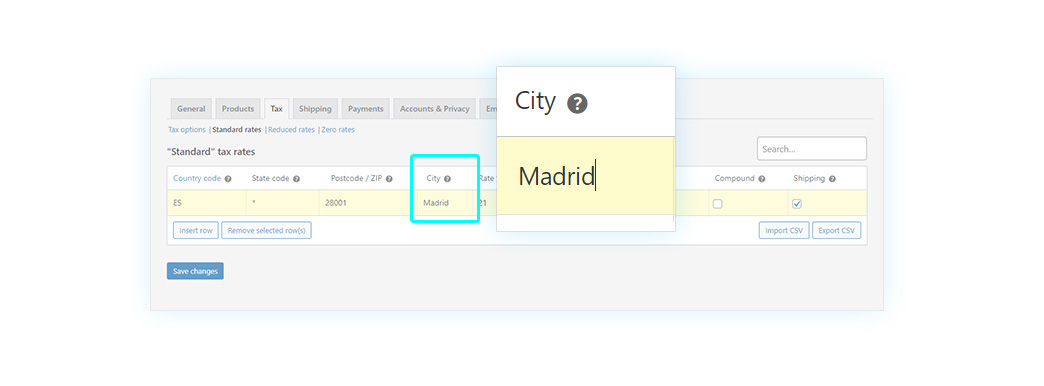
The next item is the City. You can choose whether to apply your rule to a city, to more than one, or all. In the latter case, leave this field empty. Also, you can always use the semicolon to specify different cities (Paris; Lion).
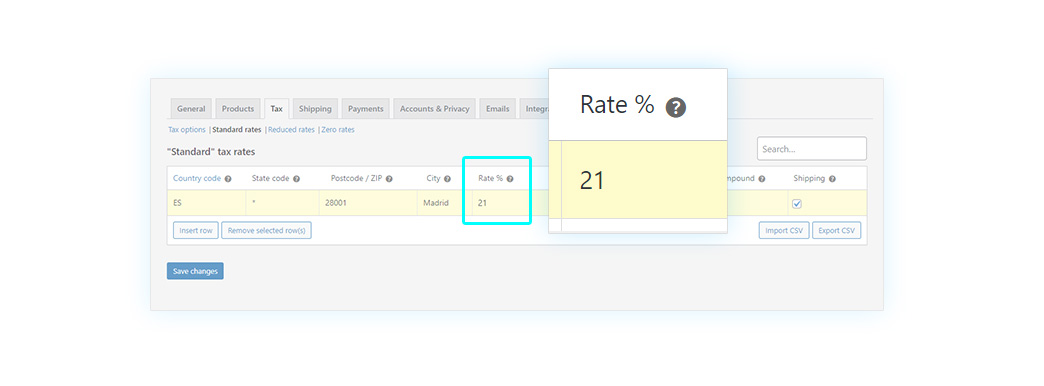
Then we must add the rate required to buy your tax rule in the Rate % section. You might not know the required rate, especially if you are selling to countries outside your own. In which case, you can find the complete list of worldwide tax rates here. Keeping in mind that Spain has a 21% VAT rate, that’s what I’m going to enter in my configuration.
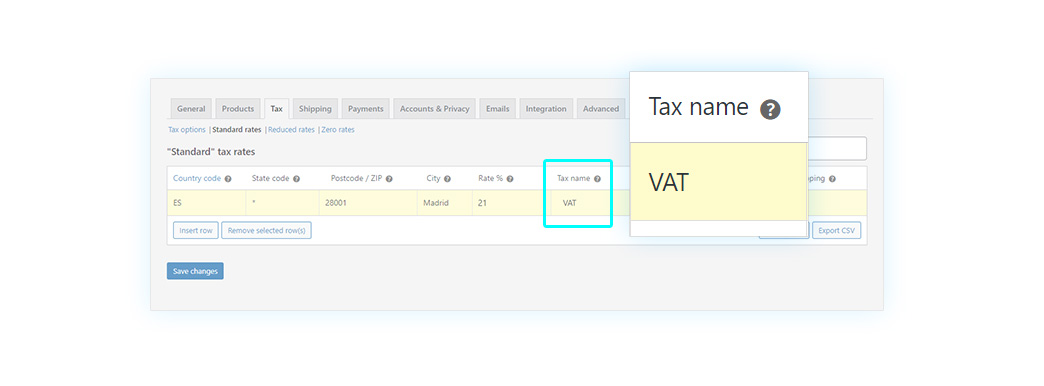
Now you must choose your Tax name. There are three different types of taxes so that the name can be uniquely identifiable. In this case, we might call it VAT.
Let’s move on to another point: Priority. You can set different taxes for the same parameters: in this case, it’s essential to place the order of priorities to be used once they are applied. For example, if we have a 10% tax and a 7% tax applying to the same products, we can pick which one will be used first (assigning 1 to the first one and 2 to the second one, so that 1 has priority).

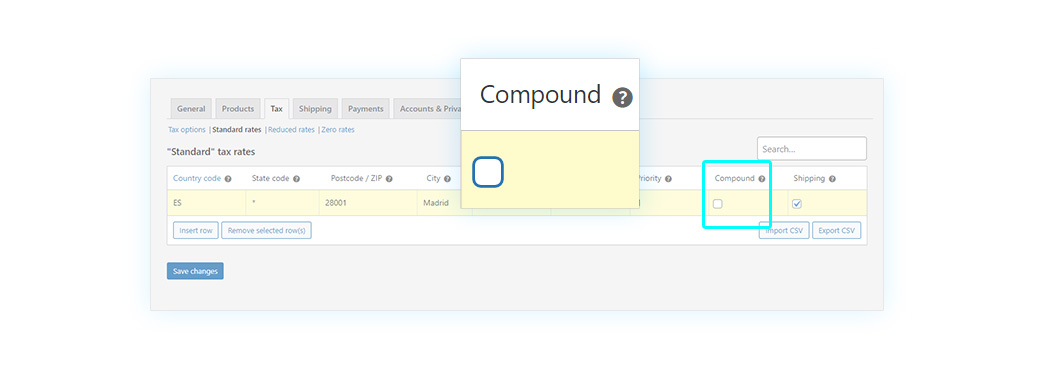
In the penultimate point, called Compound, you may consider it as a tax on taxes. It’s a specific kind of tax that applies to other taxes, and you can activate it by checking its dedicated box.
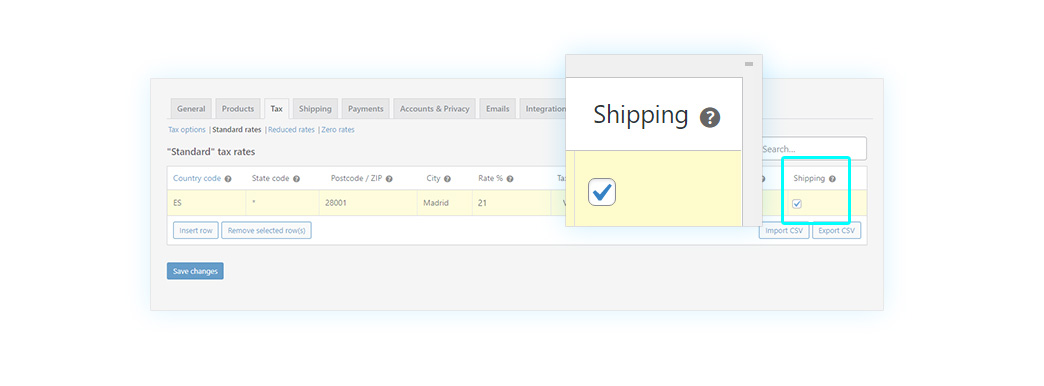
Finally, the Shipping options; it’s an excellent idea to offer free shipping whenever possible. But in case you want your customer to pay the shipping costs, you can tax the shipping costs by checking the box for this function.
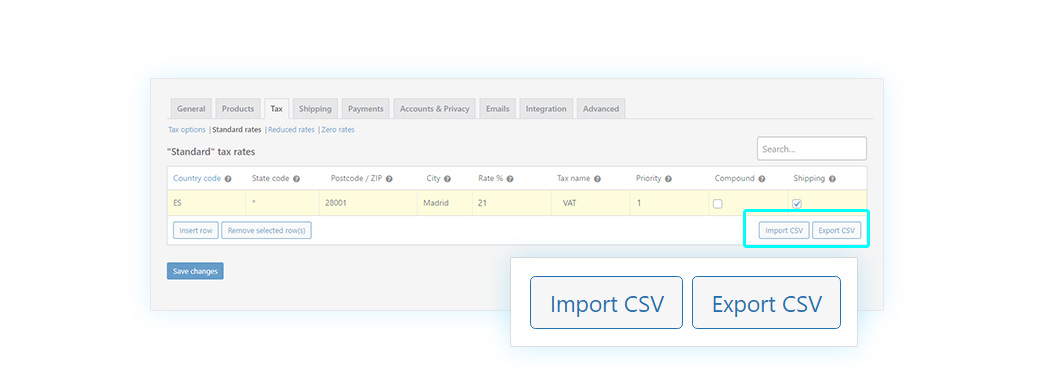
This is the result of our configurations:
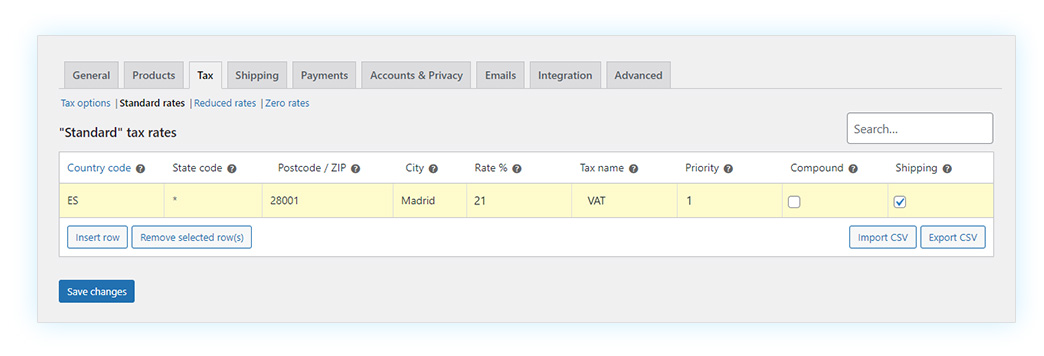
You have seen so far how to manually set a tax, but if you have your required tax information in a CSV file, you can import it with a few clicks and apply it to one or more states. To do this, click on Import CSV. You can also do the opposite process: by clicking Export CSV, you can export your configuration to use it again elsewhere.
Now you know how to set up your store’s taxes and also how to create tax rules. Remember to save your changes before exiting so you don’t have to configure it time after time. In the next one, more WooCommerce Essential Guides!