Have you ever thought of a phrase or design and then imagine a t-shirt displaying it? This happens among creative individuals, so why not offer a product to fulfill these innovative ideas? Or maybe just to give your customers the possibility to dedicate a phrase on a t-shirt for a special someone or sports event.
Having in your online store a dedicated option that takes the customer to another level regarding the product choices is a big plus and more importantly, when talking about the fashion industry, in this world, individuality is everything!
In this guide, we’re going step by step in the making of a custom t-shirt.
Who is this tutorial on WooCommerce Product Add-ons useful for?
This tutorial can become your best friend if you’re in the fashion industry and you want to offer a special treat to your customers, or maybe you own a copy shop and want to make the process of t-shirt printing easier. Either case, you’ll find that it’s not as hard as it may look like, and your customers will love it!
The challenge when creating a product like a custom t-shirt
We have all been there when a client comes asking for things that do not exist in our shop, and we have to witness their disappointment when telling them we don’t have t-shirts with unicorns and the letter A. Every business owner would contemplate thinking: but what if we could make it and satisfy our customer? How would it be? What do I need to make it happen? And you start to figure out a way to improve your customer service and make those special requests happen. It will all start with dedicated equipment to print, followed by a stock of t-shirts, but then another question would be: How to display the product on my web page? How are my clients going to do it? How can we charge per printed side or per letter? What about the cost of programming it? And many more questions will arise.
We know it is not easy to please customers nowadays. Having a simple, easy-to-set-up product with options has never been more reachable for any custom product dreamer. Get on board and discover how practical it is to have your customizable product online using YITH WooCommerce Product Add-ons & Extra Options.
The process of creating the add-ons and extra options in 8 steps
Step 1: Add a simple product from WooCommerce
We will start by creating a simple product, and name it ‘Customizable T-shirt,’ we will add a short description, a product image, a price, and possibly the stock quantity available.
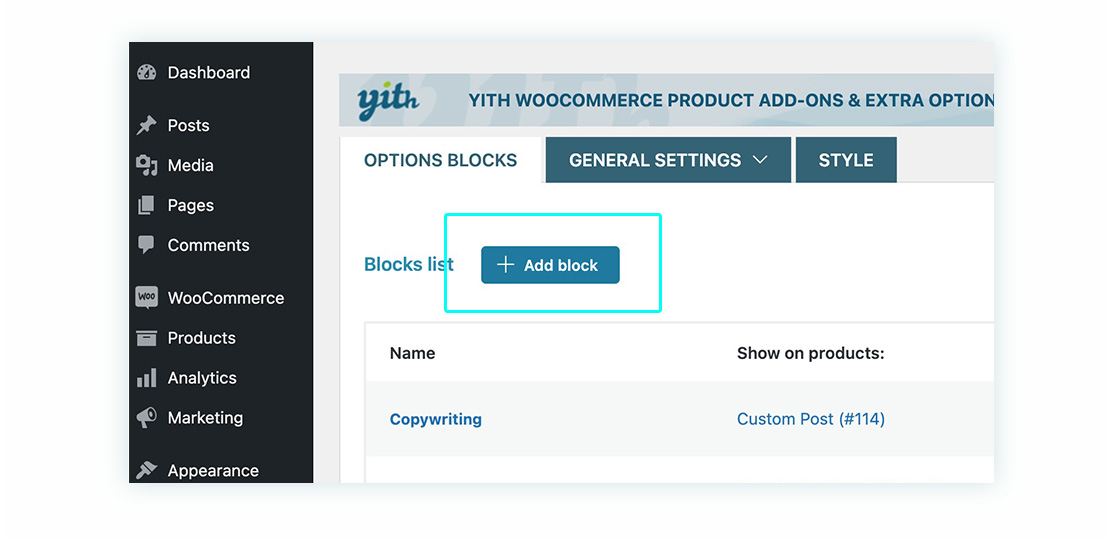
Step 2: Add a block
After step 1, you can add as many blocks as you want according to your needs and assign these to one or more products. Go to YITH > Product Add-ons > Add block.
If you want to watch the process of creating a block of options, you can check our YouTube video.
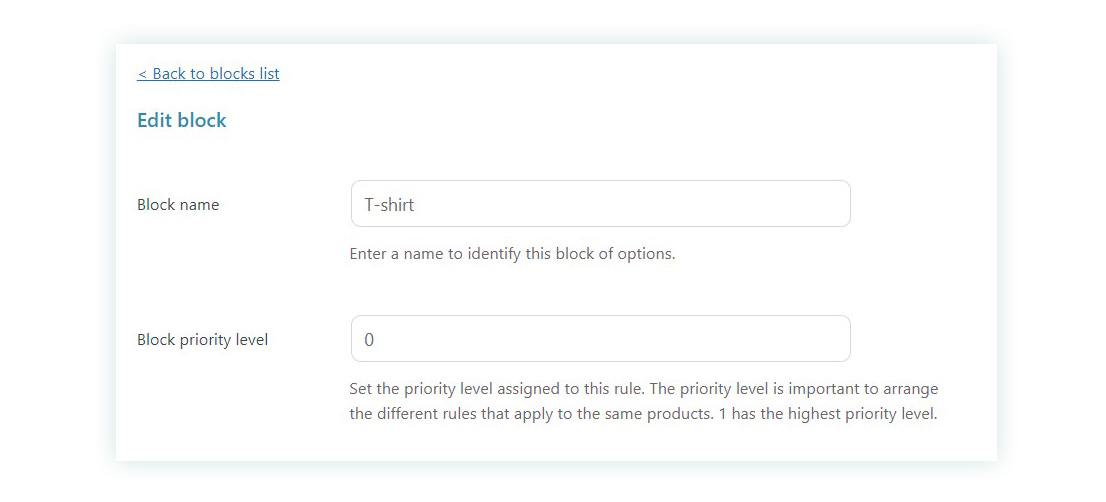
Step 3: Name your block and set a priority.
The block will contain all your options together. It’s important to name our newly created block in order to find it easily. We’ll name it ‘T-shirt’. Priority is used when you have products that have more than one block, and the number is the order in which they’ll be shown. For this example, we don’t need to worry about it, as only one block is assigned to this product.
Step 4: Label or image for the color of your T-shirt
If you think of a common option used in most online clothing shops, what would it be? You probably think of two things: color and size. In this section, we are going to focus on the first one.
To add them, we first go to our T-shirt block, and click on ‘Add options’.
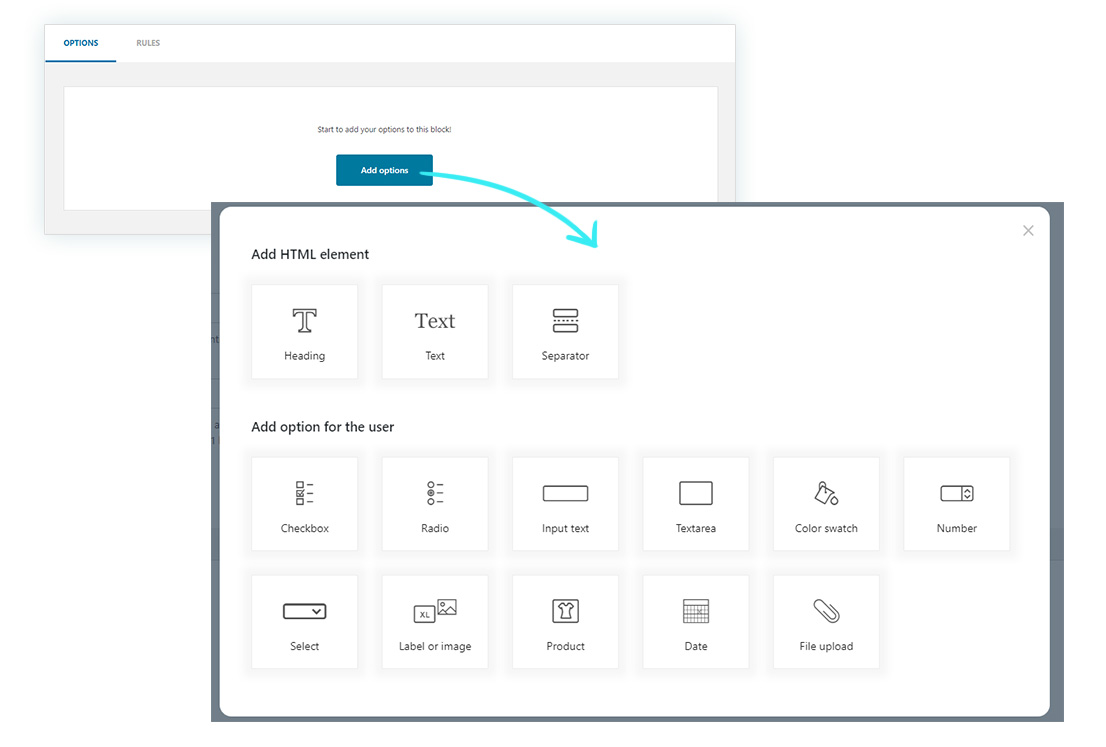
Then we select “Label or image”. And maybe you’re thinking: why don’t we select “Color Swatch”? Because in this case we are adding two different colors with an image, not just the color palette. We are going to create labels with images to see the T-shirt in the different colors.
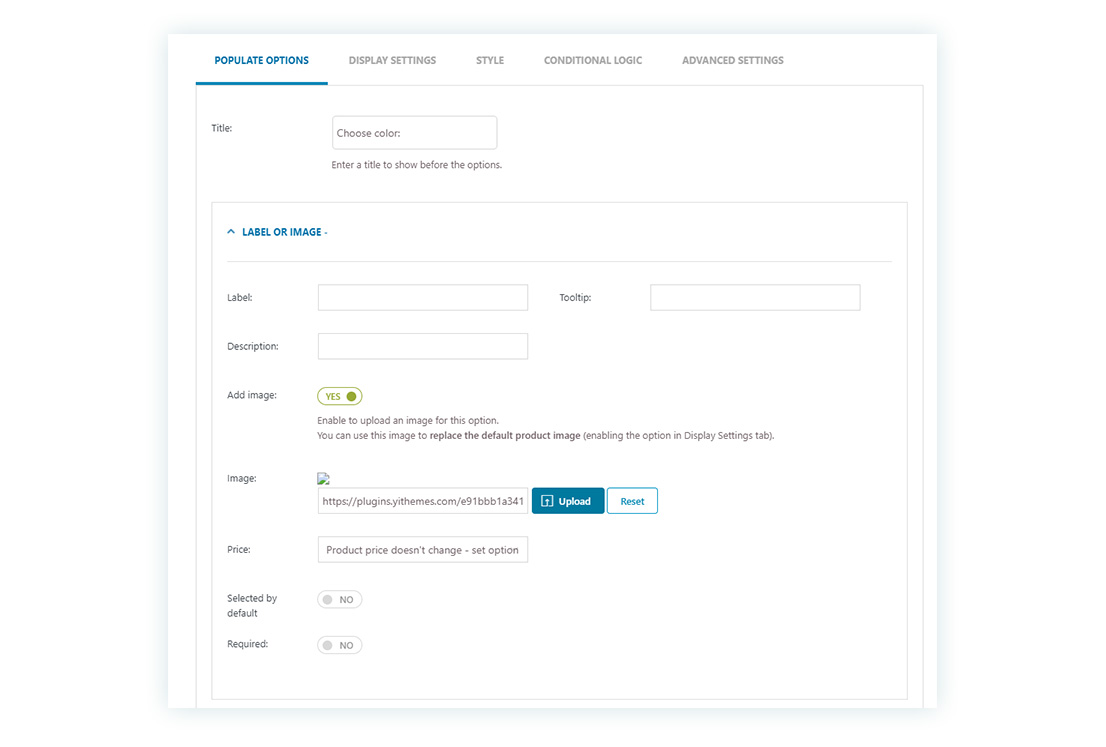
For the title, we put ‘Choose color:’. Below, we don’t put a label, tooltip, description, or price, but we include an image. When we select it, we click on ‘Add a new option’. Then we repeat the process with the other color.
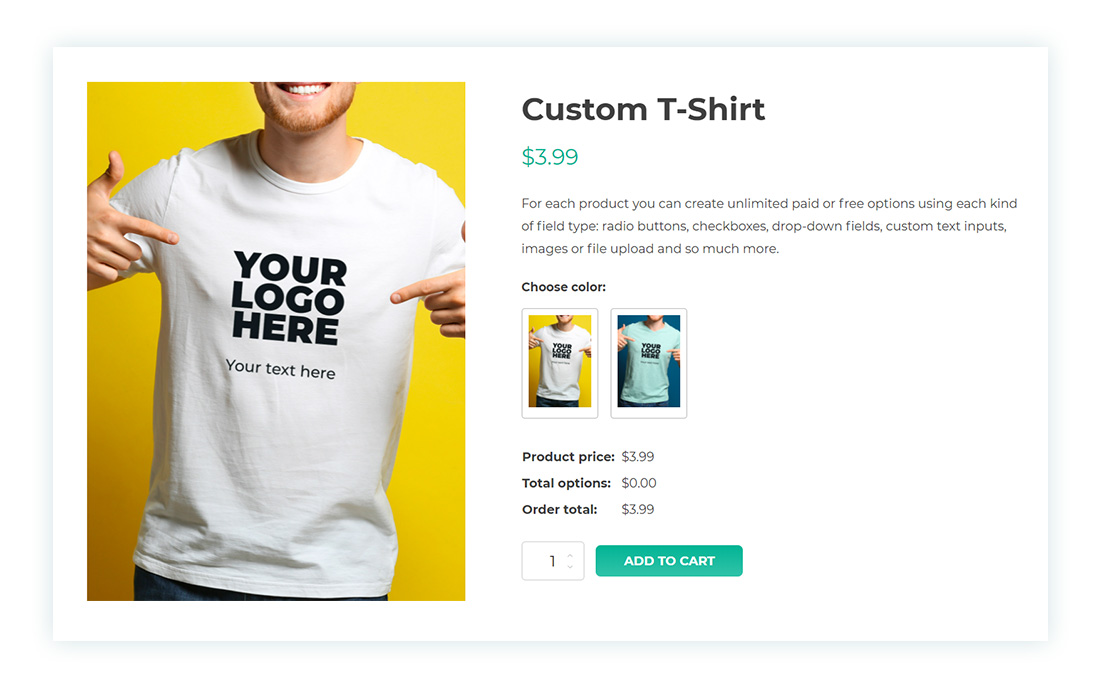
When we configure our first option, we go to the ‘Display settings’ tab. We will find new options, like ‘product image replacing options’. In this case, we select ‘replace with options image’. When the customer selects one of the two colors, the main image will change to the one selected.
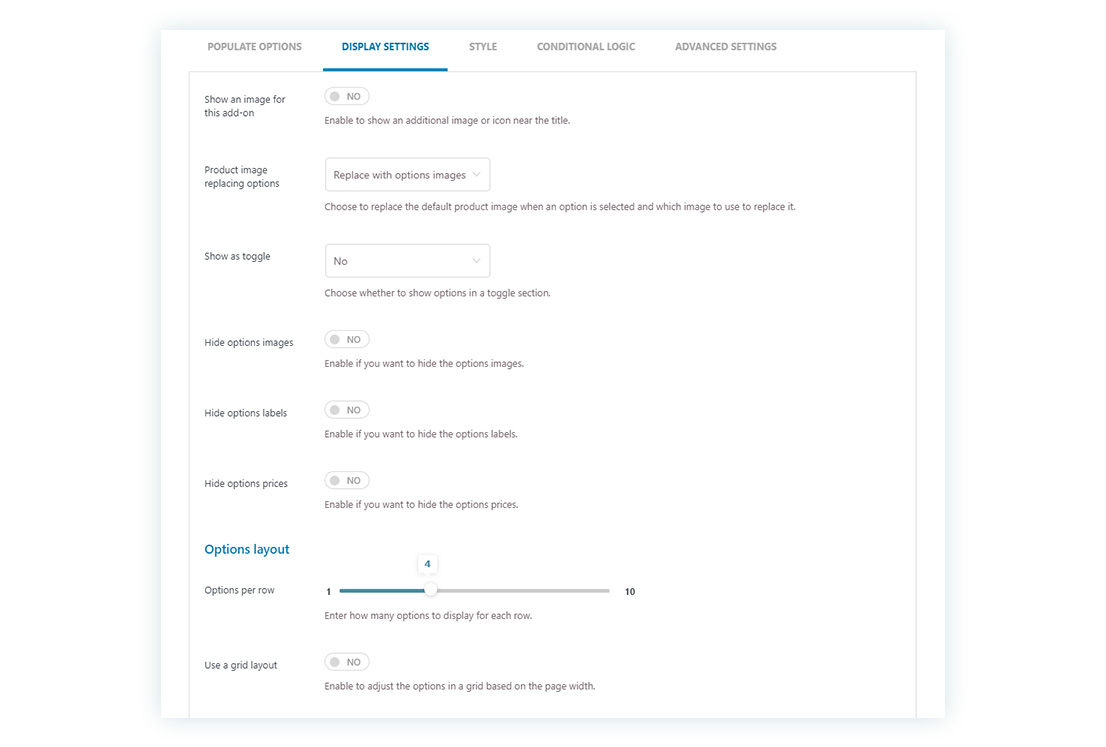
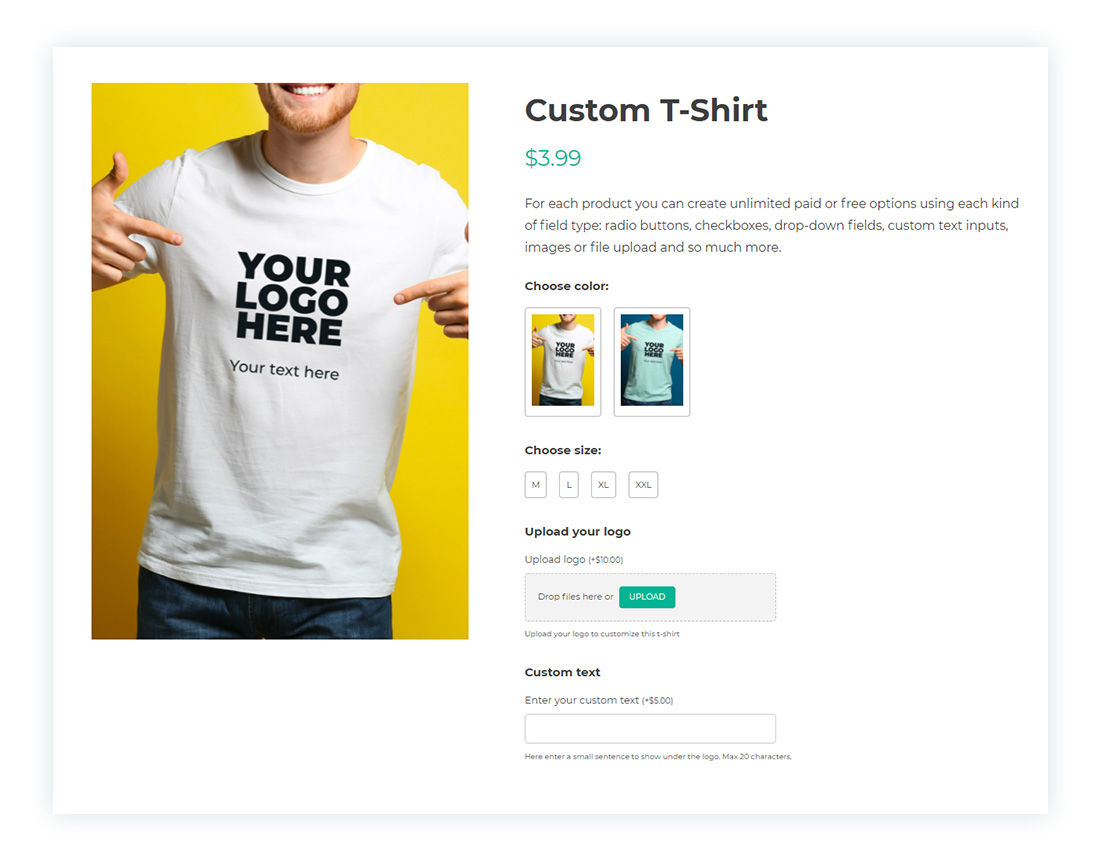
We will leave the style, conditional logic, and advanced settings tabs for what they are for now, so when the process of adding colors and the relevant settings are in place, we must save the changes. The end result of our configuration will look like this on the product page:
Step 5: Add a size selection
The second common option when shopping for clothing is to allow customers to choose a size, right? In this example, the customer can choose one of a selection of sizes. We click on ‘Add options’ (like step 4) and choose “Label or image”. We could have also chosen a “Selector”, but in this case, we prefer this option. This is how it will look after they have been configured:
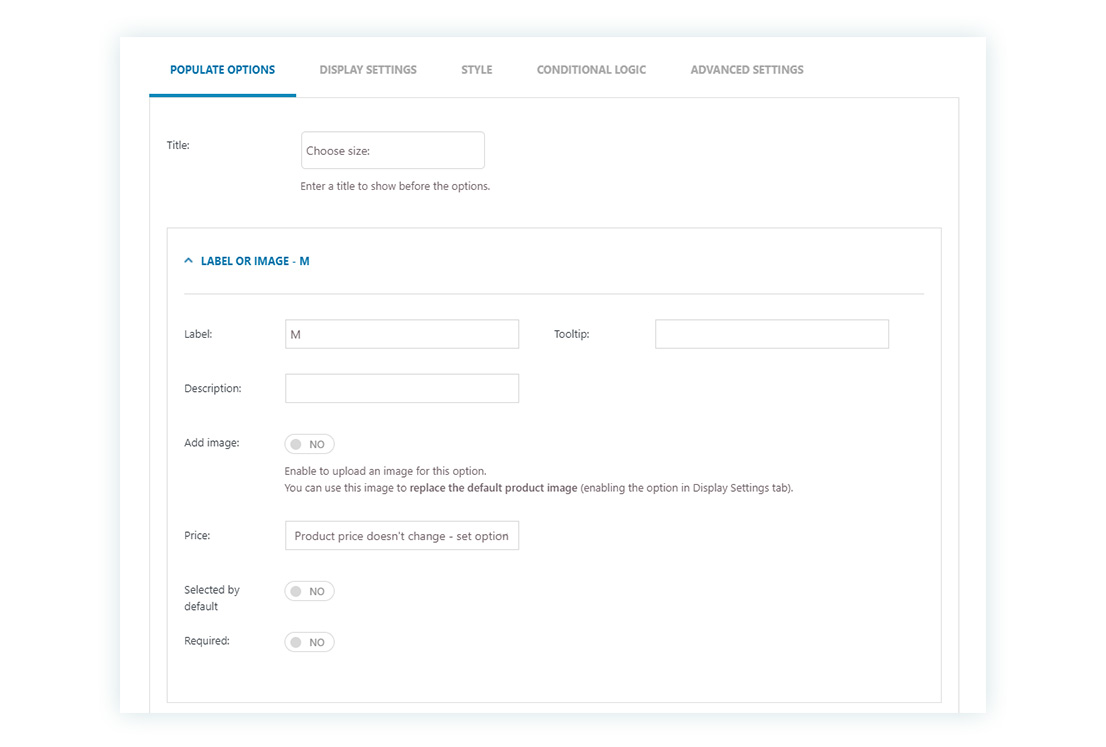
For the title, we put ‘Choose size:’. We name the label ‘M’ and leave the rest of the configuration as it is. Then we click on ‘Add a new option’ and repeat the process with the other sizes: L, XL, and XXL.
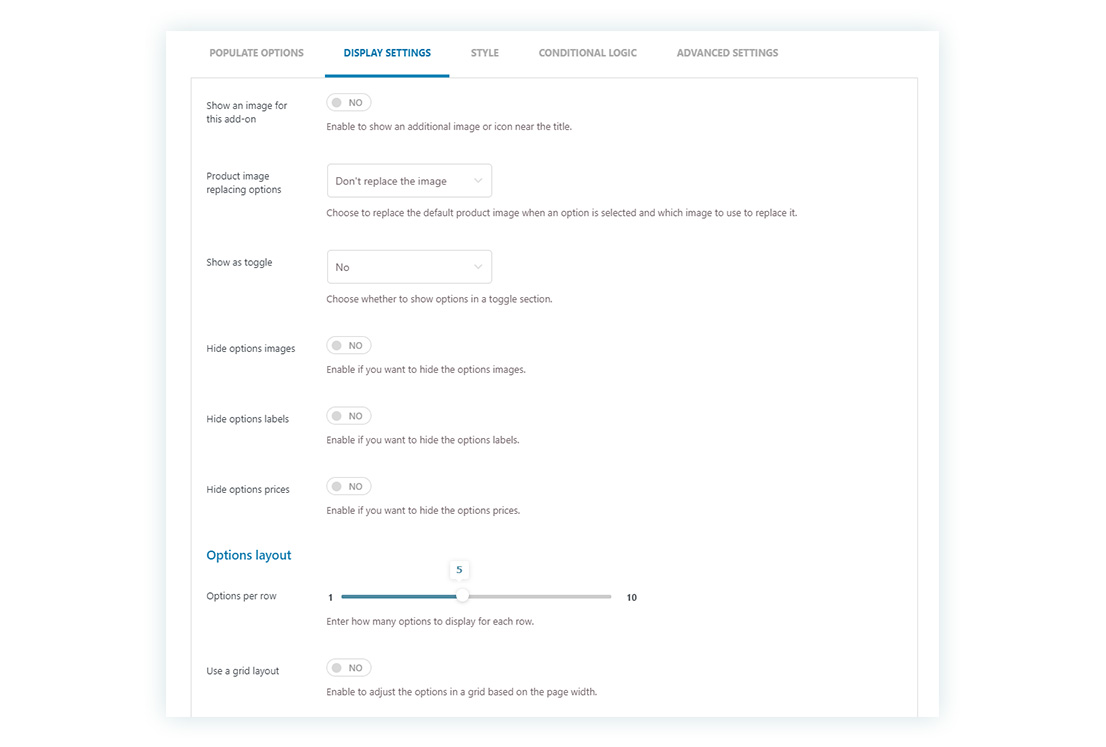
But in the ‘Display settings’, it is essential to put a minimum of x options per row so that they labels all lign up.
Step 6: Allow your customers to upload their logo
You will find many customers that want to add an image or logo to their custom t-shirt. With Product Add-ons & Extra Options, you can do just that.
Go to ‘Add options’ and select “Upload file”. For the title, we put ‘Upload your logo’. In the label, we write ‘Upload logo’, and in the description ‘Upload your logo to customize this t-shirt’. We don’t add an image but the price changes. We select ‘Increase the main product price’, which has an option cost of €10.
Before saving, we go to ‘Display settings’, set one option per row, and enable the grid layout, with an options width of 50%.
Step 7: Offer the possibility to add a custom text
What are we missing when we are going to customize a T-shirt? Obviously, the customizable text the customer can choose themselves. Thanks to these options, users can add a custom text that can join the image of the previous option.
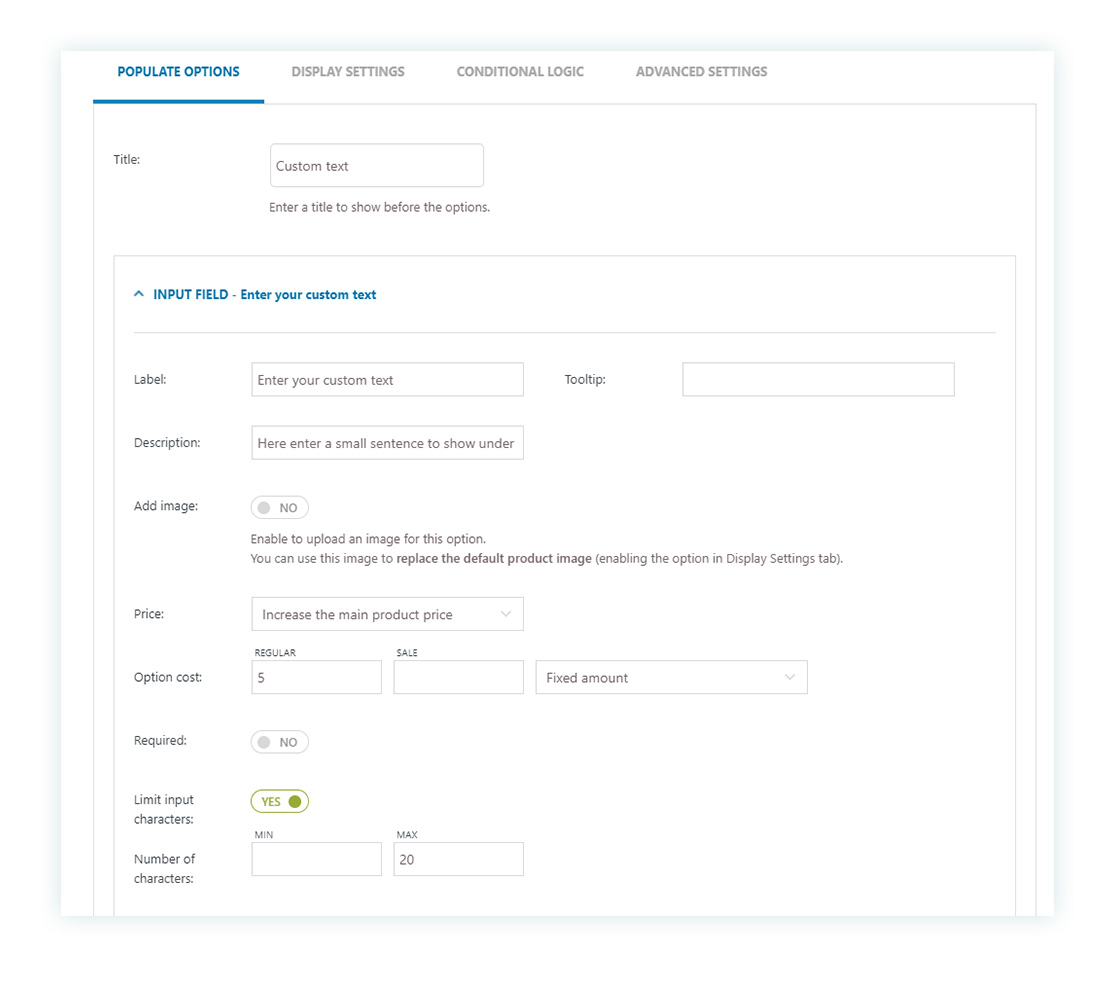
So, go to ‘Add options’, like the other steps, and select “Textarea”. We put ‘Custom text’ in the title. Also, put a label (‘Enter your custom text’) and description. In the last one, we add that we only allow a maximum of 20 characters: ‘Here, enter a small sentence to show under the logo. Max 20 characters’.
We also change the price for the user to have an additional cost if they add a text. We select ‘Increase the main product price’ and put €5 as the standard option cost. But we can’t forget to enable the limit input characters and set a maximum of 20 characters.
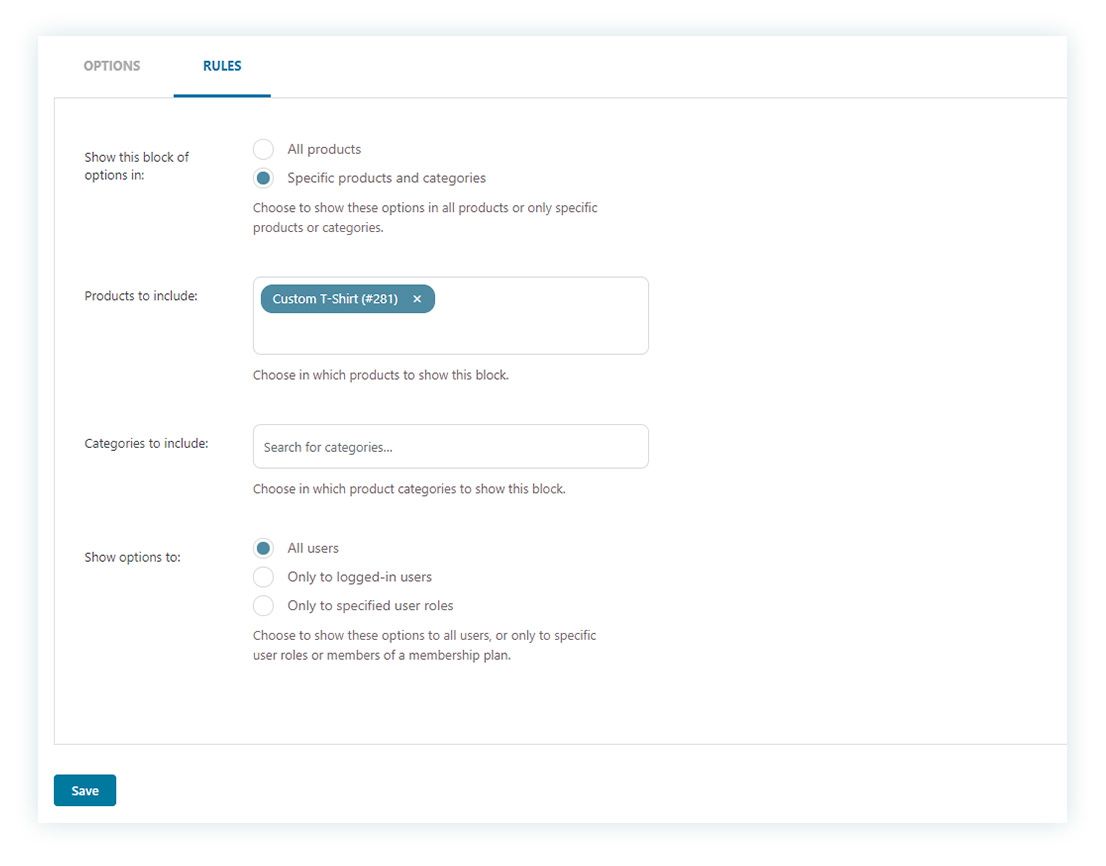
Step 8: Add rules
Don’t think that the last step is the least important; on the contrary, without this step, the options block would not appear in our product. Here we will determine whether the options list will be visible on every product or just selected ones. For example, you can have the same block options showing on more than one product. This is where we set these types of rules that will allow you to have a lot of control over each add-on.
You can also decide whether the block will be visible to every user or not. Maybe you want to avoid showing options to guest users but to those who have an active account. As you can see, you are controlling where to show the options and to whom.
Why use YITH Product Add-ons & Extra Options?
Having a presence online for a clothing shop has become vital in the eCommerce scenario, using all tools available to customize your products have never been more valuable in this rapidly growing environment.
Using the YITH Products Add-ons & Extra Options, you are able to provide custom products to clients improving your marketing strategy to gather insight about what customers are looking for and make a difference among the vast market options available right now in the fashion industry. It will be fun for customers as you are offering more than a product, an experience that will be shared with their friends, and with that, an open invitation to new clients.
An advantage to both managers and clients? we can’t ask for more! Check out the Live Demo and the sandbox site to know the plugin’s functions and have fun creating your custom product. You can also check our YouTube playlist for more tutorials.