As we have seen in previous articles, WooCommerce offers great potential which allows you to sell products in many different ways.
I have shown you how to sell images by creating a credits based subscription on your e-commerce store and how add a donation service where customers themselves chose the value of the products they are buying, in previous articles.
I have also shown you how to create a learning course, but what if we want to create different types of courses? And maybe link them together?
For instance let’s say I want to sell a writing course to my customers, but since this is such a broad topic, I have decided to divide this course into three levels:
- A Base Course: Which is about the basics of writing for different targets: novels, journalism and advertisement.
- An Advanced Course: It contains the basics of writing, journalism writing for websites and copy writing.
- A Complete Course: It contains the basics and the advanced content, plus advanced copy writing with interviews to the big names of this field
Once all the content is created, you want to be able to sell these three courses, adding three specific features to them:
- Each course has a monthly cost and lasts three months.
- Each course has a higher cost than previous one.
- Each course contains its own materials plus the content of the other lesser courses.
So, to make things clear, in case customers buys the Complete Course they will pay a slightly higher amount and they are going to get access to the content included in the other two courses as well, saving a lot of money on the total amount of the three courses together (which will incentivize customers to buy the most expensive of the three levels, raising the average transaction value on your store)
How can you set up this sales system on your WooCommerce based store then? Well, by using the WooCommerce Membership and the WooCommerce Subscription plugins.
Let’s see how.
Required Plugins
Plugin Settings – WooCommerce Subscription
The first thing you should do is to create the courses you wish to sell. To do this, you should use the WooCommerce Subscription plugin.
Once the plugin is installed and activated, create the first course, just like you would with any other item in your website, by going to WooCommerce > Products. In this case, I have named mine “Basic course – Writing”.

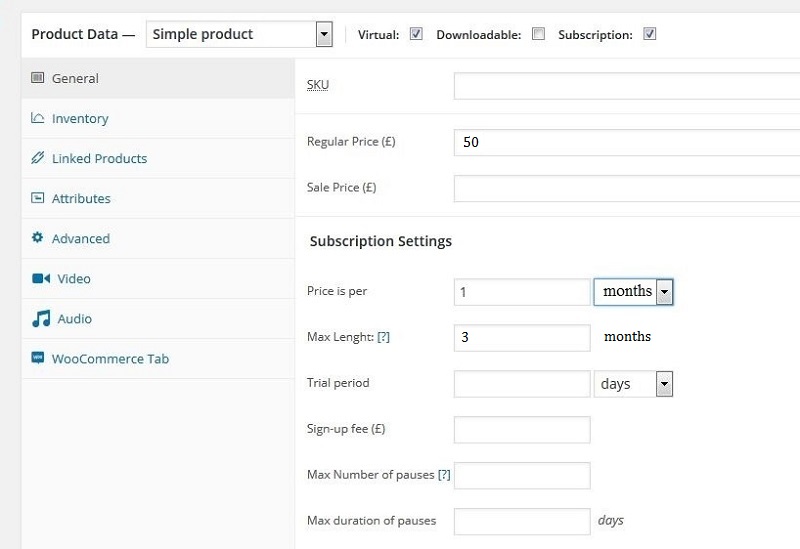
In the product creation page, lower down, you find the WooCommerce Subscription options.
You need to check the Virtual box (implying this is a virtual product that doesn’t need shipping) and Subscription.
Lower down you see the subscription settings. My base course costs 50£ per month, however, you are free to set your price of choice.
- Regular price – £50 (The price of each subscription renewal).
- Price is per – 1 month (The amount of time before the automatic renewal occurs. I have set it to 1 month since my course has a monthly cost. It could also be weekly, bimonthly, annual…).
- Max Lenght – 3 (Shows how many times the subscription is going to automatically renew, leave it to 0 keep it renewing for an indefinite amount of times).
Once your product is ready to be put on display, let’s create its content.
Create your own lessons
We can do this two ways:
- By creating posts that will contain the lessons and the downloadable materials, which will be visible only by those who purchased the related course.
- By creating products (both physical and digital) that will be given to customers once they have purchased the related course.
In this tutorial we are going to use the posting method, but it is a very similar process in both cases.
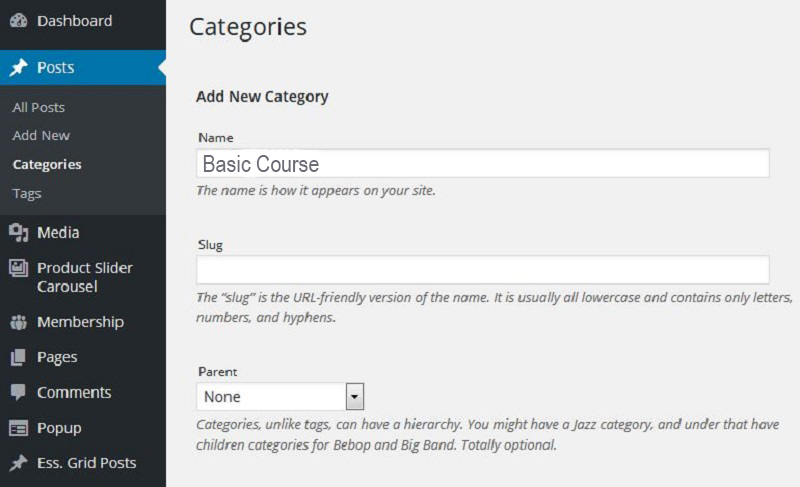
The first thing we need to do is creating three different categories of posts, one for each level of your course. This one is not a mandatory step, but it is highly recommended, especially if you are willing to offer many different lessons in your courses.
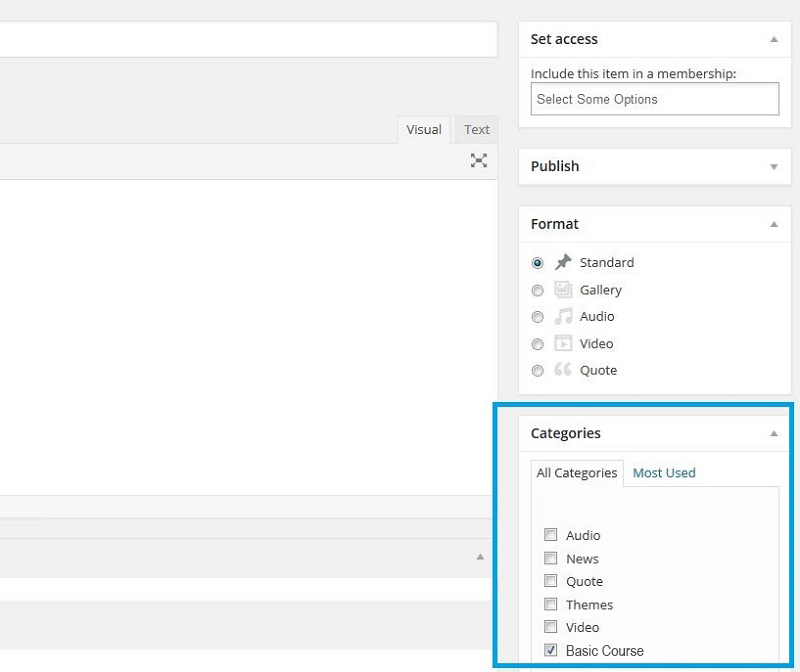
Let’s go to Post > Categories and create three categories. The image below shows the first one, they are all done using the same procedure.
Once your three categories are created, let’s create the related posts. You decide how many posts and lessons there will be. Remember to add each lesson to its corresponding course category.
Once this step is completed for each article, you should then have a list of lessons, each one in its own category. Assuming there will be 5 specific lessons in each course, then you will have:
- 5 articles in the “Basic Course” category
- 5 articles in the “Advanced Course” category
- 5 articles in the “Complete Course” category
Now let’s create our courses and arrange them as follows:
- Basic Course – 5 articles
- Advanced Course – 10 articles (5 + 5 from the Basic Course)
- Complete Course – 15 articles (5 + 10 from the Advanced Course)
Plugin Settings – WooCommerce Membership
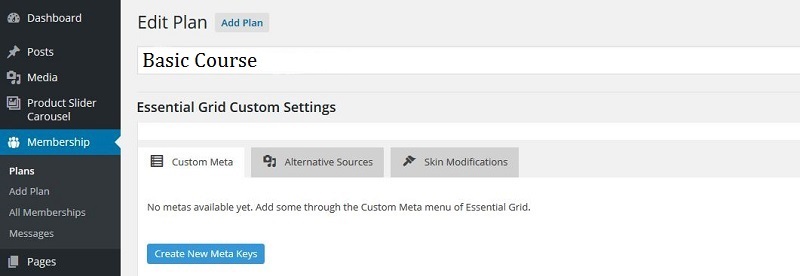
Let’s go to Membership > Add Plan and create a membership plan for each of our three courses. Starting from the Basic Course:
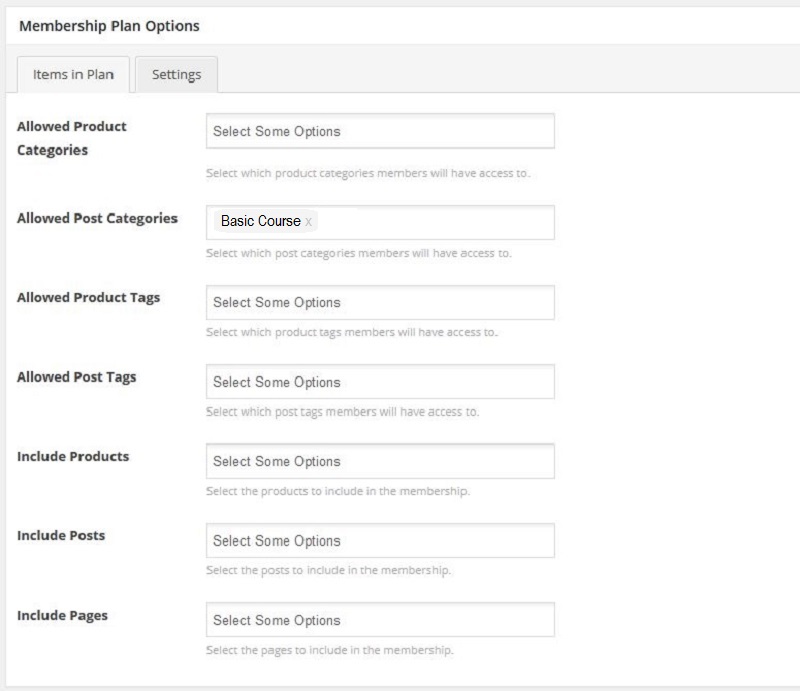
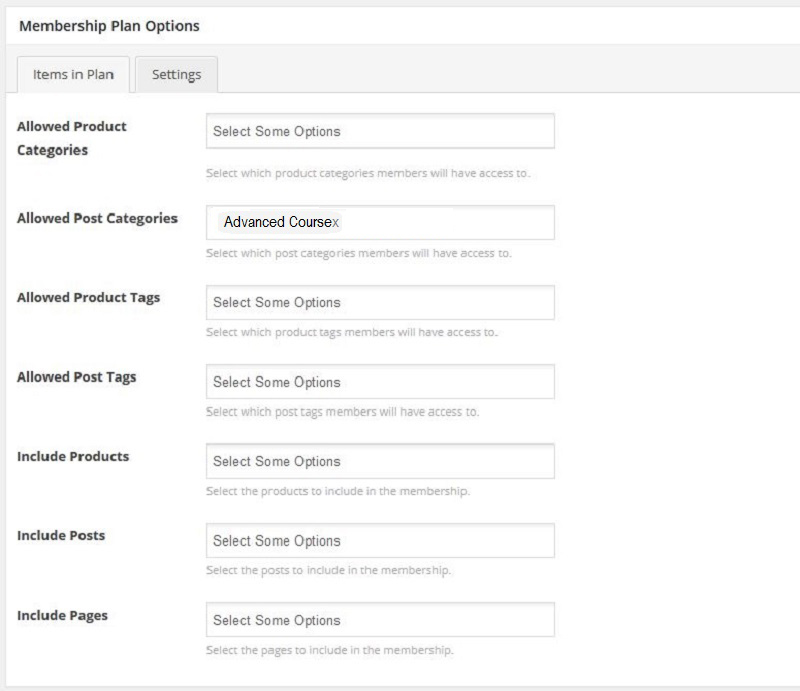
Lower down you will find two tabs: Items in Plan e Settings.
The first one is used to set which products and/or articles are going to belong into the membership plan. These settings also allow you to add a single object or the whole category it belongs into (which is why I suggest you create categories, which speeds up the whole process).
Let’s add the previously created Basic Course category which contains our articles.
Now explore the second tab in this page called Settings and select the product through which your membership is going to be put on sale.
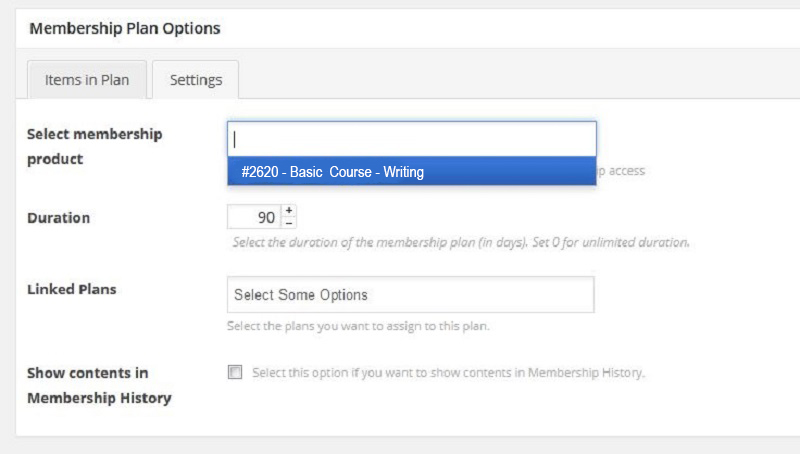
Set the same duration we have entered in the Subscription tab (3 months – 90 days) and your basic course is ready to be distributed.
So what else needs to be done in order to create the two more advanced courses?
Well, all you need is one extra step.
You need to create the Advanced Course and then link it to the corresponding category:
After this, go to the Setting tab and add the “Basic Course” membership plan we have previously created to the Linked Plans list.
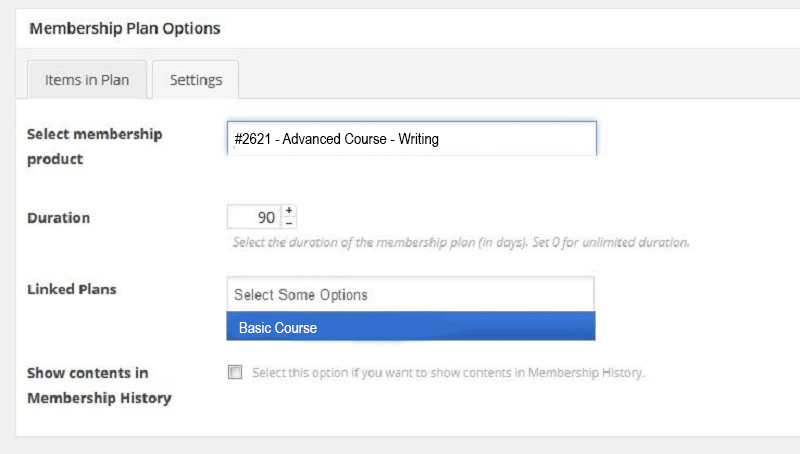
By doing this, the Advanced Course is going to contain its own specific materials plus all that belongs into the lesser course. Now, enter the selling item for this course in the Select membership product section.
Follow the same steps for the Complete Course and you are set!
Two final endpoints before concluding this tutorial:
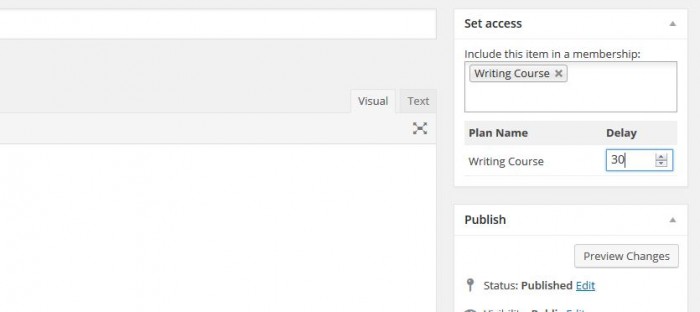
If you wish for the content of your course to be released gradually – the first part right away, the second part after a month and the third one after two months – you need to go back to its specific post and click Set access in the upper right corner, which will allow you to include your article into a membership plan (which you have actually already done by including its whole category) and we can set a given amount of days of delay before this content is made available
Finally, I recommend you allow a credit card payment option on your store, so that customer that will buy your courses will be able to benefit of several ways of performing their payment.
It might seem like a small detail, but considering that only 14% of the the worldwide customer base for online services uses PayPal as their default payment system, it would be a good idea to offer alternative ways of payment in order to avoid losing customers.