“Unity is strength” is the concept behind the success of Marketplaces.
We have all bought something from an online marketplace at some point in our lives: Ebay is a prime example of marketplace, but also Amazon hosts several shops.
This service has the potential of being generic or specific.
Ebay based its success on trading used products and Etsy did the same with hand made and do-it-yourself products.
But why are online marketplaces such powerful tools? Why do so many vendors decide to use them to sell their products?
The main reason is that a trading platform is convenient for all the parts involved.
For Customers:
- They get a wider choice of products and shops condensed in the same place, which saves them a lot of browsing time.
- They can perform one single purchase for all the want rather then having to make several payments.
For Sellers:
- They get to sell their products without having to make their own website, saving money on its creation, indexing etc…
- They can exploit the popularity of products from other shops to gain visibility for their own
For the Marketplace Creators:
- They receive a solid income from the shopkeepers fees and subscriptions.
I’m going to use this tutorial to show you how to handle this second kind of Marketplace, in order for you to be able to create your own and start gaining thanks to other people’s shops right away.
So, how can you create a marketplace in which vendors pay for a subscription fee to use?
All it takes is two plugins and ten minutes of your time.
Let’s begin!
Required Plugin
WooCommerce Plugins:
Before configuring the two plugins, we need to prevent unregistered customers from buying the required Fee.
To do this, we need to divide the seller registration process into two steps:
- The user registers and buys the Fee.
- The user acquires seller access.
Now need to deactivate the Enable Guest Checkout option in WooCommerce > Settings > Accounts & Privacy > Guest checkout.

Now we can configure the Multi Vendor plugin.
WooCommerce and Multi Vendor configuration:
Once the plugin is installed, the “Become a Vendor” page becomes available, its access is reserved to registered users only, to change their user status from Customer to Vendor.
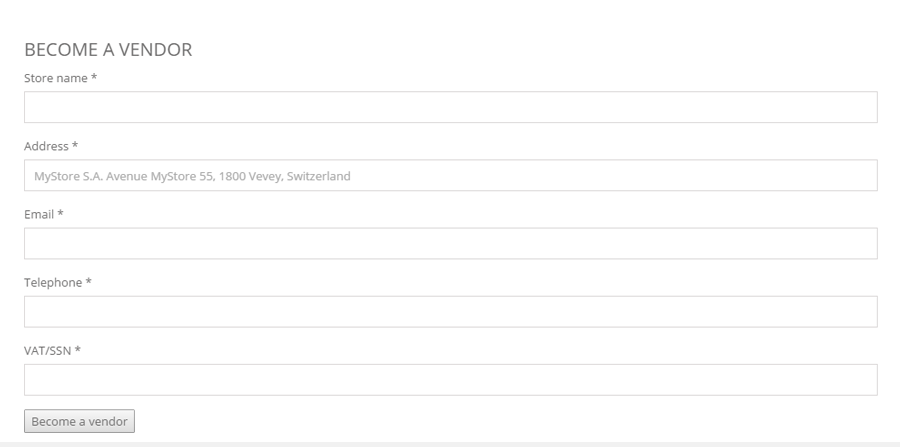
If this page looks not available for whatever reason (activation errors, JavaScript errors etc…) it is still possible to manually create it following these steps:
- Go to Pages -> Add new and create a new page called “Become a Vendor”
- Enter the following shortcode in the page: [yith_wcmv_become_a_vendor]
- Go to YITH Plugins -> Multi Vendor -> Frontpage and set your newly create page at step one in “Become a vendor” page.
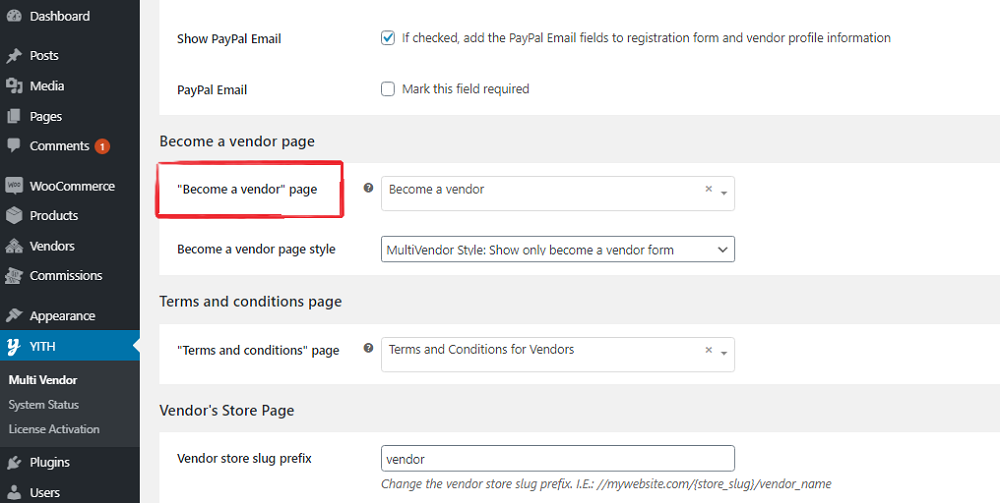
Now you should disable vendor registrations in the My Account tab, YITH Plugins -> Multi Vendor -> Frontpage by unchecking the Enable Vendors registration in “My Account” page box.
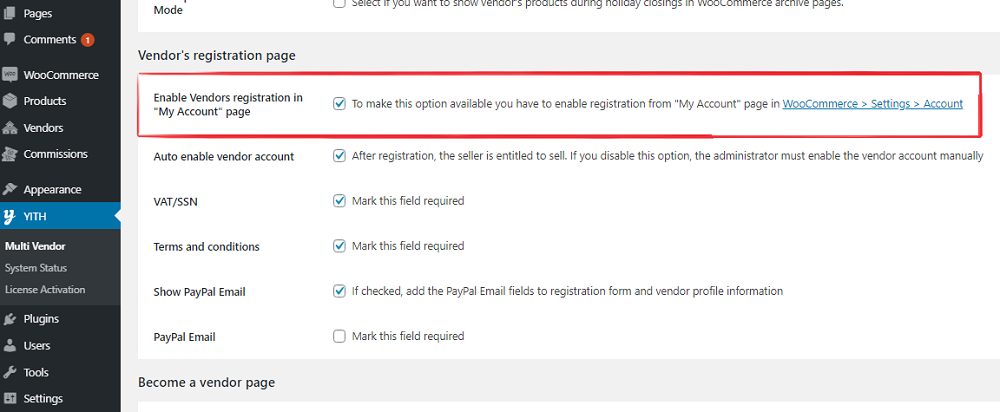
Doing this will only allow registrations from the Become a Vendor page.
Now all you need to do is to allow for only Fee buyers to access this page and to do this we are going to use the “Membership” plugin.
The first thing you should to is to create the product customers need to buy to receive their Membership (meaning the opportunity to register on your store as Marketplace vendors, since the membership is going to contain the vendors registration page).
To do this, go to Products -> Add Product and create a new virtual kind of products (to void shipping fees), and assign it to a Name and a Price (which will be the price customers need to pay to acquire the Vendor status on your WooCommerce based Marketplace)
Configuring WooCommerce Membership: Creating a Membership plan
- Go to Membership -> Add Plan
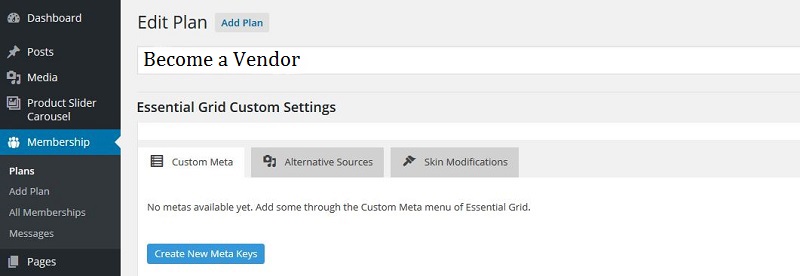
- In the Items in Plan -> Include Pages select the “Become a Vendor” page you previously created.

- In the Settings -> Select membership product tab select the Membership item you have previously created and click on Publish.
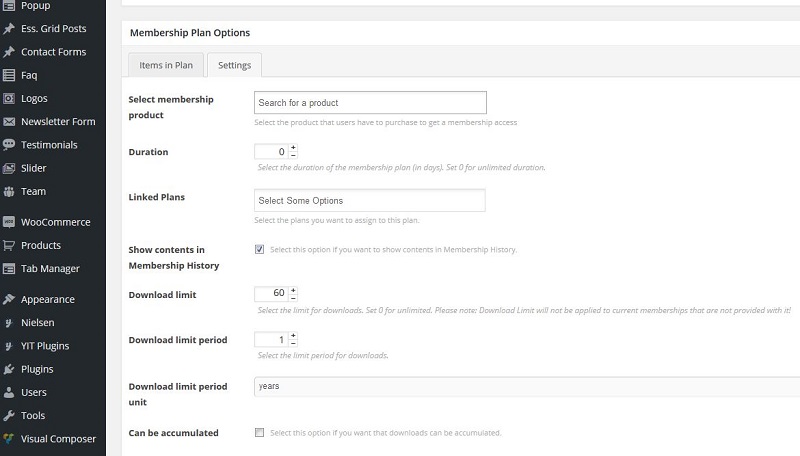
This way only users who buy the membership plan will be able to see the Become a Vendor page and only they will be able to register as Vendors.
And you are set! In just a few steps you have created your own WooCommerce Marketplace in which vendors need to pay a fee to sell their own products.
Now you can start earning money on other vendors who sell on your own Marketplace.