The internet is a paradise for all those creative souls that had no idea where to start selling their creations until yesterday.
It’s not unlikely to find e-commerce stores focused on photos, images, portraits and any other visual art that is so popular at this moment in time.
But if it’s undoubtedly good for our store be able to sell our products, we can easily exploit other ways to have a regular income on our store.
Especially when dealing in a huge amount of products, it is better to offer a system that will keep a customer connected to your store rather then selling one single item, thus creating a long lasting relationship.
That’s what a lot of similar websites do, first of which Fotolia. Other than buying one single image, customers are allowed to subscribe and download a given amount of picture for a limited amount of time.
Creating monthly credits subscriptions allows you to achieve two important results:
- It increases the average transaction value – Since it is convenient to pay for a monthly subscription rather then buying individual items, customers tend to chose this option even if they only need one single itemt. This way you rise your average purchase value and keep it steady.
- It keeps customers coming – A timed subscription, especially one that renews byitself (as we will see below) allows for a growing customer base on your store.
To sell your images on a credit based subscription, we are going to exploit the combined action of two plugins and to guide you through this process, let me give you a practical example.
In detail:
- A store that sells landscapes pictures
- Two different kinds of subscriptions, a monthly and a yearly one, granting access to 5 and 60 credits (one per downloaded image) which cost 15£ and 100£.
Required plugins
Monthly and yearly Subscription
The first thing you need to do is create subscriptions. To do this, you need the Subscription plugin.
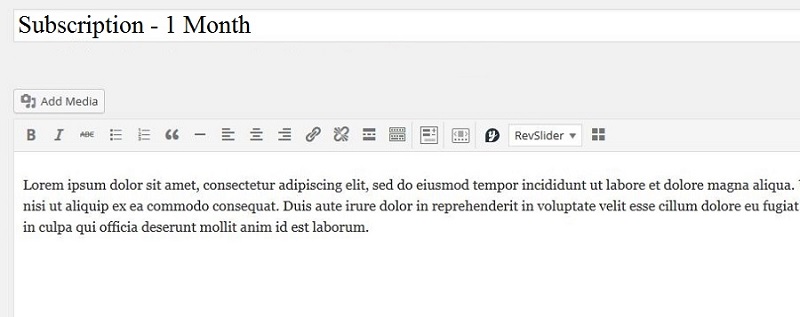
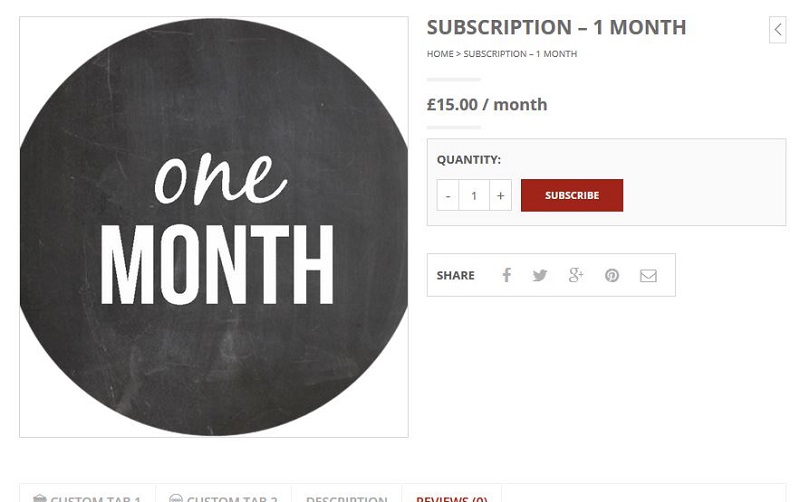
Once the plugin is installed and activated, let’s create a monthly subscription, the same way we would to this with any other item in our store, browsing through WooCommerce > Products. In this case, I named mine Subscription – 1 Month.
In the same product creation page you will find the Subscription options menu.
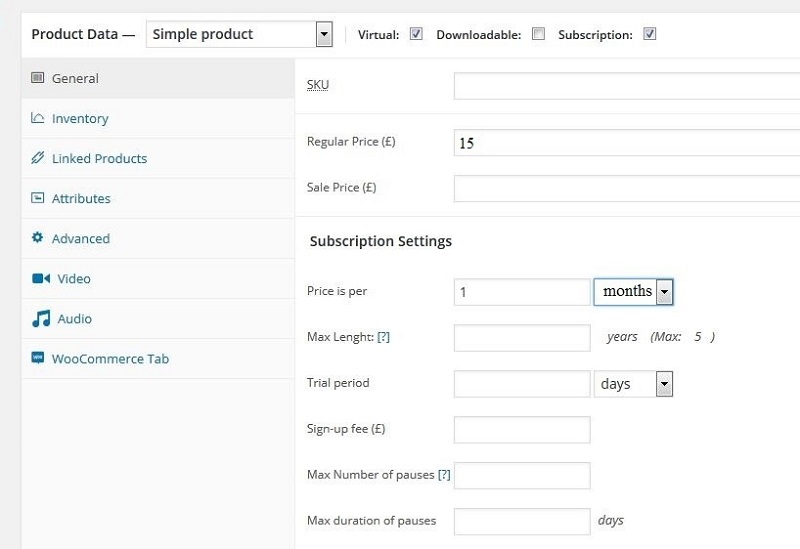
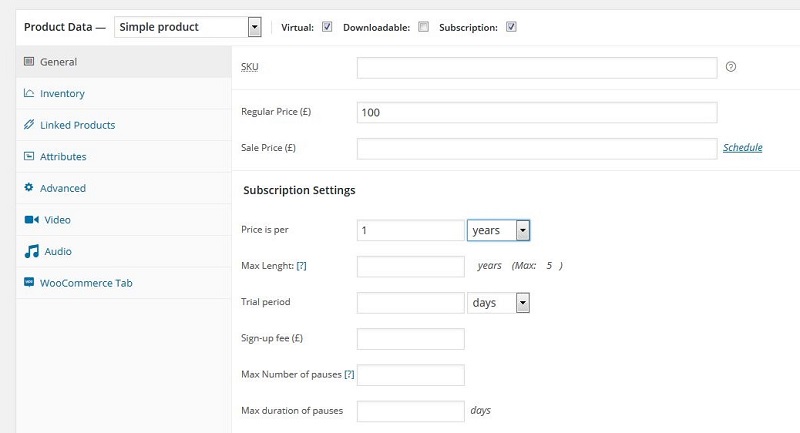
Check the Virtual box (implying this is a digital product that does not require shipping) and Subscription.
Lower down you find the subscription settings, following the starting example I’ve set it as follows:
- Regular price – 15£ (the price of each single subscription renewal).
- Price is per – 1 month (the amount of time required before the subscription gets automatically renewed, I have set it to one month, because this is a monthly subscription, it could as well be set to varying amounts of time).
- Max Lenght – 0 (Shows how many times the subscription is going to be automatically renewed, leave it to 0 for it to renew indefinitely)
This is how we created the monthly subscription. To create a yearly one, we need to repeat the very same steps and change price and duration.
Once the subscriptions are created, we need to link them to their related content, that’s when we start using Membership.
Let’s create the content that is for sale
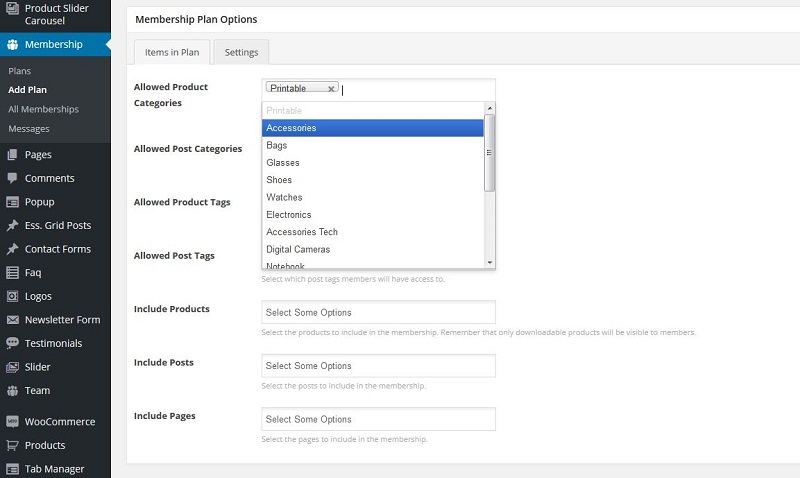
First of all we need our content. We are going to enter each product we want to be available for this subscription in its related category. In this case I’ve created the “Printable” category. You can link as many categories as you like to your membership.
This is not a mandatory step but it is extremely advised you do it since it will make your work easier later on, as you will see.
Allowing credit related content – Membership
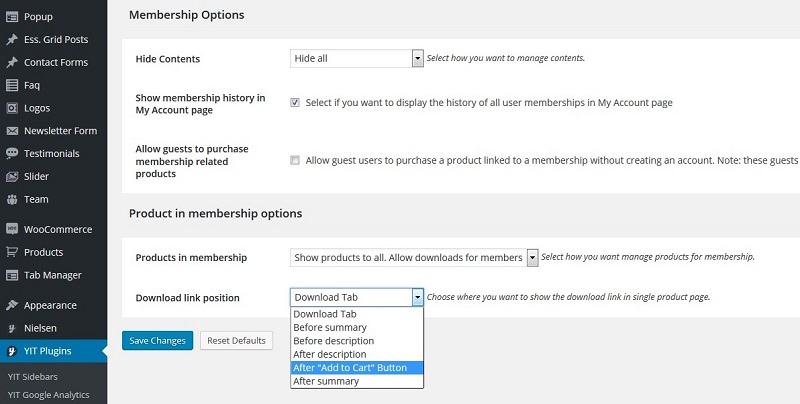
The first thing you need to do is browse through YIT Plugins > Membership and then from Products in Membership pick “Show products to all. Allow download for members“.
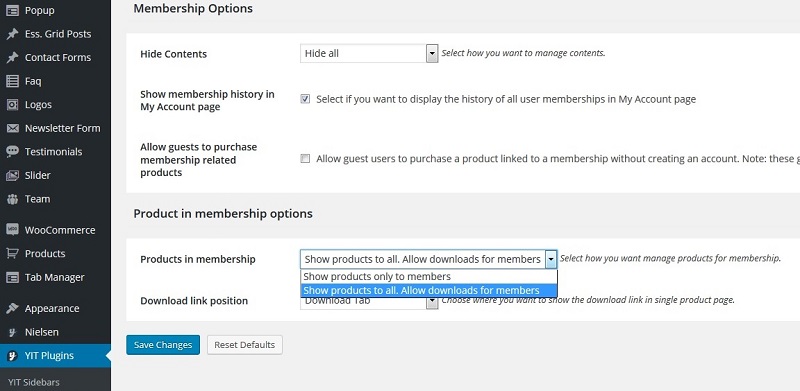
This way your items will be displayed in the catalog and can be bought individually, but only subscribers will see the direct download button.
Right underneath you can chose the location the link will be displayed at in the product page. As you can see, I picked “After “Add to cart” Button” and that’s where we are going to find it.
Now that we have created our subscriptions with their related content, let’s create our membership plan.
To do this, browse through Membership > Add Plan and assign a unique name to your plan. To link it to its related Sunscription, I’ve named my plan Subscription – 1 Month.
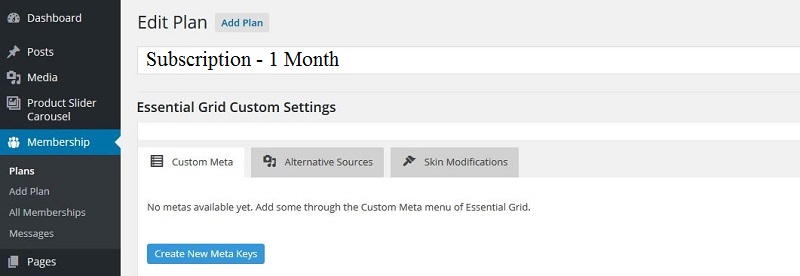
Lower down you find two tabs: Items in Plan and Settings.
In the first one you can set which items are going to be part of your membership plan. Settings allow you to add a single object or its whole category.
I mentioned it would have helped to insert all your products in the same category, so now you can add it all without having to do the process for each single object. Let’s then add the “Printable” group to the Allowed Product Categories.
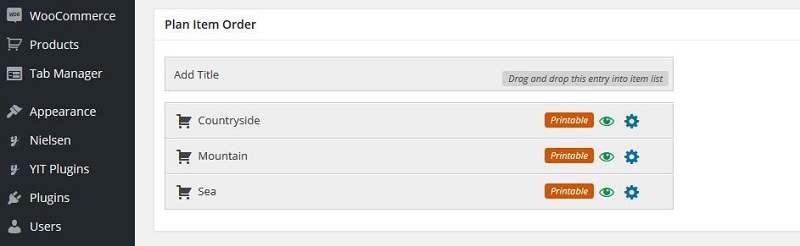
Once this category is added, lower down you will find the Plan Item Order, which allows you to drag and drop items into the preferred order of appearance. In this case, I see three items because there are three images in the category.
Now browse through the second tab in this page, Settings, and select the product through which the membership is going to be sold.
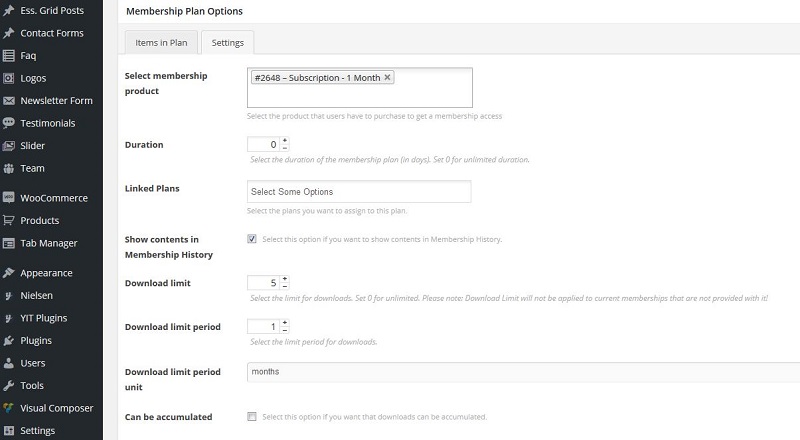
Let’s set the duration equal to the one in Subscrition (1 month) and set the amount of credits available with this membership. Since this is the monthly one, we will enter 5 in Download Limit.
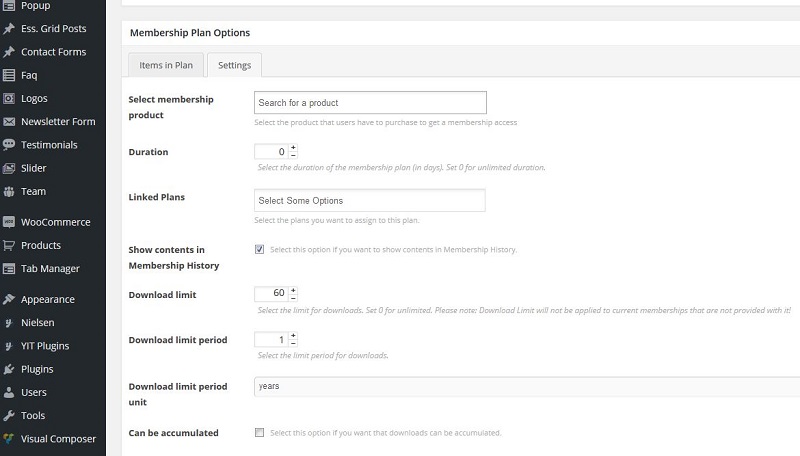
In order to create a yearly plan, just follow the same procedure and change the settings accordingly. We are going to increase the Download limit and set it to a one year time limit.
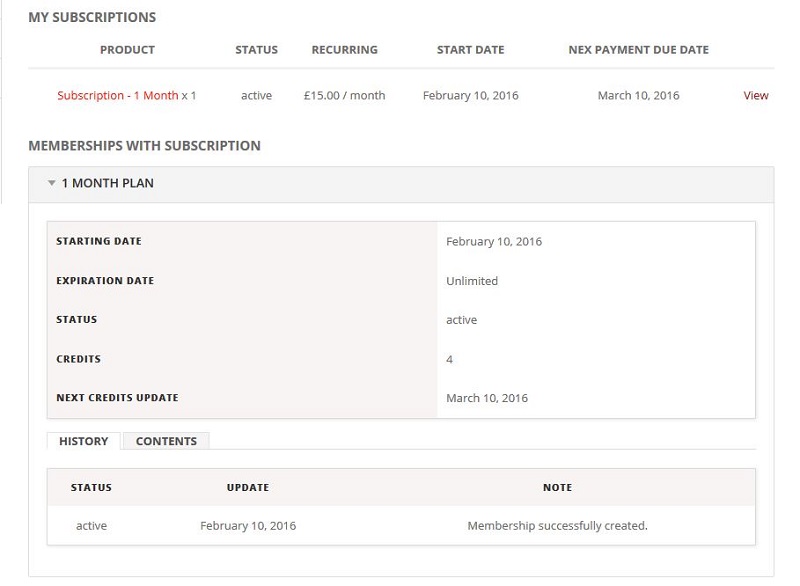
Done! Now your customers can subscribe by simply buying your subscriptions like any other product. This is how our monthly subscription will look like:
This way, once the subscription is purchased and customers have officially become members, they can see their account and membership. Since this is a monthly subscription, as you can see the credits amount is 5.

Once customers are going to check out one item, they will see the download link we have previously set.
Once the file is downloaded, the credits counter is going to update automatically.
Before concluding, I suggest you implement a credit card payment system to your online store, so that subscribing members can use alternative payment system other than PayPal.
It might seem like a small detail, but considering only 14% of customers uses PayPal as their default payment system, it’s only wise to offer alternative payment systems in order not to lose customers.
To do this in a quick and easy way I suggest you use the Stripe plugin.