Make the process of building your computer fun and practical for your customers! Do you have a tech shop and are looking for a way to sell a product with options? Look no further. Read along to find out how simple it would be for you (using WooCommerce) and your clients to choose the product they like.
If you are a newbie in the WooCommerce world we recommend you check our WooCommerce essential guides, a comprehensive guide of tutorials to start from zero to sale.
Who is this tutorial on WooCommerce Product Add-ons useful for?
You will find in this plugin a useful tool when dealing with products that have necessary options. Working with variable products sometimes it’s not quite exactly what you need, sometimes a business needs an innovative way to introduce a product or even a way to portrait the options without having to upload many different products, to allow every possible combination. Sometimes you want your customers to be able to add a text so they can buy a custom t-shirt or maybe you want to add an additional service like a transportation option. The sky’s the limit when it comes to product options, that is why the YITH Products Add-ons & Extra Options will offer you plenty of ways to make the product special and unique.
The challenge when creating a product like a laptop computer
As a business selling this kind of product, you must be familiar with getting a lot of questions from customers before buying. People who want to know the difference between i5 and i7, asking for compatibility issues, and many more specific questions. It can get messy and when confusion arrives, it can cause hesitation with ending in the customer not buying the product.
What if you could offer a computer with set options, where its functions are compatible and dedicated to a particular use? That would be a game-changer for customers and yourself. For example, you could name the product ‘My gaming Computer’ or ‘My computer for School’ and add specific components or brands that are aligned to the searched functionalities. It prevents many types of questions as the process is clearly defined.
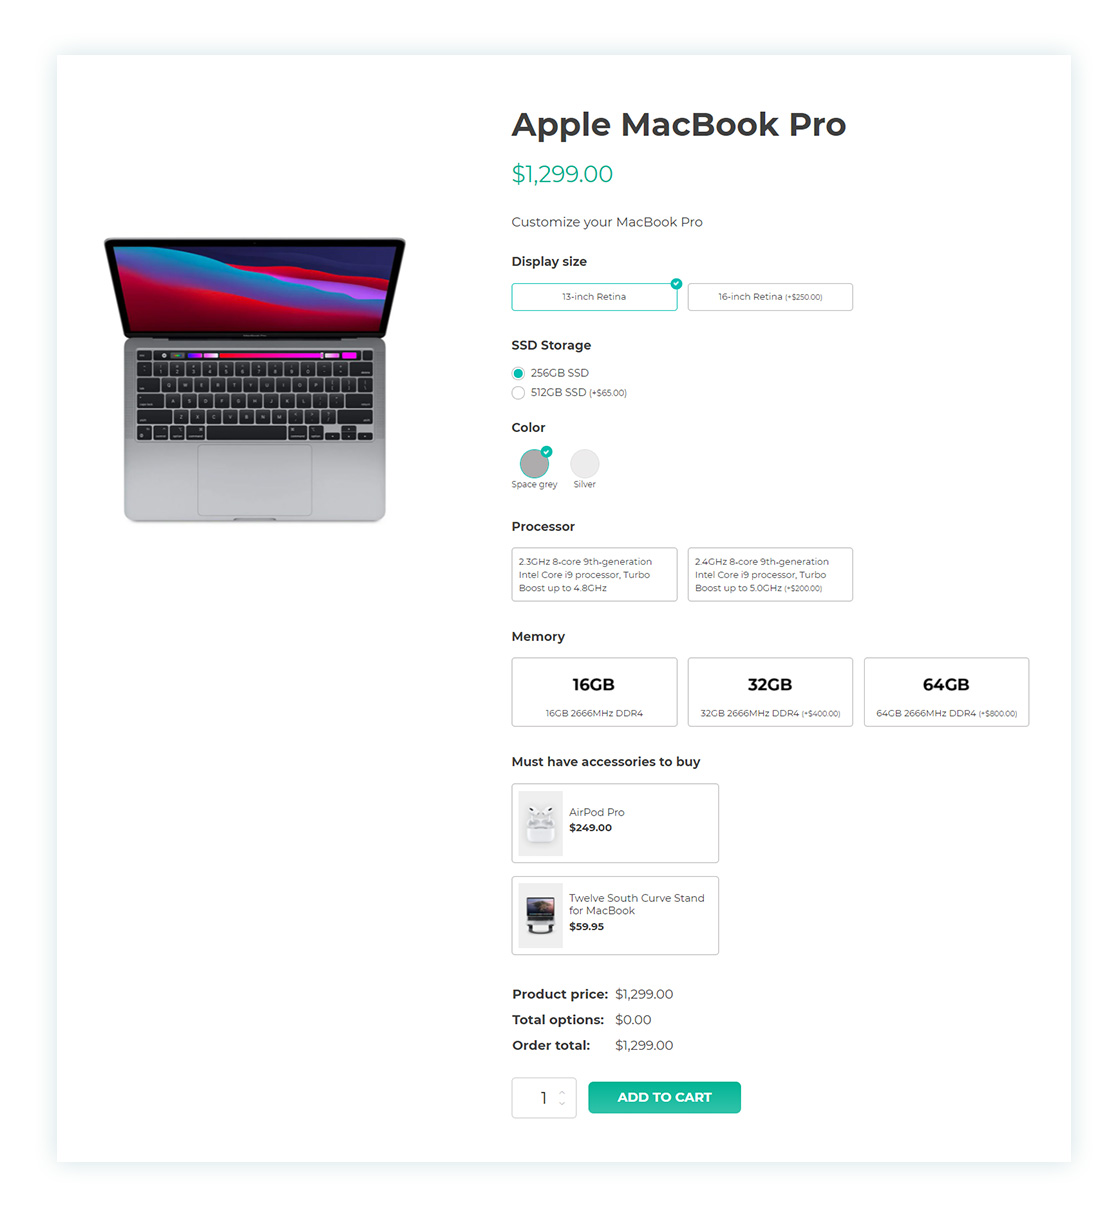
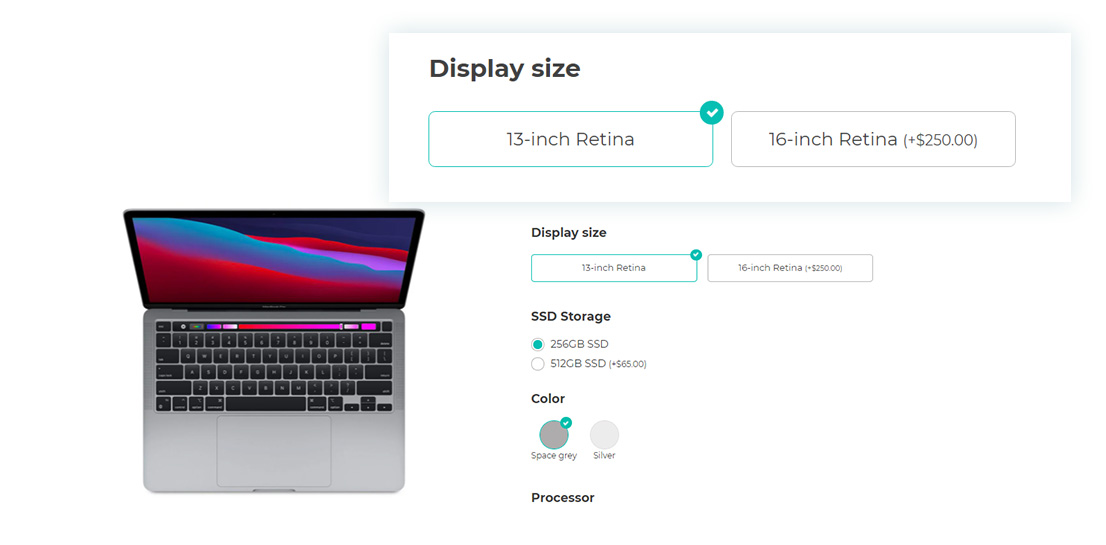
For this step-by-step tutorial, we are going to recreate a product of a computer with simple options to get you started on what can be done with this plugin. It would look like this on the product page:
The process of creating the add-ons and extra options in 8 steps
Step 1: Create a simple product
We will start by creating a simple product, we will name it ‘Apple Macbook Pro’, we will add a short description, a product image, and a price.
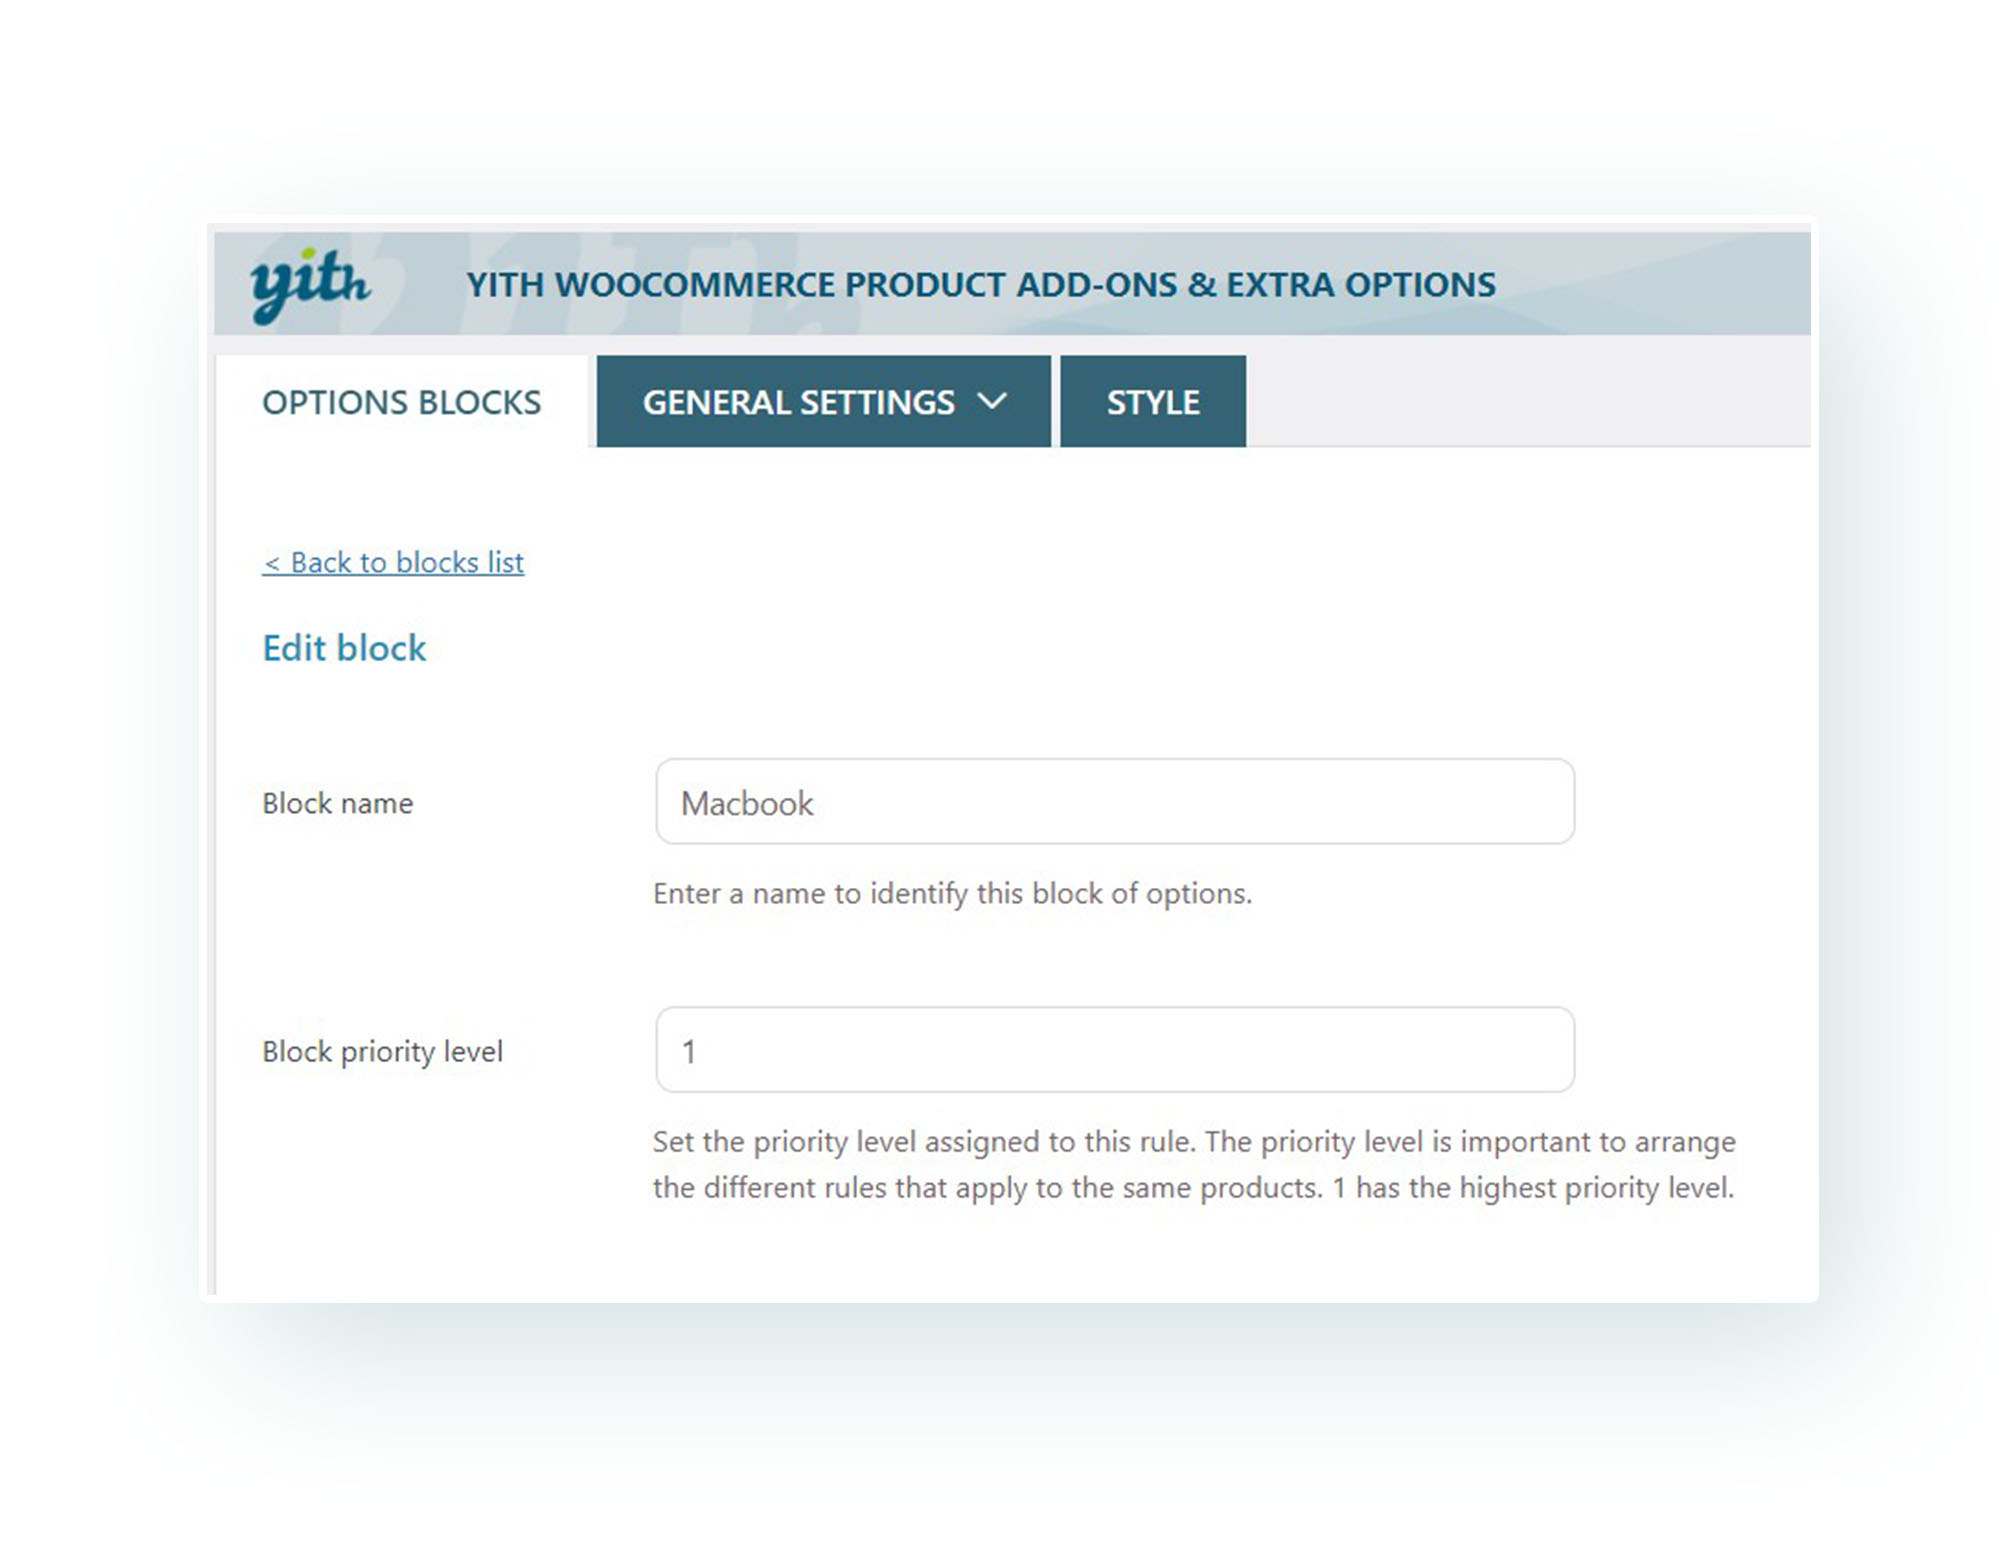
Step 2: Add a block
Go to YITH > Product Add-ons > Add block. The block will contain all your options together. We’ll name it ‘Macbook’. Priority is used when you have products that have more than one block and the number is the order in which they’ll be shown. For this example, we don’t need to worry about it, as only one block is assigned to this product.
If you want to watch the process of creating a block of options you can check our YouTube video.
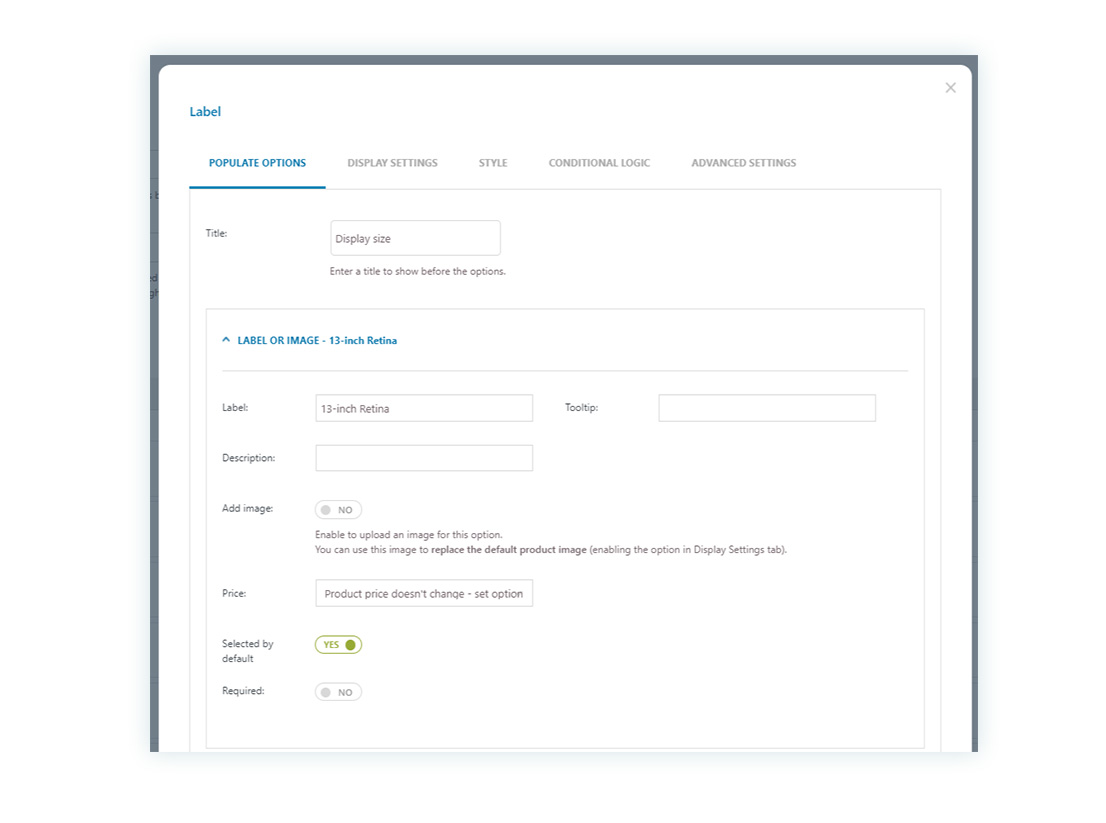
Step 3: Label or image for Display size, Processor, and Memory
Let’s get started with our options, we will use a Label or Image for the first three options: Display size, Processor, and Memory. But first, we want the ‘Display Size’ to appear, so we will go to Add options > Label or image and put ‘Display size’ as a title, in the label we write the specific feature of the screen (13-inch Retina). We will set this option as default by changing the toggle to ‘yes’.
Below these, you will find the ‘+ Add a new option’ button and you can click it in order to offer an alternative, in our case we added a 16-inch Retina with an additional price. Additional prices for options can be changed by choosing Price > Increase product price. We set the normal price to 200 for the 16-inch display.
In case you want to add an image just go to Add image > Yes, and you’ll be able to upload a picture or enter a link to it.
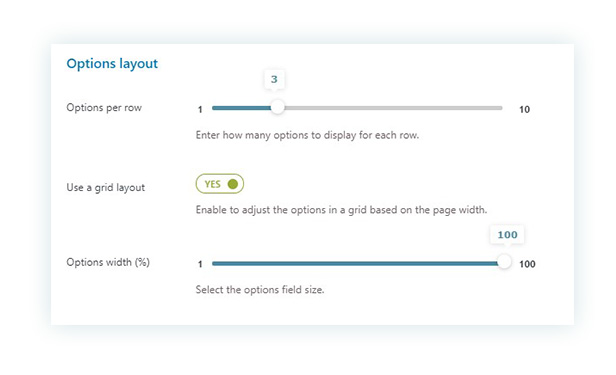
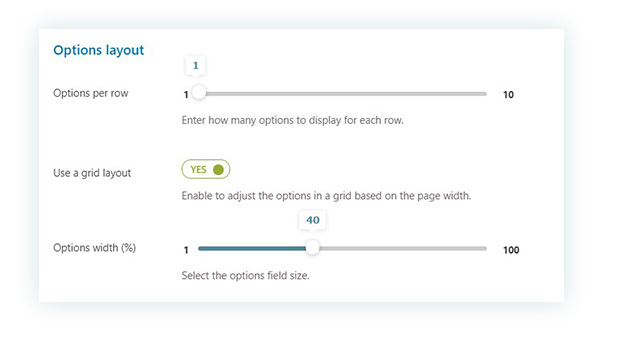
After adding the necessary options to our computer’s screen, we have to choose how they are going to be displayed. For this, we go to the Display settings tab where we only change the Options Layout.
We now are going to venture into the Advanced settings tab only to change the selection type to ‘Single’. This means that our customers won’t be able to buy a computer with both screen sizes.
Step 4: Radio Buttons for SSD Storage
As it shows in the product picture shared at the beginning, radio buttons are used for the SSD storage options. On the product page, we have something like this:
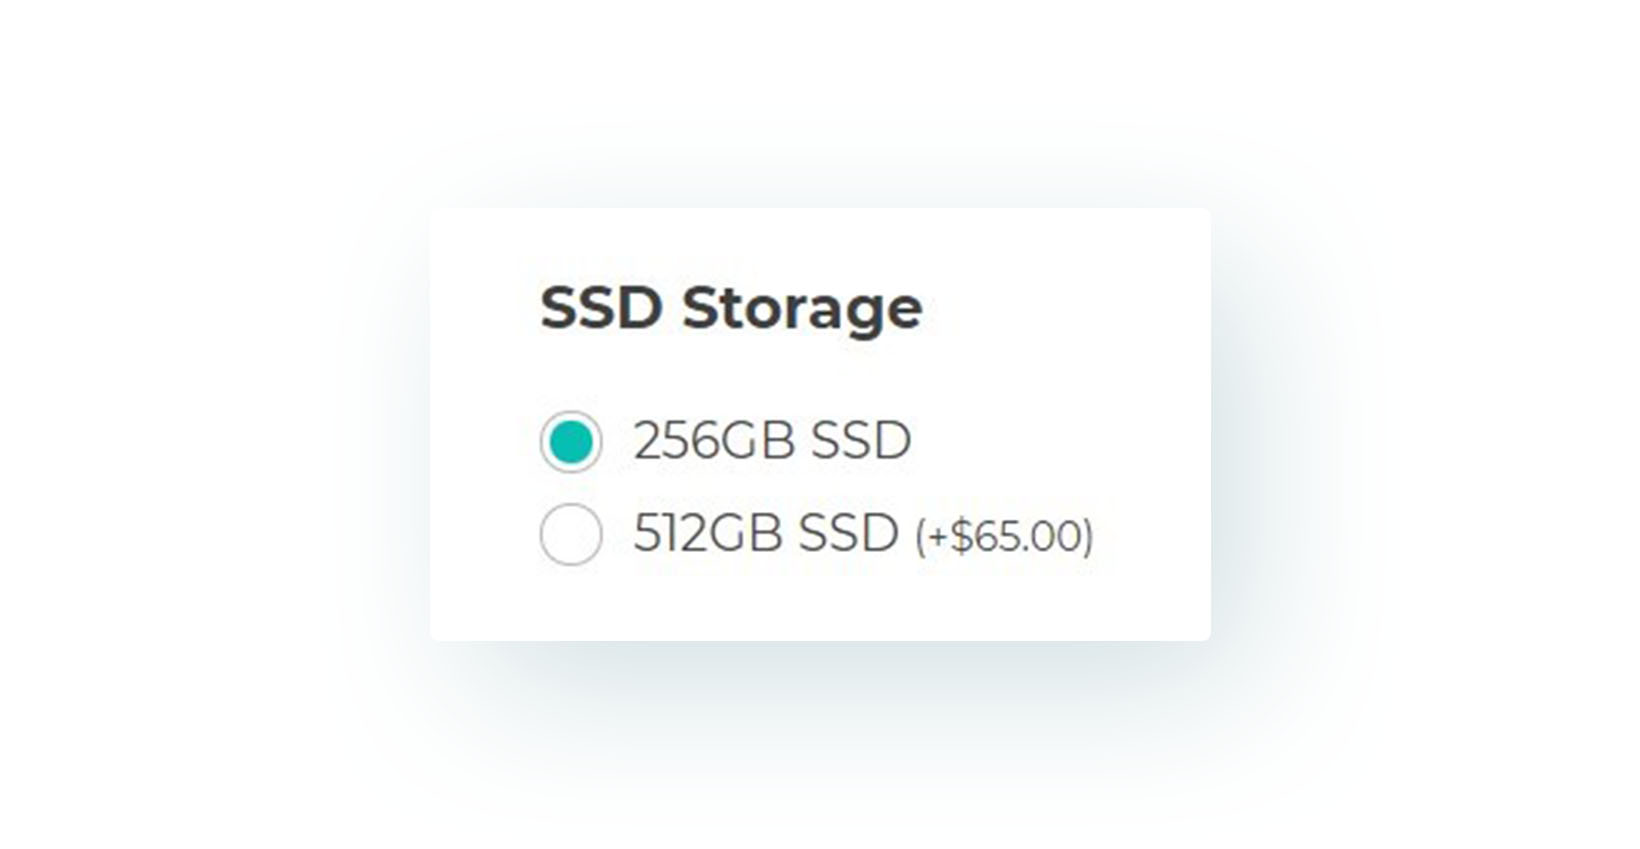
But in order to have this, we will have to first go to our Block that we named Macbook and add an option. There, we will select Radio as the ‘Add option’.
In the Populate options tab, we will add a title, a label (that is the first option’s name) and activate the Selected by default toggle.
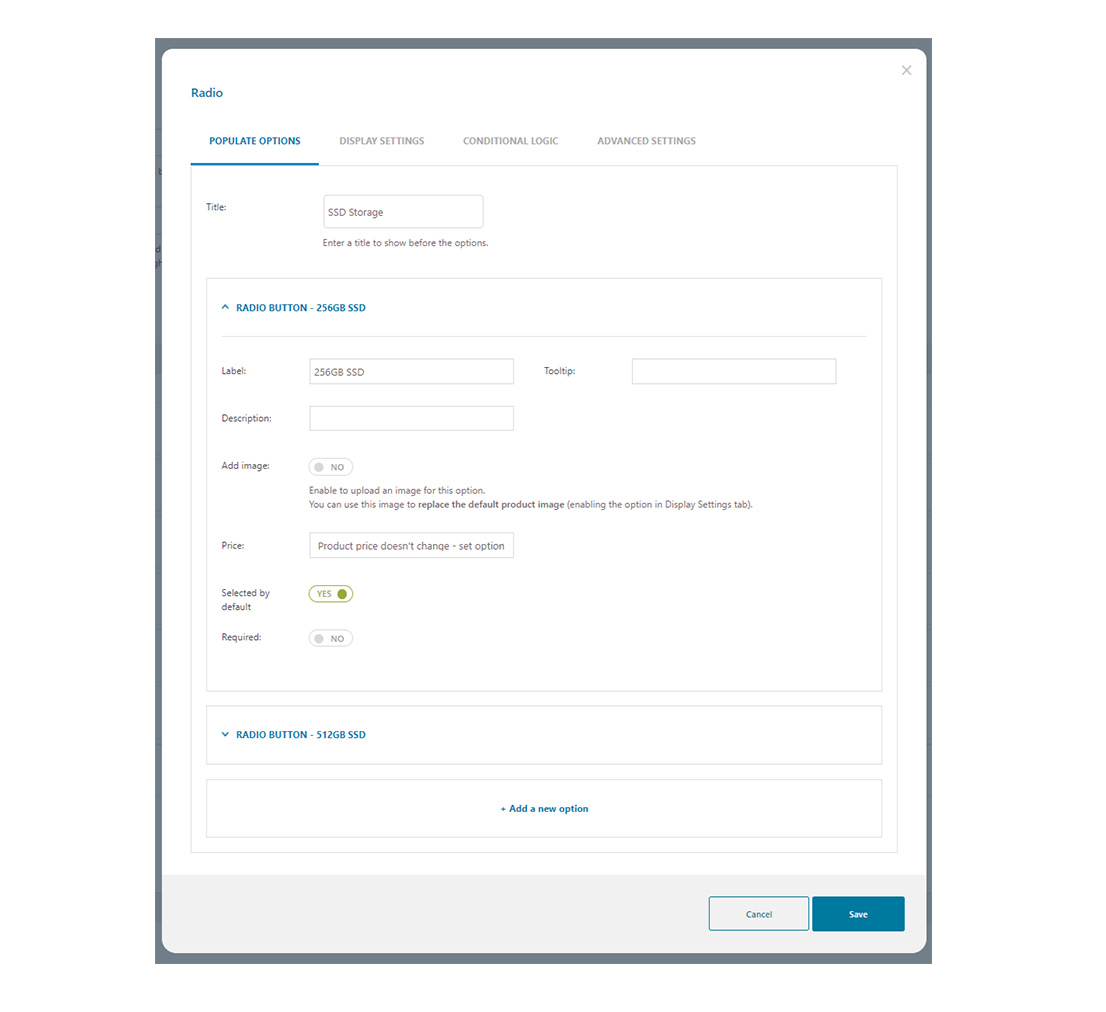
In the display settings tab, we’ll only change the Options layout to enable the grid and set it in the number 2. For Advanced settings, as we did before, we allow choosing only one product in Selection type > Single.
You can also check our YouTube video about Radio Buttons.
Step 5: A color for your computer
Colors are one of the most-added options throughout online shops, it is always a good idea to offer a color variant. In our case, we are going to offer two: Space Grey and Silver.
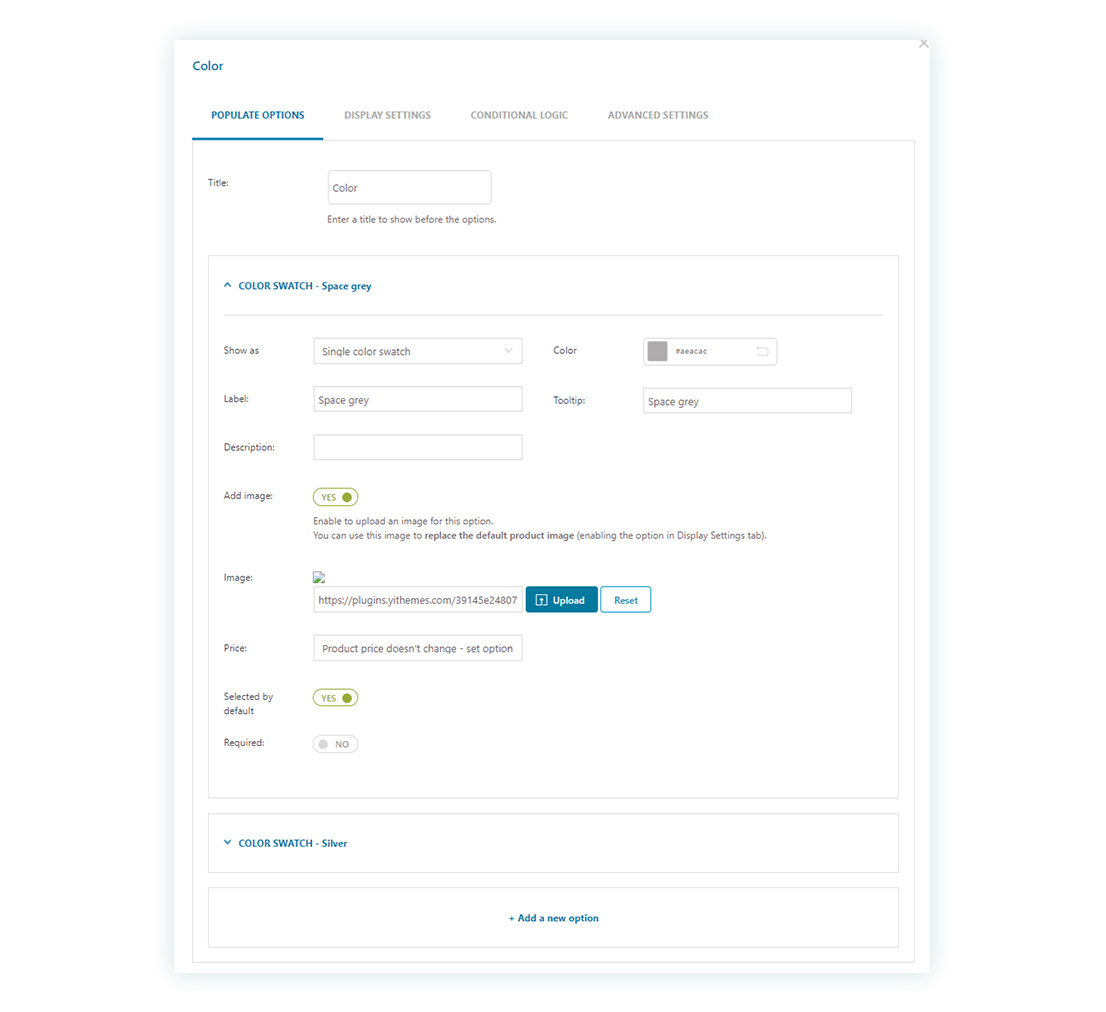
To add them you have to first go to our computer block and go to Add options > Color swatch.
For the title, we put ‘Color’. Below, in the ‘Show as’ options we can choose a single, a double color, or an image color swatch. We chose the single, and we picked a grey color. Also in the Label, we entered the color name and we added a picture of the computer in that color. The space is going to be our default color and it is included in the price.
As you can see, below the Space Grey option there is the other: Silver. The process is the same, the only difference is that we put an additional price if you choose that color.
In the Display settings, we’ll set the grid to two and in Advanced settings, we’ll again allow choosing only one product in Selection type > Single.
Step 6: Adding HTML Heading
The HTML Heading is used to add custom texts that you can use to add a message or simply to introduce the next set of options.
As we did for all of our options, we’ll go to Add options > Add HTML element > Text. We are going to use this piece of text to upsell our accessories.

Step 7: Offering products as options
This will definitely be a useful resource when selling computers, you can always upsell accessories that are needed, for example; a protective case or a wireless mouse. Think of items your customers might consider after buying the main product. You can use the options as a reminder of upsells, they might decide to buy together with the main product or not, but at least they realize the shop offers them too.
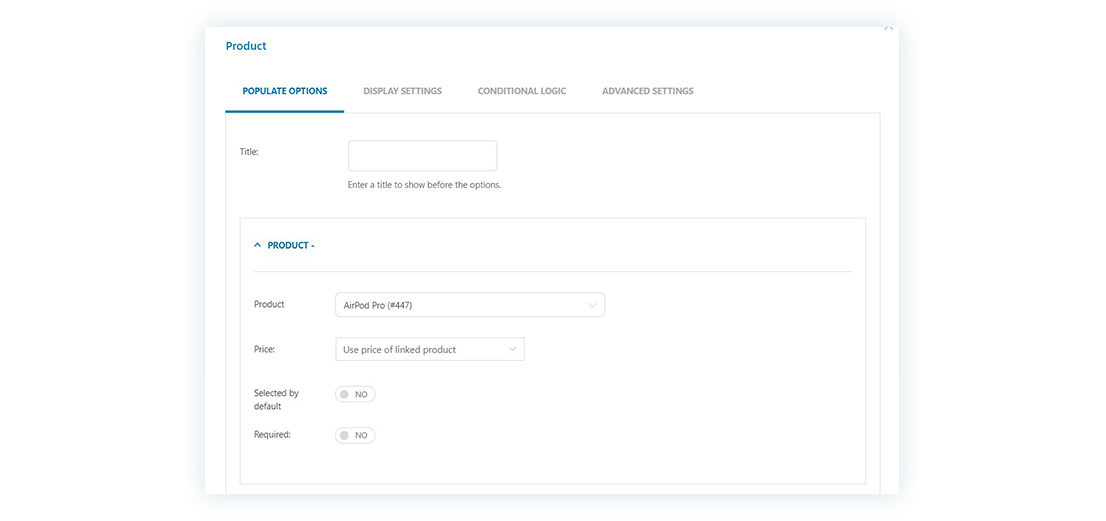
For our example, we’re going to offer a set of Airpods and a laptop stand. In order to achieve this, we will add another option and choose ‘Product’. The settings will allow us to choose a product and a price (if needed).
For the display settings, we’re only changing the Options Layout as seen below.
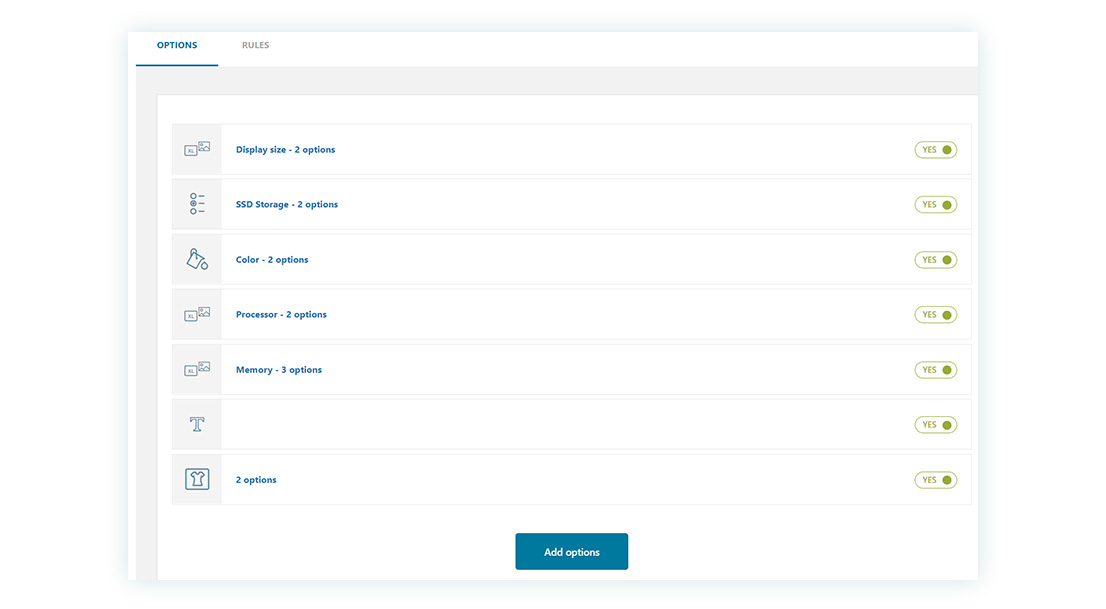
And we finished with our options for the computer! This is how the list looks like for our block:
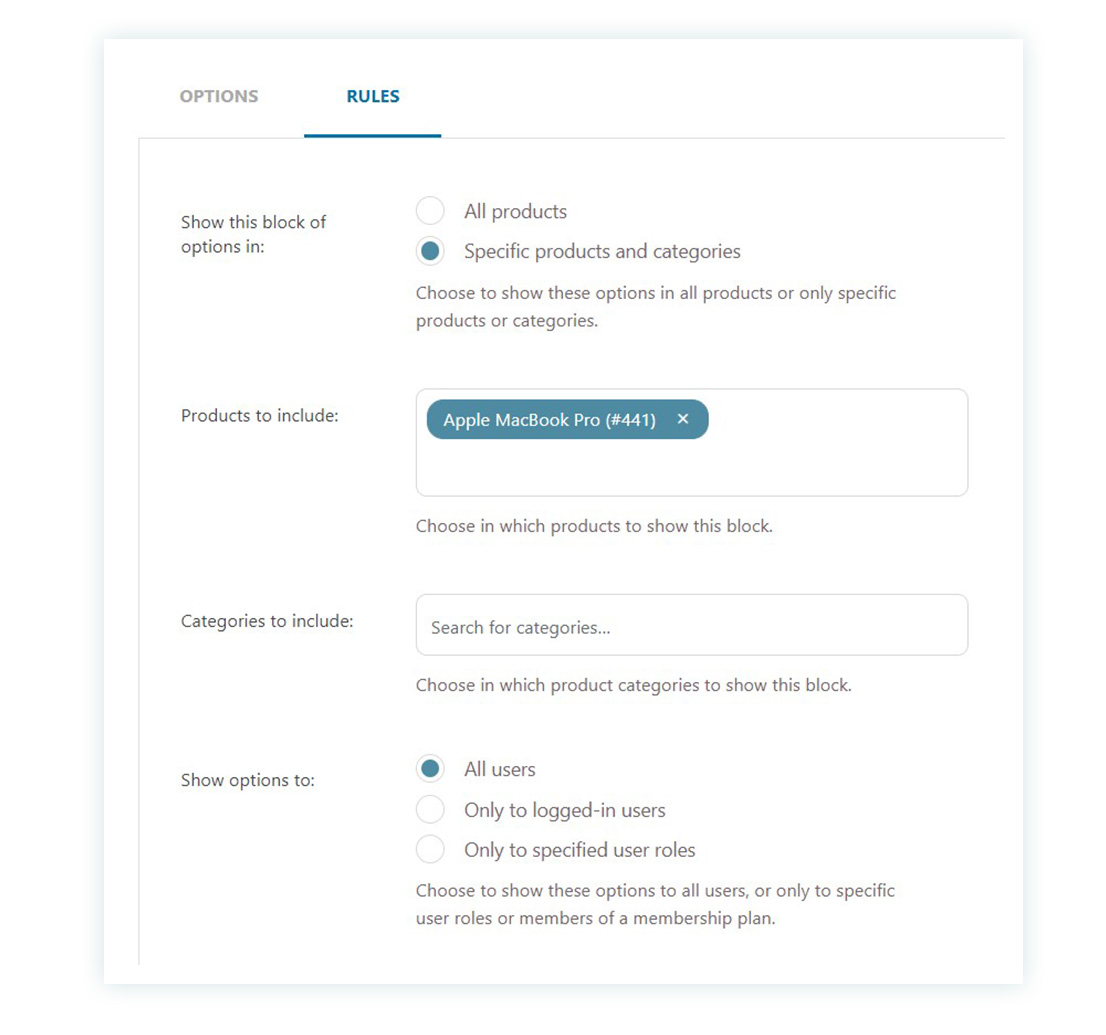
Step 8: Add Rules
Last but not least, the rules determine whether this list is going to be visible on every product, or just selected ones, and to every user.
This is important to configure if you do not want the options to show for guest users and only to logged-in users, like trade customers or members. Also, you can have the same block options showing on more than one product. This is where we set these types of rules and you can have a lot of control over each add-on.
Why use YITH Product Add-ons and Extra Options?
Consumers are a vital part of every e-commerce business. That is why it is extra important to offer the best experience for them by customizing their visit to your shop. Your customers will appreciate the freedom to choose different components of a product and make it their own as if the item was completely customized for them exclusively.
The YITH Product Add-ons & Extra Options will add personality to your products, enabling you to target the needs of the clients better by offering personalized options. Besides, it was made to be easy to set up and manage so that you avoid extra coding costs and maintain an always up-to-date store.