These days having an “Online bay” for your activity has become a requirement for all sorts of products and services.
This is why many companies rely on web design agencies in order to create their own personal corner of the internet.
For people selling products, whether they are digital or a physical ones, it’s easy enough to create a store using simple and free tools such as WordPress and WooCommerce.
In this article I’m going to quickly turn a classic e-commerce store into an online showcase with the following features:
- The chance of creating a showcase which includes prices for the items displayed but doesn’t allow purchases.
- The chance of allowing customers to request a quote for the product they are after.
- The chance to highlight and display the brand names for our products in the catalog.
- The chance to enter the EU system of energy classes for your products.
Let’s see how we can achieve these results in a few clicks!
How do I create a product catalog using WooCommerce?
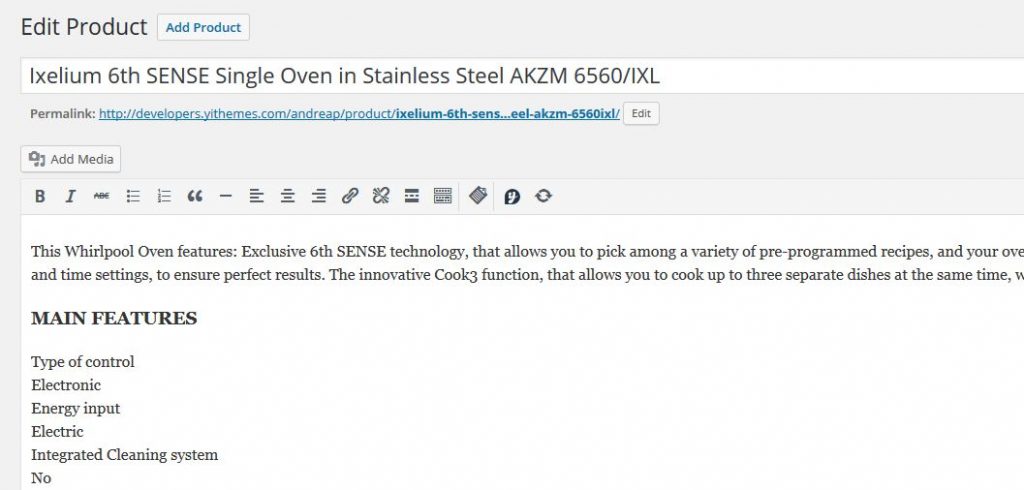
The first step to make your own showcase is to create a store as we normally would with any other product. Let’s now enter the products in the store:
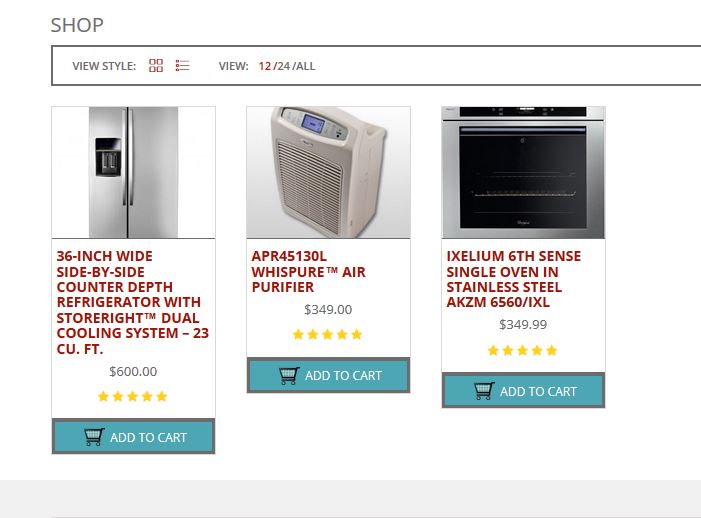
Once all of the products are added, this is how the store is going to look like:
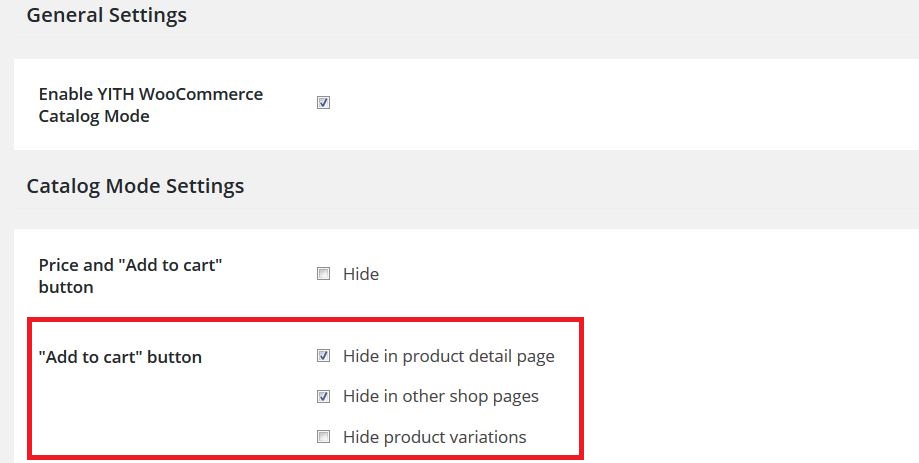
But we don’t want to create a store, we want a showcase. So let’s use a plugin that allows us to integrate this feature to our website: WooCommerce Catalog Mode.
Once the plugin is installed and activated, you can configure the catalog you wish to create, specifically you can decide whether you wish to add the price and the “add to cart” button or just the latter.
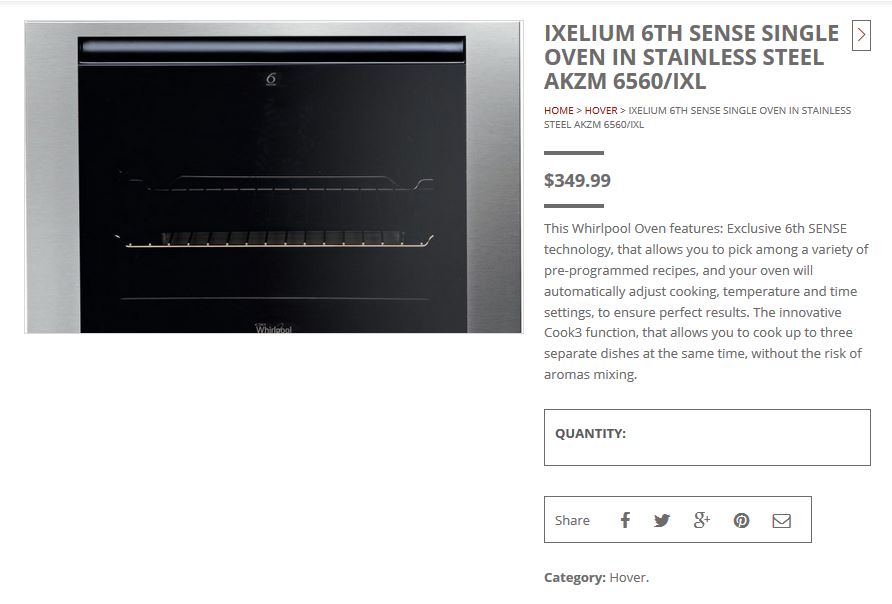
Since we want our price to display their price but disable the purchase function, we will only hide the button:
So in the product page you will no longer see the purchase option:
So now let’s offer our customers the chance to request a quote.
Request for Quotes via WooCommerce
The chance to request a quote is essential for many aspects of an online showcase:
- It allows us to get in touch with customers without having to wait for them to come visit our store.
- It makes customers feel like they are taking part in a negotiantion, improving your relationship with them and bringing them closer to performing their purchase.
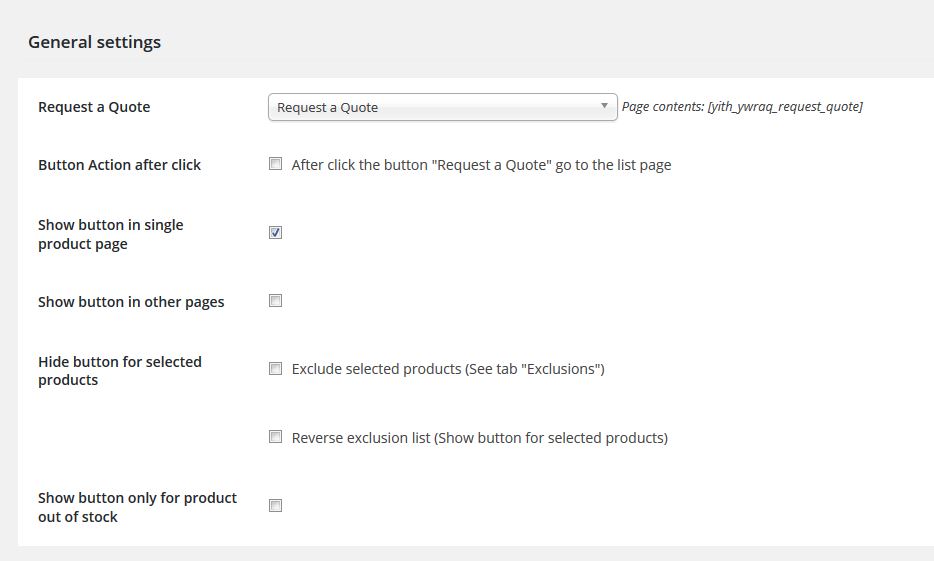
To do this we are going to use the WooCommerce Request a Quote plugin.
In the plugin settings screen we get to choose where to display the request a quote button, customize the look and the fields that you wish to display:
Once our settings are configured, this is how our product is going to look like:
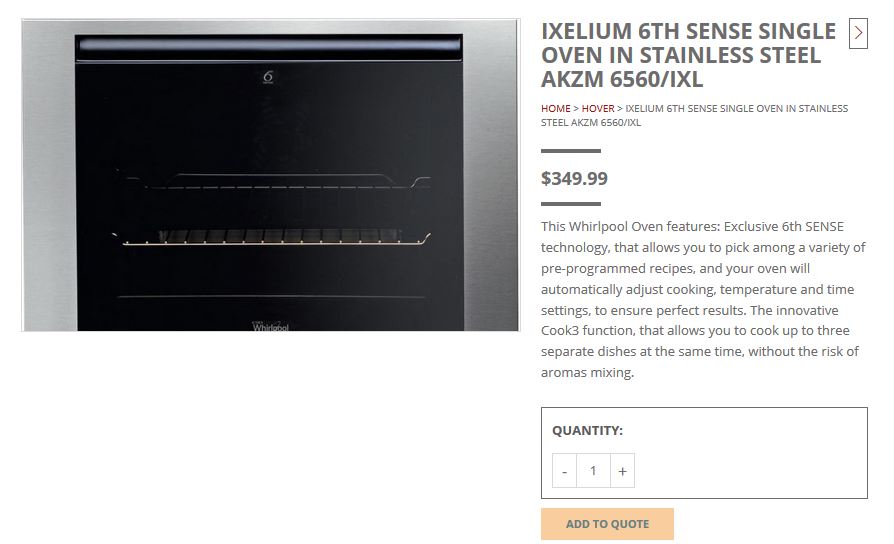
This is how you can grant your customers the chance to add products to the quote request and send it to the admins of the website, who will be able to reply with their offer.
we are half way through, see how little it takes to create a showcase using the right instruments?
Moving on, now we wish to introduce a system that allows browsing by brand, thus improving the navigation through the items in your catalog… How can we do this, then?
How to browse by Brand using WooCommerce?
Brands are a basic component for all products, especially for appliances, since people tend to trust a brand they already tested and appreciated more than others.
This is why displaying the brand logo of a specific product, other than being a quality guarantee for your store, it rassures customers that see a familiar element in an otherwise unknown environment.
So let’s use our third plugin: WooCommerce Brands Add-on.
Once it is installed and activated let’s go to Products > Brands and create the brands of our products, for this article, I have only used Whirlpool:
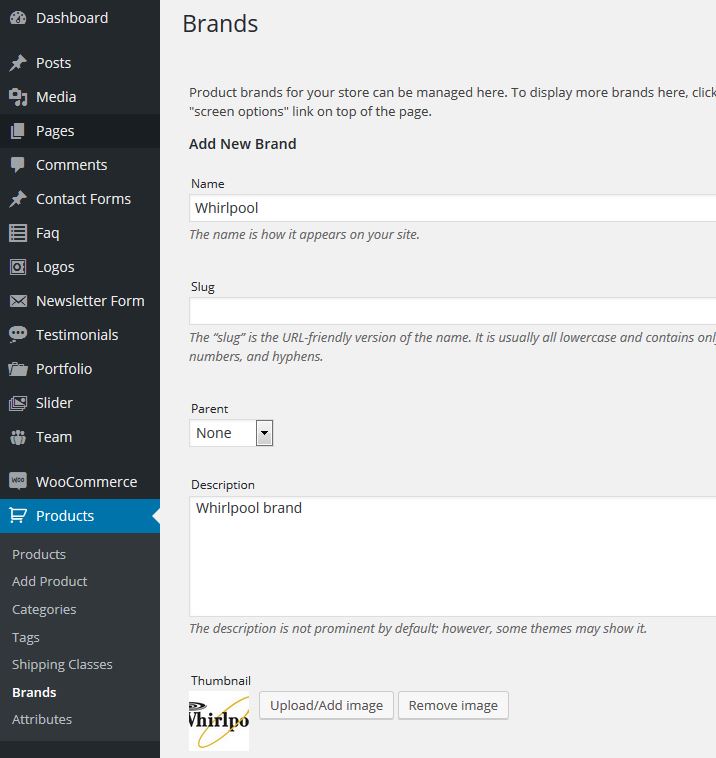
As you can see, we can set up the name, description and image for each brand. Once that’s done, we need to assign it to the related products.
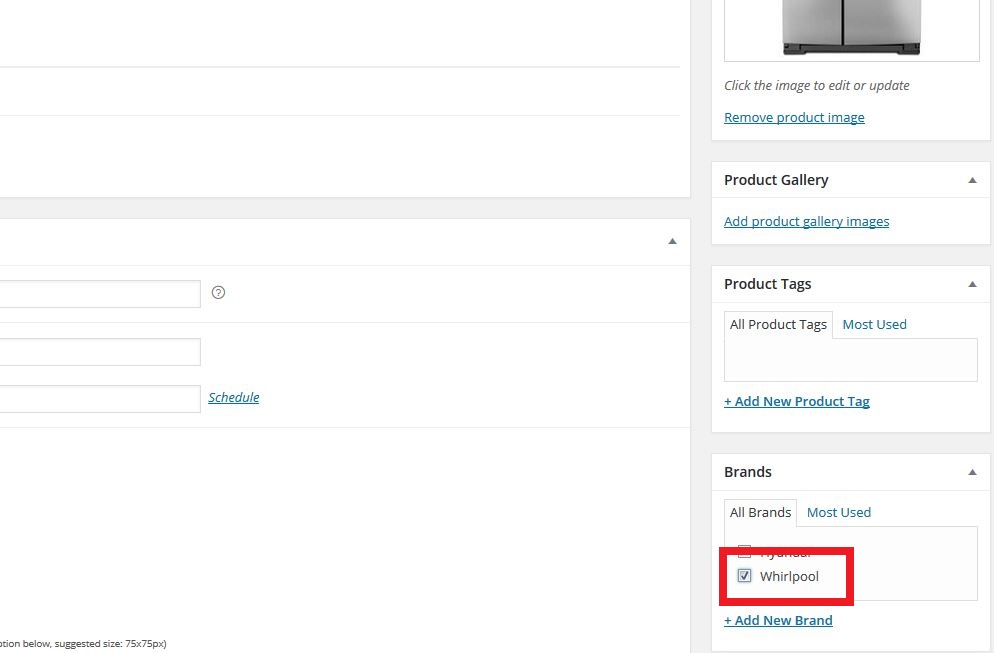
In the product editing page, all you need to do is check the box of the related brand:
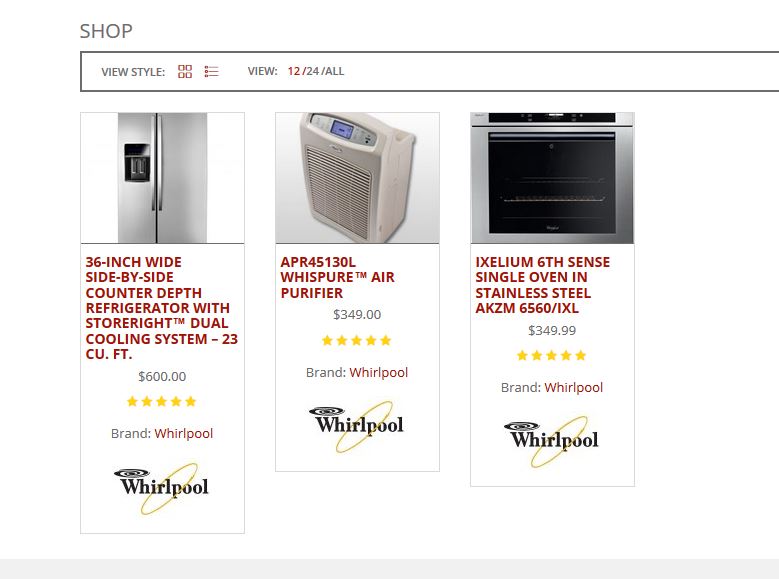
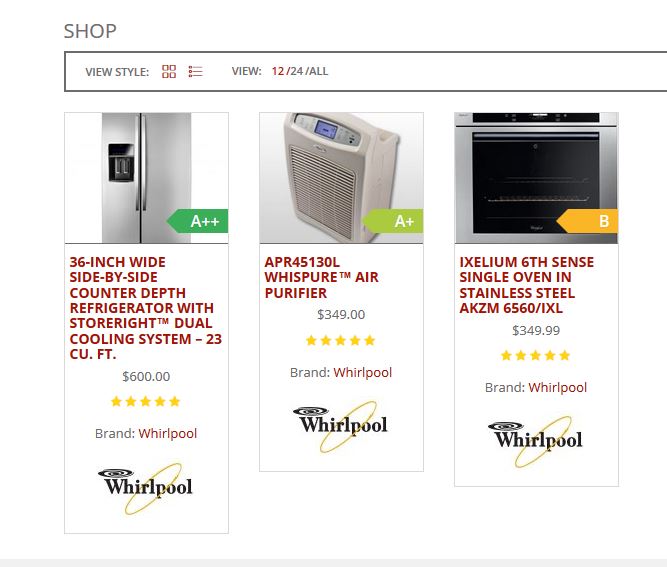
Once you have done this for all of your products, here is how your catalog is going to look like:
All you have left is one final step: adding the energy class for each product.
How do I add an energy class for product on sales on WooCommerce?
Protecting the environment is a very important matter these days and you may often see customers basing their choices on the energy class of a certain product.
In order to introduce this option, we are going to use one last plugin: WooCommerce EU Energy Label.
This plugin might be the easiest one to use among the four we have seen so far, since all you need to do is install it and activate it to have this function available in the product page:
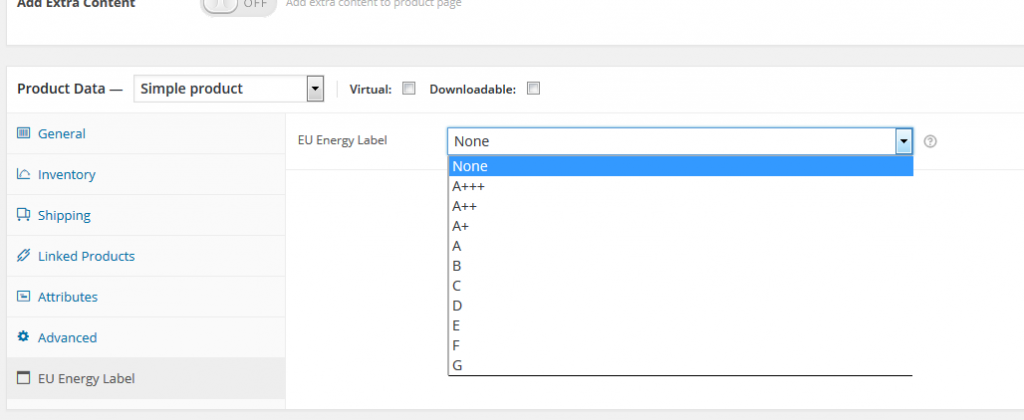
From this drop down menu you can choose the designed energy class and it’s going to be displayed in the product image:
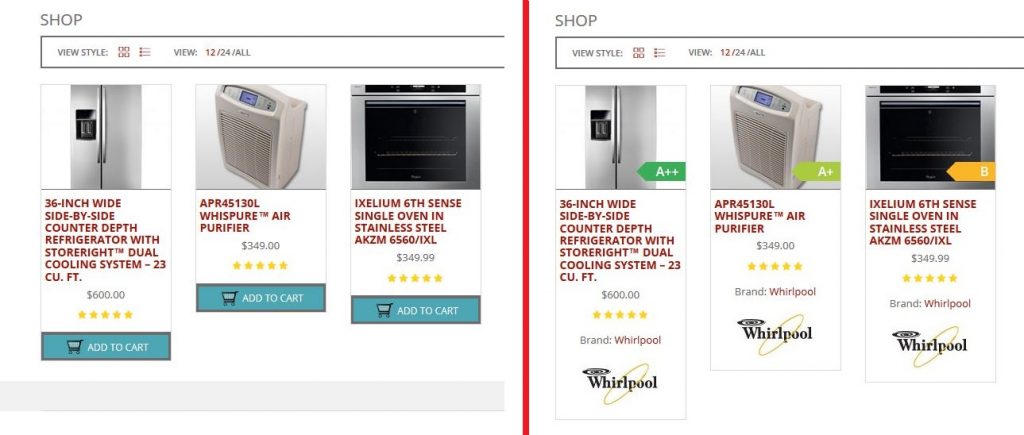
In just a few clicks we have completely turned a simple online store in a specific showcase for appliances that we can use to boost our sales.
And considering how little time that took, the difference between before and after is huge:
Now it’s your turn! You are free to customize your own showcase however you like, all you can imagine is just one click away!