Anyone who owns an online store knows that optimizing their website is a significant challenge. This is because, unlike in-person shopping, eCommerce stores can have hundreds of vulnerabilities and small details that become obstacles during the buying process.
Statistics show that almost 70% of customers who browse online and add products to their shopping cart will abandon it. Imagine a similar situation in a traditional supermarket, with dozens of full shopping carts abandoned in the aisles.
But why is the abandonment rate so high in online stores? Well, there are several reasons. One of them is the difference in the very nature of physical and digital purchases in terms of potential customer engagement.
Although there will always be differences between the two buying experiences, this does not mean there is no room for improvement. On the contrary, optimizing all the different steps in the process has proven to be one of the keys to increasing sales and customer satisfaction — especially the checkout process as it’s the final and most critical stage.
Throughout this article, we’ll see how to customize the checkout page in WooCommerce and what changes can benefit your eCommerce store.
Table of contents
How the checkout works in WooCommerce
The checkout process in WooCommerce is quite intuitive. Customers go through different sections of the eCommerce before reaching the checkout page. They go from the product catalog to the shopping cart and to the checkout last to complete the order.
There are typically several fields on this page that customers need to complete in order to proceed with their purchase.
Among these, we find:
- Shipping/billing address – To complete a purchase, you need to enter your shipping and billing addresses. In most cases, these two addresses will be the same, but if you are buying a product for someone else, you may need to provide separate addresses. This information is required for all types of sales, even those that do not involve physical shipping. For digital or downloadable products, we recommend using a plugin that removes any unnecessary fields during the purchase process, such as WooCommerce Quick Checkout for Digital Goods.
- Discount field – All checkouts have a field where you can enter a discount code. This is essential both for promotional campaigns where coupons are offered to customers and for discount codes offered as a form of refund for any order issues.
- Payment method – Finally, customers need to select their preferred payment method. This may prompt additional checkout fields to be completed or redirect them to an external payment page.
This is how the WooCommerce checkout page usually looks:
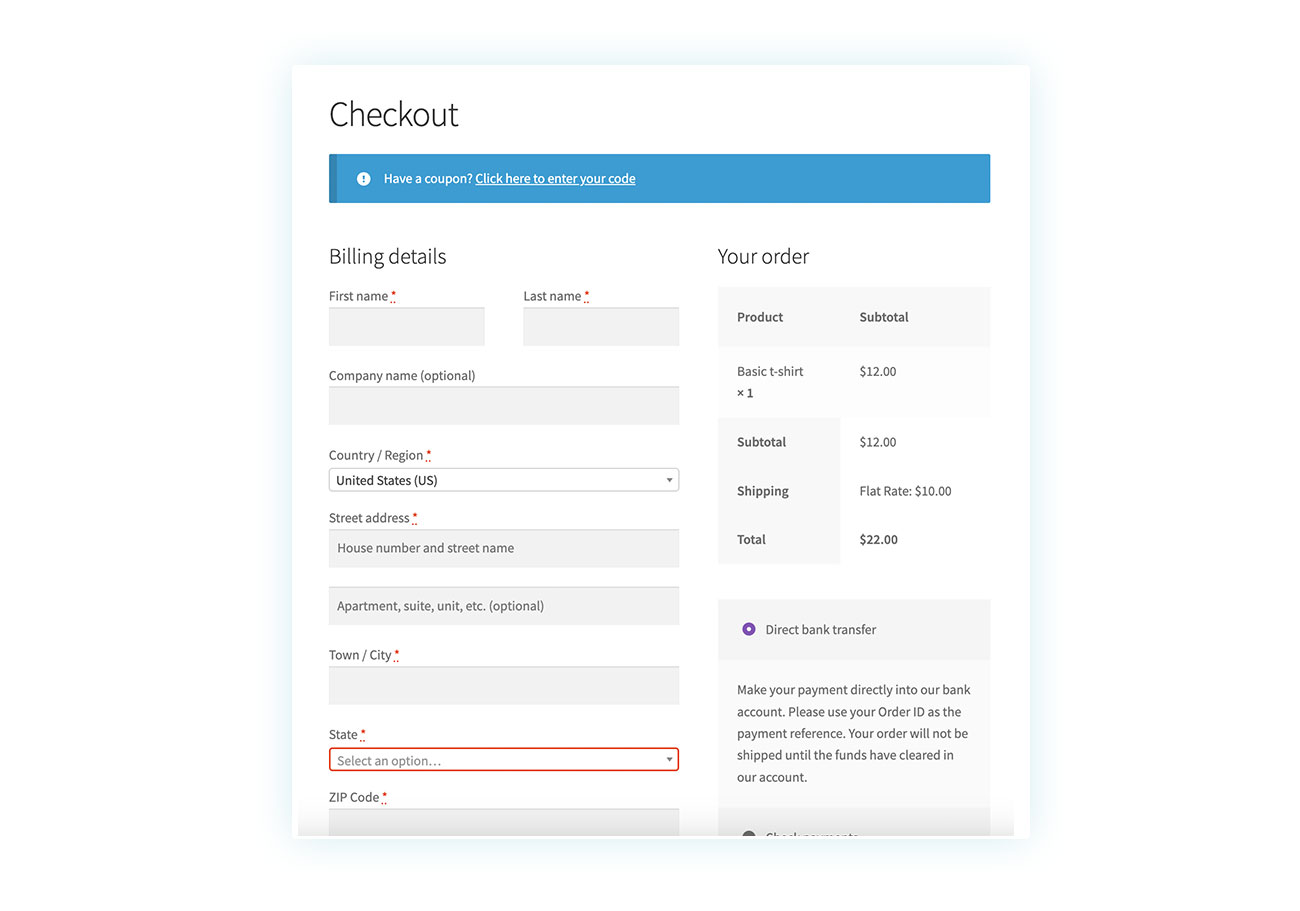
Optimize the checkout page to increase conversions
Since the checkout page is one of the most important parts of an eCommerce site, there are many ways to optimize it. For example, you can remove certain fields (as in the case of digital products above) or add new ones.
It all depends on what you want to achieve. In most cases, you’ll be driven by the desire to increase conversions, so let’s see what steps you need to take.
Increase sales by making the checkout page more engaging
Let’s look at some examples of features that a good checkout should have:
- Clarity and simplicity – The purchasing process is vulnerable. As previously mentioned, 70% of orders do not get processed. While factors outside our control contribute to this percentage, such as insufficient funds or external distractions, there is still room to improve these numbers. A complex or confusing buying process is a major factor in cart abandonment. Clarity can be achieved through clear language and graphics.
- Security – The average user has become suspicious and insecure due to years of internet experience, especially when buying outside well-known portals like Amazon. To reassure customers and encourage payment, you can display logos of popular payment methods both during checkout and at the bottom of your site. Additionally, you can explain how customers’ personal information will be handled. Last but not least, a money-back policy and a clear return policy can also help build trust.
As you can see, the ability to add or remove fields from the checkout form can be critical to increasing conversions.
Finally, we recommend experimenting with different techniques and aspects for your checkout page. Analyze customer behavior and cart abandonment rates to find out at what point in the checkout process they stop. Remember that optimization is a never-ending process, and you may need to adapt your site over time.
Now that we’ve seen some of the reasons why you might want to edit your checkout page, let’s see how you can do so. First, let’s see where this page is located and how it’s generated by WooCommerce.
Where to find the Default WooCommerce Checkout Page
If you are reading this article, you probably want to modify and/or optimize your store’s checkout page. Unfortunately, this requires some programming skills or the use of a dedicated plugin.
And why is that? Because WooCommerce automatically creates the most important pages for your online store and these cannot be edited using blocks like other pages or items.
When you start creating a store on WooCommerce, pages such as the Shop, Shopping Cart, My Account, and Checkout are generated automatically.
You can find each one of these pages in the Pages section of the site:
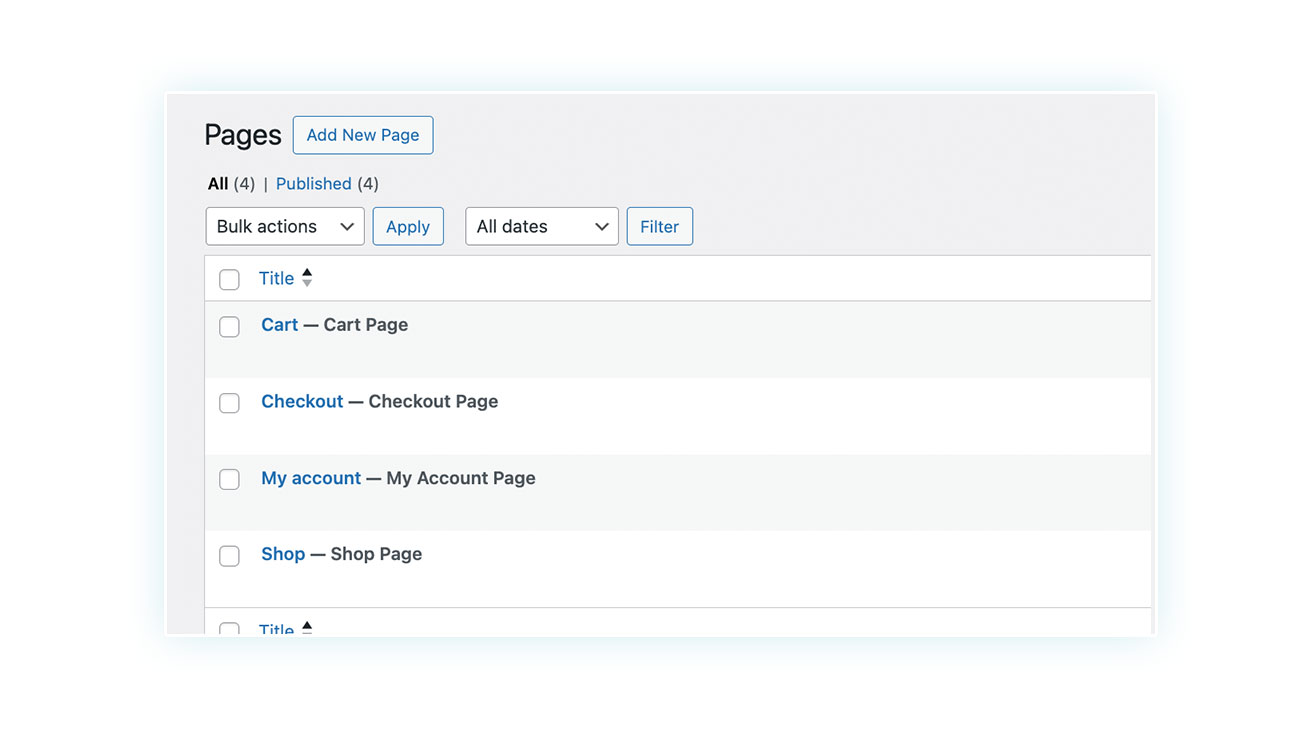
If you click on the checkout page, you can see how it is created by WooCommerce:
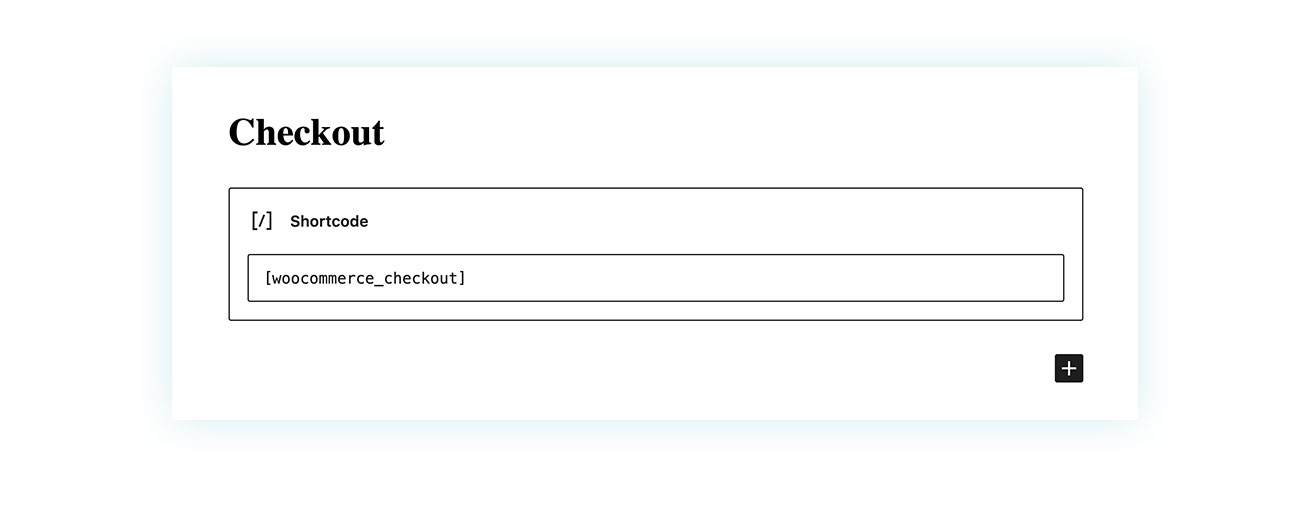
As you can see, a unique shortcode turns the page into the default checkout page. So, if you happen to delete this page by accident, you can recreate it by adding a shortcode block and entering
[woocommerce_checkout]Using a Plugin to Modify WooCommerce Checkout Fields
As we suggested earlier, the best way to customize WooCommerce checkout page is by using a plugin.
There are several options to choose from, such as the already mentioned Quick Checkout for Digital Goods. You might also want to consider WooCommerce Multi-step Checkout to simplify the final steps in the buying process.
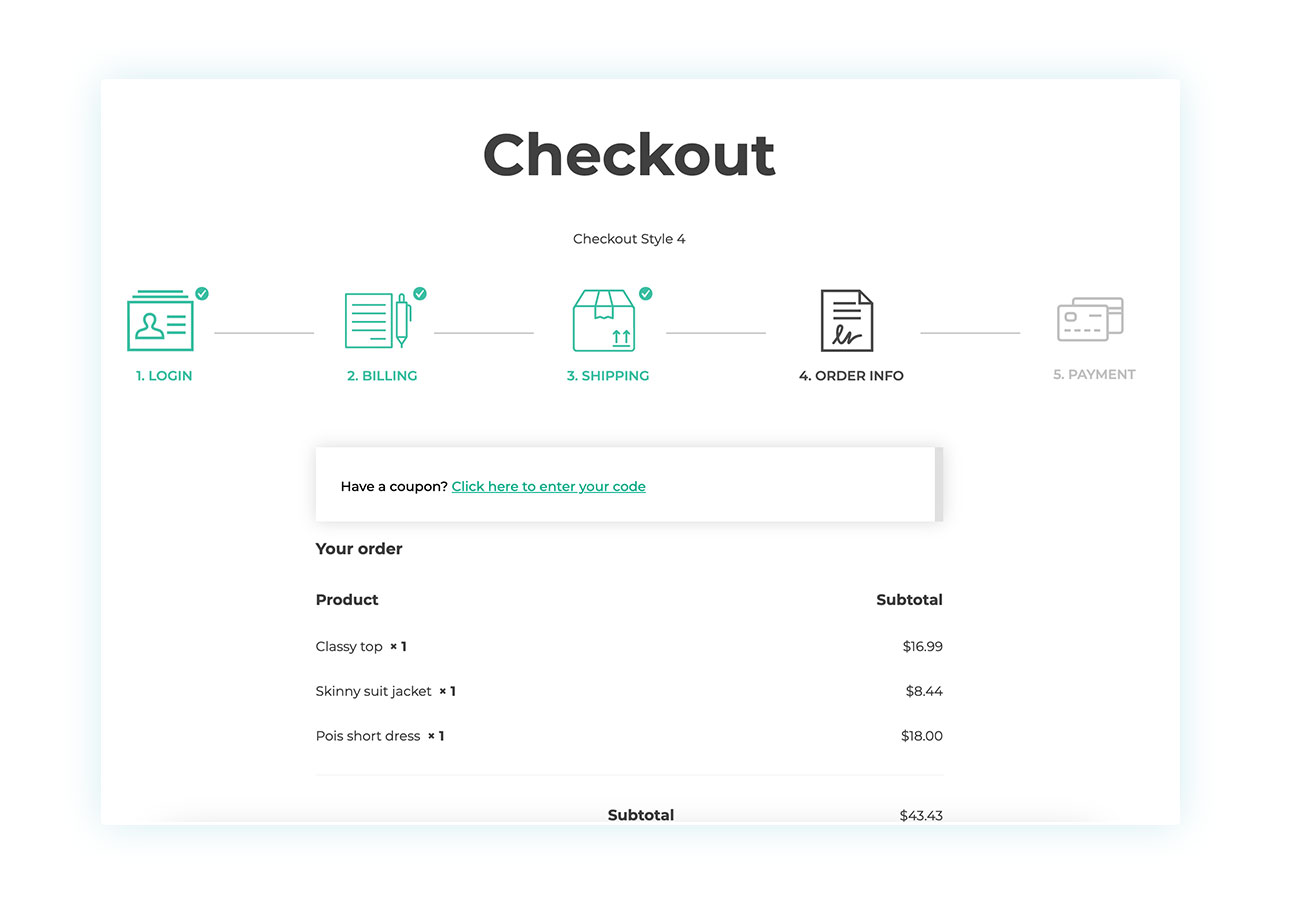
As you can see in the image above, this plugin allows you to have a custom checkout page process by dividing it into a series of steps. This way, you can better guide the customer through the steps instead of scaring them with a huge page full of fields to complete.
This plugin can be very useful, but in this article, we’ll be looking into another one in particular.
How to add fields to WooCommerce checkout
For this, we have chosen the plugin that we believe best meets the needs of most sellers. Our goal is to edit the different WooCommerce checkout fields, and here’s the plugin that can help us do that.
Best plugin for editing WooCommerce Checkout
We recommend using the WooCommerce Checkout Manager plugin to create a customized checkout experience in your WooCommerce store.
This plugin has dozens of features designed to give you complete control over this part of the site.
Main features of the plugin
This plugin has several features but it’s still really easy to use. We will see these features in action later on but here’s what you can expect from using it:
Custom checkout fields for every need:
- Edit shipping, billing, and the additional notes fields.
- Create new fields (text, multiple choice, and more).
Intuitive and informative design:
- Choose colors, text, and tooltips for each field.
- Show which fields are required with JavaScript validation.
Maximum flexibility:
- Sort the fields as you like with the drag-and-drop feature.
- Choose a single column for checkout (instead of the default two).
Smart conditional fields:
- Show or hide fields based on products, categories, or previous user choices.
That being said, we believe it is easier to understand a plugin when you see it in action. In the next section, you will find a tutorial to learn how to use it.
Tutorial on how to edit WooCommerce checkout
The plugin’s functionality is simple. After installing and activating the plugin, go to YITH > Checkout Manager to access the different options in the plugin:
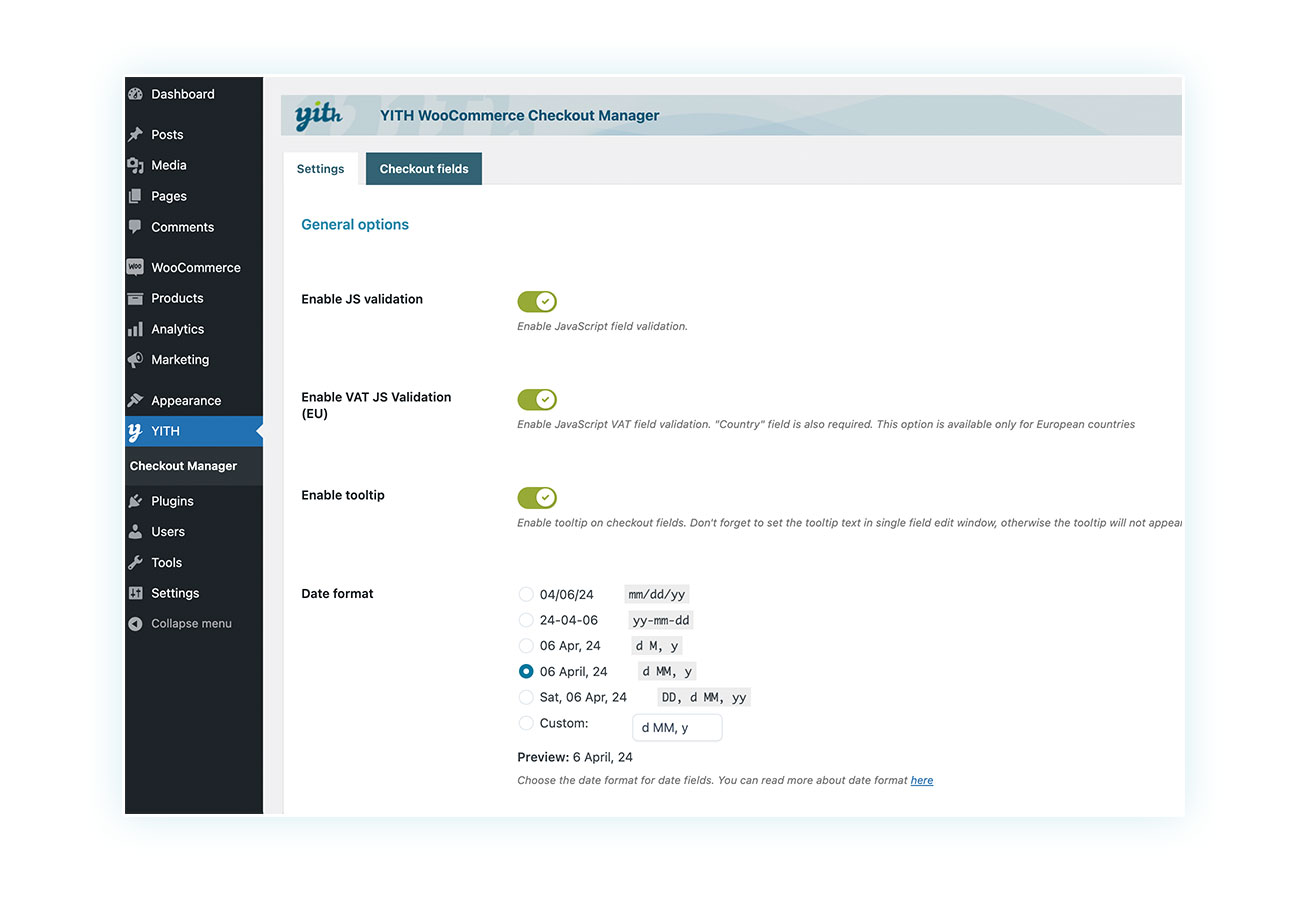
This section is divided into two parts:
- Settings – Where you can decide the general behavior of the plugin, such as date and time format, JavaScript verification, and more.
- Checkout Fields – Where you can actually edit the various fields that make up your checkout.
To access the customizable fields, simply click on the second tab:
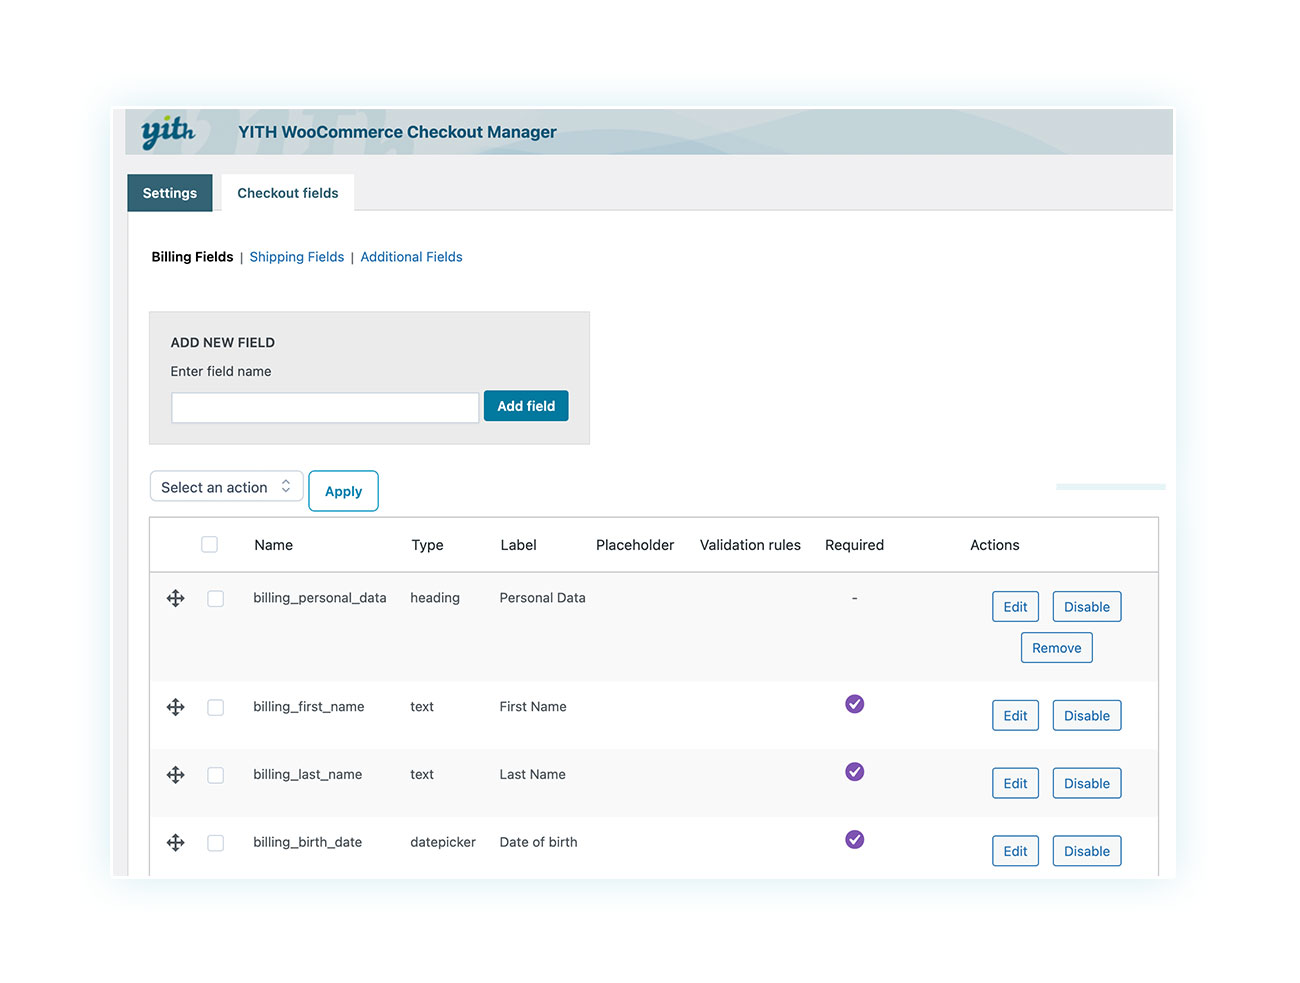
This section is divided into three subsections:
- Billing Fields – Where you can edit, remove, and add the fields that make up the billing section.
- Shipping Fields – Same but with the fields related to shipping items.
- Additional Fields – Where you can add extra fields that do not fall under the first two sections.
To add a field, all you have to do is enter the name you want to give it in the top bar and click on “Add Field”. You’ll then get a popup to configure it:
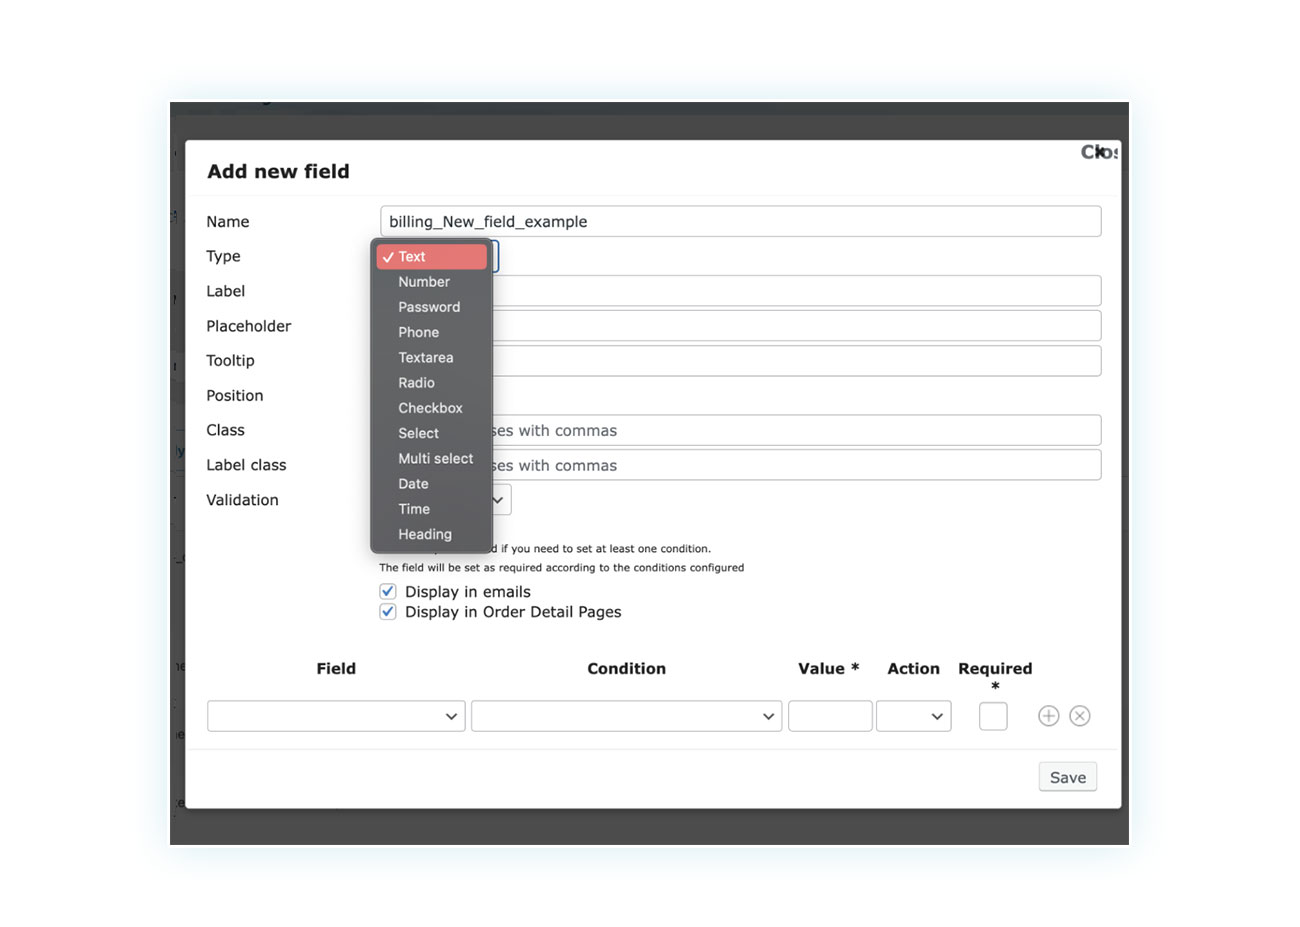
In the image, you can see all the different types of fields you can add based on your needs.
For example, if you offer shipping services, you can add a field to let customers select the day and time they want to get the product delivered. This is just one of the many possible ways you can take advantage of this plugin.
Once you’re done configuring the field, you can save it and it will be added to the WooCommerce checkout.
As you can see, adding fields is a piece of cake and you can start doing it minutes after buying the plugin.
FAQ
- What are the benefits of customizing the WooCommerce checkout page?
Having a custom WooCommerce checkout page allows you to remove unnecessary fields that slow down the buying process and, at the same time, add the necessary fields to reduce cart abandonment and increase conversions. - Is it possible to add custom fields to the checkout pages without using plugins?
You can add code to the functions.php page of your site, but we do not recommend this practice for those who are not well-versed in programming to prevent errors. - How do I optimize WooCommerce’s mobile checkout page?
Consider enabling one-click checkouts with the WooCommerce One-Click Checkout plugin and remove any unnecessary checkout fields that may crowd a small screen. - How can I test the changes I made to my WooCommerce checkout page?
The best way to do this is to analyze the results over a short period of time and compare them to the basic WooCommerce checkout and other variations you have tried. - How does WooCommerce checkout page customization impact user experience and conversions?
70% of shoppers abandon orders before completing them. This is often due to obstacles or problems they encounter during their order. A complex payment page full of fields to fill out can discourage customers, so make it as simple as possible.
Conclusion
You can use different methods and plugins to customize the checkout process in your eCommerce store. Just because a feature is available on WooCommerce, it doesn’t mean it’s optimized. While WooCommerce is a great foundation for your online store, you often need to adapt it to your needs to get excellent results.
Due to the high cart abandonment rate, improvements like this can significantly boost your eCommerce sales and conversions.