Have you ever been to an arcade? A place of laughs and happiness indeed, up until you try out the bear claw machine.
There’s no joy in that very moment, only frustration for all those times your prize is almost yours, only to drop back down at the very last second.
Annoying, isn’t it? That’s pretty much what happens to online sellers every single day.
An average amount of 68% of potential buyers abandon their online transaction before completing it. And that’s a huge amount!
The four main reasons behind such a big dropout rate are:
- Unexpected expenses, such as shipping fees – A customers with a limited budget might feel displeased when they see their total amount of expenses rise unexpectedly.
- The checkout system is complicated or takes too long to complete, which makes customers feel discouraged.
- Out of fear of shady practices. The internet can be both a gold mine and a bottomless pit, and we’ve all grown mistrustful towards it. As an example, being redirected to some other website to perform the payment may cause a customer to drop out of a transaction.
- Because they are not sure your store is reliable. You need to be as clear and exhaustive as you can be regarding your policies, and even then a customer might still have questions. Given online stores have no clerks to rely on, customers might leave if their doubts go unanswered.
All of these reasons will individually weaken your transactions amount and combined will drastically hit your income… think about that 68%.
Just like every seller out there, I have seen this happen to me as well, but I fixed it by taking care of a few things I’m going to examine in detail in this article.
Let’s check out how to fix the three main aspects of this issue – fear, difficulties and insecurity – step by step.
Required Plugin
How to simplify the checkout system
Having to enter too much data on checkout – such as user name, password, address, shipping details, order details etc. – might cause a customer to lose his motivation.
Obviously though – you might say – you need that data to process a transaction, however, a couple of simple tweaks will definitely lighten the workload for your customer.
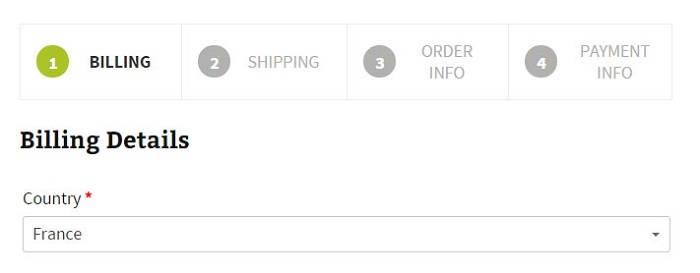
In this case we are simply going to divide the whole checkout process in a few simple steps, so that buyers won’t lose attention, letting them take care of details one by one so that they won’t feel lost.
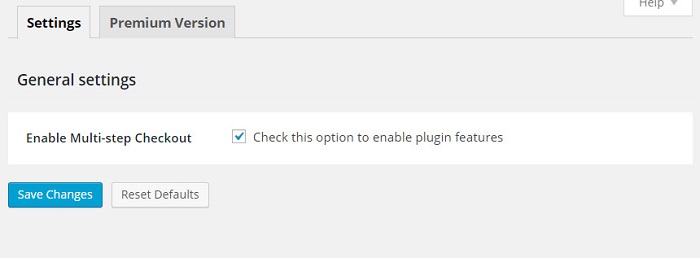
It’s Easy: after installing and activating the plugin, go to YIT Plugins > Multi-step Checkout and activate this option by clicking on its box.
There you go, that was much easier than dealing with those bear claw machines.
This is how your customers will see their checkout pages now:
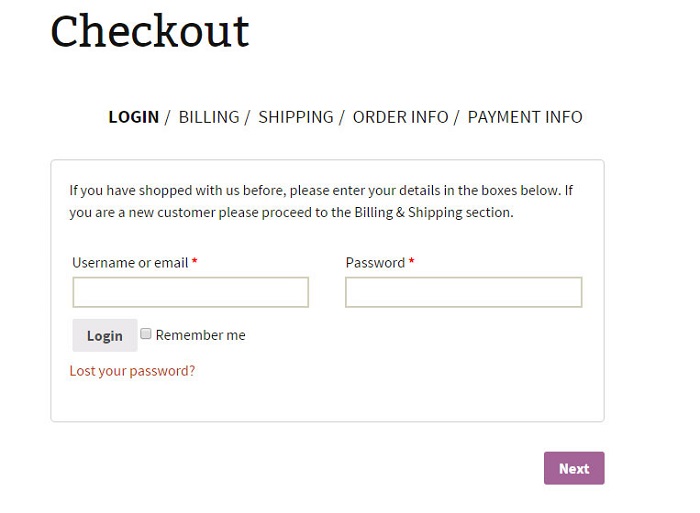
This plugin also offers the opportunity to customize the checkout tabs with icons or a number system.
Now that this process is clear, you can proceed to check out how to reduce the dropout rate caused by external payment websites.
Paying by credit card directly on your store
PayPal is the most common payment system, but offering direct credit card payment is also essential for your store.
According to several surveys, only 14% of online buyers use PayPal, against a strong 73% who declare they would rather use a credit or debit card. But in the end, if customers drop out during the checkout, then it was all for nothing.
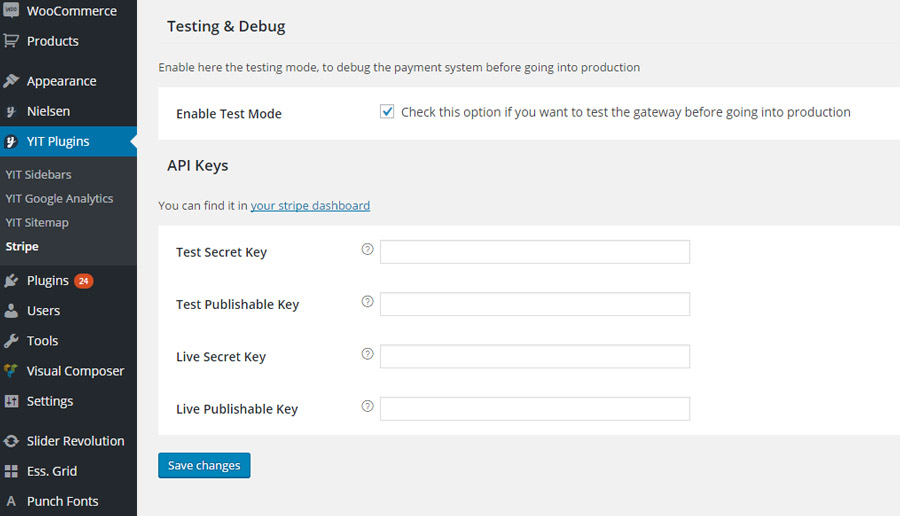
In order to save both ways, we are going to use the Stripe plugin, which uses its namesake service to create a form withing your very store, that will allow customers to pay on the spot, using their credit card.
Starting off, once the plugin is installed and activated, you will need to insert your API Keys, namely two Publishable Keys and two Secret Keys, which are needed to test and then use the plugin itself.
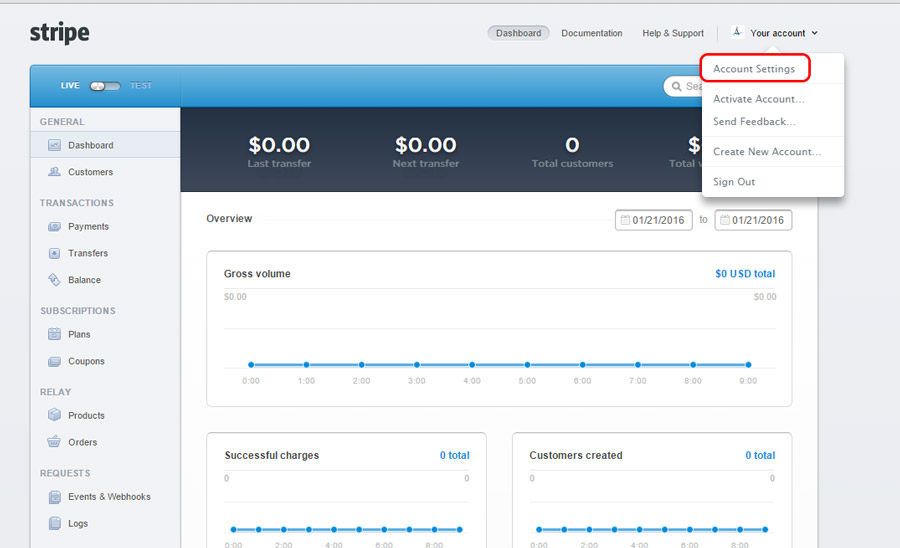
Don’t own them? No problem, just visit dashboard.stripe.com, register your account and then click on “Account Settings”
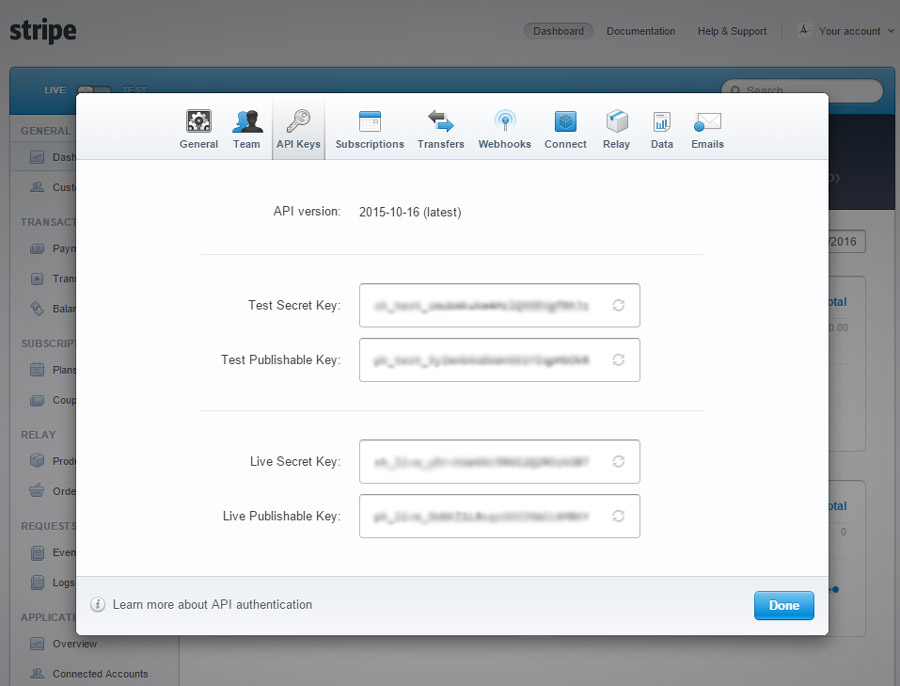
Here in the Api Keys tab you will find the keys you need to enter in the plugin.
Enter your keys, then enable Test Mode in order to test your payment system before it’s effective.
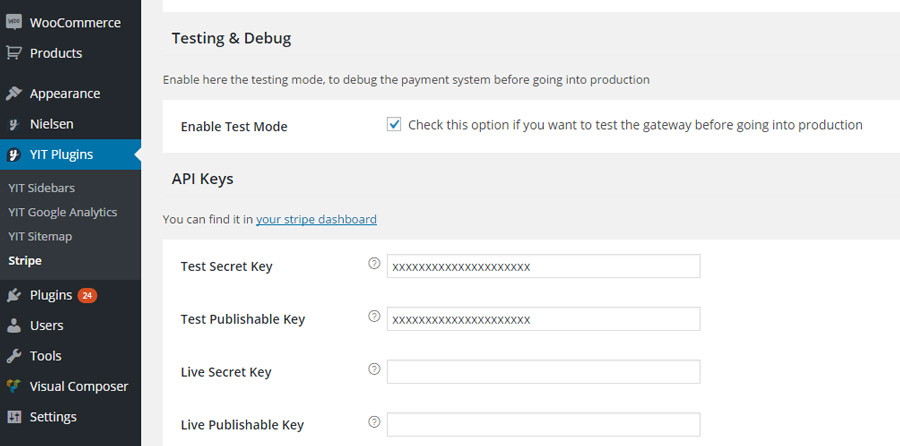
If all went according to plan, you only need to enter your Live Key now, and you’re set! Your customers are free to use their credit card to perform payments directly from your store.
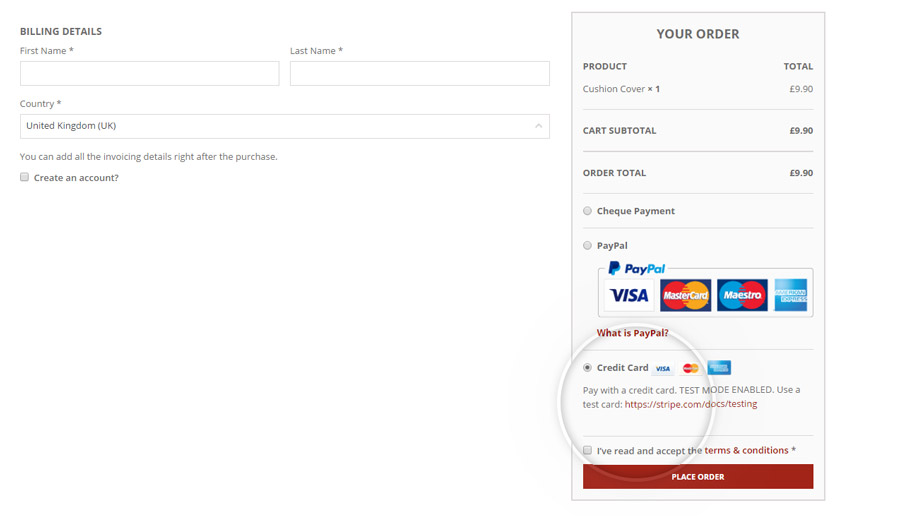
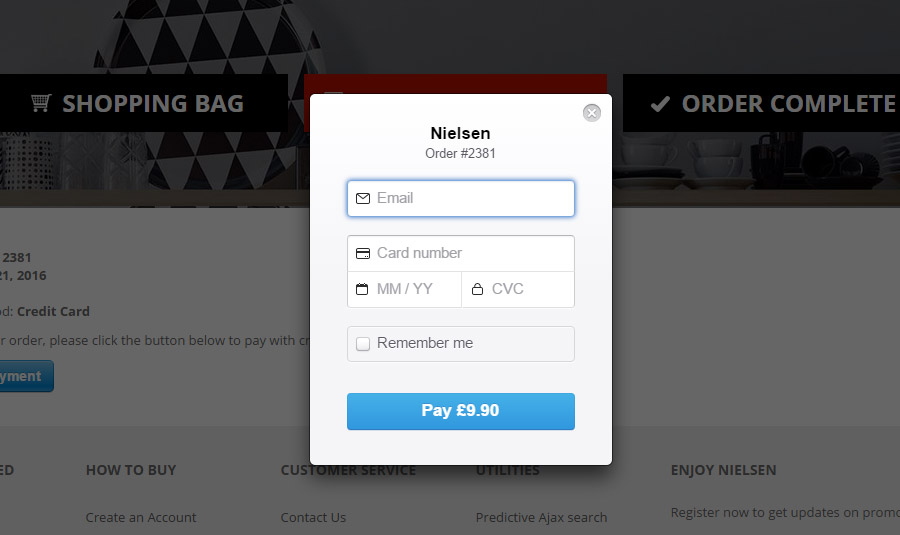
Once your customers pick their desired payment system, they will see this simple form where they can enter their personal data and proceed to the checkout.
This plugin also offers more settings such as the chance for the customer to save their credit card data – so that they won’t have to enter them again every single time, making the payment system easier and quicker – or the chance to pay by Bitcoin.
You’ve just completed step 2 out of 3! And you’ve reached the 66 (,6666666-)% of the required amount of work.
All you need to do now is provide answers to any doubt your customers might have that might stop them from buying from your store.
Answer their questions
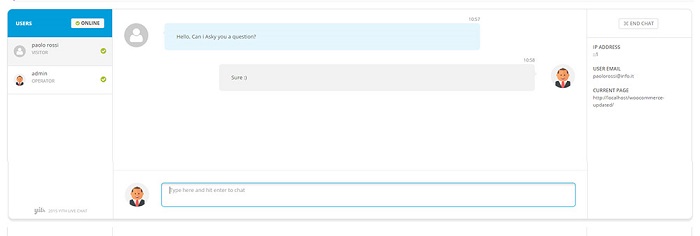
I’ve stated before that online stores have no clerks to talk to, but there is a viable alternative: Live Chat.
Most customers don’t bother sending emails because they know they are going to need to wait a long time before they receive a reply and, even in case of excellent customer service, they might just change their mind about their whole purchase in a few minutes.
Let’s go and set up a live chat between customers and the shop managers which will answer customers questions directly making feel supported.
To do so you need the Live Chat plugin, let’s see how it works in detail:
In case you don’t already have one, you are going to need to create a free Firebase account for this plugin to work correctly.
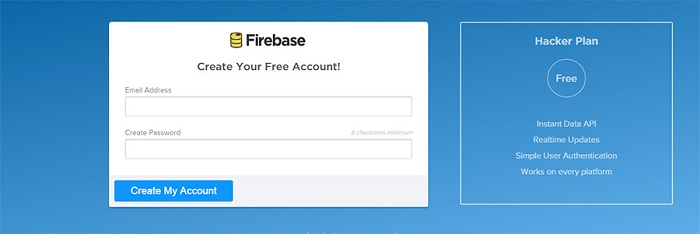
Once your account is created, you will see the following screen:
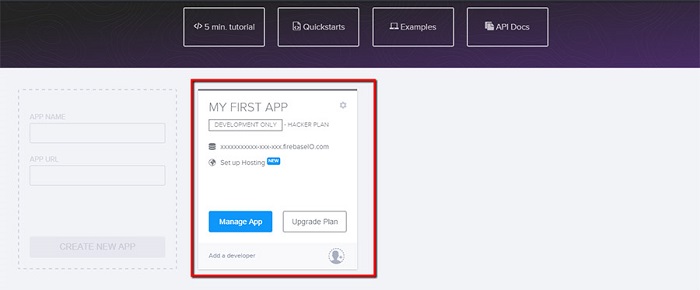
In order for this plugin to work correctly you need an application for your account or you may simply use the one provided by Firebase.
Once you have done this you can activate the plugin on your online store from its specific section.
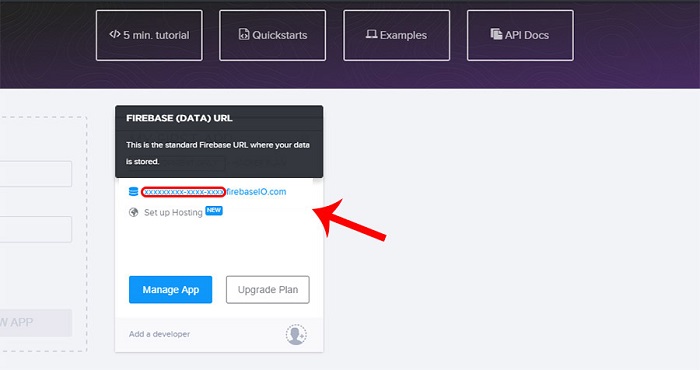
Enter the first part of the URL you see right before firebaselO.com in the Firebase App Url section in your personal Firebase page.

Now you should enter your Firebase security key in the Firebase App Secret section. To get one, simply click your URL in the Firebase web page.
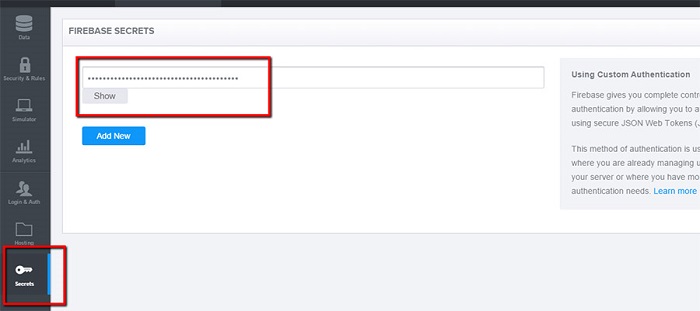
Now enter the Secrets section and copy your key.
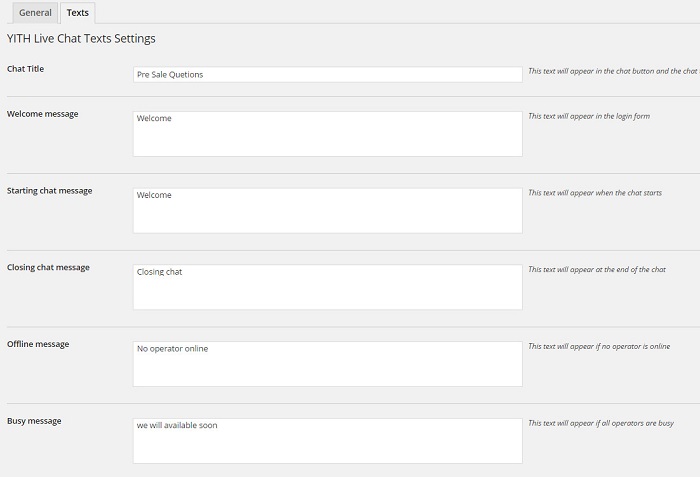
Done, you can now customize your opening chat messages in the Texts section, on the side of each form you will see the instances in which your message will be displayed.
Excellent! Once this step is completed you can check out your live chat function in its specific section:
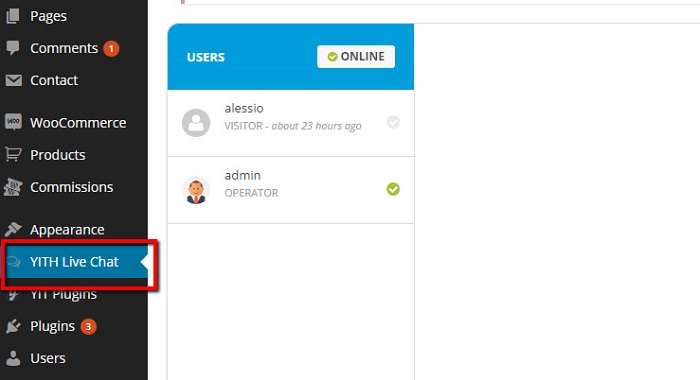
You can have up to two simultaneously active conversations in your console (this is limited by the free version), each one in its own panel.
You may create several chat operators for as long as they have a specifically designe role in the YITH Live Chat Operator.

This plugin also allows you to receive offline messages that you will see, and be able to reply to, as soon as you go back online.
And you’re set! You have done all you could to drastically reduce that cursed 68% dropout rate!